Interlogix TruVision Installation Manual
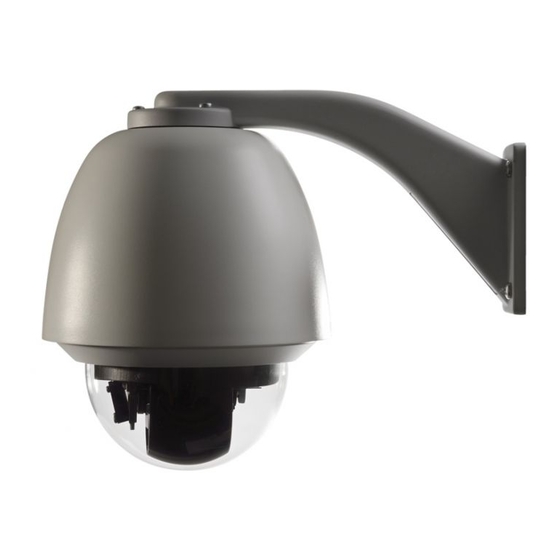
Analog ptz camera
Hide thumbs
Also See for TruVision:
- User manual (169 pages) ,
- Quick start manual (113 pages) ,
- Configuration manual (68 pages)

Related Manuals for Interlogix TruVision


Summary of Contents for Interlogix TruVision
-
Page 1: Camera Installation
TruVision Analog PTZ Camera Installation Manual P/N 1072692A-EN • REV 1.0 • ISS 10OCT13... - Page 2 © 2013 UTC Fire & Security Americas Corporation, Inc. Copyright Interlogix is part of UTC Climate Controls & Security, a unit of United Technologies Corporation. All rights reserved. TruVision name and logo are trademarks of United Technologies. Trademarks and Other trade names used in this document may be trademarks or registered patents trademarks of the manufacturers or vendors of the respective products.
-
Page 3: Table Of Contents
This pocket guide provides basic information on setting up and using the TruVision Analog PTZ Camera. Detailed information on the cameras can be found in the configuration manual. Product overview This is the user manual for TruVision analog PTZ camera models TVP-2101 (23X pendant, PAL) -
Page 4: Before You Begin
When installing your camera, consider these factors: • Place the camera in a secure location. • Ensure that the camera is in a well-ventilated area. • Do not expose the camera to rain or moisture. EN 4 TruVision Analog PTZ Camera... -
Page 5: Camera Description
Figure 1: Overview of the dome camera (pendant-mount shown) 1. Power supply cord. Connect 24 VAC power supply RS-485 port 3. Video output. Connect the BNC connector to a CCTV monitor. 4. Housing. 5. Bubble. EN 5 TruVision Analog PTZ Camera... -
Page 6: Installing A Camera
(see below). The module should snap firmly into position. If using an SD card, insert it into the module before inserting the module into the housing. 8. Re-attach the bubble by screwing it to the housing. EN 6 TruVision Analog PTZ Camera... -
Page 7: Flush-Mount Cameras
6. Make sure the housing tab is closed and then PUSH the housing into the pass-through hole. Hold the housing and fix it by screwing the housing tabs down to the mounting surface. 7. Insert the PTZ module into the housing: EN 7 TruVision Analog PTZ Camera... -
Page 8: Surface-Mount Cameras
The PTZ camera cables can be routed either from the top or side of the housing (see figures below). For the cables routed from the top of the housing, you need to drill a cable hole in the ceiling. EN 8 TruVision Analog PTZ Camera... - Page 9 A. Screw holes; B. Cable hole 2. Secure the mounting base to the ceiling with screws. 3. Unscrew the bubble from the camera and remove the protective tape from the PTZ module. EN 9 TruVision Analog PTZ Camera...
-
Page 10: Dip Switch Settings
See the figures below. Align Push up (1) and then push sideways (2). Lock clip 8. Insert the PTZ module into the housing: EN 10 TruVision Analog PTZ Camera... -
Page 11: Dip Switch Settings
The values are ON=1 and OFF=0. See Figure 2 on page 12. Each DIP switch number represents a DIP switch value, ranging from 1 to 8 from the lowest to highest. EN 11 TruVision Analog PTZ Camera... - Page 12 Interlogix/GE Impac RS- 4800 Baud PELCO-D 9600 Baud PELCO-P 19200 Baud Reserved Others 38400 Baud The rest of above is 9600 Baud Termination Settings Switch Number 7 Switch Number 8 Reserved Not Terminated off Terminated EN 12 TruVision Analog PTZ Camera...
- Page 13 Protocol Settings Use positions 4, 5, and 6 of DIP switch SW2 to set the communication protocols of the dome. See Table 3 below. Table 3: Protocol values Protocol Interlogix-485 PELCO-D PELCO Reserved Others EN 13 TruVision Analog PTZ Camera...
-
Page 14: Specifications
Flush-mount housing: Ø 206 × 251 mm Surface-mount housing: Ø 180 × 240 mm Environmental Pendant-mount housing: IP66 Flush-mount housing: IP54 Surface-mount housing: IP44 Weight Pendant-mount housing: 3.5 kg Flush-mount housing: 3 kg Surface-mount housing: 2.5 kg EN 14 TruVision Analog PTZ Camera...
Need help?
Do you have a question about the TruVision and is the answer not in the manual?
Questions and answers