Table of Contents
Advertisement
Quick Links
Advertisement
Table of Contents

Related Manuals for Oce VarioPrint 6000 series


Summary of Contents for Oce VarioPrint 6000 series
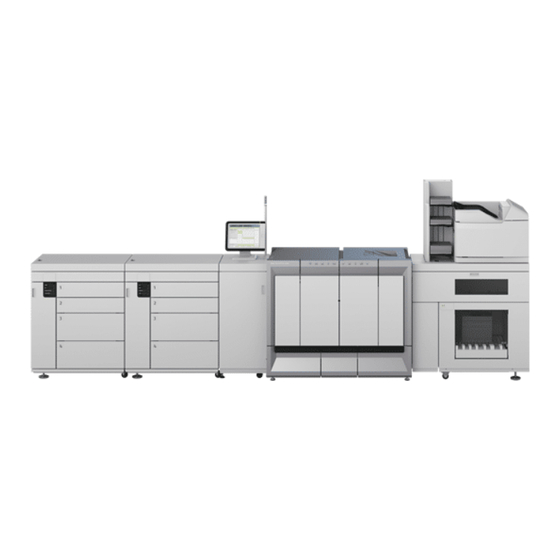
- Page 1 Océ User manual Océ VarioPrint 6000 series Maintenance tasks...
- Page 2 Océ Copyright 2006-2008 Océ All rights reserved. No part of this work may be reproduced, copied, adapted, or transmitted in any form or by any means without written permission from Océ. Océ makes no representation or warranties with respect to the contents hereof and specifically disclaims any implied warranties of merchantability or fitness for any particular purpose.
- Page 3 Trademarks Trademarks List of trademarks Océ, Océ VarioPrint 6000 series are registered trademarks of Océ-Technologies B.V . Products in this publication are referred to by their general trade names. In most, if not all cases, these designations are claimed as trademarks or...
- Page 4 Trademarks...
-
Page 5: Table Of Contents
Table of Contents Table of Contents Chapter 1 Introduction ............7 Notes for the reader. - Page 6 Table of Contents...
-
Page 7: Introduction
Chapter 1 Introduction... -
Page 8: Notes For The Reader
Notes for the reader Notes for the reader Introduction This manual helps you to use the machine. The manual contains a description of the machine and guidelines to use and operate the machine. There are also tips to increase your knowledge of the machine and to help you manage the workflow even better. -
Page 9: Available Documentation
Integrated Online Helps in the printer driver, the Settings Editor and other proprietary applications. Note: Please check www.oce.com for the latest version of the documentation. Main Content of the User Manuals The following table provides an overview of the main content of the user manuals. -
Page 10: Introduction To The Maintenance Tasks
Introduction to the maintenance tasks Introduction to the maintenance tasks Introduction This manual is intended for trained and certified operators who received the special maintenance training for the printer. Therefore, this manual is only intended as a reference guide for the described maintenance procedures. On the operator panel, you must always press 'Next' to continue with the next step, or 'Finish' to complete a maintenance task. - Page 11 Introduction to the maintenance tasks [2] Overview of the maintenance tasks (2 – 2) Maintenance Maintenance task Where to find more level information Solve paper jams in hot *** 'Remove sheets from the areas of the printer process modules' on page 34 Clean the OPC belts *** 'Clean the OPC belt (left)' on page 49 ***)
- Page 12 Introduction to the maintenance tasks Begin maintenance The maintenance section of the 'System' view shows the required or suggested maintenance tasks. Here, you can only view the maintenance tasks. [1] Begin maintenance When you press the 'Start maintenance' button, the actual maintenance screen appears.
-
Page 13: Determine The Required Maintenance
Determine the required maintenance Determine the required maintenance Introduction The operator panel indicates that maintenance is required, and when maintenance is required. The operator panel also leads you through all the steps of each maintenance task. This section describes how the operator panel indicates that the machine requires maintenance. - Page 14 Determine the required maintenance Chapter 1 Introduction...
-
Page 15: Maintenance Tasks - Level 1
Chapter 2 Maintenance tasks - Level 1... -
Page 16: Replace The Cleaners
Replace the cleaners Replace the cleaners Introduction This procedure is only intended for key operators who received the special maintenance training. When to do If the maintenance icon in the dashboard indicates that maintenance is required soon or immediately. Before you begin Make sure that you have 2 new spiral cleaners and 2 new sheet cleaners at hand. - Page 17 Replace the cleaners Open the doors and covers Use socket wrench 10 to loosen the bolt of the front doors (1). Open the front doors (2). [5] Open the front doors Lift the right-hand top cover to the upper position (1). Lift the left-hand top cover to the upper position (2).
- Page 18 Replace the cleaners Unlock and lower the right-hand top cover (2). [7] Lift the left-hand inner cover Caution: Make sure that the right-hand inner cover is locked in the upper position. Lift the right-hand inner cover to the upper position. [8] Lift the right-hand inner cover Unlock the clean units Caution: Hot area.
- Page 19 Replace the cleaners Use the D-wrench to turn M1 counter-clockwise. [9] Unlock the clean units Lift the clean units Caution: Hot area. Use heat-resistant gloves. Caution: Make sure that both clean units are locked in the upper position. Use the red handle to lift the right-hand clean unit to the upper position (1). Use the red handle to lift the left-hand clean unit to the upper position (2).
- Page 20 Replace the cleaners Remove the sheet cleaners Caution: Hot area. Use heat-resistant gloves. Attention: Do not remove a layer of the sheet cleaner when the cleaner is inside the machine. Press both red leaf springs at the end of the right-hand sheet cleaner outwards. [11] [11] Press the red leaf springs outwards Chapter 2 Maintenance tasks - Level 1...
- Page 21 Replace the cleaners Remove the sheet cleaner. [12] [12] Remove the sheet cleaners Repeat the steps 1 and 2 for the left-hand sheet cleaner.
- Page 22 Replace the cleaners Remove the spiral cleaners Caution: Hot area. Use heat-resistant gloves. Press both red leaf springs at the end of the right-hand spiral cleaner outwards. [13] [13] Press the red leaf springs outwards Chapter 2 Maintenance tasks - Level 1...
- Page 23 Replace the cleaners Remove the spiral cleaner. [14] [14] Remove the spiral cleaners Repeat the steps 1 and 2 for the left-hand spiral cleaner. Recondition the sheet cleaners Remove 1 layer and an extra 2-3 cm (about 1 inch) of both sheet cleaners, including the old adhesive strip (1).
- Page 24 Replace the cleaners Note: Only use a new sheet cleaner if the cylinder does not contain enough clean-sheet paper. Install the spiral cleaners Lock the right-hand spiral cleaner between the red leaf springs. [16] [16] Install the spiral cleaners Repeat step 1 for the left-hand spiral cleaner. Note: The spiral cleaners only fit in one way.
- Page 25 Replace the cleaners Install the sheet cleaners Lock the right-hand sheet cleaner between the red leaf springs. [17] [17] Install the sheet cleaners Repeat step 1 for the left-hand sheet cleaner. Note: The sheet cleaners only fit in one way.
- Page 26 Replace the cleaners Lower the clean units Attention: Make sure that the clean units are in the lowest position. Lift the right-hand clean unit and push the red handle to unlock the locking mechanism (1). Lower the right-hand clean unit into the locked position (2). Lift the left-hand clean unit and push the red handle to unlock the locking mechanism (3).
- Page 27 Replace the cleaners Close the covers Unlock and lower the right-hand inner cover. [20] [20] Close the right-hand inner cover Lift the right-hand top cover to the upper position (1). Unlock and lower the left-hand inner cover (2). [21] [21] Close the left-hand inner cover Close the left-hand top cover (1).
- Page 28 Replace the cleaners Finish the maintenance task Close the front doors. Use socket wrench 10 to tighten the bolt of the front doors. [23] [23] Close the front doors On the operator panel, confirm that you successfully replaced the cleaners. Chapter 2 Maintenance tasks - Level 1...
-
Page 29: Lock The Clean Unit (Left)
Lock the clean unit (left) Lock the clean unit (left) Introduction This procedure is only intended for key operators who received the special maintenance training. When to do After you replaced the cleaners *** 'Replace the cleaners' on page 16 ***, you must restart the machine. - Page 30 Lock the clean unit (left) Use the D-wrench to turn N1 clockwise. [25] [25] Lock the clean unit Close the front doors. Use socket wrench 10 to tighten the bolt of the front doors. [26] [26] Close the front doors On the operator panel, confirm that you successfully locked the clean unit.
-
Page 31: Lock The Clean Unit (Right)
Lock the clean unit (right) Lock the clean unit (right) Introduction This procedure is only intended for key operators who received the special maintenance training. When to do After you replaced the cleaners *** 'Replace the cleaners' on page 16 ***, you must restart the machine. - Page 32 Lock the clean unit (right) Use the D-wrench to turn M1 clockwise. [28] [28] Lock the clean unit Close the front doors. Use socket wrench 10 to tighten the bolt of the front doors. [29] [29] Close the front doors On the operator panel, confirm that you successfully locked the clean unit.
-
Page 33: Maintenance Tasks - Level 2
Chapter 3 Maintenance tasks - Level 2... -
Page 34: Remove Sheets From The Process Modules
Remove sheets from the process modules Remove sheets from the process modules Introduction During the printing process, sheets can get stuck in one or more process modules. Sometimes, you can only remove these sheets when the machine is off, for example when a sheet is stuck in the preheat unit. Then, only trained operators are allowed to remove these sheets. - Page 35 Remove sheets from the process modules Open the doors Use socket wrench 10 to loosen the bolt of the front doors (1). Open the front doors (2). [31] [31] Open the front doors Remove sheets at the top cover Remove the sheets at the top cover (1). Lift the right-hand top cover to the upper position (2).
- Page 36 Remove sheets from the process modules Remove sheets at the inner covers Caution: Hot area. Use heat-resistant gloves. Caution: Make sure that the left-hand inner cover is locked in the upper position. Remove the sheets at the inner covers. Unlock the left-hand inner cover and lift the left-hand inner cover to the upper position (2).
- Page 37 Remove sheets from the process modules Remove the sheets from the receiving unit. Note: Always pull out the sheet straight and in horizontal direction. [35] [35] Remove the sheets from the receiving unit Use the D-wrench to turn the axle of the transfuse pinch clockwise. The transfuse pinch gets unlocked.
- Page 38 Remove sheets from the process modules Remove sheets from the registration unit Turn handle C1 clockwise (1). Open drawer C1 (2). Note: Opening the drawer can be difficult due to jammed media. [38] [38] Open the registration unit Remove the sheets at C2, C3 and C4. [39] [39] Remove the sheets from the registration unit Chapter 3 Maintenance tasks - Level 2...
- Page 39 Remove sheets from the process modules Caution: Hot area. Remove the sheets below the preheat unit. [40] [40] Remove the sheets below the preheat unit Close drawer C1. Note: Do not turn handle C1. [41] [41] Close drawer C1...
- Page 40 Remove sheets from the process modules Remove the preheat unit Caution: Hot area. Use heat-resistant gloves. Loosen the bolts of the preheat unit to unlock the preheat unit. [42] [42] Unlock the preheat unit Pull out the unit as far as possible. [43] [43] Pull the unit out Lift the red handle and pull the unit further outwards.
- Page 41 Remove sheets from the process modules Lower the front of the unit and remove the unit. Put the unit on a heat-resistant base. Make sure that the left-hand side is on top. Disassemble and assemble the preheat unit Caution: Hot area. Use heat-resistant gloves. Press both red leaf springs at the preheat unit plate outwards and pull out the plate.
- Page 42 Remove sheets from the process modules [47] [47] Assemble the preheat unit Remove the sheets below the transfer unit. [48] [48] Remove the sheets below the transfer unit Install the preheat unit Caution: Hot area. Use heat-resistant gloves. Put the slider wheels of the preheat unit behind the slider wheels of the machine.
- Page 43 Remove sheets from the process modules Put the preheat unit in horizontal position and push the unit into the machine. [50] [50] Push the preheat unit into the machine Tighten the bolts of the preheat unit. [51] [51] Tighten the bolts Turn handle C1 anticlockwise to lock the registration unit.
- Page 44 Remove sheets from the process modules Unlock the clean units Caution: Hot area. Use heat-resistant gloves. Use the D-wrench to turn N1 counter-clockwise. Use the D-wrench to turn M1 counter-clockwise. [53] [53] Unlock the clean units Lift the clean units Caution: Hot area.
- Page 45 Remove sheets from the process modules Use the red handle to lift the left-hand clean unit to the upper position (2). [54] [54] Lift the clean units When you press 'Next' on the operator panel, a dialog box appears. Attention: A sheet on one of the spiral cleaners or on both spiral cleaners will seriously damage the machine.
- Page 46 Remove sheets from the process modules Lower the left-hand clean unit into the locked position (4). [55] [55] Lower the clean units Lock the clean units Use the D-wrench to turn N1 clockwise. Use the D-wrench to turn M1 clockwise. [56] [56] Lock the clean units Chapter 3 Maintenance tasks - Level 2...
- Page 47 Remove sheets from the process modules Close the covers Unlock and lower the right-hand inner cover. [57] [57] Close the right-hand inner cover Lift the right-hand top cover to the upper position (1). Unlock and lower the left-hand inner cover (2). [58] [58] Close the left-hand inner cover Close the left-hand top cover (1).
- Page 48 Remove sheets from the process modules Finish the maintenance task Close the front doors. Use socket wrench 10 to tighten the bolt of the front doors. [60] [60] Close the front doors On the operator panel, confirm that you successfully removed the sheets. Chapter 3 Maintenance tasks - Level 2...
-
Page 49: Clean The Opc Belt (Left)
Clean the OPC belt (left) Clean the OPC belt (left) Introduction This procedure is only intended for key operators who received the special maintenance training. When to do When each 7th print contains a pollution at exact the same location. Before you begin Make sure that you have the Cleaner P and the offset pads at hand. - Page 50 Clean the OPC belt (left) Unlock the OPC unit Use the D-wrench to push and turn L1 counter-clockwise. Use the D-wrench to push and turn L2 counter-clockwise. Use the D-wrench to push and turn L3 counter-clockwise. Use the D-wrench to push and turn L4 counter-clockwise. Use the D-wrench to turn L5 clockwise.
- Page 51 Clean the OPC belt (left) Clean the OPC belt Attention: Do not touch the OPC belt with your fingers. Rotate the metal OPC pulley until the spots are visible. [64] [64] Rotate the OPC pulley Apply a small amount of Cleaner P on an offset pad. Clean the spot with this offset pad.
- Page 52 Clean the OPC belt (left) Use the red handle to push the OPC unit inwards as far as possible. [66] [66] Move the OPC unit in Use the D-wrench to turn L5 counter-clockwise into the locked position. Use the D-wrench to turn L4 clockwise into the locked position. Use the D-wrench to turn L3 clockwise into the locked position.
- Page 53 Clean the OPC belt (left) Finish the maintenance task Close the front doors. Use socket wrench 10 to tighten the bolt of the front doors. [68] [68] Close the front doors On the operator panel, confirm that you successfully cleaned the OPC belt.
-
Page 54: Clean The Opc Belt (Right)
Clean the OPC belt (right) Clean the OPC belt (right) Introduction This procedure is only intended for key operators who received the special maintenance training. When to do When each 7th print contains a pollution at exact the same location. Before you begin Make sure that you have the Cleaner P and the offset pads at hand. - Page 55 Clean the OPC belt (right) Use the D-wrench to turn K5 counter-clockwise. [70] [70] Unlock the OPC unit Use the red handle to move the OPC unit as far outward as possible. [71] [71] Move the OPC unit out...
- Page 56 Clean the OPC belt (right) Clean the OPC belt Attention: Do not touch the OPC belt with your fingers. Rotate the metal OPC pulley until the spots are visible. [72] [72] Rotate the OPC pulley Apply a small amount of Cleaner P on an offset pad. Clean the spot with this offset pad.
- Page 57 Clean the OPC belt (right) Use the red handle to push the OPC unit inwards as far as possible. [74] [74] Move the OPC unit in Use the D-wrench to turn K5 clockwise into the locked position. Use the D-wrench to turn K4 counter-clockwise into the locked position. Use the D-wrench to turn K3 counter-clockwise into the locked position.
- Page 58 Clean the OPC belt (right) Finish the maintenance task Close the front doors. Use socket wrench 10 to tighten the bolt of the front doors. [76] [76] Close the front doors On the operator panel, confirm that you successfully cleaned the OPC belt. Chapter 3 Maintenance tasks - Level 2...
-
Page 59: Appendix A Miscellaneous
Appendix A Miscellaneous... -
Page 60: Reader's Comment Sheet
Reader's comment sheet Reader's comment sheet Questions Have you found this manual to be accurate? O Y es O No Were you able to operate the product, after reading this manual? O Y es O No Does this manual provide sufficient background information? O Y es O No Is the format of this manual convenient in size, readability and arrangement... - Page 61 Country: Please return this sheet to: Océ-Technologies B.V . For the attention of ITC User Documentation. P.O. Box 101, 5900 MA Venlo The Netherlands Send your comments by E-mail to: itc-userdoc@oce.com For the addresses of local Océ organisations see: http://www.oce.com...
-
Page 62: Addresses Of Local Océ Organisations
Océ-Australia Ltd. Océ-Österreich GmbH P.O. Box 363 Postfach 95 Ferntree Gully MDC 1233 Vienna Vic 3165 Austria Australia http://www.oce.at/ http://www.oce.com.au/ Océ-Belgium N.V ./S.A. Océ-Brasil Comércio e Indústria Ltda. J. Bordetlaan 32 Av. das Naçőes Unidas, 11.857 1140 Brussel Brooklin Novo Belgium Săo Paulo-SP 04578-000... - Page 63 Addresses of local Océ organisations Océ-Hungaria Kft. Océ-Ireland Ltd. 1241 Budapest 3006 Lake Drive Pf.: 237 Citywest Business Campus Hungary Saggart http://www.oce.hu/ Co. Dublin Ireland http://www.oce.ie/ Océ-Italia S.p.A. Océ Japan Corporation Strada Padana Superiore 2/B 3-25-1, Nishi Shinbashi 20063 Cernusco sul Naviglio (MI)
- Page 64 5450 North Cumberland Avenue Chicago, IL 60656 http://www.oceusa.com/ Note: The web site http://www.oce.com gives the current addresses of the local Océ organizations and distributors. Note: The addresses of local Océ organizations for information about the Wide Format Printing Systems and the Production Printing Systems can be different from the addresses above.
- Page 65 Index Index Available documentation ....9 Sheet cleaners ......16 Solve paper jam in hot areas .
- Page 66 Index...
Need help?
Do you have a question about the VarioPrint 6000 series and is the answer not in the manual?
Questions and answers