Eaton Powerware Series User Manual
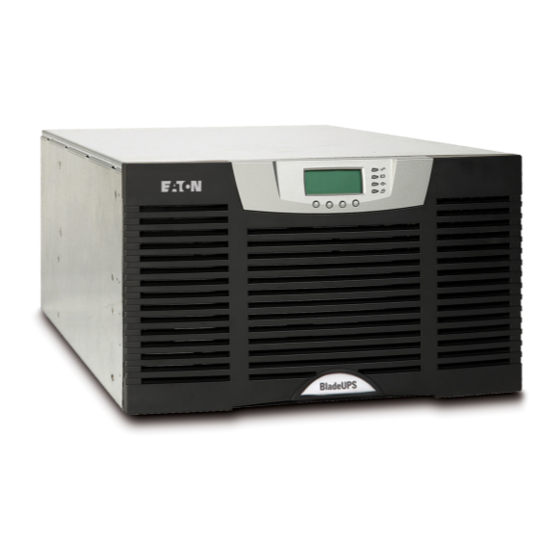
Bladeups 12 kva powerware series
Hide thumbs
Also See for Powerware Series:
- User manual (84 pages) ,
- Mechanical installation manual (28 pages) ,
- Instructions manual (16 pages)
Table of Contents
Advertisement
Quick Links
Advertisement
Table of Contents

Related Manuals for Eaton Powerware Series


Summary of Contents for Eaton Powerware Series
- Page 1 Powerware Series ® Eaton BladeUPS 12 kVA User's Guide...
- Page 3 Powerware Series ® Eaton BladeUPS 12 kVA User's Guide...
- Page 4 Phillips Screw Company. All other trademarks are properties of their respective companies. ECopyright 2007–2009 Eaton Corporation, Raleigh, NC, USA. All rights reserved. No part of this document may be reproduced in any way without the express written approval of Eaton Corporation.
- Page 5 89/336/EEC, Council Directive relating to electromagnetic compatibility 92/31/EEC, Amending Directive 89/336/EEC relating to EMC The EC Declaration of Conformity is available upon request for products with a CE mark. For copies of the EC Declaration of Conformity, contact: Eaton Power Quality Oy Koskelontie 13 FIN-02920 Espoo...
-
Page 6: Special Symbols
Special Symbols The following are examples of symbols used on the UPS or accessories to alert you to important information: RISK OF ELECTRIC SHOCK - Observe the warning associated with the risk of electric shock symbol. CAUTION: REFER TO OPERATOR'S MANUAL - Refer to your operator's manual for additional information, such as important operating and maintenance instructions. -
Page 7: Table Of Contents
................. . . EATON BladeUPS ® (12 kVA) User's Guide 164201649 Rev 4www.eaton.com/powerquality... - Page 8 ..................EATON BladeUPS ® (12 kVA) User's Guide 164201649 Rev 4www.eaton.com/powerquality...
-
Page 9: Introduction
Figure 1 shows the BladeUPS module with an optional Extended Battery Module (EBM). Figure 1. The BladeUPS Module with Optional EBM EATON BladeUPS ® (12 kVA) User's Guide 164201649 Rev 4www.eaton.com/powerquality... - Page 10 UPS modules. A standalone UPS converts to a parallel UPS by changing the line cord. Each UPS in the parallel system connects to a BladeUPS Bar pre-installed in the rear of an Eaton rack. Racks can be configured for bottom or top entry.
- Page 11 INTRODUCTION The BladeUPS Bar for parallel systems, mounted in the rear of an Eaton rack, provides the required input and output connections for the paralleled UPSs and has a single system-rated input connection. Figure 2 shows an example of a BladeUPS parallel system.
- Page 12 Figure 29 on page 39 shows an example of a standalone UPS with EBMs. Figure 30 on page 40 and Figure 31 on page 41 show examples of a parallel system with EBMs. EATON BladeUPS ® (12 kVA) User's Guide 164201649 Rev 4www.eaton.com/powerquality...
-
Page 13: Safety Warnings
Keep unauthorized personnel away from batteries. Proper disposal of batteries is required. Refer to your local codes for disposal requirements. Never dispose of batteries in a fire. Batteries may explode when exposed to flame. EATON BladeUPS ® (12 kVA) User's Guide 164201649 Rev 4www.eaton.com/powerquality... - Page 14 Hold uautoriseret personale væk fra batterierne. Korrekt bortskaffelse af batterier er påkrævet. Overhold gældende lokale regler for bortskaffelsesprocedurer. Skaf dig aldrig af med batterierne ved at brænde dem. Batterierne kan eksplodere ved åben ild. EATON BladeUPS ® (12 kVA) User's Guide 164201649 Rev 4www.eaton.com/powerquality...
-
Page 15: Belangrijke Veiligheidsinstructies
Houd onbevoegden uit de buurt van de accu's. De batterijen moeten op de juiste wijze worden opgeruimd. Raadpleeg hiervoor uw plaatselijke voorschriften. Nooit batterijen in het vuur gooien. De batterijen kunnen ontploffen. EATON BladeUPS ® (12 kVA) User's Guide 164201649 Rev 4www.eaton.com/powerquality... - Page 16 Laitteen saa huoltaa vain ammattitaitoinen huoltohenkilökunta, joka tuntee akut ja niihin liittyvät varotoimet. Älä päästä valtuuttamatonta henkilöstöä lähelle akkuja. Akusto täytyy hävittää säädösten mukaisella tavalla. Noudata paikallisia määräyksiä. Älä koskaan heitä akkuja tuleen. Ne voivat räjähtää. EATON BladeUPS ® (12 kVA) User's Guide 164201649 Rev 4www.eaton.com/powerquality...
- Page 17 Une mise au rebut réglementaire des batteries est obligatoire. Consulter les règlements en vigueur dans votre localité. Ne jamais jeter les batteries au feu. L'exposition aux flammes risque de les faire exploser. EATON BladeUPS ® (12 kVA) User's Guide 164201649 Rev 4www.eaton.com/powerquality...
- Page 18 Kenntnisse der erforderlichen Vorsichtsmaßnahmen verfügt. Nicht autorisiertes Personal von Batterien fern halten. Die Batterien müssen ordnungsgemäß entsorgt werden. Hierbei sind die örtlichen Bestimmungen zu beachten. Batterien niemals verbrennen, da sie explodieren können. EATON BladeUPS ® (12 kVA) User's Guide 164201649 Rev 4www.eaton.com/powerquality...
-
Page 19: Avvisi Di Sicurezza
Le batterie devono essere smaltite in modo corretto. Per i requisiti di smaltimento fare riferimento alle disposizioni locali. Non gettare mai le batterie nel fuoco poichè potrebbero esplodere se esposte alle fiamme. EATON BladeUPS ® (12 kVA) User's Guide 164201649 Rev 4www.eaton.com/powerquality... -
Page 20: Viktig Sikkerhetsinformasion
Batterier må fjernes på korrekt måte. Se lokale forskrifter vedrørende krav om fjerning av batterier. Kast aldri batterier i flammer, da de kan eksplodere, hvis de utsettes for åpen ild. EATON BladeUPS ® (12 kVA) User's Guide 164201649 Rev 4www.eaton.com/powerquality... - Page 21 Siga as instruções apropriadas ao desfazer‐se das baterias. Consulte os códigos do local para maiores informações sobre os regulamentos de descarte de produtos. Nunca jogue as baterias no fogo, porque há risco de explosão. EATON BladeUPS ® (12 kVA) User's Guide 164201649 Rev 4www.eaton.com/powerquality...
- Page 22 ïðåäîñòîðîæíîñòè. Íå äîïóñêàéòå ê ðàáîòå ñ áàòàðåÿìè ïîñòîðîííèõ. Íåîáõîäèìî ñîáëþäàòü ïðàâèëà óòèëèçàöèè àêêóìóëÿòîðîâ. Îáðàòèòåñü ê ìåñòíûì íîðìàòèâíûì àêòàì çà èíôîðìàöèåé î òðåáîâàíèÿõ ê óòèëèçàöèè. Íèêîãäà íå áðîñàéòå àêêóìóëÿòîðû â îãîíü. Àêêóìóëÿòîðû ìîãóò âçîðâàòüñÿ ïîä âîçäåéñòâèåì îãíÿ. EATON BladeUPS ® (12 kVA) User's Guide 164201649 Rev 4www.eaton.com/powerquality...
-
Page 23: Advertencias De Seguridad
Es necesario desechar las baterías de un modo adecuado. Consulte las normas locales para conocer los requisitos pertinentes. Nunca deseche las baterías en el fuego. Las baterías pueden explotar si se las expone a la llama. EATON BladeUPS ® (12 kVA) User's Guide 164201649 Rev 4www.eaton.com/powerquality... - Page 24 Service ska utföras av utbildad servicepersonal med kunskap om batterierna och nödvändiga försiktighetsåtgärder. Håll ej behörig personal borta från batterierna. Batterierna måste avyttras enligt anvisningarna i lokal lagstiftning. Använda batterier får aldrig brännas upp. De kan explodera. EATON BladeUPS ® (12 kVA) User's Guide 164201649 Rev 4www.eaton.com/powerquality...
-
Page 25: Installation
Tools Required To assemble the components, you may need the following tools: Medium flat-bladed screwdriver Short-handled #2 Phillips screwdriver ® Long-handled #2 Phillips screwdriver 7 and 8 mm wrench or socket EATON BladeUPS ® (12 kVA) User's Guide 164201649 Rev 4www.eaton.com/powerquality... -
Page 26: Unpacking The Cabinet
Three-phase, 4-wire plus ground, 208Y/120V nominal (BladeUPS 12 module) or 400Y/230V nominal, 380–415 Vac acceptable (BladeUPS 12i module) 50/60 Hz Wall-mounted breaker that is readily accessible to the operator EATON BladeUPS ® (12 kVA) User's Guide 164201649 Rev 4www.eaton.com/powerquality... -
Page 27: Preparing The Rack
Reorient the door and hang it on the hinges; replace the hinge pins. Reverse the door handle mounting. NOTE The handle uses gravity to operate properly. Reversing the handle is required. Move the Eaton logo to the upper part of the door. EATON BladeUPS ® (12 kVA) User's Guide... - Page 28 Allow for hole spacing and numbering (see Figure 3). For guidelines for configuring a parallel system with EBMs, see page 3. Continue to the following section, “Installing the Input and Output Wiring.” EATON BladeUPS ® (12 kVA) User's Guide 164201649 Rev 4www.eaton.com/powerquality...
-
Page 29: Installing The Input And Output Wiring
Figure 4 shows input and output wiring in a bottom entry rack and a top entry rack. Wiring in a Bottom Entry Rack Wiring in a Top Entry Rack Figure 4. Wiring Entry Options EATON BladeUPS ® (12 kVA) User's Guide 164201649 Rev 4www.eaton.com/powerquality... - Page 30 Bottom Entry Wiring only. Remove the eight screws on the wireway top cover and retain. Slide the cover back and off the wireway and retain. See Figure 6. Wireway Top Cover Ferrite Assembly (mounted) Figure 6. Removing the Wireway Top Cover EATON BladeUPS ® (12 kVA) User's Guide 164201649 Rev 4www.eaton.com/powerquality...
- Page 31 Figure 8 and Table 2. Route the three input phases and the input neutral through the mounted or loosened ferrite assembly (see Figure 6). Ground Bottom Entry Top Entry Terminal Block Terminal Block Ground Figure 8. BladeUPS Bar Terminal Block EATON BladeUPS ® (12 kVA) User's Guide 164201649 Rev 4www.eaton.com/powerquality...
-
Page 32: Ebm Setup
NOTE Discard the EBM user's guide if you are installing the EBM with a new UPS at the same time. Use the UPS user's guide to install both the UPS and the EBM. EATON BladeUPS ® (12 kVA) User's Guide 164201649 Rev 4www.eaton.com/powerquality... -
Page 33: Rack Setup For The Ebm
If you are installing additional rails, place the next rail 4 holes above the last installed screw (see Figure 10). NOTE Verify that the hole patterns on the rails and mounting brackets align with the hole pattern on the rack. EATON BladeUPS ® (12 kVA) User's Guide 164201649 Rev 4www.eaton.com/powerquality... - Page 34 Figure 10. Front Rail Screw Positions for the EBM Secure the rail to the front of the rack with two hex-head screws (see Figure 11). Front Rail Hex-Head Screws Figure 11. Securing the Front Rail EATON BladeUPS ® (12 kVA) User's Guide 164201649 Rev 4www.eaton.com/powerquality...
- Page 35 If the mounting brackets are not already installed, align the two mounting brackets with the screw holes on the side of the EBM and secure with the supplied 6-32 flat-head screws (see Figure 14). EATON BladeUPS ® (12 kVA) User's Guide 164201649 Rev 4www.eaton.com/powerquality...
- Page 36 11. Secure the front of the EBM to the rack using two hex-head screws in each mounting bracket as shown in Figure 15. Hex-Head Screws Figure 15. Securing the EBM Mounting Brackets EATON BladeUPS ® (12 kVA) User's Guide 164201649 Rev 4www.eaton.com/powerquality...
-
Page 37: Ups Setup
Verify that the following items are included with the UPS: UPS front cover Communication terminal block connectors: - (3) two-pin connectors - (2) two-pin connectors with jumpers - (1) three-pin connector (2) wire saddles Communication cable (DB-9/DB-9) EATON BladeUPS ® (12 kVA) User's Guide 164201649 Rev 4www.eaton.com/powerquality... - Page 38 Parallel system only. Verify that the following items are included with each Powerware Hot Sync CAN Bridge Card: CAN Bridge Card cable with (2) RJ-45 connectors Redundant signal cable with (2) two-position terminal block connectors (2) blue terminating plugs EATON BladeUPS ® (12 kVA) User's Guide 164201649 Rev 4www.eaton.com/powerquality...
-
Page 39: Rack Setup For The Ups
Top of Rail Position 9 Mounting Bracket Position 4 Bottom of Rack Position 1 Bottom of Rail or Top of Other Cabinet Figure 17. Front Rail Screw Positions for the UPS EATON BladeUPS ® (12 kVA) User's Guide 164201649 Rev 4www.eaton.com/powerquality... - Page 40 Position 12 Position 11 Position 2 Position 1 Front M5 Screws Figure 19. Securing the Front Rail Adjust the rail size on the rail assembly for the depth of your rack. EATON BladeUPS ® (12 kVA) User's Guide 164201649 Rev 4www.eaton.com/powerquality...
- Page 41 The UPS is heavy (see page 99). Removing the UPS from its carton requires a minimum of two people. Use the corrugated lifting sling (packaged with the UPS) to move the UPS. Place the UPS on a flat, stable surface with the front of the UPS facing toward you. EATON BladeUPS ® (12 kVA) User's Guide 164201649 Rev 4www.eaton.com/powerquality...
- Page 42 UPS and secure with the supplied 6-32 flat-head screws (see Figure 22). Mounting Bracket 6-32 Flat-Head Screws Figure 22. Installing the UPS Mounting Brackets 12. Slide the UPS into the rack. EATON BladeUPS ® (12 kVA) User's Guide 164201649 Rev 4www.eaton.com/powerquality...
- Page 43 Verify that the brackets seat firmly, then tighten the nuts on the rear hold-down brackets. The UPS is now secured in the rack. Figure 24. Inserting the Rear Hold-Down Bracket EATON BladeUPS ® (12 kVA) User's Guide 164201649 Rev 4www.eaton.com/powerquality...
- Page 44 2-Pin with Jumper 2-Pin Connector 2-Pin with Jumper 3-Pin Connector Wire Saddle Figure 25. Installing the Communication Terminal Block Connectors 20. Continue to the following section, “Installing the UPS Internal Batteries.” EATON BladeUPS ® (12 kVA) User's Guide 164201649 Rev 4www.eaton.com/powerquality...
-
Page 45: Installing The Ups Internal Batteries
When a tray is fully installed, tuck the plastic handle on the end of the tray into place. Figure 27. Installing the UPS Battery Trays Reinstall the battery cover plate. EATON BladeUPS ® (12 kVA) User's Guide 164201649 Rev 4www.eaton.com/powerquality... -
Page 46: Ebm Installation
Parallel system only. Repeat Steps 1 and 2 for each UPS with EBM(s). See Figure 30 on page 40 and Figure 31 on page 41 for examples of EBM connections in a parallel system. EATON BladeUPS ® (12 kVA) User's Guide 164201649 Rev 4www.eaton.com/powerquality... - Page 47 Continue to “Standalone UPS Installation” on page 42 or “Parallel UPS Installation” on page 43. Battery Breaker UPS Battery Connector EBM Cable Battery EBM Battery Breakers Connectors Figure 29. Typical EBM Installation EATON BladeUPS ® (12 kVA) User's Guide 164201649 Rev 4www.eaton.com/powerquality...
- Page 48 Figure 30. Example EBM Installations in Parallel Systems NOTE Figure 30 shows one system using the supplied EBM cables and two systems using optional 0.9m (3 ft) battery extension cables. EATON BladeUPS ® (12 kVA) User's Guide 164201649 Rev 4www.eaton.com/powerquality...
- Page 49 INSTALLATION Figure 31. Example EBM Installation in a Large Parallel System NOTE Figure 31 shows a system using optional 0.9m (3 ft) battery extension cables. EATON BladeUPS ® (12 kVA) User's Guide 164201649 Rev 4www.eaton.com/powerquality...
-
Page 50: Standalone Ups Installation
If an emergency power-off (disconnect) switch is required by local codes, see “Remote Emergency Power-off” on page 83 to install the REPO switch before powering on the UPS. Continue to “Standalone UPS Initial Startup” on page 59. EATON BladeUPS ® (12 kVA) User's Guide 164201649 Rev 4www.eaton.com/powerquality... -
Page 51: Parallel Ups Installation
UPSs in a new parallel configuration. In this case, two blue terminating plugs are supplied with each UPS. None of the Powerware Hot Sync CAN Bridge Cards contains a Jumper J7. EATON BladeUPS ® (12 kVA) User's Guide 164201649 Rev 4www.eaton.com/powerquality... -
Page 52: New Multiple Parallel Ups Installation
Figure 33. Powerware Hot Sync CAN Bridge Card NOTE Eaton recommends installing the Powerware Hot Sync CAN Bridge Card in X-Slot Communication Bay 2 (see Figure 32 on page 43), leaving Communication Bay 1 available for other types of X-Slot cards. - Page 53 Install one of the two supplied blue terminating plugs (see Figure 34) into the CAN IN port on the first UPS (UPS 1 in Figure 36). Blue Terminating Plug (CAN IN) Figure 34. Installing the Blue Terminating Plug (First UPS) EATON BladeUPS ® (12 kVA) User's Guide 164201649 Rev 4www.eaton.com/powerquality...
- Page 54 UNIT 2, and so forth. NOTE You can configure the parallel system with UPS 1 at the bottom of the rack (as shown in Figure 36) or at the top of the rack. EATON BladeUPS ® (12 kVA) User's Guide 164201649 Rev 4www.eaton.com/powerquality...
- Page 55 UPS, the remaining UPS transfers the load to bypass instead of supporting the load. Verify that all wiring is correct for proper operation. 13. Remove the Standalone/Parallel terminal block connector from the last UPS (UPS 3 in Figure 36). EATON BladeUPS ® (12 kVA) User's Guide 164201649 Rev 4www.eaton.com/powerquality...
- Page 56 Gently loop and twist the parallel input cords as shown to minimize stress on the cords. The loop and twist for each cord may vary depending on configuration and strain relief. EATON BladeUPS ® (12 kVA) User's Guide 164201649 Rev 4www.eaton.com/powerquality...
-
Page 57: Single Parallel-Ready Ups Installation
Verify that the UPS is installed in a rail kit in a rack containing a BladeUPS Bar. Switch off utility power to the distribution point where the parallel-ready UPS system will be connected. Be absolutely sure there is no power. EATON BladeUPS ® (12 kVA) User's Guide 164201649 Rev 4www.eaton.com/powerquality... - Page 58 Figure 38. Powerware Hot Sync CAN Bridge Card NOTE Eaton recommends installing the Powerware Hot Sync CAN Bridge Card in X-Slot Communication Bay 2 (see Figure 32 on page 43), leaving the X-Slot Communication Bay 1 available for other types of X-Slot cards.
- Page 59 UPS, but does not specify which UPS or how many. 10. If you left the UPS unattached to the rack, secure the front and rear of the UPS as described in Steps 14 and 15 on page 35. EATON BladeUPS ® (12 kVA) User's Guide 164201649 Rev 4www.eaton.com/powerquality...
- Page 60 Gently loop and twist the parallel input cord as shown to minimize stress on the cord. The loop and twist for the cord may vary depending on configuration and strain relief. 14. Continue to “Parallel System Initial Startup” on page 60. EATON BladeUPS ® (12 kVA) User's Guide 164201649 Rev 4www.eaton.com/powerquality...
-
Page 61: Ups Installation Into An Existing Parallel System
Figure 40. Powerware Hot Sync CAN Bridge Card NOTE Eaton recommends installing the Powerware Hot Sync CAN Bridge Card in X-Slot Communication Bay 2 (see Figure 32 on page 43), leaving the X-Slot Communication Bay 1 available for other types of X-Slot cards. - Page 62 CAN OUT port. Continue to Step 10. Remove and discard the black terminating plug installed in the CAN IN port of the first UPS. EATON BladeUPS ® (12 kVA) User's Guide 164201649 Rev 4www.eaton.com/powerquality...
- Page 63 Reconnect the CAN Bridge Card Cable to the Powerware Hot Sync CAN Bridge Card. g. Tighten the screws securing each Powerware Hot Sync CAN Bridge Card in its X-Slot communication bay. EATON BladeUPS ® (12 kVA) User's Guide 164201649 Rev 4www.eaton.com/powerquality...
- Page 64 UPS, the remaining UPS transfers the load to bypass instead of supporting the load. Verify that all wiring is correct for proper operation. 14. Remove the Standalone/Parallel terminal block connector from the last UPS (UPS 3 in Figure 42). EATON BladeUPS ® (12 kVA) User's Guide 164201649 Rev 4www.eaton.com/powerquality...
- Page 65 UPS, but does not specify which UPS or how many. 17. If you left the UPSs unattached to the rack, secure the front and rear of each UPS as described in Steps 14 and 15 on page 35. EATON BladeUPS ® (12 kVA) User's Guide 164201649 Rev 4www.eaton.com/powerquality...
- Page 66 UPS(s) without shutting down the parallel system, perform the steps in “Parallel System Initial Startup”on the additional UPS(s) only. Figure 43. Connecting UPSs to the BladeUPS Bar (Bottom Entry Shown) EATON BladeUPS ® (12 kVA) User's Guide 164201649 Rev 4www.eaton.com/powerquality...
-
Page 67: Standalone Ups Initial Startup
13. Press any button on the front panel display to activate the menu options, and then press the button until the TURN UPS ON/OFF menu displays. 14. Press the button to display the TURN UPS ON option; press the button. EATON BladeUPS ® (12 kVA) User's Guide 164201649 Rev 4www.eaton.com/powerquality... -
Page 68: Parallel System Initial Startup
Deactivate the external REPO switch and restart the UPS. 21. See “Updating the UPS Firmware” on page 98. NOTE The batteries charge to 80% capacity in less than 5 hours. However, Eaton recommends that the batteries charge for 48 hours after installation or long-term storage. - Page 69 13. To energize loads connected through the load connectors, switch all load connector circuit breakers to the ON ( ) position. 14. On any UPS, press the button until the Start screen appears. EATON BladeUPS ® (12 kVA) User's Guide 164201649 Rev 4www.eaton.com/powerquality...
- Page 70 NOTE When adding a new UPS to a parallel system or updating one UPS's firmware, verify that all UPSs in the parallel system are updated to the same firmware version. NOTE The batteries charge to 80% capacity in less than 5 hours. However, Eaton recommends that the batteries charge for 48 hours after installation or long-term storage.
-
Page 71: Operation
(see Figure 45). A thicker bar indicates the node is energized. Bypass Output Power Percentage Rectifier/ Inverter Battery Charge Remaining Charger (or Battery is Charging) Battery Figure 45. BladeUPS Module Mimic Screen EATON BladeUPS ® (12 kVA) User's Guide 164201649 Rev 4www.eaton.com/powerquality... -
Page 72: Changing The Language
Display Functions As the default or after 15 minutes of inactivity, the LCD displays the selectable Start screen. The default is the Eaton logo and can be changed to the Mimic screen in the User Settings menu. The backlit LCD automatically dims after a long period of inactivity. Press any button to restore the screen. - Page 73 Type / Part Number / Serial Number / Firmware / Display / System Display / CAN Bridge Turn UPS On/Off On and Off Options Turn UPS Off / Turn System On / Turn System Off EATON BladeUPS ® (12 kVA) User's Guide 164201649 Rev 4www.eaton.com/powerquality...
-
Page 74: User Settings
Modem Installation: [Not Installed] [X-Slot-1] [X-Slot-2] Not Installed Set Modem Call Events Event #0 Call modem: no Set Modem Init String ATZ0 Set Modem Call Command None Set Modem Communication Password None EATON BladeUPS ® (12 kVA) User's Guide 164201649 Rev 4www.eaton.com/powerquality... -
Page 75: Operating Modes
The system bypass input directly supplies the system output with three-phase AC power, and the UPS stands ready to automatically transfer to double-conversion (Standard) operation as needed. The battery recharges when necessary. EATON BladeUPS ® (12 kVA) User's Guide 164201649 Rev 4www.eaton.com/powerquality... -
Page 76: Battery Mode
When the UPS is turned off and remains plugged into a power outlet, the UPS is in Standby mode. The indicator is off, indicating that power is not available to your equipment. The battery recharges when necessary. EATON BladeUPS ® (12 kVA) User's Guide 164201649 Rev 4www.eaton.com/powerquality... -
Page 77: Ups Startup And Shutdown
UPS status from the front panel to view the active alarms. Correct the alarms and restart if necessary. 10. Press any button on the front panel display to activate the menu options. Select TURN UPS ON/OFF, TURN UPS ON, and press the button. EATON BladeUPS ® (12 kVA) User's Guide 164201649 Rev 4www.eaton.com/powerquality... -
Page 78: Starting A Parallel System
Correct the alarms and restart if necessary. 11. On any UPS, press any button on the front panel display to activate the menu options. Select TURN UPS ON/OFF and TURN SYSTEM ON. EATON BladeUPS ® (12 kVA) User's Guide 164201649 Rev 4www.eaton.com/powerquality... -
Page 79: Starting The Ups On Internal Bypass
Check the UPS status from the front panel to view the active alarms. Correct the alarms and restart if necessary. EATON BladeUPS ® (12 kVA) User's Guide 164201649 Rev 4www.eaton.com/powerquality... -
Page 80: Standalone Ups Shutdown
UPS stops beeping. The output relays open, the UPS transfers to Standby mode, and the indicator turns off. Switch the UPS battery circuit breaker to the OFF (O) position. EATON BladeUPS ® (12 kVA) User's Guide 164201649 Rev 4www.eaton.com/powerquality... -
Page 81: Parallel System Shutdown
CONTROL and GO TO NORMAL MODE. Alternatively (standalone UPS only): Press any button to activate the menu options, then select TURN UPS ON/OFF, TURN UPS ON, and OK to confirm. EATON BladeUPS ® (12 kVA) User's Guide 164201649 Rev 4www.eaton.com/powerquality... -
Page 82: Setting Power Strategy
UPS + 1 EBM UPS + 2 EBMs UPS + 3 EBMs UPS + 4 EBMs Press the button to save the setting. Press the button until the Start screen appears. EATON BladeUPS ® (12 kVA) User's Guide 164201649 Rev 4www.eaton.com/powerquality... -
Page 83: Setting The Battery Low Alarm Level
(for example, another UPS feeding the BladeUPS module may trip off). NOTE Battery Tests will only run when the system is in High Efficiency Mode and the charger is in Rest Mode. EATON BladeUPS ® (12 kVA) User's Guide 164201649 Rev 4www.eaton.com/powerquality... - Page 84 OPERATION EATON BladeUPS ® (12 kVA) User's Guide 164201649 Rev 4www.eaton.com/powerquality...
-
Page 85: Communication
DB-9 Communication Port Redundant Signal Wiring (For Parallel Use Only) Relay Output Contacts X-Slot Communication Bay 1 X-Slot Communication Bay 2 Figure 46. Communication Options and Control Terminals (Standalone UPS shown) EATON BladeUPS ® (12 kVA) User's Guide 164201649 Rev 4www.eaton.com/powerquality... -
Page 86: Installing Communication Options And Control Terminals
See “Communication Options” on page 79 or “Control Terminals” on page 81 for detailed information. Route and tie the cable(s) out of the way. Continue to “Operation” on page 63 to start up the UPS. EATON BladeUPS ® (12 kVA) User's Guide 164201649 Rev 4www.eaton.com/powerquality... -
Page 87: Communication Options
Multiplexed X-Slot 1 X-Slot 2 Communication Bay DB-9 Communication Port Communication Bay Any X-Slot card Any X-Slot card except the Eaton Modem Card Not in use Any X-Slot card Eaton Relay Interface Card Available Powerware Hot Sync CAN Bridge Card... -
Page 88: X-Slot Cards
(10/100BaseT) network. It has a built-in switching hub that allows three additional network devices to be connected to the network without the requirement of additional network drops. In addition, you can attach an Eaton Environmental Monitoring Probe to obtain humidity, temperature, smoke alarm, and security information. -
Page 89: Control Terminals
The relay output contacts must not be connected to any utility connected circuits; the utility requires reinforced insulation. The relay output contacts have a maximum rating of 30 Vac/1A and 60 Vdc/2A nominal values. EATON BladeUPS ® (12 kVA) User's Guide 164201649 Rev 4www.eaton.com/powerquality... -
Page 90: Programmable Signal Inputs
Set actions for alarms from a generator, such as disabling the charger for an undersized generator or shutdown for a failed generator. Configure an ATS (automatic transfer switch) sensor to transfer the system to Bypass mode. EATON BladeUPS ® (12 kVA) User's Guide 164201649 Rev 4www.eaton.com/powerquality... -
Page 91: Remote Emergency Power-Off
Securely mount the remote REPO switch. Recommended locations include near operator's consoles or near exit doors. Refer to the REPO switch manufacturer's installation instructions for enclosure dimensions and wiring knockouts. EATON BladeUPS ® (12 kVA) User's Guide 164201649 Rev 4www.eaton.com/powerquality... -
Page 92: Installing Repo For A Parallel System
REPO contact. See Figure 53 for NO REPO wiring and Figure 54 for NC REPO wiring. Reconnect the REPO connector pins and turn on the UPS manually to restart. Short the pins to keep the UPS running. Maximum resistance is 10 ohm. EATON BladeUPS ® (12 kVA) User's Guide 164201649 Rev 4www.eaton.com/powerquality... - Page 93 UPS 1 REPO Terminals (Normally-Open) + Polarity Normally-Open – Polarity + Polarity Normally-Closed Factory-Installed Jumper Wire – Polarity (do not remove) Figure 53. Normally-Open REPO Switch Wiring in a Parallel System EATON BladeUPS ® (12 kVA) User's Guide 164201649 Rev 4www.eaton.com/powerquality...
- Page 94 Normally-Closed – Polarity UPS 1 REPO Terminals + Polarity Normally-Open REPO Switch – Polarity (Normally-Closed) + Polarity Normally-Closed – Polarity Figure 54. Normally-Closed REPO Switch Wiring in a Parallel System EATON BladeUPS ® (12 kVA) User's Guide 164201649 Rev 4www.eaton.com/powerquality...
-
Page 95: Parallel Communication
15–20 seconds to complete once all the UPSs in the parallel system have logic power. If a UPS is shut down or otherwise loses logic power, the UPS will re-identify itself in the proper sequence once logic power is restored. EATON BladeUPS ® (12 kVA) User's Guide 164201649 Rev 4www.eaton.com/powerquality... -
Page 96: Metering
In a standalone UPS, the load can be connected from the outlet cord or the Anderson load connector. The Output measurement would be the total load on the UPS, and the Load Receptacle reading would be the portion supplied by the Anderson load connector. EATON BladeUPS ® (12 kVA) User's Guide 164201649 Rev 4www.eaton.com/powerquality... -
Page 97: Ups Maintenance
If you store the UPS for a long period, recharge the battery every 6 months by connecting the UPS to utility power. The batteries charge to 80% capacity in fewer than 5 hours. However, Eaton recommends that the batteries charge for 48 hours after long-term storage. -
Page 98: Replacing Batteries
EBM. If not already installed, install the supplied mounting brackets on the new EBM. Replace the EBM. See “Recycling the Used Battery or UPS” on page 98 for proper disposal. EATON BladeUPS ® (12 kVA) User's Guide 164201649 Rev 4www.eaton.com/powerquality... -
Page 99: How To Replace Ups Internal Batteries
Unplug the LCD cable connecting the back of the control panel to the electronics module. LCD Cable Figure 55. Removing the UPS Front Cover NOTE Disconnecting the control panel from the electronics module automatically transfers the UPS to Bypass mode. EATON BladeUPS ® (12 kVA) User's Guide 164201649 Rev 4www.eaton.com/powerquality... - Page 100 When a tray is fully installed, tuck the plastic handle on the end of the tray into place. Figure 57. Installing the UPS Battery Trays EATON BladeUPS ® (12 kVA) User's Guide 164201649 Rev 4www.eaton.com/powerquality...
-
Page 101: Testing New Batteries
NOTE Battery Tests will only run when the system is in High Efficiency Mode and the charger is in Rest Mode. To test new batteries: Plug the UPS into a power outlet for 48 hours to charge the battery. Press any button to activate the menu options. EATON BladeUPS ® (12 kVA) User's Guide 164201649 Rev 4www.eaton.com/powerquality... -
Page 102: Replacing The Electronics Module
Pull firmly to unseat the connectors. Use two hands to support the module. NOTE Treat the electronics module with care to avoid damaging the fans, connectors, or internal circuitry. EATON BladeUPS ® (12 kVA) User's Guide 164201649 Rev 4www.eaton.com/powerquality... - Page 103 Push the top of the front cover firmly into place, and then push the bottom firmly into place. Verify that no alarms are indicated on the control panel. Transfer the UPS to Normal mode. EATON BladeUPS ® (12 kVA) User's Guide 164201649 Rev 4www.eaton.com/powerquality...
-
Page 104: Replacing A Ups In A Parallel System
For the location of the cables, see Figure 36 on page 47. Disconnect any other cables, such as REPO signals or serial communications. Switch the UPS load connector circuit breaker to the OFF (O) position. EATON BladeUPS ® (12 kVA) User's Guide 164201649 Rev 4www.eaton.com/powerquality... - Page 105 14. If not returning the UPS for warranty, see ”Recycling the Used Battery or UPS” on page 98 for proper disposal. 15. Continue to “UPS Installation into an Existing Parallel System” on page 53. EATON BladeUPS ® (12 kVA) User's Guide 164201649 Rev 4www.eaton.com/powerquality...
-
Page 106: Recycling The Used Battery Or Ups
Updating the UPS Firmware To keep the UPS firmware updated with the latest improvements and benefits, visit www.eaton.com/powerquality often for updates. You can download the latest firmware version. The downloadable file includes the instructions for installing the update. -
Page 107: Specifications
1.2/1.2m (4/4 ft) UPSCord12PCE 12 kW CE parallel Anderson* 0.5m (1.5 ft) * Customized Anderson connector for use with Eaton BladeUPS Bar Table 10. Weights and Dimensions Extended Battery Module (EBM) Dimensions (WxDxH) 441 x 660 x 261 mm 438 x 660 x 131 mm 17.4”... - Page 108 BladeUPS Bar (see Table 9 on page 99). Noise Filtering MOVs and common mode line filter Input Power Factor High Efficiency setting: load dependent Standard setting: >0.99 Input Mode Three-phase EATON BladeUPS ® (12 kVA) User's Guide 164201649 Rev 4www.eaton.com/powerquality...
- Page 109 >150%: load transfers to Bypass mode after 300 ms Voltage Waveform Normal mode and Battery mode: Sine wave; <2% THD with linear load; <5% with nonlinear load Full Output Three-phase EATON BladeUPS ® (12 kVA) User's Guide 164201649 Rev 4www.eaton.com/powerquality...
- Page 110 12/6 4.7/13.6 9.5/27 17/42 27/60 34/76 BladeUPS 12i module 12/6 4.7/13.6 9.5/27 17/42 27/60 34/76 NOTE Battery times are approximate and vary depending on the load configuration and battery charge. EATON BladeUPS ® (12 kVA) User's Guide 164201649 Rev 4www.eaton.com/powerquality...
- Page 111 24/57 38/82 48/105 48/24 6.7/19.2 13/34 23/54 35/77 44/98 60/30 6.2/18.4 13/33 22/52 33/74 42/94 NOTE Battery times are approximate and vary depending on the load configuration and battery charge. EATON BladeUPS ® (12 kVA) User's Guide 164201649 Rev 4www.eaton.com/powerquality...
- Page 112 SPECIFICATIONS EATON BladeUPS ® (12 kVA) User's Guide 164201649 Rev 4www.eaton.com/powerquality...
-
Page 113: Troubleshooting
Check for one of the following alarms: bypass may be unstable or in brownout over or under voltage, bypass over or under frequency, or bypass conditions. unavailable. LED is flashing slowly. 1 beep every second. EATON BladeUPS ® (12 kVA) User's Guide 164201649 Rev 4www.eaton.com/powerquality... - Page 114 Wait until the battery test completes. To cancel a test in progress, see “Testing New Batteries” on page 93. Battery test failed. The batteries need service. Contact your service representative. Clear the alarm by opening the battery breaker. EATON BladeUPS ® (12 kVA) User's Guide 164201649 Rev 4www.eaton.com/powerquality...
- Page 115 Verify that all UPSs in the parallel system are from the same detects a UPS in the system with a manufacturer. UPSs with different OEM numbers will not parallel. different OEM number. EATON BladeUPS ® (12 kVA) User's Guide 164201649 Rev 4www.eaton.com/powerquality...
-
Page 116: Silencing The Alarm
A replacement or repair unit will be shipped, freight prepaid for all warrantied units. NOTE For critical applications, immediate replacement may be available. Call the Help Desk for the dealer or distributor nearest you. EATON BladeUPS ® (12 kVA) User's Guide 164201649 Rev 4www.eaton.com/powerquality... -
Page 117: Warranty
End-user’s credit card, or send the End-user an invoice (which the End-user agrees to pay), for the value of the replacement product. If the Warranted Item is to be replaced by Eaton, but the End-user is unwilling or unable to supply a credit card number or purchase order for the... - Page 118 Some States or jurisdictions do not allow the exclusion of limitation of incidental or consequential damages, so the above limitation or exclusion may not apply to you. Eaton shall not be responsible for failure to provide service or parts due to causes beyond Eaton’s reasonable control.
- Page 120 *1642016494* 164201649 4...
Need help?
Do you have a question about the Powerware Series and is the answer not in the manual?
Questions and answers