Advertisement
Table of Contents
Advertisement
Table of Contents

Related Manuals for BLADEZ Brazil


Summary of Contents for BLADEZ Brazil
- Page 1 OWNER’S MANUAL Important: Read all instructions carefully before using this product. Retain this owner’s manual for future reference. BH North America | 20155 Ellipse, Foothill Ranch, California 92610 | p.949.206.0330 | f.949.206.0013 | www.bhnorthamerica.com...
-
Page 2: Table Of Contents
TABLE OF CONTENTS Title Page Introduction Warnings and Labels Safety Information Exercise Instruction Training Guidelines Suggested Stretches Overview Assembly Instructions Exploded View Drawing Console Overview Console Operation Parts List Warranty... -
Page 3: Introduction
CONGRATULATIONS Congratulations on your purchase of Bladez Fitness equipment. We hope you appreciate the style, quality, and value that exercisers across North America have come to expect from Bladez Fitness. If you have any questions, concerns or product issues, do not return the equipment to the retail store. -
Page 4: Warnings And Labels
WARNINGS AND LABELS • Misuse of this machine may result in serious injury. • Read User’s Manual prior to use and follow all warnings and instructions. • Do not allow children on or around the machine. • Pedals continue to spin when you stop pedaling. -
Page 5: Safety Information
Always wear athletic shoes when using the machine and tie the laces securely. 6. This machine must only be used for the purposes described in this manual. DO NOT use accessories that are not recommended by Bladez Fitness. 7. Do not place sharp objects near the machine. -
Page 6: Exercise Instruction
EXERCISE INSTRUCTION Use of the machine offers various benefits; it will improve fitness, muscle tone and when used in conjunction with a calorie controlled diet, it will help you lose weight. 1. Consult your doctor before starting any exercise program. It is advisable to undergo a complete physical examination. -
Page 7: Training Guidelines
TRAINING GUIDELINES Exercise is one of the most important factors in the overall health of an individual. Listed among its benefits are: • Increased capacity for physical work (strength endurance) • Increased cardiovascular (heart and arteries/veins) and respiratory efficiency • Decreased risk of coronary heart disease •... - Page 8 ANAEROBIC TRAINING This means “without oxygen” and is the output of energy when the oxygen supply is insufficient to meet the body’s long term energy demands. (For example, a 100 meter sprint.) THE TRAINING THRESHOLD This is the minimum level of exercise which is required to produce significant improvements in any physical fitness parameter.
- Page 9 pulse rate, but not enough to strain your heart. Your initial level of fitness is important when developing an exercise program for you. When starting, you can get a good training effect with a heart rate of 110-120 beats per minute (BPM). If you are more fit, you will need a higher threshold of stimulation.
- Page 10 are on the correct program is a very slight soreness in most major muscle groups. This is quite normal and will disappear in a matter of days. If you experience major discomfort, you may be on a program that is too advanced, or you have increased your program too rapidly.
-
Page 11: Suggested Stretches
SUGGESTED STRETCHES Head Rolls Rotate your head to the right for one count while feeling the stretch up the left side of your neck. Next, rotate your head back for one count, stretching your chin to the ceiling. Rotate your head to the left for one count, and finally, drop your head to your chest for one count. - Page 12 SUGGESTED STRETCHES Inner Thigh Stretch Sit with the soles of your feet together with your knees pointing outward. Pull your feet as close into your groin as possible. Gently push your knees towards the floor. Hold for 15 counts. Toe Touches Slowly bend forward from your waist, letting your back and shoulders relax as you stretch toward your toes.
-
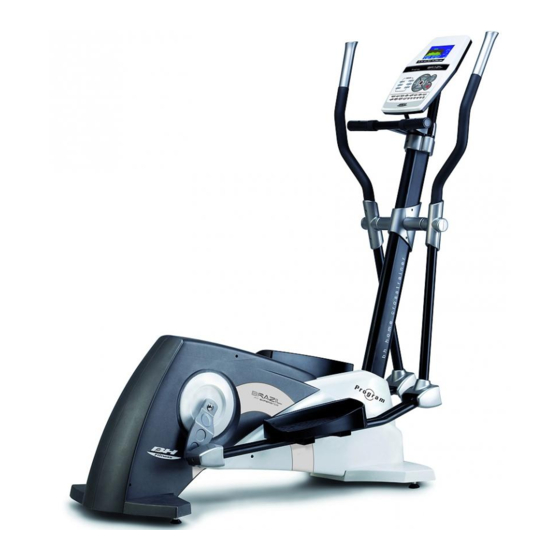
Page 13: Overview
OVERVIEW... -
Page 14: Assembly Instructions
ASSEMBLY INSTRUCTIONS ATTENTION: The assistance of a second person is required for certain steps of the installation process when assembling this machine. STEP 1 1. Take the machine out of its box and make sure that all of the pieces are there. STEP 2 FITTING THE HANDLE BARS ATTENTION: The assistance of a second person is REQUIRED for this stage of the assembly. - Page 15 STEP 3 FITTING THE MAIN POST Take the main post (72) and remove the screws (71), the washers (8) and spring washers (9) from the bottom of the post (72) Fig.5. Next, bring the main post (72) up to boss (H) on the main body (51) Fig.5. Connect terminals (78) Fig.5 with (80), Fig.5.
- Page 16 FIG. 6 STEP 4 FITTING THE PEDAL TUBE Loosen the screw (15) along with the spacer (18), the washer (8) and the nut (16), using the combination tool. Fig.6. Take the left pedal tube (21) and insert the spacer (18) in the direction of the arrow, FIG.
- Page 17 FIG. 7 STEP 5 FITTING THE FOOTRESTS Position the left footrest (23L) (marked with the letter “L”) on top of the machines left pedal tube (21), Fig.7, (left and right refers to the user’s position during exercise) refit the screws (22), the washers (8) and the nuts (4) removed previously and tighten securely.
- Page 18 STEP 7 FITTING THE UPPER HANDLEBARS Take the top left handlebar (3L) (marked with the letter “L”). Insert the top bar onto the bottom left handlebar (13L), lining up the letters (L), Fig.9, fit the screws (6), and the cap nuts (4) and tighten securely. Now go through the same procedure for the top right handlebar (3R).
- Page 19 STEP 9 FIG. 10 FITTING THE ELECTRONIC MONITOR. ATTACHING THE MONITOR. Remove the screws (69), Fig.10, at the back of the monitor (63). Then connect the terminals (93 & 93a) and the handgrip terminals (41a with 41) and (42a with 42), Fig.10. Next, slide the front of the monitor onto the plate on top of the main post (64) in the direction of the arrow, Fig.10, tuck the...
- Page 20 MOVEMENT & STORAGE The machine is equipped with wheels (47), as shown in Fig.12, which make it easier to move. The two wheels at the front of the unit make it easier to place the equipment into any chosen position by lifting the rear slightly. Store your equipment in a dry place, preferably not subject to changes in temperature.
-
Page 21: Exploded View Drawing
EXPLODED VIEW DRAWING... -
Page 22: Console Overview
CONSOLE OVERVIEW Function Control Scrolling Text Marquee Training Programs User Data Time Target Heart Rate Speed/RPM Watts/Calories Quick Control Mode Distance Selection Reset Key Key Watt/Personal/H.R.C. Quick Control Mode Quick Start Selection Up Key Key Body Fat/Manual Programs P1-P12 Down Key Start/Stop Key Recovery Key Enter Key... -
Page 23: Console Operation
CONSOLE OPERATION A. FUNCTION Scan Alternates Between Watts/Calories and RPM/Speed 6 Seconds Per Display RPM* 0-999 Speed* 0.0-62 mph Time 0:00-99:59 Distance 0.00-62 mi Calories 0-999 Heart Symbol On/Off Flashes Manual 1~16 Level Program P1~P12 Watts Constant 10~350 Personal U1~U4 H.R.C 55%, 75%, 90%, Ind (Target) Pulse... - Page 24 program from U0-U4 by turning the UP/DOWN button and then pressing the ENTER button for confirmation. Input user data, sex, age, height, weight on top-right window, then press ENTER button for confirmation. C. DESCRIPTION SCROLLING TEXT MARQUEE on Top of LCD screen Below are some key words you will need to know to operate this console.
- Page 25 C. FUNCTION DESCRIPTION MANUAL Set the resistance level using the dot matrix display then (if required) set exercise parameters TIME/DISTANCE/WATT/CALORIES/PULSE, then press START/STOP to START manual program. PROGRAM There are 12 preset programs (P1-P12). The resistance level can be adjusted when the PROGRAM PROFILE is flashing.
- Page 26 RECOVERY When you have finished your workout, press RECOVERY. For RECOVERY to function correctly, please hold on the HR handgrips. TIME will count down from 1 minute and then your fitness level from F1 to F6 will be displayed. NOTE: during RECOVERY, no other displays will operate.
- Page 27 F. KEY FUNCTIONS Quick Key Body Fat/Manual/Program/Watt/Personal/H.R.C. Enter Key Function Select and Confirmation Key Up/Down Key Increase and Decrease Or Select Option Reset Key Reset All Displays To Default Values Start/Stop Key Start/Stop Key Quick Start Quick Start Key Recovery Key Fitness Test By Measuring Your Recovery Rate G.
-
Page 28: Parts List
PARTS LIST NO Description NO Description END CAP FLAT WASHER FOAM GRIP M6 NUT SCREW WITH NYLON MAIN FRAME TOP HANDLEBAR(R、L) NUT8 MAGNETIC SET HALF ROUND WASHER FLAT WASHER SCREW M8*-45L WAVE WASHER BEARING(6002) C-SHAPE CLIP FLAT WASHER SCREW IDLE WHEEL SPRING WASHER FOR SPRINGWASHER FLYWHEEL... -
Page 29: Warranty
Owner’s Manual. FOR WARRANTY REPAIRS, PLEASE DO NOT TAKE YOUR MACHINE BACK TO THE RETAIL STORE. CONTACT BLADEZ FITNESS FIRST. Bladez Fitness/BH North America Corporation 20155 Ellipse Foothill Ranch, CA 92610 Phone: 949.206.0330;...
Need help?
Do you have a question about the Brazil and is the answer not in the manual?
Questions and answers