Table of Contents
Advertisement
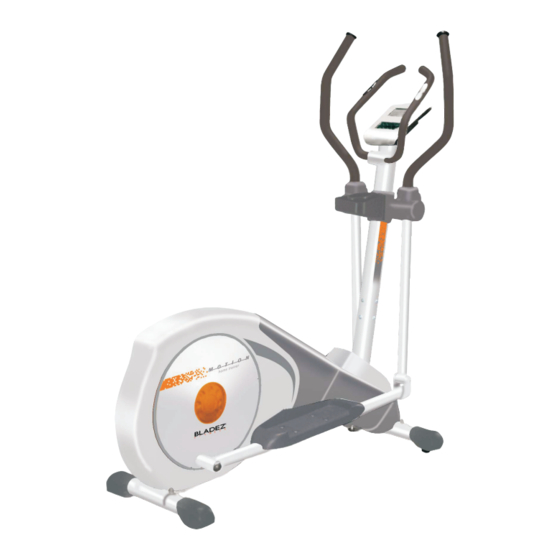
X450
model
OWNER'S MANUAL
ASSEMBLY OPERATION MAINTENANCE
WARRANTY
PARTS
ORDERING
CAUTION:
Exercise of a strenuous nature, as is customarily done on this equipment, should not be
undertaken without first consulting a physician. No specific health claims are made or implied as they
relate to the equipment.
IMPORTANT:
Read all instructions carefully before using this product. Retain this owner's
manual for future reference.
BH North America
Foothill Ranch, California 92610
Advertisement
Table of Contents

Related Manuals for BLADEZ X450


Summary of Contents for BLADEZ X450
- Page 1 X450 model OWNER’S MANUAL ASSEMBLY OPERATION MAINTENANCE WARRANTY PARTS ORDERING CAUTION: Exercise of a strenuous nature, as is customarily done on this equipment, should not be undertaken without first consulting a physician. No specific health claims are made or implied as they relate to the equipment.
-
Page 2: Table Of Contents
TABLE OF CONTENTS Attachment - A- Safety……………….…..1 Attachment - B - Heart Rate…………….… 2 Attachment - C - Training……………..3 Hardware & Parts Contents………....7 Pre-Assembly Instructions…….....8 Assembly Instructions…………………..10 Installation…………………….......15 Elliptical Operations……………....17 Maintenance…………………………....19 Exploded View ………........20 Parts List …………………......21 Warranty……..………………………....22... -
Page 3: Attachment - A- Safety
ATTACHMENT - A IMPORTANT SAFETY ADVICE PRECAUTIONS This elliptical has been designed and constructed to provide maximum safety. Nevertheless, certain precautions should be taken when using exercise equipment. Read the whole manual before assembling and using the elliptical. The following safety precautions should also be observed: 1. -
Page 4: Attachment - B - Heart Rate
ATTACHMENT - B TARGET HEART RATE Ɣ The old motto, “no pain, no gain”, is a myth that has been overpowered by the benefits of exercising comfortably. A great deal of this success has been promoted by the use of heart rate monitors. With the proper use of a heart rate monitor, many people find that their choice of exercise intensity is either too high or too low and exercise is much more enjoyable by maintaining their heart rate in the desired benefit range. -
Page 5: Attachment - C - Training
ATTACHMENT - C TRAINING GUIDELINES Exercise is one of the most important factors in the overall health of an individual. Listed among its benefits are: Increased capacity for physical work (strength endurance) Increased cardiovascular (heart and arteries/veins) and respiratory efficiency Decreased risk of coronary heart disease Changes in body metabolism, e.g. - Page 6 Specifics Different forms of exercise produce different results. The type of exercise that is carried out is specific both to the muscle groups being used and to the energy source involved. There is little transfer of the effects of exercise, i.e. from strength training to cardiovascular fitness. That is why it is important to have an exercise program tailored to your specific needs.
- Page 7 The target is not a magic number, but a general guide. If you’re above average fitness, you may work quite comfortably a little above that suggested for your age group. The following table is a guide to those who are keeping fit. Here we are working at about 80% of maximum.
- Page 8 SUGGESTED STRETCHES The correct form for several basic stretches is shown at the right. Move slowly as you stretch—never bounce. 1. Toe Touch Stretch Stand with your knees bent slightly and slowly bend forward from your hips. Allow your back and shoulders to relax as you reach down toward your toes as far as possible.
-
Page 9: Hardware & Parts Contents
HARDWARE & PARTS CONTENTS Handlebar Attachment Cover Base Frame Wrench Hex Head Bolt Upright Tube M8*15/Allen Head Bolt Console M10 End Cap M8 Plastic Cap Pedal Tube ( L ) Bushing 57.6mm Pedal Tube ( R ) Bushing 15mm Pedals Washer 5/16 * 16 Front Stabilizer Washer 10mm... -
Page 10: Pre-Assembly Instructions
PRE-ASSEMBLY INSTRUCTION GENERAL INSTRUCTIONS Carefully read through the instructions contained in this manual. It provides you with important information about assembly, safety and use of the machine. 1. This unit has been designed for home use. The weight of the user must not exceed 300 lbs. (135 kg.) 2. - Page 11 ASSEMBLY Hand Pulse Sensors Console Moving Arm Front Stabilizer Pedal Tube AC Power Adaptor Jack Rear Stabilizer If you are missing parts or require information on how to operate this product please call (949) 206-0330.
-
Page 12: Assembly Instructions
ASSEMBLY INSTRUCTIONS Note: Assembly of this unit should take two people about 45 minutes to properly assemble. STEP #1. Attach the Front Stabilizer (76) to the bottom front portion of the Base Frame (67) using the screw (19), washer (65), nylock nut (20), and plastic cap (21) combination as shown in illustration #1. - Page 13 ASSEMBLY INSTRUCTIONS STEP #3. This step may require the assistance of an additional person. Join the male and female connectors ends that attach the console control wire (90) to the Base Frame (67). Slide the Upright Tube (68) into the Base Frame (67) paying close attention not to cut or pinch the control wires.
- Page 14 ASSEMBLY INSTRUCTIONS STEP #5. Attach the Left Pedal Tube (74) to the Flywheel Shaft using the spacer (37), bushings (82), bearing (15), retainer(16), bushings (83), washer(17) Nylock nut (12), and plastic cap (5) combination as shown in illustration #5. Repeat the process for the Right Pedal tube using the same steps.
- Page 15 ASSEMBLY INSTRUCTIONS STEP #7. PULL WIRE Pull the pulse sensor cable up to the console mount using the pull wire, which is secured to the top of the Upright Tube (68). Mount the Fixed Handlebar (71) to the mounting bracket located at the top portion of the Upright Tube (68) using the hex bolts (6) supplied.
- Page 16 ASSEMBLY INSTRUCTIONS STEP #9. PLEASE DO NOT PINCH OR CUT THE CONTROL WIRING. Join the male and female ends of the connectors that attach the console control wire to the Upper portion of the swivel tube. Attach the console (43) to the mounting plate of the center tube using screws (30) provided as shown in figure #9.
- Page 17 ASSEMBLY INSTRUCTIONS STEP #11. Connect the AC Power Adaptor (6VDC 1A) that comes with the unit from the wall to the jack located just above the rear stabilizer as shown Illustration #11...
-
Page 18: Installation
INSTALLATION IMPORTANT SAFETY INFORMATION THIS UNIT IS INTENDED FOR HOUSEHOLD USE ONLY READ ALL INSTRUCTIONS BEFORE USING THIS ELLIPTICAL CAUTION: Before starting any exercise program, it is recommended that you consult your physician. WARNING: Connect this unit to a properly grounded outlet only. DANGER: To reduce the risk of electric shock, always unplug the elliptical from the electrical outlet immediately after using and before cleaning. -
Page 19: Elliptical Operations
Elliptical Operations QUICK START ENTER DOWN RESET RECOVERY STOP START... - Page 20 Elliptical Operations...
-
Page 21: Maintenance
MAINTENANCE INSTRUCTIONS CLEANING WARNING: Always unplug your elliptical prior to cleaning or servicing your unit, in order to avoid electrical hazard or shock. Care has been taken to assure that your elliptical has been properly adjusted and lubricated at the factory. It is not recommended that the user attempt service on the internal components instead seek service from an authorized service center. -
Page 23: Parts List
PARTS LIST Model No. X-450 Key No. Part No. Description Key No. Part No. Description 30907001 Handlebar end cap 30907058 Middle cover, RH 30907002 Handlebar grip 30907059 Side cover, LH 30907003 T-Bar grip 30907060 Side cover, RH 30907004 Hand pulse grip unit 30907061 Screw 30907005 End cap 30907062 Motor... -
Page 24: Warranty
LIMITED THREE (3) YEARS PARTS AND ONE (1) YEAR LABOR For THREE (3) year from date of purchase, by original consumer purchaser, BH North America will replace at BH North America option free of charge parts which are defective as a result of material or workmanship and ONE (1) year free of charge repair labor from date of purchase with the...
Need help?
Do you have a question about the X450 and is the answer not in the manual?
Questions and answers