
Subscribe to Our Youtube Channel
Related Manuals for Classe Audio SSP-25


Summary of Contents for Classe Audio SSP-25
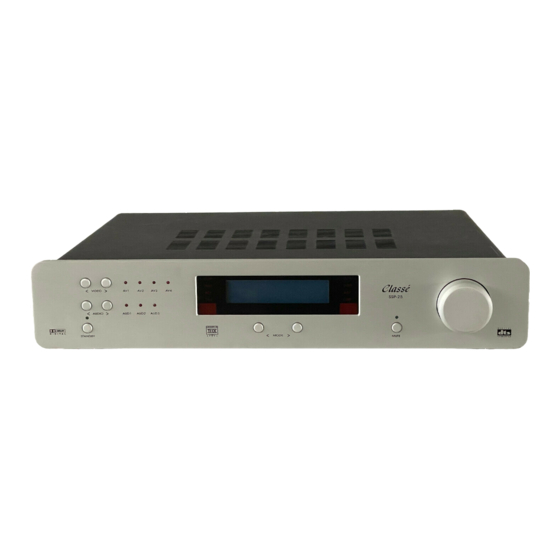
- Page 1 Classé Audio, Inc. SSP-25 Preamplifier/Surround Sound Processor SSP-25 Owner’s Manual...
-
Page 2: Safety Information
If the SSP-25 will be out of use for an extend period of time (vacation, etc.), unplug the power cord from the AC source to prevent any chance of problems from a voltage surge. -
Page 3: Table Of Contents
Page 21 2.2.1 The MENU System Page 21 2.2.2 Configuration Procedures Page 22 Section 3: Getting Started Page 24 Unpacking the SSP-25 Page 24 Optimal Placement Page 24 Section 4: System Hookup Page 25 Introduction Page 25 To Power Amplifier(s) -
Page 4: Thank You
Mono Center 7.3.7 Dolby Digital 7.3.8 Dolby Pro Logic Changing Individual Channel Levels Page 54 7.4.1 Introduction 7.4.2 On-the-Fly Techniques First Aid Page 55 Thank You From Everyone At Classé Thank you for purchasing the Classé Audio SSP-25 Preamplifier/Surround Sound Processor. -
Page 5: Classé Design Philosophy
We take great pride in offering components that combine exceptional sonic performance and long-term reliability. To do that, we have invested in extraordinary design and manufacturing facilities. We trust that you will enjoy your purchase for many years to come. Classé... -
Page 6: About This Manual
We strongly urge you to read this Manual carefully before you connect and use the SSP-25 in your home theater system. You’ll find answers to almost all of your questions in these pages. -
Page 7: Section 1: Diagrams
Section 1: Diagrams Use the pictures in this section as your guide to the SSP-25. They show the locations of all controls, inputs, outputs, remote keys -- in short, everything you need to know about your new preamplifier/surround sound processor. Read the notes under each diagram carefully. - Page 8 STANDBY (“On/Off”) LED INDICATOR This LED glows green when the SSP-25 is in Standby or “Off” mode. It does not glow at all when the SSP-25 is fully activated.
- Page 9 Dolby Digital® (AC3). Utilizing the two buttons you can quickly arrive at the mode you desire. MUTE BUTTON This button fully mutes the SSP-25’s main outputs. A second push restores the previously selected operating levels. Record output is unaffected. The Mute button provides a convenient way to lower the volume when answering the telephone.
-
Page 10: Rear Panel
With the partial exception of “a) AUD1,” the balanced input requires three-pin XLR connectors (Pin 2 = Hot), all analog audio inputs are single ended circuits with RCA-style terminations. The SSP-25 has no internal provisions for MM or MC phono amplification/RIAA equalization but accepts line level outputs from a wide variety of external step-up devices if desired. - Page 11 The front Left and Right XLR outputs provide balanced (Pin 2 = Hot) connections from the SSP-25 to power amplifiers with balanced inputs. They are ideal for mixed use (music and movies) systems where the finest audio reproduction is a prime goal.
- Page 12 The AC power switch positively disconnects the SSP-25 from all AC power when it is in the OFF position, even if the AC cord is connected to a live AC outlet. In the ON position, the SSP-25’s basic circuits (central microprocessor and remote sensors) are always active (“Standby”...
-
Page 13: Remote Control
SEE APPENDIX FOR AN EXPLANATION OF THE VARIOUS MODES. AUTO The “AUTO” button is used to cause the SSP-25 to test the character of the input signal on the current input. If the current input has been set to “Manual” and the input signal changes the SSP-25 will be unable to recognize the new signal. - Page 14 In this case, pressing MENU will exit the menu system entirely. For a full explanation of its operation and importance see Section 5. Day to day use of the SSP-25 should not require use of the “MENU” button. MODE functionally identical to the front panel Mode control (Front Panel, #8, above) steps through the SSP-25’s operating...
- Page 15 Pressing this button directly selects the Audio-Video 1 input for use. “AV1” will be briefly displayed in the panel window, then the type of audio signal and decoding mode will display. Pressing this button directly selects the Audio-Video 2 input for use.
- Page 16 MUTE The operation of this button is functionally identical to the same labeled button on the face of the SSP-25. This button mutes the SSP-25’s main outputs. A second push restores the previously selected operating levels. Record output is unaffected. The Mute button provides a convenient way to lower the volume when answering the telephone.
-
Page 17: Section 2: Installation Overview
Audio-Video input. Thus, the SSP-25 can accommodate up to 9 digital sources and up to 7 analog sources. Of course it is extremely unlikely that anywhere near that many sources would be connected to the SSP-25. However; as you can imagine, there is very little likely-hood that there is not a way to configure even an extremely complex Audio/Video installation, as long there are no more than 4 Video sources. - Page 18 (Please note: because the SSP-25 can select a digital or analog signal from the same input; if you are in a squeeze for inputs you may connect both, using the separate analog and digital connectors. If you attach two sources in this fashion you must provide some way of having only one or the other source playing, as the SSP-25 will always pick the digital source over the analog if both are playing.
-
Page 19: Video Source Components
Connect the Main Video outputs to the primary monitor/projector. Connect the SSP-25’s Record output to a VCR record input. You may also utilize the record output to send the audio and video signal to a remote area for viewing or for listening. There is both an S-Video output and a composite video output. -
Page 20: Remote Room Setup
Accomplish this by connecting a source to the SSP-25 with both composite and S-Video cables. However, remember that the SSP-25 does not allow simultaneous connection of both composite and S-Video to the same input. Simply use two SSP-25 inputs, one for composite and one for S- Video. -
Page 21: System Configuration
“Standby” mode or when AC power is totally disconnected. The input is remembered, as well as mode. Master Level remains at the same level but Mute will return to OFF when the SSP-25 leaves “Standby.” When AC power is returned the SSP-25 will turn on in “Standby” mode. When you then return it to full operation it will briefly pass through a “Mute”... -
Page 22: Configuration Procedures
Just as every installer is a different person, every installation will follow a different pattern. However, we’ve found that following certain steps in sequence speeds the installation/configuration process considerably. As you gain experience with the SSP-25’s capabilities, you may choose a different pattern but we suggest that you begin by with the following: 2.2.2.1 Mode Configuration... - Page 23 So, that’s the overview of the SSP-25. It is a simple unit to use, very intuitive in setup and use, and a lot of fun to use. But it is also quite flexible, and quite complex. In the following sections of the manual we give you some good advice on everything from getting it safely out of the box to fully enjoying it in the years to come.
-
Page 24: Section 3: Getting Started
Remove the top foam cover and then carefully remove the SSP-25 itself. Take it out of the heavy plastic bag and place the SSP-25 on a sturdy surface. Carefully inspect it and report any concealed damage to your dealer immediately. -
Page 25: Section 4: System Hookup
Section 4: System Hookup Introduction Don’t let the quantity of connectors on the SSP-25’s rear panel disturb you. If you have ever connected an integrated amplifier or preamplifier to an audio system, you are well-equipped to work with the SSP-25. - Page 26 If you’ve elected the DB25 connector, your worries are already over. With RCA connections, observe the advice in 1) above. Note that the SSP-25’s “SURR-L” jack is the Left Surround output while the “SURR-R” jack is the Right Surround output. But you knew that already, didn’t you? 4.2.4...
-
Page 27: Source Components
4.3.1.1 Types of Audio Inputs As you noticed while reviewing the rear panel diagram and associated notes in Section 1, the SSP-25 has seven audio inputs, three for audio-only components and four for audio/video components. Here are the input types and brief comments:... -
Page 28: Video Considerations
As you connect your components, make sure that a source’s left channel audio output goes to the corresponding left channel audio input on the SSP-25 -- and that the right channel output goes to the right channel input, etc. (This is important for analog signal connections only as all digital audio signals, whether stereo or multi-channel, carry “flags”... -
Page 29: Patience Is A Virtue
Patience is a virtue! Take your time. The SSP-25 is complex in that it handles audio and video signals to and from many other components and provides sophisticated audio processing so you can enjoy many different types of software. If you elect to install and configure the SSP-25 yourself, hooking everything up properly will be the most demanding task you face before enjoying its many capabilities. -
Page 30: Section 5: Initial System Configuration
It shows all the choices available and how to reach particular screens efficiently. As you begin to configure the SSP-25, you’ll find that you’ll need this diagram less and less. The menu displays themselves provide almost all the information you’ll need to select and lock into memory the various adjustments. -
Page 31: The Menu Tree Page 30 And
SSP-25 SETUP MENU TREE (Press "MENU" or “ TRIM” , on remote, to start) Setup item (with MENU Level MENU Level MENU level 3 Choices default) Press > or < then ENTER to Press > or < to Press /\ to increase or \/ press >... -
Page 32: Navigation: The First Steps
General Information As mentioned above, you’ll need the SSP-25’s remote control to navigate the menu system. The buttons or keys you’ll use most are located in the middle of the remote keypad. They are the MENU key, the four arrow keys (Up, Down, Left, Right), and the ENTER key. - Page 33 Pressing MENU while in any play mode and in any input will bring up the “Main MENU, Mode setup” display. If you are using the SSP-25 to play music or watch a movie it will continue to operate in the same fashion as before you pressed the MENU key.
-
Page 34: Mode Configuration
MENU /\ (the UP arrow key) > (the RIGHT arrow key) \/ (the DOWN arrow key) < (the LEFT arrow key ENTER It’s going to be easy, and it’s going to be fun. MODE Configuration 5.3.1 MODE overview Press the “MENU” key to bring up the first display. The Display shows “Main MENU - Mode Setup.” Press the “ENTER”... -
Page 35: 5.3.4 Compression
We recommend you use the default. You are less likely to miss a surround sound event, as the SSP-25 will always attempt to decode into Pro Logic, unless there is a flag in the digital data which says there is no surround information. -
Page 36: 5.3.5 Bac K To Normal Operation
SOURCE ADJUSTMENTS OVERVIEW This section of the setup MENU will quickly show you how flexible and user friendly the SSP-25 is. In the following section we will show you how to set up the seven inputs (or as many as you need of the seven available). You should read over this section of the manual before you decide which input will be used for what piece of equipment, and you certainly should read this section before you actually plug anything in. -
Page 37: Mode
So, naturally, selecting “digital” will tell the SSP-25 to always play the material present at the digital input, even if there is no signal at the digital input and there is signal present at the analog input. -
Page 38: Input Level
Begin to set analog input levels by making sure that you’ve connected each analog source component to the appropriate input on the SSP-25. Turn on each component. For CD players, obtain a test disc with a “full scale” white noise test track. After selecting this track, press “play”... -
Page 39: Analog Input Level
Turn on each source that is plugged into the SSP-25 and play it. Put a tape into the VCR, turn on the satellite, get a DVD disc playing on the player and/or get the laser player playing, turn on the Tuner. Turn down the Master Level of the SSP-25, so it won’t play too loud, and then switch from input to input while listening to the different sound pressure... -
Page 40: Analog Input Level Setup
(Digital audio output from satellite receivers is only just now beginning to reach the marketplace). These sources don’t really have any test signals you can use, and you have to use the actual analog device that will be feeding the SSP-25 to set it up properly. - Page 41 “Analog – Stereo” or you will not be able to accurately set the analog input level. Press MENU three times, to back out of the menus and return the SSP-25 to full operating mode.
-
Page 42: Audio Configuration And Delay
5.5.1 Speaker setup is relatively easy. You only have to tell the SSP-25 what size and how many speakers are attached to it. In the following section we will show you how to set up the speakers. You should read over this section of the manual before you decide how you will describe the speakers attached to your home theater system. -
Page 43: 5.5.1.2 Center Speaker
Right and Left speakers to one or two sub-woofers, and then through the sub-woofer cross-over to the Front Left and Right speakers. Set up the SSP-25 for “Large” speakers and adjust the sub-woofer cross-over settings to give you the maximum amount of bass. (You will still require another sub-woofer for the LFE information). -
Page 44: 5.5.1.4 Subwoofer
Delay setup is important to your enjoyment of movies, and any other Surround mode you use. The purpose of the setup is to tell the SSP-25 where the listener is sitting in the room, or actually, how far all the speakers are from each other and from the listener. -
Page 45: Delay Setup Worksheet
Please turn to the next page for the worksheet and to continue with the setup. Delay setup work-sheet DECIDE where you will be sitting while enjoying a movie. MEASURE the distance from the seat-back to each of the six speakers and fill in the blanks below. (Use a pencil in case you change something later on). -
Page 46: Balance Setup
-- all the possible system variations except those dictated by the software you are playing. Although you can calibrate the SSP-25 surprisingly well using your ears alone, we strongly suggest a sound level meter for even greater accuracy. The Radio Shack meter (catalog # 33-2050) is both inexpensive and reasonably precise. -
Page 47: Subwoofer Limit
It will pause at any given speaker when you press either the “/\” or “\/” key on the remote while the speaker is playing noise. When you stop adjusting the level the SSP-25 will return to automatically playing white noise on the speakers one at time. - Page 48 This feature may or may not be useful to you, and perhaps you should just leave this setup option until you find you actually need it. Not all subwoofers are created equal. Many Subwoofers will take all the power which might be expected to be included in a movie or on a Music CD. Other Subwoofers are not as capable.
-
Page 49: Feature Setup
5.6.2 LANGUAGE You can select the language you wish the SSP-25 to communicate with you in. The options are English, Spanish and French. Press “MENU”, then press the “>” key twice to display “Main menu – System setup.” Select this option by pressing... -
Page 50: Factory Reset
After you have reset to factory defaults you will need to set up all the operational parameters in order to properly use the processor. Press the “MENU” key to exit “Factory reset.” Pressing “MENU” a total of four times will return the SSP-25 to full operational mode. -
Page 51: Section 6: Balance Trim
“turn-off” the unit, (put it into “Standby” mode). Pressing the STANDBY button again will restart the unit with all trim levels returned to the default of all speakers. We do not suggest you put the SSP-25 in standby mode while watching or listening. -
Page 52: Section 7: Operating The Ssp-25
Sections will be very practical, some a bit more theoretical. All will help you better understand the SSP-25 and how to derive the most enjoyment from it. As you review these points, remember that true sophistication isn’t measured by the number of front panel controls but by the lack of them! Enjoy. -
Page 53: Mode Selection
DTS is an advanced multi-channel digital format developed by Digital Theater Systems, Inc. It provides high resolution audio from a variety of audio-only and audio-video sources. DTS-encoded CDs and laser discs are available now. DTS DVDs are expected in the spring of 1998. The SSP-25 is ready for this promising format with internal microprocessor-controlled decoding. -
Page 54: Changing Individual Channel Levels
Amazon jungle. Sometimes . . . Whatever the reason, the SSP-25 gives you the tools to make instant adjustments to the output level for each channel individually to construct a sound field customized not just to your room but to your mood at the moment! 7.4.2... -
Page 55: First Aid
AC line surges, sags or outages, spurious inputs, etc. The SSP-25 functions in an even harsher environment as it will be connected to cable and satellite video sources that provide even more direct pathways for unwanted electrical or electronic interference. - Page 56 Classé Audio, Inc. 5070 François Cusson Lachine, Quebec Canada H8T 1B3 (514) 636-6384 (514) 636-1428 (FAX) The SSP-25 Owner’s Manual was written by Smartalk. Copyright © 1998 by Classé Audio, Inc. All rights reserved. Printed in Canada.
Need help?
Do you have a question about the SSP-25 and is the answer not in the manual?
Questions and answers