Table of Contents
Advertisement
Advertisement
Table of Contents

Related Manuals for Classe Audio SSP-60


Summary of Contents for Classe Audio SSP-60
- Page 1 OWNER’S MANUAL SSP-60 Pre-amplifier/Surround Sound Processor...
-
Page 2: Important: Safety Information
Classé dealer for a thorough check-up and proper repair. If the SSP-60 will be out of use for an extended period of time (vacation, etc.), you may wish to unplug the power cord from the AC source to prevent any chance of problems from a voltage surge or lightning strike. -
Page 3: Thank You From Everyone At Classé
Thank You From Everyone At Classé Thank you for purchasing the Classé Audio SSP-60 Preamplifier/Surround Sound Processor. We take great pride in offering components that combine exceptional sonic performance and long-term reliability. To do that, we have invested in extraordinary design and manufacturing facilities. We trust that you will enjoy your purchase for many years to come. - Page 4 CD, DVD and SACD players. This owner’s manual will make it possible for you to set up the SSP-60 and begin using it only a short period of time after you take it out of the box. Section 1 quickly details getting it out of the box and suggests a few precautions.
-
Page 5: Table Of Contents
SECTION 1.0 - GETTING STARTED...6 UNPACKING THE SSP-60...6 OPTIMAL PLACEMENT AND INSTALLATION NOTES...6 VENTILATION...6 A FEW NOTES ABOUT THE SSP-60 AND THE SET-UP...7 SECTION 2.0 - CONNECTING THE SSP-60...9 SECTION 3.0 - FRONT PANEL CONTROLS ...11 SECTION 4.0 - THE SSP-60 REMOTE CONTROL ...12 SSP-60 MENU FLOW CHART...15... -
Page 6: Section 1.0 - Getting Started
Do not place the SSP-60 on a rug or other soft surface into which it could sink. Do not place another unit on top of the SSP-60. Do not place the SSP-60 on top of a unit that generates heat. -
Page 7: A Few Notes About The Ssp-60 And The Set-Up
Dolby Pro Logic, Dolby Pro Logic II (Movie), Neo6 Cinema and four Music modes: Natural, Party, PLII Music, Neo6: Music. The user can bypass the digital section of the SSP-60, if desired, and connect, for example, a high quality stereo source to the Left and Right channels of the 7.1 channel input. - Page 8 SSP-60 REAR PANEL...
-
Page 9: Section 2.0 - Connecting The Ssp-60
IR receiver of the SSP-60. For this purpose, you will need to install a 2 conductor shielded cable with 1/8” mini mono plugs at both ends from the SSP-60’s IR OUT to the IR in of the other unit. -
Page 10: For Example
(if Zone has AV1selected as its source). With only a little thought and planning you can turn the SSP-60 into a versatile control center. To record a source, or to play music throughout your house you will need to connect both the digital and the analog inputs from several audio or audio video pieces, such as a CD player, a Satellite receiver or a DVD player. -
Page 11: Section 3.0 - Front Panel Controls
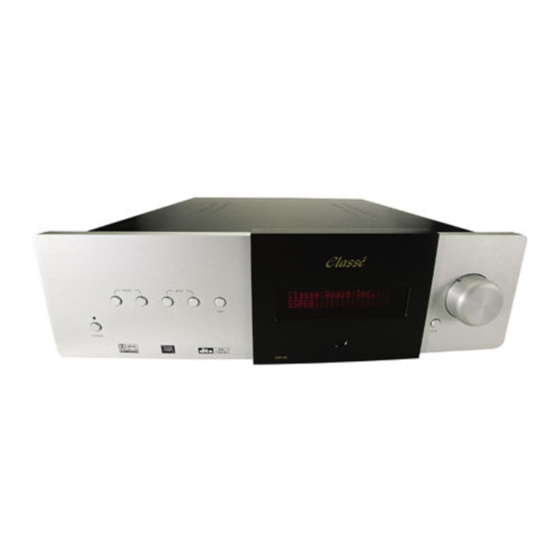
Section 3.0 - Front Panel Controls The SSP-60 operates intuitively. The seven controls on the face of the processor give you all the options you need to turn it on and use it successfully day after day. The “STANDBY” button toggles the SSP-60 from standby to operate and vice versa. There is an on/off switch on the rear of the unit, which turns the AC on and off. -
Page 12: Section 4.0 - The Ssp-60 Remote Control
Section 4.0 - The SSP-60 Remote Control The keys on the SSP-60 remote control are laid out in an easy to use pattern. The keys have been grouped according to their use. The first three rows, DIM through TRIM /\, are a set of ten buttons with a variety of relatively unrelated tasks. The second section is made up of three rows beginning with EXIT and ending with the single key \/. - Page 13 Use the TRIM /\ or \/ keys to adjust the selected parameter. This is a temporary adjustment - when the SSP-60 is put into Standby or is powered off the speaker levels will revert to the settings in the Level Setup (under the Speaker Setup menu) and the Treble/Bass settings will revert to the settings in the Audio Setup.
- Page 14 AV1 - AV6 These six keys each directly access one of the AV Sources consisting of a Video Input and a hard-wired Analog Audio input plus any associated Digital Audio input selected during setup. These keys can also be used to select Zone Sources. AUD1 - AUD4 These four keys each directly access one of the Audio Sources consisting of a hard-wired Analog Audio input plus any associated Digital Audio input...
-
Page 15: Ssp-60 Menu Flow Chart
SSP-60 Menu flow chart Main Menu Audio setup Speaker setup Source setup Display setup Trigger setup THX Audio setup Exit Audio setup Dolby/DTS setup Preset setup Treble ---ll--- 0dB Bass ---ll--- 0dB LFE level Exit Speaker setup Level setup Distance setup... -
Page 16: Section 5.0 - Setting Up The Ssp-60
(except the Analog Monitor sub-menu). To begin: be sure the SSP-60 is on. If the SSP-60 display is not on, and the green LED above the standby button is not lit, then you must turn the power “ON”... -
Page 17: Audio Setup
AUDIO SETUP: These displays show that you have accessed the Audio setup sub-menu and chosen the Audio setup Dolby/DTS setup. You can scan through the available choices by pressing the \/ and /\ > Dolby/DTS setup buttons on the remote. When the feature you wish to adjust is highlighted press the < or Preset setup >... -
Page 18: Speaker Setup
5.2.1 Level setup: There are two ways to calibrate the speakers with the SSP-60. You can do it by hand with the aid of a Sound Pressure Level (SPL) meter. An inexpensive but relatively accurate meter is available at most Radio Shack stores, or through their catalog. - Page 19 5.2.2 Distance setup: This menu is used to synchronize the sound coming from several speakers so it arrives to the listeners’ ears at the same time. Proper synchronization makes it possible for the listener to localize the apparent source of a sound in the surround environment.
- Page 20 TV Display Before you begin, set the volume level of the SSP-60 to a reasonably loud level (start around -10) and turn up your subwoofer level. To activate distance auto-calibration place the cursor at “Dist. Autocalibrate ?” and press ENTER. The...
- Page 21 Sound Pressure Level at the listening position is 75 dB. The SSP-60 will test every speaker in the same sequence as described above and set their levels to 75 dB.
-
Page 22: Source Setup
5.3.2 Analog monitor: Analog monitor is a link to a special screen mode, which can be seen only when using the On Screen Display. You can use this mode to adjust the sensitivity of the SSP-60’s analog inputs. First, you will need to play some music which has high peak levels, and see if the signal clips. Use the LEFT (<) and RIGHT (>) keys to adjust the gain so that the signal never clips, but in a manner that the signal peaks will come... -
Page 23: Display Setup
“TV System” set to the correct format for your Country. If you are, however, having trouble with the picture it may be that the wrong format is set. This is easy to correct. Using the display on the front panel of the SSP-60, navigate to the Display setup screen and change the format to PAL or NTSC, whichever is correct for your TV and DVD player. -
Page 24: Trigger Setup
TRIGGER SETUP: There are three Voltage Triggers on the SSP-60. They are used to turn associated equipment on and off. These displays show that you have accessed the Trigger setup sub-menu and Trigger setup highlighted Trig1 sense. You can scan through the available choices by pressing the \/ Trigger 1 sense Power On and /\ buttons on the remote. -
Page 25: Thx Audio Setup
THX AUDIO SETUP These settings will permit you to access the various THX parameters of the SSP-60. The SSP-60 features THX ULTRA2 processing which incorporates BGC (Boundary Gain Compression) and ASA (Advanced Speaker Array). The directional characteristics of the new THX ULTRA2’s left, right, center and rear surround speakers have been revised to minimize any changes in the perceived timbral balance over the widest possible listening area. -
Page 26: Section 6.0 - Using The Tape Inputs And Outputs
VCR _ SSP. Use a two channel analog audio cable to connect the analog output from your VCR to the AV 6 analog Inputs. 6.1.4 SSP _ VCR. Use a two channel analog audio cable to connect the Record Output connectors of the SSP-60 to the audio input connectors of the recording component. 6.1.5 VCR _ SSP. -
Page 27: Recording Analog Audio Only
RECORDING DIGITAL AUDIO ONLY 6.4.1 SSP _ D-VCR. Use a TOSlink cable to connect the output of the SSP-60’s digital out to the digital input of the digital recording component. 6.4.2 D-VCR _ SSP. -
Page 28: Section 7.0 - Remote Zone Use
Section 7.0 - Remote Zone Use One of the strengths of the SSP-60 is its ability to send a separate program to a remote Zone. It can send a Composite picture (from a Composite input) and an analog two-channel audio signal to another room or a whole house if you wish. -
Page 29: Appendix Arc5 Codes For Classé Ssp-60
APPENDIX A RC5 Codes for Classé SSP-60 Below are the codes for programing programable remote controls. The code sequence must include all of the information, including defining the code as RC5. For example: RC5 System 25 Code 13 = MUTE. -
Page 30: Appendix Bssp-60 Mode Chart
APPENDIX B SSP-60 Mode Chart Below are the available modes (subject to change) and the active speakers in each case. The subwoofer is not included in the table since it is active if selected in the speaker setup and if any of the active speakers are set as “small”. - Page 31 Continued from previous page MODE Signal Type Surround 6.1 Dolby Digital EX Dolby Digital 5.1 Dolby Digital 2/0 DTS-ES Discrete DTS-ES Matrix DTS 3/2 Analog Dolby Digital EX Dolby Digital EX Dolby Digital 5.1 Dolby Digital 2/0 DTS-ES Discrete DTS-ES Matrix DTS 3/2 Analog DTS-ES Matrix...
-
Page 32: Appendix Cssp-60 Mode Descriptions
(back) channel. Natural, Party: These are two music modes available on the SSP-60. These music modes will take a normal stereo signal and convert it into left, center, right and surround channels to create a surround field. The two modes have different sonic personalities. -
Page 33: Appendix Dssp-60 Thx Mode Chart
APPENDIX D SSP-60 THX Mode Chart Speaker configuration > Signal type Processing Mode Cinema All applicable Mono All applicable Stereo Stereo signal* Dolby Pro Logic Stereo signal* PL II Movie Stereo signal* PL II Music Stereo signal* Neo:6 Cinema Stereo signal*... -
Page 34: Ssp-60 Specifications
Output impedance: Analog audio inputs Stereo analog inputs Maximum input level: Input impedance: 7.1 channel analog input Maximum input level Input impedance SSP-60 SPECIFICATIONS 75 ohms 75 ohms 75 ohms 75 ohms 75 ohms 75 ohms 8 Vrms 56 ohms 0.002%... - Page 35 SSP-60 weight and dimensions Net weight: Gross weight (with box and packing): Net dimensions: Gross dimensions (box): 27.75 lbs 12.62 Kg 42 lbs 19.09 Kg 16” D x 19” W x 6.15” H 40.6 x 48.2 x 5.7 cm 25.5” D x 25.5” W x 13.5” H...
- Page 36 Classé Audio, Inc. 5070 François-Cusson Lachine, Québec Canada H8T 1B3 (514) 636-6384 (514) 636-1428 (FAX) email: cservice@classeaudio.com Copyright © 2003 by Classé Audio, Inc. All rights reserved. Printed in Canada.
Need help?
Do you have a question about the SSP-60 and is the answer not in the manual?
Questions and answers