Ganz DIGIMASTER SERIES User Manual
Digimaster series 4 / 8 / 16 channel stand-alone digital video recorder
Hide thumbs
Also See for DIGIMASTER SERIES:
- Installation manual (18 pages) ,
- Installation manual (18 pages)

Related Manuals for Ganz DIGIMASTER SERIES


Summary of Contents for Ganz DIGIMASTER SERIES
- Page 1 4 / 8 / 16 Channel Stand-Alone DIGITAL VIDEO RECORDER DIGIMASTER SERIES DVR USER’S MANUAL...
-
Page 2: Table Of Contents
• INDEX • CHAPTER 1. Specifications & System Organization 1. Specifications ------------------------------------------------------------ 3 2. Product Contents List -------------------------------------------------------- 5 3. System Organization --------------------------------------------------------- 6 • CHAPTER 2. Product Description 1. Front Panel(8&16CH) -------------------------------------------------------- 7 2. Rear Panel(8&16CH) --------------------------------------------------------- 8 3. Front Panel(4CH) ----------------------------------------------------------- 9 4. - Page 3 • INDEX • CHAPTER 5. MENU ⊙ Go to Menu -------------------------------------------------------------- 17 ⊙ Go to System Setup -------------------------------------------------------- 17 1. Display ------------------------------------------------------------------ 18 2. Camera ----------------------------------------------------------------- 21 3. Sound ----------------------------------------------------------------- 24 4. System ------------------------------------------------------------------ 25 5. Event/Sensor ------------------------------------------------------------- 30 6. Disk Management ---------------------------------------------------------- 33 ⊙...
-
Page 4: Specifications
1. Specifications & Organization 1. Specifications Video standard PAL/NTSC Audio 2-way Audio conference Monitor display Real time:25 Fps (PAL), 30Fps(NTSC) per camera Covert camera operation Programmable Event/Log search Up to 1,000,000 for user login/out, config changes, remote access, connects/disconnects Record Scheduling Daily, Weekly adjust specific Hr per channel Remote Access TCP/IP, View, Search, Recording &... - Page 5 1. Specifications & Organization Pre-alarm recording Up to 5 sec., programmable per camera OSD languages English, Spanish, Chinese, Dutch, Portuguese, French, Russian,Japanese, Polish, Romanian, German Ethernet interface 10/100-Base-TX, RJ-45 Remote Function Live View, Live Recording, Search, Set-up, Archiving PTZ Control RS-485 interface Supply voltage 100VAC-240VAC, 60/50Hz...
-
Page 6: Product Contents List
1. Specifications & Organization 2. Product Contents List Please confirm that all product contents are present after opening the package. ① Basic Contents DR4N 12V Adaptor DR8N or DR16N Unit AC Power Cable User’s Manual Remote Controller Remote Agent AAA Battery x 2 Installation CD ②... -
Page 7: System Organization
1. Specifications & Organization 3. System Organization Alarm Sensor #1-16 Relay Out Remote Client PC Image Printer Camera #1-16 Alarm Input/Out NETWORK AVI Backup TCP/IP Video In WEB Client Backup Video Out Remote Controller A/V Monitor CD-RW Monitor... -
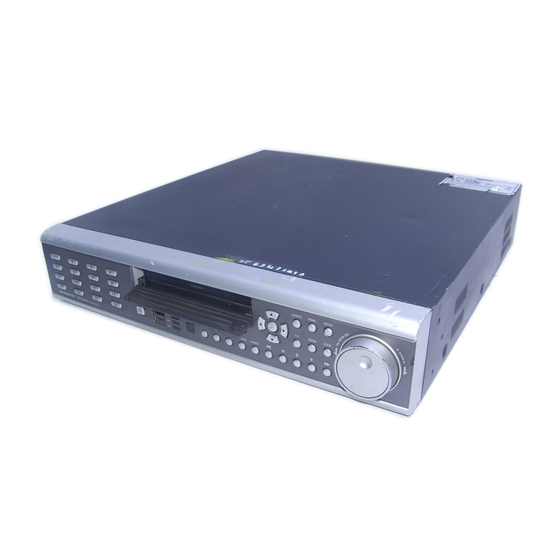
Page 8: Chapter 2. Product Description
2. Product Description 1. Front Panel(8&16CH) ① Power : System Power On/Off ② DISPLAY : Select Screen Division Mode or Rotation Mode ③ SEQUENCE : Select Sequence Screen Mode ④ PANIC : Trigger Panic Recording Mode and Panic Relay Output ⑤... -
Page 9: Rear Panel(8&16Ch)
2. Product Description 2. Rear Panel(8&16CH) ① Video IN / Loop : BNC Video Input Port (1 ~ 8/16), BNC Video Loop Output (1 ~ 8/16) ② Monitor out : BNC Main Monitor Output SVHS : Output Video by Connected SVHS. ③... -
Page 10: Front Panel(4Ch)
2. Product Description 3. Front Panel(4CH) CD-RW : CD-RW Device for Backup. Channel Selection Button : Select Channel or Input Password. Led Indicator : Indicate Present System Status Information. ( PWR: System On/Off, REC: Record On/Off, ALARM: Alarm Sensor Detection Status, NET: Client Network Connection Status, ) Search Controller : Searching Recorded Data or Control Menu &... -
Page 11: Rear Panel(4Ch)
2. Product Description 4. Rear Panel(4CH) Video In : BNC Port for Connection of DVR & Camera. (4 Camera Connectable) Loop Back : Output DVR Camera Video to Loop Back Port. (4 BNC Port) Monitor Out : Output DVR Video to AV Monitor. Spot Out : Output Spot-out Video to AV Monitor. -
Page 12: Remote Controller
2. Product Description 5. Remote Controller POWER MENU: Open System Setup Menu System ON/OFF Channel Selection Buttons RETURN ENTER: Apply / Select / Go to Next Screen Cancel / Deselect / Previous Screen Navigation Buttons : used for Playback Control, Menu Navigation, and PTZ/Focus Control Change Search Menu... -
Page 13: Chapter 3. Display
3. Display 1. System Power ON • Press Power Button to Startup the DVR. • After the Power-On Self-Test, the system will ask the user to input a password to begin operation. • Initial Display Mode is 8ch / 16ch Live View Mode. •... -
Page 14: Live View Display Mode Selection
3. Display When this unit is connected with a remote client PC, a Network Status Icon will appear on the Status Bar. • This icon indicates the current network conditions. - Green: Network is connected and stable. - Blue: Network is connected, but is unstable. - Red: Network is very unstable. -
Page 15: Ptz/Focus Control
3. Display 4. PTZ/FOCUS Control • Control Camera Movements of PTZ (Pan/Tilt/Zoom) Devices • Press PTZ Button to switch into PTZ mode. (Status Bar is replaced by PTZ controls) • Each PTZ function is manipulated by using a button on the Front Panel or on the Remote Controller. •... -
Page 16: Chapter 4. Search
4. Search ⊙ Go to Search Mode • Press Search Button and Log-In as Administrator or Manager. • Use Directional Keys to Navigate Search Menu. • To Open/Advance Each Submenu, Press Enter. • To Return to a Previous Menu Screen, Press Return. (Repeatedly Pressing Return will exit out of all menus.) 1. -
Page 17: Search By Event
4. Search • Video Playback Controls ① : Basic Playback Mode (Normal Speed (1x) Forward Playing) ② : Normal Speed (1x) Backward Playing ③ : Pause Playback (enables the JOG wheel) ④ : Fast Forward (2x ~ 64x Speed) ⑤ : Fast Rewind (2x ~ 64x Speed) ⑥... -
Page 18: Chapter 5. Menu
5. Menu ⊙ Go to Menu ① Press the SETUP Button. ② Unit will ask for Login/Password Entry. ③ Input Password Using by Channel Selection Buttons. ④ After Login, Select a submenu and Press Enter. -System Setup : Edit System Setup/Configuration -Record Menu : Edit Recording Schedule/Settings - Archiving : Setup and Initiate Archive/Backup Process •... -
Page 19: Display
5. Menu 1. Display - Allows Configuration of Display Properties • Live View Display options are edited within this submenu. • Navigate menus by using Directional Buttons Select the desired menu category and press ‘Enter’. • ENTER Return to Previous Menu (or Live View Mode) RETURN •... - Page 20 5. Menu 1-3. SEQUENCE • Activation : Activation On/Off • List : Sequence Title • Created By: User who programmed the sequence • Choose Add to Add a New Sequence • Input the Sequence Title • Choose Activation (On/Off) • Save and Exit •...
- Page 21 5. Menu * Setup sequence ① Press enter then red border line ② Select display mode among 16 ③ Display mode selected, press disappear. Setup mode activated. mode. 1set can be made by 16 mode. channel selection button as you want.
-
Page 22: Camera
5. Menu 2. Camera - Allows Setup of Camera Parameters and Options 2-1. Camera Title • Covert : Set Channel as Covert Channel (On/Off) (When a channel is set to Covert, it will be hidden from Live View and Playback, but video will still be recorded.) •... - Page 23 • Baud Rate : Setup PTZ Communication Speed (2400, 4800, 9600,19200, 38400 bps) ※ Supported PTZ Protocols : GANZ-PT, Samsung (MRX-1000), Samsung (SCC641),Honeywell (SD1) Honeywell (GMC), Lilin (Fastdome), Fastrax (Ⅱ), GC (655N), D-MAX, Sunin DSC-230, Scan Dome-Ⅱ, Vicon, Philips 8560-700...
- Page 24 5. Menu 2-4. Motion Detection • Adjust the Motion Sensitivity Level (1 ~10) • Move Cursor over grid using the Directional Keys. • Click AREA SETUP to define motion-sensitive area • Press ENTER, and then use the Directional Keys to select an area of targets on the grid.
-
Page 25: Sound
5. Menu 3. Sound 3-1. Audio - Allows for configuration of Audio parameters and options • Live Audio : Audio Output to Audio Out Terminal (ON/OFF) (Live Audio Output is from Audio In Terminal) • Audio Monitoring Channel: Select Channel for Audio Output. (1 ~ 4 Channels of Audio Input) •... -
Page 26: System
5. Menu 4. System - Basic System Environment Setup 4-1. Date/Time ※ You should set the proper Time Zone for your geographic location before adjusting the other settings. • Date / Time: Set the Present Date and Time • Date Format : Select the style of Date Display. (Ex: YYYY/MM/DD or MM/DD/YYYY) •... - Page 27 5. Menu 4-2. Network • IP Address : Input the unit IP Address • Gateway : Input the IP Address of Internet-Connected Router • Subnet Mask : Input the Subnet Mask IP • DNS Server: Input the 1 and 2 DNS Server IP Addresses •...
- Page 28 5. Menu 4-3. Mail These settings allow the DVR to send outgoing E-Mail Notifications to the list of recipients listed within the DVR. • Server: Setup the outgoing Mail Server Address • Input the server address using the Virtual Keyboard. •...
- Page 29 5. Menu 4-4. User Management DVR User Account Setup • There are 3 groups of User Account types: - Administrator, Manager, and User • A total of 7 users can be established for each account type. • Input the new User ID, •...
- Page 30 5. Menu 4-5. System Information • S/W Version: DVR Firmware Version • H/W Version : DVR Hardware Version • Video Signal Type: NTSC or PAL • Disk Capacity: used HDD capacity / total HDD capacity • IP Address: The current IP Address of the DVR •...
-
Page 31: Event/Sensor
5. Menu 4-6. Control device • System ID : Select system ID. (1~254) • Protocol : Select protocol. • Baud rate : Setup baud rate. 5. Event/Sensor 5-1. HDD Event • Drive: All HDDs are listed by IDE Channel Number. •... - Page 32 5. Menu 5-2. Alarm Input • Operation: Set Alarm/Sensor Connection Status (Enable/Disable) • Type : Set Alarm/Sensor as Normally Open or Normally Closed. (N/O) (N/C) 5-3. Alarm Out ※ Configure the DVR Alarm Relay Output for each channel to trigger relay output on alarm activations, video loss, or motion. •...
- Page 33 5. Menu 5-4. Buzzer Out • Operation: Buzzer Out (Enable/Disable). • Mode: Setup in Latched/Transparent Mode (same as Alarm Out). • HDD Event: Turn Buzzer (On/Off) when HDD Event occurs. • Duration: Buzzer time (5 sec ~ 5 min, or manual reset on DVR) •...
-
Page 34: Disk Management
5. Menu 5-5. E-Mail Notification • E-Mail Notification will send an e-mail to a list of recipients, based on Alarm, Video Loss, Motion, or HDD Events. • Check or uncheck each type of condition that you want to trigger an E-Mail Notification, on each channel. •... -
Page 35: Go To Record Menu
5. Menu ⊙ Go to Record Menu • Press the Setup button and login as an ADMINISTRATOR. • Choose “Record Menu” 1. Recording Operations • Schedule Mode: Choose ‘DAILY’ or ‘WEEKLY’. - Daily : The recording schedule that you configure will be used for every day of the week. -
Page 36: Continuous/Motion Record Schedule
5. Menu 2. Continuous / Motion Record Schedule 2-1. Parameter • Select a block of time from the 0-24hr Timeline (you may select multiple blocks). • Press ENTER again to set up the Resolution, FPS, Quality, and Audio on each channel. 2-2. -
Page 37: Alarm Recording Schedule
5. Menu 3. Alarm Recording Schedule 3-1. Parameter • Select a block of time from the 0-24hr Timeline (you may select multiple blocks). • Press ENTER again to set up the Resolution, FPS, Quality, and Audio on each channel. 3-2. Schedule •... -
Page 38: Panic Setup
5. Menu 4. Panic Setup • To setup each channel, press enter. • Setup each channel. (Size, FPS, Quality, Audio) • By panic button of front panel, can record urgently as setup. -
Page 39: Go To Archiving
5. Menu ⊙ Go to Archiving 1. CD-R/W and USB Archiving / Backup ① Device : Choose from available media. (CD-R/W and/or USB Memory Stick are detected automatically.) ② From : Select the Start Date/Time of the video recording that you wish to archive. ③... -
Page 40: Chapter 6. Client
6. Client • Minimum and Recommended System Requirements for a Client PC ① Main Board (CPU): Pentium III @ 500 MHz (minimum), Pentium 4 @ 1GHz or above (recommended) ② OS: Windows 2000 Pro (minimum), Windows XP Pro (recommended), DirectX version 9.0c (or higher) ③... - Page 41 6. Client ③ Choose the Folder where the Remote Agent software will be installed. ④ The Remote Agent software files will be copied onto your PC, with a status bar showing the progress.
-
Page 42: Introduction
6. Client 1. Introduction ③ ① ④ ⑤ ⑥ ⑦ ⑧ ⑨ ⑩ ⑪ ⑫ ⑭ ⑬ ① Main Display : Shows single or multi-channel view of cameras connected to the DVR. ② Camera Selection Buttons : Indicates Camera #; click button to display a selected camera. ③... -
Page 43: Configuration
6. Client 2. Configuration 2-1. DVR List ② ① ③ ④ ⑤ ① List of DVRs and DVR Groups ② DVR Information : Enter DVR Name, IP, Port, User ID, Password ③ Camera Position : Set camera positions for multi-channel viewing ④... - Page 44 6. Client 2-2. Add Group ① ① At ‘site’ of left upper side, right click the “Add Group”. ② ② Input the Group name.
- Page 45 6. Client ③ ③ Input DVR information.(name, IP, port, ID, PW) ④ ④ Set camera position, check option and press ‘ADD’...
- Page 46 6. Client ⑤ ⑤ New DVR list is shown on the left upper side.
- Page 47 6. Client 2-3. Configuration ① Video OSD : Select screen information. (title, name, date, time) ② Video output : Select video output method. - Overlay Mixer : Output without passing through CPU. - Video Renderer : Output through CPU. - GDI : When you cannot see video by upper 2 way, use this way. ③...
- Page 48 6. Client Press button, select DVR name, and press Select. Password Input Window Open, then input password. 1. Record • Alarm Recording Schedule - Click the “Set” Button for Alarm Recording. - Setup size, rec. rate, quality, audio. • Record Operations •...
- Page 49 6. Client 2. Camera • Status/Title Setup - Setup for Each Camera (Covert function On/Off, Camera Name). • Color Setup - Setup Color for Each Screen. • Covert/PTZ Setup - Setup for Each Camera PTZ Protocol, Baud rate. • Motion Area - Click the “Properties”...
- Page 50 6. Client 2-4. Event/sensor • Alarm Input - Setup for Each Channel Alarm Connection & Type. • Alarm Out - Setup each channel when alarm, videoloss, motion are happened. - Disk Event: Alarm On/Off when HDD has the problem. - Operation: Setup Relay Connect with Alarm Sensor. - Mode: Setup Reacted Relay as Latched/Transparent Mode.
- Page 51 6. Client 2-5. System • System Info - Possible to Watch DVR System Status. • SMTP - Setup the mail server and user’s E-mail. • Users - Setup the Users. - Click the “Add” or “Modify” button. • Disk Overwrite - Setup DVR HDD Overwrite On/Off.
-
Page 52: Monitoring
6. Client 3. Monitoring 3-1. Select Remote DVR to Connect • Select I/D to Connect Server. • I/D can be Add, Change, and Delete at Setup. 3-2. Screen Division Selection • 1*1 View : Showing One (1) Video which User Selected. (Selection Video by Camera Selection Button) •... - Page 53 6. Client • 9-Channel View Mode • 16-Channel View Mode 3-3. PTZ Control • Press the PTZ Control Button • PTZ Controller : Use the directional buttons to control camera Pan, Tilt, and Zoom functions • FOCUS/ZOOM : Select Focus or Zoom Control •...
- Page 54 6. Client 3-4. AVI Video Conversion • Click AVI Conversion Button to Begin AVI File Conversion. • During AVI Conversion, a message is displayed. • Click ‘Stop” to Stop Conversion and Save AVI File. • The path and filename of your saved AVI file is displayed. •...
-
Page 55: Search
6. Client 4. Search 4-1. Introduction ① ③ ④ ⑤ ⑥ ⑦ ⑧ ② ① Search Screen : View Playback of Selected Video ② Search Bar/Timeline : Search Recorded Video on Timeline (also indicates Recording Mode) ③ LIVE : Return to Live View Mode SETUP : Edit Options ④... - Page 56 6. Client ① 4-2. Search Method ⑥ ⑤ ④ ③ ② ⑦ ① Indicates the Time of Day (0 ~ 24 hours) on Search Timeline. ② Indicates Recording Mode (Blue : No Recording, Red: Recorded Images Present) ③ Search Bar : Drag bar with the mouse to search through recorded video on the timeline. ④...
- Page 57 6. Client 4-3. SEARCH Options ③Save Image ①Archive ⑤Log Viewer ②Backup Play ⑥Event Viewer ④Print ① Archive – Backup Image from Server to Remote PC. • Time Range - Enter the Starting and Ending Date/Time. • Channel : Check each channel to include in the Archive. •...
- Page 58 6. Client ② Backup Play (DVR Player) – Transfer to DVR Player ① ② ④ ③ ⑤ ① Video Display (Single-Channel Mode available only) ② Open Backup File for Viewing ③ Indicates Playback Channel ④ Indicates Present Date/Time and Searchable Dates/Times ⑤...
- Page 59 6. Client ③ Save Image – Capture Image and Save to Local PC • Click ‘Save Image’ Icon during Video Playback. • Chose Filename and File Type (JPG, BMP), and Save Location, and click ‘Save’. ④ Print Image – Present Image Capture and Print Out Image •...
- Page 60 6. Client ⑤ Log Viewer – Find Video from the DVR Event Log. ② ① ③ ④ ⑤ ⑥ ⑨ ⑧ ⑩ ⑪ ⑦ ① Select Starting Date/Time and Ending Date/Time from which to search for Event Log events. - Press Search Button to Search and View Search Results. ②...
- Page 61 6. Client Event Viewer - ⑥ Showing Present Event in Server & Find Image ① Indicates the order in which events occurred. ② Indicates the DVR # on which an event occurred. ③ Indicates the Camera # on which an event occurred. ④...
-
Page 62: Web Client
6. Client 5. Web Client • WEB Client Connection ① Input the IP Address or URL of the DVR in the Internet Explorer Address Bar. ② A dialog will appear to confirm download of an ActiveX control. Please click ‘Confirm’ or ‘Continue’. ③... - Page 63 6. Client...
-
Page 64: Important Safety Instructions
• IMPORTANT SAFETY INSTRUCTIONS 1) Read these instructions. 2) Keep these instructions. 3) Heed all warnings. 4) Follow all instructions. 5) Do not use this apparatus near water. 6) Clean only with a dry cloth. 7) Do not block any of the ventilation openings. Install in accordance with the manufacturer's instructions.
Need help?
Do you have a question about the DIGIMASTER SERIES and is the answer not in the manual?
Questions and answers