Table of Contents
Advertisement
Quick Links
Download this manual
See also:
Owner's Manual
Digital Recording Studio
Getting Started:
Audio connections, Recording sources for this guide
Power-up, Load and play the demo song
Demo song Track Layout
Quick Tour of D1600 modes
D1600 Additional Features
Working with the D1600:
Select and work with the demo song
Using the FF and REW keys in a song
Copy the demo song to a new song location for editing
Un-protect and rename the demo song
Disable Scene Memory and work with the MixView display
View the Post Fader levels as you mix
Mute/un-mute tracks with the TRACK STATUS keys
Work with the EQ function
View the Insert effect assignments for the demo song
Overview of Insert effect configurations
Work with the lead vocal track in "SISTER DANCE"
Set a new Locate point in the song
Work with the lead vocal Insert effect
Work with the Counter
Work with the lead guitar track
Scrub the audio to find and set a new Locate point
Assign and work with a new Insert effect for track 3
Store IN and OUT points, and use the Loop Playback function
Work with the Master and Final effects
Set new Master effect send levels
Work with the Final effect
Store the new Final effect in a user location
Playback the song and make any final mix changes
Store a new initial Scene for the song
Additional tips when working with Scenes
Work with the Solo function
Work with the Monitor Cue function
Work with the Metronome and Rhythm patterns
D1600 Guided Tour
3
4
5
6
13
15
15
15
15
16
16
16
16
17
17
18
18
18
19
19
19
20
21
21
22
22
23
23
23
24
25
25
26
Advertisement
Table of Contents

Related Manuals for Korg D1600


Summary of Contents for Korg D1600
-
Page 1: Getting Started
Getting Started: Audio connections, Recording sources for this guide Power-up, Load and play the demo song Demo song Track Layout Quick Tour of D1600 modes D1600 Additional Features Working with the D1600: Select and work with the demo song Using the FF and REW keys in a song... -
Page 2: Table Of Contents
Record the new Tempo Map to stereo tracks Record a guitar track as the rhythm track plays back Creating an Audio CD on the D1600: Create a blank region of audio at the start of the new song Write and finalize a CD... -
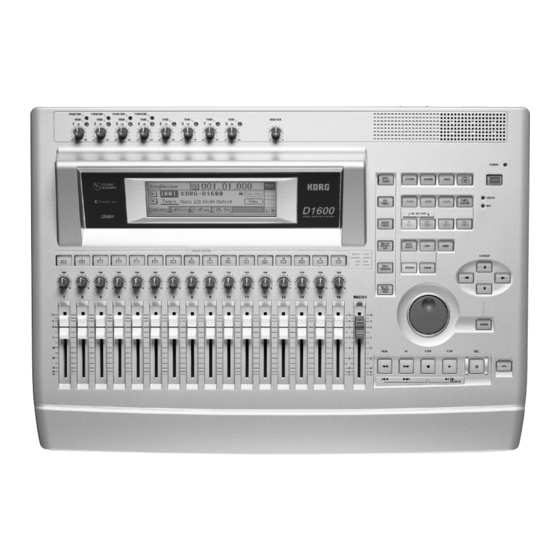
Page 3: D1600 Guided Tour
D1600 Guided Tour Getting Started: D1600 Hard Drive Installation: Detailed instructions for installing the included 20GB hard drive in the D1600 drive bay are located in the original shipping carton, and in the Owner’s Manual, page 134. Audio connections: Connect the rear panel MONITOR L / R outputs to a stereo monitoring system for playback/recording, and connect headphones to the front panel PHONES jack. - Page 4 D1600 real panel, using an external compatible CDR/RW drive. 1. Press the CD EJECT button on the front of the CDR/RW drive, and then insert the enclosed D1600 DEMO SONG DATA CD, and press gently to close the CD drawer.
- Page 5 KORG D1600 Guided Tour 13. Slowly raise the MASTER fader to the “0” position, and rotate the D1600 MONITOR knob to a comfortable listening level (or raise the PHONE LEVEL knob if you’re using headphones). 14. When the demo song has finished playing, press the STOP key.
- Page 6 Scene. The D1600 features a Channel Pairing function to group adjacent channels for controlling Track Status, Pan, EQ, Effect and Aux send settings as well as fader position.
-
Page 7: Scene Memory Mode
SCENE MEMORY mode: The D1600 features 100 -Scene Memory for "snapshot" automation of channel faders, pan, EQ and Effect settings and effect and aux send levels! The Demo Song “SISTER DANCE” has an initial Scene stored. When the song is selected, the SCENE key will light and the original mix settings will be recalled. -
Page 8: Insert Effect Mode
Insert effect program you've selected. There are 128 preset insert effect programs to choose from, including 98 chains of up to 5 effects at once. The D1600 features Korg's famous REMS modeling effects - accurate amp, cabinet and microphone simulations. You can edit any of the preset effect programs, then store your edits to 128 user effect programs. -
Page 9: Solo Mode
Press the “OK” button to return to the previous page. The D1600 features Monitor Cue level and pan settings, to dial in your own separate mix, without affecting the mix routed to the Master outputs. See the Owner’s Manual, page 39 for more information. -
Page 10: Tuner Mode
More “hands-on” work with the SCRUB function later in this guide. TUNER mode: The D1600 features a built-in auto-chromatic tuner! STOP playback, then press the INPUT key, followed by pressing the “Tuner” tab. Here, you can tune an instrument connected to the INPUT 8 / GUITAR IN jack. - Page 11 Press the TEMPO/RHYTHM key. On this page you can set tempo, time signature and rhythm settings for a song. The D1600 provides you with the "ultimate metronome" - the sampled drum patterns in memory provide a great tempo "guide" for many music genres.
- Page 12 You can record solo parts etc. on the virtual tracks and then select your favorite take! Bouncing tracks has never been easier! In addition to basic track bouncing functions, the D1600 features an exclusive "16 to 2" function. This lets you bounce 16 tracks of audio to 2 Virtual tracks to create virtual mixdowns internally, and then select your favorite...
-
Page 13: D1600 Additional Features
Rear panel XLR and 1/4 inch connectors for Channels 1-4, plus switch-able phantom power for each of the XLR inputs! Built-in cooling fan: The internal fan is configured to run when the D1600 is stopped or during playback, but automatically shuts down when you begin recording! 100 Scenes, 100 Mark points and 4 Locate points per song: Store "snapshot"... - Page 14 Use the SUB INPUTS to send external signals directly to the Master bus: Assign any of analog inputs 1-8 as Sub Inputs, and input the audio from an external sequencer in sync, direct to the D1600's Master bus, or record any external audio final pass, along with the internal tracks, direct to your mastering deck. You can also use the Sub Inputs to return audio from an external processor connected to the AUX OUT.
-
Page 15: Select And Work With The Demo Song
KORG D1600 Guided Tour Working with the D1600: Select and work with the demo song: 1. If “SISTER DANCE” isn’t already selected, press the SONG key, then press the “SelSong” tab. 2. Press the “>” popup button to the left of the current song name. -
Page 16: Disable Scene Memory And Work With The Mixview Display
KORG D1600 Guided Tour 11. Press the “SelSong” tab, then press the “Rename” button. Repeatedly press the “>” button in the display, until the space just to the right of “DANCE” is highlighted, and then press the “0..9” button. Rotate the DIAL until the highlighted space indicates “2”, and then press the “OK”... -
Page 17: View The Insert Effect Assignments For The Demo Song
The largest configuration of multiple effect choices - use this one when you need up to eight mono effects in a song. Ideal for fixed pan sources that need effect isolation, like drums. Note: For more information on setting assignments, configurations and locations of insert effects, see the D1600 Owner’s Manual, pages 43 and 105. -
Page 18: Work With The Lead Vocal Track In "Sister Dance
Once you’ve edited an effect, the display will indicate “EDIT” to the left of the effect name. You can then press the “Store” button in the display, and save the new effect to one of 128 user effect locations. Note that the factory user effects are identical to the preset effects. For more information, see the D1600 Owner’s Manual, page 46. -
Page 19: Work With The Counter
KORG D1600 Guided Tour Work with the Counter: 1. Press the STOP key to stop playback, and press the IN/LOC1 key to reset the song to the beginning. 2. Press to highlight “000:00: 000 on the “Counter”, then rotate the DIAL until the “Counter” reads “001:50:000”. -
Page 20: Assign And Work With A New Insert Effect For Track 3
KORG D1600 Guided Tour Try the “Play From” function: 9. Press the PLAY key. The audio data will begin playback at the currently stopped position, and play for two seconds, before automatically returning to the stored locate point. Try the “Play To” function: 10. -
Page 21: Store In And Out Points, And Use The Loop Playback Function
You can use the Loop playback/record function in conjunction with the Auto-punch recording mode. This method lets you record repeated takes over the same section, and then use the Undo function to select the best take! For more information, see the D1600 Owner’s Manual, page 31. Work with the Master and Final effects: Two Master effect processors can be used simultaneously, with individual send levels for each channel. -
Page 22: Set New Master Effect Send Levels
The Final effect is an independent processor with 32 preset and 32 user Final effect programs available. It is located at the end of the effect routing scheme in the D1600, and is used for "mastering" and dynamics applications. During mixdown you can use a Final effect to "polish"... -
Page 23: Store The New Final Effect In A User Location
KORG D1600 Guided Tour 1. Reset the song to the beginning, and then press the PLAY key to begin playback. 2. In the MASTER EFFECT page, press the “FinalEff” tab, and note that “F008 DY2:StudioLimitr” is the effect assigned. 3. Press to “toggle” the “Bypass” button and “Cancel” button, to listen to the song without and with the Final effect. -
Page 24: Additional Tips When Working With Scenes
Tip: Scene changes (up to 100 per song) can be transmitted and received via MIDI program change messages. For more information on Scene mode operations, see the D1600 Owner’s Manual, pg. 41. Tip: In any song where Scene Memory is enabled (SCENE key lit when song is selected), the settings originally stored as scenes will be recalled each time you restart the song. -
Page 25: Work With The Solo Function
The Solo function lets you isolate and monitor individual tracks, master effect sends and returns, and aux sends. The faders on the D1600 control both recording and monitoring levels, and a Cue Level function is provided for separate adjustment of level and pan while you record. -
Page 26: Work With The Metronome And Rhythm Patterns
KORG D1600 Guided Tour Tip: The “AutoIn” function: When On, mixer channels that are set to REC will monitor track playback, and will automatically switch to monitoring the external input sound when recording or in rehearsal mode, and when stopped. When Off, you will always hear the input sound for channels set to REC. -
Page 27: Connect A Microphone And Set The Input Level
2. Press the “New” button, then press the “OK” button. The next-available empty song location (“NEW SONG”) will be selected. About the D1600 recording formats available: In the “SongSel” tab, the SongType can be set for 16 bit / 16 track, allowing 8 track simultaneous recording with 16 track playback. -
Page 28: Check The Pre Fader Level And Adjust The Input Signal
Note: The D1600 has an internal fan, and when recording, the fan automatically shuts down, and starts up on playback and when stopped. Fan control can be set to “Off”, “Rec&PlayOff”(default setting), and “On” in the “SYSTEM > Control” tab. -
Page 29: Working With Virtual Tracks
Working with Virtual Tracks The D1600 features 8 Virtual tracks for every track - 128 tracks per song! Virtual tracks give you the benefit of being able to record several takes without overwriting any previous takes. Then you can select from your favorite Virtual track(s) for playback, bouncing or in mixdown. -
Page 30: Create A "16-2" Virtual Mixdown
Create a “16-2” Virtual Mixdown: The D1600 features a number of ways to bounce multiple tracks, including an exclusive "16-2" function that lets you bounce multiple mixes to selected Virtual track pairs, with varied effects and EQ, and then select your favorite mixdown from the Virtual tracks. - Page 31 KORG D1600 Guided Tour 7. Press the METER/TRACK VIEW key, then press the “>” popup button in the upper left of the display, and press the “PostFdrLev” radio button, followed by pressing the “OK” button. 8. Check to see that the “Counter” is set to “000:00.000”.
-
Page 32: Work With The Clipboard, Fade And Undo Functions
KORG D1600 Guided Tour 16. Press the METER / TRACK VIEW key, then press the PLAY key to playback and view the post fader levels for Tracks 13 and 17. When you're finished playing back the mixdown, press the STOP key, then press the IN / LOC1 key to locate to the song beginning. - Page 33 Single and multiple tracks can be set to fade-in and out by a selected mode (curve), as indicated in step 9 above. Cross- fades can also be set by using fade-in and fade-out in conjunction with each other. For more information on fades, see the D1600 Owner’s Manual, page 56.
- Page 34 D1600 is on, and consumes disk capacity. If you’ve completed recordings and edits on a song and want to free up as much hard disk space as possible, power-off the D1600 and the Undo history of up to 99 recordings, edits or operations will be deleted from the hard disk.
-
Page 35: Create A New Song And Connect A Guitar
KORG D1600 Guided Tour Guitar and Insert effect / Rhythm Pattern Demo Recording source for this section: The following section suggests a guitar as the input source. If you would like to use another instrument such as keyboards, connect the stereo outputs to any available rear panel adjacent inputs (3/4, 5/6 etc.) and set the pan knobs for these channels to L/R. - Page 36 Song tempo can be set manually, by tempo maps, or with a tempo track which can be recorded via MIDI clock or by tap tempo. For more information, see the D1600 Owner’s Manual, page 62. Create a new Tempo Map: Tempo maps let you specify tempo, time signature and rhythm patterns for each measure in a song.
-
Page 37: Record The New Tempo Map To Stereo Tracks
KORG D1600 Guided Tour The tempo map has been created, and you can view each event by pressing the “Map005” parameter in the upper left of the display, and rotating the DIAL left or right. You’ll see the measure, tempo and pattern information for each event entered. - Page 38 Go through this section once you have one or more songs completed on the D1600. You can produce an audio CD on the D1600, if the Korg CDRW-2 or other compatible CD-R or CD-RW drive is installed. Most consumer CD players will not playback CD-RW disks. If you plan to playback any D1600 CD masters on consumer CD players, use good quality CD-R media for mastering.
-
Page 39: Write And Finalize A Cd
17. Press the “Play/Stop” button to playback the CD: Tip: For more information on CD mastering with the D1600, see the Owner’s Manual, page 49 and 91. Tips: After you’ve completed this guide, make sure to Delete all of the copied and new songs you created as you went through each exercise –... -
Page 40: Basic Operations
Selecting songs: 1. SONG key Ô With D1600 stopped at current song beginning: Hold STOP and press REW 1 or more times to go to previous song(s) Ô Hold STOP and press FF 2 or more times to go to next song(s). -
Page 41: Loop Recording
KORG D1600 Guided Tour Loop recording: LOOP key Ô Set Counter location Ô STORE key: set IN point Ô Set Counter location Ô STORE key: set OUT point Ô Set Loop:On Ô AUTO PUNCH key Ô Press RolTime and set pre-roll and post-roll time Ô Set AutoPunch:On Ô Set TRACK STATUS to RECORD (red) Ô Ô Press REC Ô Press PLAY Ô Auto-punch recording at IN point and ends at OUT point , then continues to loop Ô... -
Page 42: Song And Track Editing
KORG D1600 Guided Tour QuickSteps D1600 Song and Track Editing Song Editing Copy Song: (copies entire song to internal or external drive) SONG key Ô SelSong tab, select song to be copied ÔEditSong tab Ô Press > to select Copy Ô OK Ô Press destination internal song number and use DIAL to select (or press Drive and select destination drive/OK) Ô... -
Page 43: Owner's Manual References
Normalize Track: (boosts level of specific region (IN/OUT) for maximum level before clipping) TRACK key Ô EditTrack tab Ô Press > to select Normalize Ô OK Ô Select track(s) Ô Press Exec. ÔOM pg. 86 Additional D1600 Owner’s Manual References: Installing hard disks and CD-R/RW drives CD Mastering...
Need help?
Do you have a question about the D1600 and is the answer not in the manual?
Questions and answers