Table of Contents
Advertisement
Quick Links
Download this manual
See also:
Quick Reference Manual
Advertisement
Table of Contents

Subscribe to Our Youtube Channel
Related Manuals for Polycom 4-Line Phone


Summary of Contents for Polycom 4-Line Phone
- Page 1 ACC 1137- PUG Polycom 4 and 6-Line Phones Owner’s Manual V.1 Owner’s Manual...
-
Page 2: Table Of Contents
Using Your Hosted PBX phone system ......18 System Description ............. 18 Getting Started ..............18 Polycom 4 and 6-Line Desk Phones ......... 18 Introduction to your Polycom Desk Phone ....18 Before You Use Your Phone ..........18 ... - Page 3 Managing Incoming Calls ..........32 Rejecting Calls ..............33 Diverting Calls ..............34 Desk Phone– Basic Call Features ......... 35 Answering a call ..............35 To answer a call using Hands-Free Speakerphone mode: ..........35 ...
- Page 4 Change the Number of Rings Before Voicemail Picks Up ..........58 Call Lists and Directories ..........58 Managing Call Lists ............58 Managing Contacts ............59 Adding Contacts ..............60 Editing Contacts ..............62 ...
-
Page 5: Introduction
Introduction Congratulations on purchasing the AccessLine DPS FLEX phone system and service. You will now be able to share your phone connection between fixed & wireless handsets and across multiple locations using the latest in ‘Voice over IP’ services. This User Guide will show you how to setup and use your new DPS FLEX phone system and service. -
Page 6: Basic Requirements
Basic Requirements The PBX phone system is designed to use your existing broadband data connection as well as the existing data wiring in your office. Where you don’t have data wiring, you may use the optional Wireless Transmitter and Wireless Adapters to connect Desk Phones wirelessly. -
Page 7: Getting To Know Your Hosted Pbx System
Getting to know your Hosted PBX Before you Begin Your Installation The DPS FLEX phone system is designed to use your existing broadband data connection as well as the existing data wiring in your office. Where you don’t have data wiring, you may use the optional Wireless Transmitter and Wireless Adapters to connect Desk Phones wirelessly. - Page 8 Standard Setup Options: This diagram depicts your setup options. By purchasing the optional Wireless Transmitter and Wireless Adapters you may also connect Desk Phones wirelessly. Cordless Phones: This diagram depicts the setup options for Cordless Phones. Cordless phones can be used in conjunction with Shared Line Phones and the optional Base Unit or they can be installed as Stand Alone Phones.
- Page 9 Fax Adapter: This diagram depicts the setup options for the Fax Adapter. The Fax Adapter allows you to use your existing fax machine with the AccessLine DPS service. Setup Options that are not supported The following setup options ARE NOT supported: Owner’s Manual...
-
Page 10: Assigning Extension Numbers And Phone Numbers To Phones
1. Connecting one phone to another 2. Connecting a phone to the base unit then connecting a PC 3. Connecting a phone to the base unit wirelessly and then connecting a PC 4. Connecting a PC to the base unit 5. -
Page 11: Installing Your Hosted Pbx Phone System
Installing your Hosted PBX Phone System Installing Desk Phones Desk Phones can be installed in the following ways You may connect Desk Phones Wirelessly to the Optional • Wireless Transmitter and the Optional Wireless Adapters You may connect Desk Phones to your existing router •... - Page 12 Option 1: Connect Desk Phones using your existing data network To your router or wall jack Use the included phone cord and connect one end into the port on the back of the phone labeled and connect the other end into any data port on your network (router, switch or wall jack).
- Page 13 Option 3: Connect phones wirelessly within 40’ using the Wireless Adapter The wireless adapter allows a desk phone to be used without a cord connecting it to the Wireless Transmitter. The range of the Wireless Adapter is 40 feet from the base unit. The wireless adaptor has its own power supply.
-
Page 14: Attaching The Base
Attaching the Base To attach the Base to the phone: 1. Place all cords in the recessed area above the modular jacks. 2. Align the two protrusions on the bracket with their corresponding holes in the phone. Owner’s Manual... - Page 15 3. Snap them together to lock the base to the phone. Owner’s Manual...
-
Page 16: Activating The Service
Activating the Service Before you can make or receive calls, you need to activate your phone line(s). This also activates the billing for your phone line(s). To activate your phone line(s): 1. Go to www.accessline.com/login and enter your Administrator Portal login name and password 2. - Page 17 Owner’s Manual...
-
Page 18: Using Your Hosted Pbx Phone System
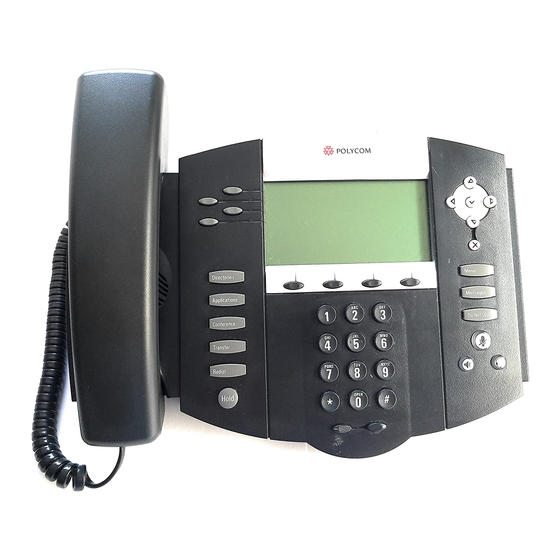
Polycom 4 and 6-Line Desk Phones Introduction to your Polycom Desk Phone The Polycom 4 and 6-Line Desk Phones provide a powerful, yet flexible IP communications solution, delivering excellent voice quality. The high-resolution graphic display supplies content for call information, directory access, and system status. - Page 19 Item Description 1 Message W aiting Alert f or v oice m essages Indicator 2 Arrow K eys Scroll t hrough d isplayed i nformation. ...
- Page 20 Transfer o f c urrent c all t o t hird p arty. Dials m ost r ecently d ialed p arty. Access v arious f eatures o f y our ...
-
Page 21: Using The Navigation Keys
Call K ey 14 Use t hese k eys t o a ctivate t he 4 o r 6 call a ppearance l ines o n y our phone. ... -
Page 22: Information Screen
Information Screen The display screen of your phone provides you with a host of important information elements. The top line of the screen displays: Popup text (for example, network errors) • Do Not Disturb text • Missed call text or second incoming caller display •... -
Page 23: Customizing Your Phone
Customizing Your Phone You can customize your Polycom 4 or 6-Line Desk Phone by adjusting the setting for time and date, display contrast, and ring type, for example. You can add contacts to the phone’s directory manually or from call lists. You can handle incoming calls from different contacts in different ways. -
Page 24: Changing The Display Contrast
To configure the time and date formats: Press Select Settings > Basic > Preferences > Time & Date. Select from Clock Date, Clock Time, Clock Order, or Enable/Disable. Using , scroll through the options under each of these selections. Press the Select soft key to confirm your choice. The following figure shows the Clock Time menu. -
Page 25: Changing The Backlight Intensity
Press the Up or Down soft keys to increase or decrease the display contrast. You can also use the volume keys to increase or decrease the display contrast . Note Press the Ok or Cancel soft keys to accept or cancel changes. Press to return to the idle display. - Page 26 If you do not press any keys on the phone after 20 seconds of the backlight turning on, the backlight dims (or changes) to medium in the following cases: A call is in progress • A call is on hold •...
-
Page 27: Enabling The Headset Memory Mode
Press the Up or Down soft keys to increase or decrease the backlight intensity. Press the Ok or Cancel soft keys to accept or cancel changes. Press to return to the idle display. Enabling the Headset Memory Mode This feature is especially useful for permanent or full-time headset users. To permanently enable the Headset Memory Mode: Press Select Settings >... -
Page 28: Selecting The Correct Headset For Electronic Hookswitch
This feature allows you to answer your phone when you are using a headset. For information on supported headsets to provide electronic hookswitch features for placing, answering, and ending calls, go to www.polycom.com/support/voice enter “Headset Compatibility List” in the Knowledge Base text box or contact your system administrator. -
Page 29: Changing The Language
(Optional.) If multiple lines are configured on your phone, first select the line to change from the list using the to select the desired ring type. To hear the selected ring type, press the Play soft key. Press the Select soft key to change to the selected ring type. Press to return to the idle display. -
Page 30: Changing The Graphic Display Background
Press the Select soft key. Text that appears on the graphic display will change to the language of your choice. Press to return to the idle display Changing the Graphic Display Background You can change the picture or design that appears on the graphic display. A default background displays when the phone starts up (shown below). -
Page 31: Changing The Soft Key Label Color
Press the Select softkey. Press to return to the idle display. Changing the Soft Key Label Color You can change the soft key label color that appears on the graphic display. A default soft key label color displays when the phone starts up (shown below). To change the soft key label color: Press Select Settings >... -
Page 32: Adjusting The Volume
Using the dialpad keys 1, 3, 7, and 9 change the soft key color to your desired color. The Label soft key on the right reflects your changes. When the color of the label reaches a certain level of whiteness, “Cannot save this color. -
Page 33: Rejecting Calls
Rejecting Calls You can customize your phone so that incoming calls from a particular party are immediately sent to your voice mail. Press Select Contact Directory. to highlight the contact. You can also use the * key to page up and the # key to page down Rejecting calls is not available on shared lines. -
Page 34: Diverting Calls
Press the Edit soft key, and then scroll down to the Auto Reject field. Use the to select Enabled. Press the Save or Cancel soft keys to accept or cancel changes. Press to return to the idle display. Diverting Calls You can customize your phone so that incoming calls from a particular contact are transferred directly to a third party. -
Page 35: Desk Phone- Basic Call Features
Enter the number of the party to whom you want to divert the call. Scroll down to the Auto Divert field. Use the to select Enabled. Press the Save or Cancel soft keys to accept or cancel changes. Press to return to the idle display. Desk Phone–... -
Page 36: Inbound Caller Id
To answer a call using the headset: Press If Headset Memory Mode is activated, press Answering When on Another Call Depending on your phone model you can take up to 4 or 6 calls on your phone. If you are on a call and another call comes in to your phone you will hear a tone from the phone and the next available Call Key will flash green. - Page 37 You can also dial the number first—called “hot dialing”— and then choose the method you will use to speak to the other party. You can search the call lists, the local contact directory or the corporate directory and dial from the search results page. During a call, you can alternate between Speakerphone Hands-Free, Headset, or Handset modes by pressing the keys, or picking up...
-
Page 38: Placing A Second Call
To place a call using the headset: Do one of the following: With the optional headset connected Press or t he N ewCall s oft k ey t o o btain d ial tone. ... -
Page 39: Ending Calls
You do NOT need to dial 9 to make a phone call. Note Ending Calls To end a call: Do one of the following: If you are using the handset, press the EndCall soft key or replace • the handset. If you are using a headset, press •... - Page 40 2. Using , select the forwarding type you want to change, and then press the Select soft key. The options are: Always—To f orward a ll i ncoming c alls No A nswer—To f orward u nanswered i ncoming c all Busy—To ...
- Page 41 If you selected Busy, you will see that your phone number is entered in the Contact field by default. By entering your own phone number in this field, the phone will send callers to your voicemail box if your phone is busy. You may enter a number to forward all future incoming calls to when all of your incoming lines are busy 4.
-
Page 42: Call Management Features
2. Enter a number to forward the incoming call to. 3. Press the Forward soft key again. The incoming call is forwarded to the other party. If call forwarding is disabled, all future calls will not be forwarded and forwarding will remain disabled. -
Page 43: Call Hold
Call Hold To place a call on hold During a call, press or the Hold soft key. The hold icon will display on the Call Key label. The caller will hear the standard hold music or your custom hold music/message. Press again or the Resume soft key to retrieve the call. - Page 44 You can create a conference at any time between an active call and a call on hold by pressing the Join soft key. The Join function is only available if you have only two calls on your phone. To Join two calls with yourself: 1.
-
Page 45: Transferring Calls
All conference participants hear the dial tone and ringback when the conference host places a call to a new party. Note 3. Call the second party. The new party will be automatically joined to your call. Splitting Conference Calls After you have created a conference call, you may split those calls back to their individual calls. - Page 46 • Consultative transfer—The party to whom you want to transfer the call answers their phone before you transfer the call or hang up. You can consult with them before completing the transfer. • Blind transfer—The call is automatically transferred after you dial the number of the party to whom you want to transfer the call.
-
Page 47: At This Point, The Call Is Connected To The Number To Which You Are Transferring Them
handset on the cradle. You can cancel the transfer before the call connects by pressing the Cancel soft key. Performing a Blind Transfer Blind transfer allows you to transfer a call to another number or extension without talking to that person first To perform a blind transfer: 1. -
Page 48: Call Park
Once the call has transferred to the desired voicemail box, your line will hang up. Do not hang up the phone until the line has disconnected. Using Network-based Call Transfer This call transfer method is used when you want to transfer a call without tying up two lines on your phone system. -
Page 49: Paging (Intercom)
To pickup the parked call, anyone on any phone may dial the park number (9001 in this example) to be connected with the caller. When a call is parked on a phone, one of the lines on that phone is used until the call is picked up by another phone. Note Paging (Intercom) To page to all phones... -
Page 50: Mute
If a number on an incoming call matches a number in the system Note speed dial list, the name in the list will be displayed. Mute The mute feature allows you to hear the other party, but they cannot hear you. -
Page 51: Setting Up The Voicemail Box For The First Time
Messages can be retrieved from the Desk Phone, any other phone or through a personal website at www.accessline.com/login . Your phone indicates the presence of new voicemail messages by a flashing Message Waiting Indicator LED on the front of the phone and a visual notification on the screen as well as a presenting a voicemail icon within the line indicator. -
Page 52: Returning A Call
Dial your Desk Phone and allow it to ring When your voicemail greeting begins to play, enter your PIN over your greeting. Returning a Call While listening to a message or after listening to a message, press 9* to call that person back You may return to your voicemail box WITHOUT calling back in by pressing ## after talking to the person you called back Change your Voicemail PIN... - Page 53 Owner’s Manual...
-
Page 54: Retrieving Messages Via The Web
Retrieving messages via the Web Once logged in, click the Play button associated with the voicemail message you wish to listen to The voicemail message will play through your speakers Forward Voicemail Messages via the Web A user can forward a voicemail message from his or her voicemail box to another voicemail once logged into the personal website. - Page 55 If you have entered email address, fill in your email address, the subject line and any message you wish to include Select the delivery method: Send a link to the voicemail message or sent the voicemail message as an attachment Click the Send button when finished Owner’s Manual...
- Page 56 Voicemail Notification via Email You may setup your voicemail box to send you an email alert whenever someone leaves you a voicemail message. Go to www.accessline.com/login Enter your Desk Phone Number and PIN Click Login Select the Personal Info Tab at the top of the web page Select the Notification button Enter your email address in the space provided (you may enter multiple email addresses)
-
Page 57: To Create A Voicemail Group
To Create a Voicemail Group A Voicemail Group allows you to quickly forward a voicemail message to multiple other people without entering each person individually. Voicemail groups are created through your personal website. Once logged in, select the Personal Info Tab Select the Group Manager button Click the Create Group button Assign a Group Number- used when forwarding to a group through... -
Page 58: Change The Number Of Rings Before Voicemail Picks Up
Change the Number of Rings Before Voicemail Picks Up Your Voicemail box is programmed to take messages when you can’t answer your phone. If you want the phone to ring more or less times, you may change this setting: Press the Forward Softkey Using , select No Answer Press the Disable Soft Key... -
Page 59: Managing Contacts
Manage the call list by doing the following: To edit the phone number, press the Edit soft key. To return the call, press the Dial soft key. To view information about the call, press the More soft key followed by the Info soft key. -
Page 60: Adding Contacts
Adding Contacts You can add contacts to your contact directory: Manually • From a call list • Adding Contacts Manually To add a contact to the local contact directory manually: Press Select Contact Directory. Press the More soft key. Press the Add soft key. Enter first and/or last name of the contact from the keypad. - Page 61 Enter a contact number. This is a required field and it must be unique (not already in the directory). (Optional.) Change the Speed Dial Index. It is automatically assigned to the next available index value. Valid speed dial index values are from 1 to 9999. If you enter a speed dial index that already, “Speed dial index already exists”...
-
Page 62: Editing Contacts
To add a contact to the local contact directory from a call list: Do one of the following: A Press and then select Call Lists >Missed Calls, Received Calls, or Placed Calls as desired. b Press , or to access the desired call list. to highlight the contact. -
Page 63: Deleting Contacts
to highlight the contact. You can also use the * key to page up and the # key to page down. Press the Edit soft key Edit the contact information. Press the Save or Cancel soft keys to accept or cancel changes. Press to return to the idle display. -
Page 64: Placing Calls To Contacts
Placing Calls to Contacts To place a call to a contact in the local contact directory: Press Select Contact Directory. to highlight the contact. You can also use the * key to page up and the # key to page down. Press the Dial soft key. -
Page 65: Conformance
IMPORTANT SAFETY AND CONFORMANCE INFORMATION FOR IP PBX BASE UNIT AND DESKPHONES Conformance This equipment is designed for use in the United States. This equipment complies with the following standards: FCC Part 15, Subparts B, C, D FCC Part 68 UL60950 Analog extension ports: TNV3 CO port: TNV3... -
Page 66: Fcc Information
result in a risk of fire or electric shock. Never spill liquid of any kind on the product. To reduce the risk of electric shock, do not disassemble this product, • but take it to a qualified serviceman when some service or repair work is required. - Page 67 Connection to party line service is subject to state tariffs. (Contact the state public utility commission, public service commission or corporation commission for information.) This equipment is hearing aid compatible. Customer Owned Coin/Credit Card Phones To comply with state tariffs, the Telephone Company must be given notification prior to connection.
- Page 68 Electrical Safety Advisory It is strongly suggested that an AC surge arrestor be installed in the AC outlet to which this equipment is connected. Radio Interference This device complies with Part 15 of the FCC Rules. Operation is subject to the following two conditions: (1) this device may not cause harmful interference, and (2) this device must accept any interference received, including interference that may cause undesired operation.
Need help?
Do you have a question about the 4-Line Phone and is the answer not in the manual?
Questions and answers