Table of Contents
Advertisement
Quick Links
Advertisement
Table of Contents

Related Manuals for Planet ICA-102


Summary of Contents for Planet ICA-102
-
Page 1: Internet Camera
Internet Camera ICA-102/ICA-102W User’s Manual... -
Page 2: Ce Mark Warning
PLANET Technology. Disclaimer PLANET Technology does not warrant that the hardware will work properly in all environments and applications, and makes no warranty and representation, either implied or expressed, with respect to the quality, performance, merchantability, or fitness for a particular purpose. -
Page 3: Table Of Contents
ICA-102/ICA-102W Features............1 Package Contents ................. 3 Physical Details ................3 CHAPTER 2 INSTALLATION ............... 6 Requirements................. 6 Connecting ICA-102 series to the Camera Stand ....... 6 Hardware Install Procedure ............7 CHAPTER 3 INITIAL SETUP ..............8 Preparation..................8 Procedures..................8 CHAPTER 4 WEB USER INTERFACE.......... -
Page 4: Chapter 1 Introduction
102/102W can be placed wherever there is a wired/wireless LAN or an available xDSL/Cable modem connection, and the ICA-102 family also supports DDNS. Even when your gateway does not support DDNS, it can still co-operate with the ICA-102 family and provide live images to Internet users. -
Page 5: Internet Features
In order to view video over the Internet, users must know the Internet IP address of the gateway used by the ICA-102/102W Camera. But if the Gateway has a dy- namic IP address, DDNS (Dynamic DNS) is required. Since many existing Gateways do not support DDNS, this function is incorporated into the ICA- 102/102W Camera. -
Page 6: Package Contents
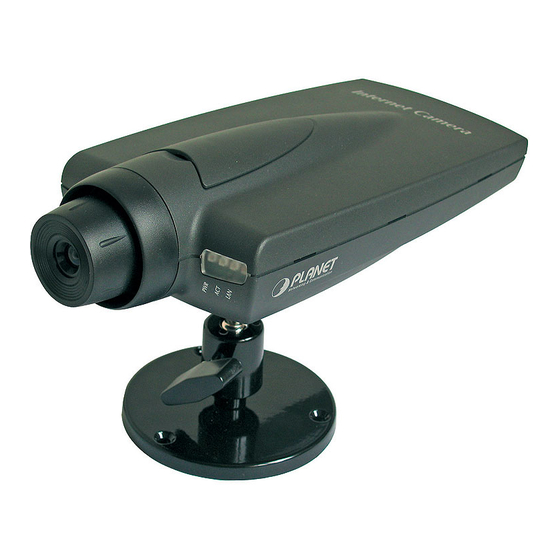
• Camera Stand • Power Adapter • CD-ROM • Quick Installation Guide If any of the above items are damaged or missing, please contact your dealer immedi- ately. Physical Details Front Panel Front Panel of ICA-102W Front Panel of ICA-102... -
Page 7: Rear Panel
Internet Camera User Guide Normally, it is not necessary to adjust the focus. The default Focus Ring focus range is from 1 meter (3 feet) to infinity. If the image is not clear, try adjusting the focus. The built-in microphone is mounted on the front. There is also a connection for an external microphone on the rear. - Page 8 Use a standard LAN cable to connect your ICA-102/102W Camera to a 10/100BaseT hub or switch. Note: LAN port On the ICA-102/102W Camera, attaching the LAN cable will disable the Wireless interface. Only 1 interface can be active at any time.
-
Page 9: Chapter 2 Installation
ICA-102 series' bottom screw hole. Attach the camera stand to ICA-102 series and station it for your application. There are three holes located in the base of the camera stand allowing ICA-102 series to be mounted on the ceiling or any wall securely. -
Page 10: Hardware Install Procedure
Hardware Install Procedure 1.Connect an Ethernet cable Connect one end of an Ethernet cable to the LAN port located on the ICA-102/102W rear panel and attach the other end to the network device (hub or switch). If you want to use wireless connection for ICA-102W, you can skip this step. -
Page 11: Chapter 3 Initial Setup
Chapter 3 Initial Setup Preparation The initial setup of ICA-102 series must be done through bundled Setup Wizard utility. Before starting installation, please ensure that: · Your PC can establish a physical connection to the Internet Camera. The PC and the Internet Camera must be directly connected (using the LAN port on the Inter- net Camera) or on the same LAN segment. - Page 12 4. The screen will list all cameras in your LAN. You can view their current settings by selecting respective Device Name from left panel. Choose the one you want to configure, click “Next”. 5. A password verification screen will pop up. Please key in administrator name and password for login.
- Page 13 7. Enter the desired network settings: IP Address, Subnet Mask, Default Gateway, Primary DNS and Secondary DNS. Click “Next” to proceed. 8. If you are using ICA-102, please skip to step 10. This screen allows you to config- ure wireless settings: Mode, Authentication Type, ESSID, Domain, and Channel.
- Page 14 10. The next screen allows you to enter a suitable Description, and set the correct Date, Time, and Time Zone. Make any desired changes, and then click “Next” to continue. 11. The Save settings screen displays all the details of your camera. Click “Save” if all settings are correct, or click “Back”...
- Page 15 Internet Camera User Guide 13. Click on “Web UI” to access the web interface of ICA-102 series. Please refer to chapter 4 for more information about web UI. Click on “Exit” to close Setup Wiz- ard.
-
Page 16: Chapter 4 Web User Interface
Web User Interface Introduction After finishing the initial setup of ICA-102 series, your camera is ready to use for all users in LAN. This chapter describes how to view live image and manage camera with web browser. The demonstration screens are from ICA-102W; the screens of ICA-102 are similar except some wireless settings. - Page 17 Internet Camera User Guide 2. Select “Security” tab, choose “Internet” zone. Click “Custom Level…” button.
- Page 18 3. Find the settings of “Download unsigned ActiveX controls”, change the option to “Prompt”. 4. Click “OK” button. 5. Click “Yes” while Warning dialog box appears. 6. Click “Apply”, then “OK” button to finish the setting. After the setting is done, a “Security Warning” dialog box would appear while you select “View Video”.
-
Page 19: Administration
Internet Camera User Guide Once the installation is successfully finished, you will see the live video immediately. Administration Once you click “Administration” option, a dialog box will pop up. Please enter default username/password as admin/admin to access the management screens. - Page 20 System Settings: Device Name: This field displays the name of your ICA-102 series. It cannot be changed. Description: This field is used for entering a descriptive name for the location used by ICA-102 series. Time: Enter the current time. Date: Enter the current date.
- Page 21 After making sure all settings in the System are correct, click on the “Apply” icon to store the settings for ICA-102 series. You can alternatively click on the “Cancel” icon to restore all settings to the values last saved to or retrieved from ICA-102 series.
- Page 22 Network IP Setting: There are two options to select from the IP setting. Access to ICA-102 series is done through assigning a proper IP ad- dress. Please make sure to use a vacant IP address when you assign Note the IP address for ICA-102 series. This will prevent errors from occur- ring if the IP address is overlapped.
- Page 23 Internet Camera User Guide The default settings are as follows: · Default IP – 192.168.0.20 · Subnet Mask – 255.255.255.0 Wireless Setting: (ICA-102W only) Mode: Use this option to determine the type of wireless communication for ICA-102W. There are two choices of Infrastructure, and Ad-hoc. The default setting for the Connection Mode is Infrastructure.
- Page 24 WEP Key Setting: WEP Encryption: Select the option used on your Wireless LAN. None - This is the default setting. If selected, data is not encrypted before be- ing transmitted. 64 Bit Keys - If selected, data is encrypted with the 64-bit default key you en- tered below.
- Page 25 · Internet users can then connect to your LAN using the Domain Name allo- cated by the DDNS service provider. Service Provider: Choose a service provider from the list. ICA-102 series only supports DynDNS cur- rently. Host Name: Enter the host name, which DDNS service provider assigned to you.
- Page 26 ICA-102 series. Second Port: This option allows you to open a second port for ICA-102 series. The HTTP con- nections (using your Web Browser) can use the port number you specified below instead of the standard HTTP port 80. The configurable port range is 1024~65534.
- Page 27 After making sure all settings in the Image are correct, click on the “Save” icon to store the settings for ICA-102 series. You can alternatively click on the “Cancel” icon to restore all settings to the values last saved to or retrieved from ICA-102 series.
-
Page 28: Admin Login
User Admin Login: These fields are used for entering the Administrator ID along with the password to access the Administration settings. Be sure to enter the password twice to confirm the details, once in the Password field and again in the Verify Password field. The default settings for Administrator ID and Password are both admin. - Page 29 Internet Camera User Guide Add/Modify User: User Name: Enter the name for the user. Spaces, punctuation, and special characters must NOT be used in the name. Also, names are case-insensitive (case is ignored), so you can NOT use 2 names with the same spelling and different case.
- Page 30 E-mail Alerts: Enable: Check the box to enable the E-Mail Alert feature. E-mails are sent when motion is detected. Motion detection can be triggered by rapid changes in lighting condi- tion, as well as by moving objects. For this reason, it should only be used indoors.
- Page 31 Internet Camera User Guide Outgoing Mail SMTP Server: Enter the address of the SMTP (Simple Mail Transport Protocol) Server to be used to send E-Mail. If the SMTP Server requires a "login" in order to send mail, check the box My Mail Server Requires Authentication and enter your login name and pass- word for the SMTP Server.
- Page 32 This screen is displayed when you click the Upgrade Firmware button on the Status screen. This screen allows you upgrade the Firmware (software) in your ICA-102/102W Cam- era. Before using this screen, your must download the upgrade file to your PC.
- Page 33 The image size of the video stream. Current Viewers: This shows how many viewers are currently viewing the Video stream. Log: ICA-102 series will record the system events here. You can use these logs for diagno- sis. Refresh: Click “Refresh” button to renew the system log.
- Page 34 Restart: Click “Restart” button to reboot your camera. Restore Factory Defaults: Click “Restore Factory Defaults” button to load default settings to camera.
-
Page 35: Chapter 5 Client Utility
Internet Camera User Guide Chapter 5 Client Utility Install Procedure STEP 1 Insert the CD-ROM into the CD-ROM drive to initiate the autorun program. Once completed a menu screen will appear as follows: STEP 2 To install the Viewer & Recorder Application click on the "Viewer & Recorder" hyper- link to activate the installation procedure for the application program. - Page 36 STEP 4 A “Choose Destination Location” screen appears, you may click on “Next” to accept the recommended destination location or click on “Browse” to select another location. After specifying the desired destination location, click on “Next” to proceed further. STEP 5 The Select Program Folder prompt will appear providing information of where the application will be located, click on “Next”...
-
Page 37: Using Viewer & Recorder Utility
Internet Camera User Guide STEP 6 A message box appears to inform you that an ActiveX plug-in has been installed to your computer.. STEP 7 Once the setup is complete, the following message box pops up. Click “OK” button to close the screen. -
Page 38: Add Camera
The Camera List displays all available ICA-102 series you have defined. The Current Recordings lists scheduled recording activity in progress. Add Camera Click “Add Camera” button, the utility will search available cameras in LAN automati- cally. Once it finds the camera, the detailed information will be displayed. If the camera has enabled User Access control, you have to enter the authorized Name and Pass- word in Login field. - Page 39 Internet Camera User Guide If you want to add a camera which located on Internet, click “Internet” tab and fill in the necessary information: IP address, port number, and login name/password (if required). Click “Test” button to check the connection to the camera, and click “Add” to add the camera to Camera List.
-
Page 40: Delete Camera
Delete Camera Select an existing camera from Camera List, click “Delete Camera” button to remove it from the list. View To view live video with utility, select an existing camera from Camera List, then click “View” button. The live video of the selected camera will pop up immediately. Play - Use this to re-start viewing, after using the Stop button. - Page 41 Internet Camera User Guide Files To view recorded video or snapshot (still image) pictures, click the Files button under the Files panel on the main screen, then select the desired option. Select a file and click “Play”, your computer will use Media Player program to play the file.
- Page 42 Schedule Recordings To schedule a recording session, click “Schedule” button. The screen displays all scheduled recordings. Click “Add” button, and select desired parameters, and then click “Save” button. The new schedule will be added to the list immediately. To modify an existing schedule, select the schedule and click “Modify”.
-
Page 43: Appendix A Frequently Asked Questions
Q: Can ICA-102 series be setup as a PC-cam on the computer? A: No, ICA-102 series can be used only on Ethernet and Fast Ethernet network. Q: Can ICA-102 series be connected on the network if it consists of only private IP addresses? A: Yes, ICA-102 series can be connected to LAN with private IP addresses. -
Page 44: Appendix B Trouble Shooting
Ensure that your PC is using an IP Address within the range 192.168.0.1 to 192.168.0.254 (excluding 192.168.0.20). Also, the Network Mask should be set to 255.255.255.0 to match ICA-102 se- ries. In Windows, you can check these settings by using Control Panel-Network to check the Properties for the TCP/IP protocol. - Page 45 Q: Noisy images occur. How can I solve the problem? A1: The video images might be noisy if ICA-102 series is used in a very low light environment. To solve this issue you need more light.
-
Page 46: Appendix C Specification
Appendix C Specification Model ICA-102 ICA-102W Hardware Specifications 10/100M Ethernet port None Built-in 802.11g wireless LAN Wireless LAN module IP assignment Manually assigned, DHCP WEP encryption None 64-bit, 128-bit PWR, ACT, LAN PWR, ACT, LAN, WLAN LED indicator Power requirement...
Need help?
Do you have a question about the ICA-102 and is the answer not in the manual?
Questions and answers