Planet ICA-750 User Manual
Dual mode ccd box internet camera
Hide thumbs
Also See for ICA-750:
- Specifications (2 pages) ,
- Quick installation manual (24 pages) ,
- Quick installation manual (16 pages)
Table of Contents
Advertisement
Quick Links
Advertisement
Table of Contents

Subscribe to Our Youtube Channel
Related Manuals for Planet ICA-750


Summary of Contents for Planet ICA-750
- Page 1 Dual Mode CCD Box Internet Camera ICA-750 User’s Manual...
- Page 2 PLANET Technology. Disclaimer PLANET Technology does not warrant that the hardware will work properly in all environments and applications, and makes no warranty and representation, either implied or expressed, with respect to the quality, performance, merchantability, or fitness for a particular purpose.
-
Page 3: Table Of Contents
2.1 Hardware Installation .................... 12 2.2 Software Quick Configuration................12 3. Viewing live video ...................... 19 3.1 Connecting ICA-750 on your LAN ................. 19 3.2 Connecting ICA-750 via Internet ................21 3.3 General Options ....................23 3.4 Setting the Focus ....................23 4. - Page 4 Appendix C --- Bandwidth Estimation................54 ICA-750 User Guide...
-
Page 5: Introduction
1. Introduction Equipped with MPEG-4 and M-JPEG video streaming, the PLANET ICA-750 is a Dual Mode CCD Box Internet Camera which is designed for professional security and high-quality video/audio requirement. The manual Day/Night switch with ICR (IR-cut filter Removable), CS-Mount optical lens and PoE (Power over Ethernet) features provides the most flexibility of IP surveillance. -
Page 6: System Requirements
· Network bandwidth: In VGA resolution mode, minimum upload bandwidth is 1Mbps. Optional: . Sound Card . Microphone (for PC) . Speaker (for PC and ICA-750) 1.3 Features Day/Night Switch with ICR (IR-cut filter removable) MPEG-4 and M-JPEG dual codec 2-Way Audio supported... -
Page 7: Application
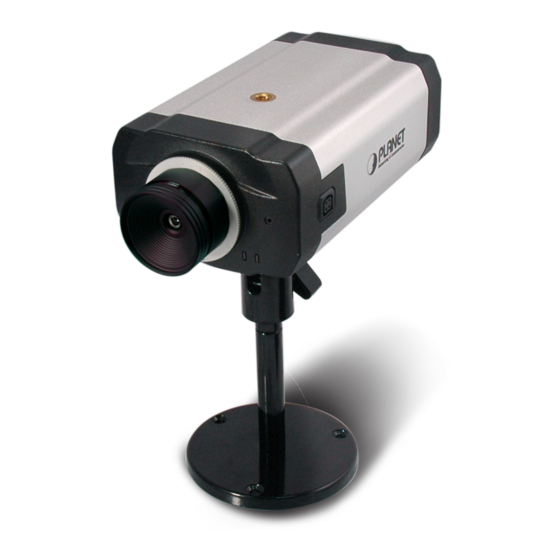
1.4 Application Remote Monitoring applications 1.5 Outlook Dual Mode CCD Box Internet Camera... -
Page 8: Front Panel
1.5.1 Front Panel The front panel of ICA-750 is shown below. Microphone LED Definition Status LED Description No power. Power on. Blinking The Power LED will blink during start up (15 ~ 20 sec). LAN connection is not detected. LAN connection is detected. -
Page 9: Rear Panel
1.5.2 Rear Panel The rear panel of ICA-750 is shown below. LAN (PoE) Reset AUDIO AUDIO DI / DO I/O Information Port Definition PORT PORT Description Reset to manufacturer default valued and reboot. When pressed and held over 10 seconds, the settings of IP Reset Camera will be set to the default values. -
Page 10: Technical Specifications
TCP/IP, SMTP, HTTP, DHCP, NTP, RTSP/RTP, UPnP, FTP, Protocols DDNS, HTTPS, SYSLOG, JABBER Management Client Web browser, Cam Viewer software Security Username and Password, HTTPS, IP Filter Motion Detection Area 4 Area definable E-mail Notification Triggered by motion detection and input I/O ICA-750 User Guide... -
Page 11: Cs Mount Lens
1.7 CS Mount Lens The following list contains the CS Mount lenses which have been tested on the Internet Camera: Brand Model 0416-M1 0816-M1 TOPICA TP-0550WOE TP-0560WOE Computar T2Z3514CS-2 TV308DC-2 SpaceCom TAV2712DC Pentax C70220DCPS Kowa LMVZ38A-IR Fujinon YV2.8x2.8LA-SA2L 13VG308AS 13VG2812AS 12VG412ASIR Tamron 12FM04CST... -
Page 12: Installation
2. Installation The followings are instructions for setting up the ICA-750. Refer to the illustration and follow the simple steps to quickly install. 2.1 Hardware Installation 1. Connect an Ethernet cable Connect one end of an Ethernet cable to the LAN port located on the camera’s rear panel and connect the other end to the network device (hub or switch). - Page 13 3. The welcome screen appears. Click on “Setup Camera” button to start the wizard. 4. After clicking the setup camera button, it will auto search for the cameras on your network. Click on to continue. Dual Mode CCD Box Internet Camera...
- Page 14 6. The administrator login window will pop up. If the Administrator Name and Administrator Password have been set, you will be prompted to enter them. If using the default values, please enter “admin” for both the name and the password. Click on “OK” to continue. ICA-750 User Guide...
- Page 15 7. On the following Camera Settings screen, you can fill and configure the Device Name, Description, Time Zone, Local Date and time here. Click on to continue. 8. You can choose “Fixed IP Address” or “Dynamic IP Address” here. Click on continue.
- Page 16 DNS. Click on to continue. 10. The next screen below will display all details of the camera. Click on to continue if those settings are correct, or click on back to modify any incorrect values. ICA-750 User Guide...
- Page 17 In this confirmation window below, click on “OK” to confirm that you want to save the new settings. If you want to cancel your changes, please click on “Cancel”. 2. After confirming, the wizard will start to save the new settings as below screen. Dual Mode CCD Box Internet Camera...
- Page 18 13. When the saving process is completed, the prompt window will be displayed as below screen. Click on “OK” to finish. 4. The setup wizard now is completed. Click on “Exit” to close the setup wizard. After modifications, you may now connect the camera with the new configuration via web rowser. ICA-750 User Guide...
-
Page 19: Viewing Live Video
3. Viewing live video 3.1 Connecting ICA-750 on your LAN After finishing the Setup Wizard, all LAN users can view live video by using the Internet Explorer. This Chapter has details of viewing live video on your LAN. 1. Start the Web browser. - Page 20 1. Video will start playing automatically. There may be a delay of a few seconds while the video stream is buffered. 2. There are a number of options available on this screen, accessed by select list, button or icon. The details are described in Chapter 3.3 – General Options. ICA-750 User Guide...
-
Page 21: Connecting Ica-750 Via Internet
3.2 Connecting ICA-750 via Internet To establish a connection from your PC to the camera via Internet, please obtain the following information from the Administrator of the camera you wish to connect: • Internet IP Address or Domain Name of the camera. - Page 22 1. Video will start playing automatically. There may be a delay of a few seconds while the video stream is buffered. 2. There are a number of options available on this screen, accessed by select list, button or icon. The details are described in Chapter 3.3 – General Options. ICA-750 User Guide...
-
Page 23: General Options
3.3 General Options These options are always available, regardless of the type of camera you are connected to. Click this to set the output I/O port to ON mode. Click this to set the output I/O port to OFF mode. Click this to get better video quality during the daytime. -
Page 24: Web Management
2. You will then be prompted for a username and password. Note: 1. If using the default values, enter “admin” for the name, and “admin” for the password. 2. The Administrator’s ID / Password can be set on the “Maintenance” of administration menu. ICA-750 User Guide... - Page 25 3. After login, the administration page will be displayed as below. 4. The administration menu contains following options. System Network Setup DDNS IP Filter I/O Port Video & Audio Video & Audio Video Access User Database Motion Detection E-Mail Event Instant Messaging Event Trigger Maintenance...
-
Page 26: Setup
This button will open a sub-page where you have 2 options: Change Button 1. Sync with PC: Set the date and time to match your PC. 2. Set New Time: Manual enter the correct date and time. ICA-750 User Guide... - Page 27 Choose the Time Zone for your location from the drop-down list. If your location is currently using Daylight Saving, enable the Time Zone “Adjust for daylight saving” checkbox. You must UNCHECK this checkbox when Daylight Saving finishes. Enable or disable the Time Server feature as required. If Enabled, the camera will contact a Network Time Server at Network Time Protocol regular intervals and update its internal timer.
-
Page 28: Network
Obtain an IP address automatically. Primary DNS server: Use the same value as PCs on your LAN. Use the following DNS server address Secondary DNS server: This DNS will be used if the Primary DNS does not respond. ICA-750 User Guide... - Page 29 Secondary Port This sets the port number for HTTP connection to the camera, whether for administration or viewing video. Enable HTTP If enabled, you can connect with either port 80 or the secondary Secondary Port port. You must enter the secondary port number (1024~65535) in the field provided.
-
Page 30: Ddns
If the IP address has changed, the DDNS Server will be notified. Check WAN IP Address NOTE: If the DDNS service provider provides some software to perform this IP address update or notification, you should NOT use this software. The update is performed by the camera. ICA-750 User Guide... -
Page 31: Ip Filter
4.1.4 IP Filter This page will be displayed after clicking on “Setup > IP Filter” of the administration menu. It helps you to allow or deny the IP address by filtering. IP Filter The IP Filter feature allows administrators to control network IP Filter camera access by filtering IP address. -
Page 32: I/O Port
It indicates the current state of the output port. Default State Select the desired option from the drop-down list. Select the option to control the output state. Manual Trigger Action When Triggered If an event is happened, it will trigger the event alerting. ICA-750 User Guide... -
Page 33: Video & Audio
4.2 Video & Audio 4.2.1 Video & Audio This page will be displayed after clicking on “Video & Audio > Video & Audio” of the administration menu. It allows you to adjust the video and audio configuration. MPEG-4 Settings Select the desired video resolution format. Resolution Video Quality Constant Bit Rate: Select the desired bit rate. - Page 34 Enable this setting if you want text to be displayed on the Video image, and enter the desired text - up to 20 characters. This feature is often Text Display used to identify each camera when multiple cameras are installed. ICA-750 User Guide...
- Page 35 Day/Night Switch Enable Night Enable Night switch schedule by checking this checkbox. Vision Schedule Choose the desired start time using a 24 hr clock. Start Time End Time Choose the desired start time using a 24 hr clock. Dual Mode CCD Box Internet Camera...
-
Page 36: Video Access
This displays all periods you have entered into the database. If you Scheduled Periods have not entered any periods, this list will be empty. Use the Delete button to delete the selected item in the list. Delete Button ICA-750 User Guide... - Page 37 Add New Schedule Choose the desired option for the period. Start Time Enter the start time using a 24 hr clock. End Time Enter the end time using a 24 hr clock. Click this button to add a new period. Add Button Clear Button Click this button to clear the adjust values.
-
Page 38: User Database
Note: Operator level allows user to switch day/night version and to trigger output ports manually. Click this button to add a new user, using the data shown on screen. Add Button Click this button to clear the input fields, ready to add a new user. Clear Button ICA-750 User Guide... -
Page 39: Event
4.3 Event 4.3.1 Motion Detection This page will be displayed after clicking on “Event > Motion Detection” of the administration menu. It allows you to set detection areas. Set Detection Areas You can set the full screen or areas of the video image to be examined. Note that Motion detection can be triggered by rapid changes in lighting Area Screen condition, as well as by moving objects. -
Page 40: E-Mail
SMTP Server Address Enter the address of the SMTP Server to be used to send E-Mail. Select the desired Authentication type for the SMTP Server. Authentication Enter your login name for the SMTP Server. SMTP Login name ICA-750 User Guide... - Page 41 Enter your password for the SMTP Server. SMTP Password Enter the name for the POP Server. POP server name Enter the E-Mail address to be shown in the "From" field when the Show "From" as E-Mail is received. E-Mail Setup Enter at least one E-Mail address;...
-
Page 42: Ftp
Enter your login name for the FTP Server. Password Enter your password for the FTP Server. Check the box to enable the Passive mode feature of the FTP. Enable Passive Mode File Path Name Enter the file path/name of the FTP. ICA-750 User Guide... -
Page 43: Instant Messaging
4.3.4 Instant Messaging This page will be displayed after clicking on “Event > Instant Messaging” of the administration menu. It allows you to set Jabber and HTTP notification. Jabber Enable Enable this checkbox to use Jabber which is a free Instant Messaging. Server Address Enter the address of your Jabber server. - Page 44 Post: If there are problems related to long URLs and non-ASCII character repertoires, which can make it necessary to use "POST" even for independent processing. ICA-750 User Guide...
-
Page 45: Event Trigger
4.3.5 Event Trigger This page will be displayed after clicking on “Event > Event Trigger” of the administration menu. It allows you to set the schedule and actions of the event. Event Schedule The Event Schedule shows all the event types currently configured in Schedule List the camera New Schedule... - Page 46 Video type - Video Format: Select the desired type for the video file. Pre/Post Capture: Select the desired length. The size of the file depends on this setting, and also the Video size and degree of compression. ICA-750 User Guide...
-
Page 47: Administration
4.4 Administration 4.4.1 Maintenance This page will be displayed after clicking on “Administration > Maintenance” of the administration menu. Administrator Login Enter the name for the Administrator here. Administrator ID Administrator Password The password for the Administrator. Verify Password Re-enter the password to ensure it is correct. Firmware Upgrade Click on "Browse"... - Page 48 Clear File Name only clears the input for the "Restore Configuration File" field. Click on “Defaults” button to reloads all default settings on Restore Factory Defaults the camera. Restart Camera Click on ”Restart” button to restarts the camera. ICA-750 User Guide...
-
Page 49: Status
4.4.2 Status This page will be displayed after clicking on “Administration > Status” of the administration menu. System Device Name This shows the name of the camera. Description This shows the description of the camera, such as location. The version of the current firmware installed. F/W version Network MAC Address... - Page 50 Buttons Click on this button will call the help window. Help Refresh Update the log and any other data on screen. ICA-750 User Guide...
-
Page 51: Log
4.4.3 Log This page will be displayed after clicking on “Administration > Log” of the administration menu. This is a log of system activity. System Log Refresh Button Click on this to update the data shown on screen. Clear Log Click this button to restart the log. -
Page 52: Appendix A --- Streaming Video / Audio Solution
• To stream video through the RTP/RTSP protocol from camera (MPEG-4 mode only) rtsp://<ip>/img/media.sav Note: Users need to specify the desired protocol in the players. • To snapshot a JPEG image (160*120, very low quality) through a 3G mobile phone: http://<ip>/img/mobile.cgi ICA-750 User Guide... -
Page 53: Appendix B --- Enable Activex Options On Your Pc
Appendix B --- Enable ActiveX options on your PC Your Internet Explorer security settings must allow for the web page to work correctly. To use the ICA-750, user must setup his IE browser as follows: From your IE browser ”Tools”... - Page 54 Here is a guideline to help you roughly estimate the bandwidth requirements for your ICA-750. The required bandwidth depends on content of video source. The slow motion video will produce smaller bit rate generally and fast motion will produce higher bit rate vice versa.
Need help?
Do you have a question about the ICA-750 and is the answer not in the manual?
Questions and answers