Table of Contents
Advertisement
Quick Links
Advertisement
Table of Contents

Subscribe to Our Youtube Channel
Related Manuals for Planet ICA-5250


Summary of Contents for Planet ICA-5250
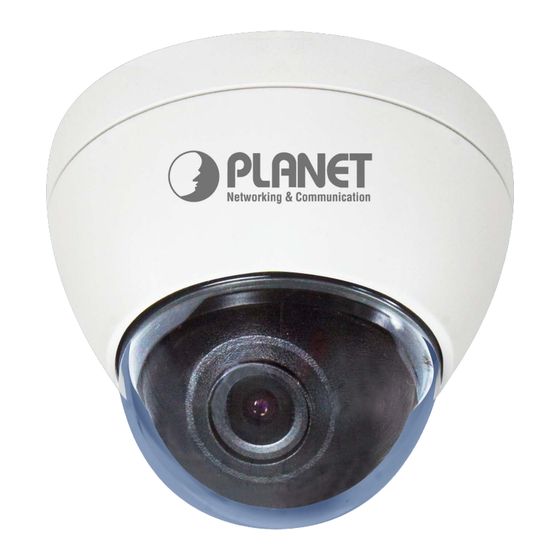
- Page 1 Full HD Ultra-mini Vandal Dome ICA-5250 Full HD Ultra-mini Vandal Dome ICA-5250...
- Page 2 Further, PLANET reserves the right to revise this publication and to make changes from time to time in the contents hereof without obligation to notify any person of such revision or changes.
- Page 3 Do not dispose of WEEE as unsorted municipal waste; they should be collected separately. Revision User’s Manual for PLANET Full HD Ultra-mini Vandal Dome Model: ICA-5250 Rev: 1.00 (June.2013) Part No. EM-ICA5250...
-
Page 4: Table Of Contents
1.4 Product Specifications................. 9 Chapter 2. Hardware Interface................11 2.1 Physical Descriptions.................11 2.1.1 Identification of ICA-5250 physical details ........11 2.1.2 I/O Control Instruction..............12 2.2 Hardware Installation ................13 2.2.1 Installing camera with screws............13 2.2.2 Installing camera w/stand with screws........14 2.3 Initial Utility Installation ................ - Page 5 Full HD Ultra-mini Vandal Dome ICA-5250 Appendix D: Planet DDNS Application ............66 Appendix E: Configuring Port Forwarding Manually........67 Appendix F: Troubleshooting & Frequently Asked Questions....70 Appendix G: Micro SD Card Compatibility ........... 74...
-
Page 6: Chapter 1. Product Introduction
Mini Design for Easy Installation The ICA-5250 is an ultra lightweight IP camera. Its weight and size are light and compact, respectively, thus offering a quick and simple installation on the ceilings or walls inside or outside of houses and buildings. Installation can be finished in less than 60 seconds. Furthermore, it can... - Page 7 Full HD Ultra-mini Vandal Dome ICA-5250 Exceptional Image Quality Together with powerful image processing attributes like Wide Dynamic Range and 3D Digital Noise Reduction (3DNR) technology, the camera is able to filter the intense backlight surrounding a subject and remove noises from video signal. The result is that an extremely clear and exquisite...
-
Page 8: Features
ICA-5250 Advanced Event Management The ICA-5250 supports a number of advanced features to enhance surveillance flexibility and event management capabilities. The advanced features include inputs/outputs for connecting to external devices such as door sensors and relays to activate light or closed doors. -
Page 9: Product Specifications
Full HD Ultra-mini Vandal Dome ICA-5250 Supports IPv6 in addition to IPv4 RTSP / UPnP / 3GPP / HTTPS protocols selectable Easy Installation & Management ONVIF compliant for interoperability IP66 and IK10 outdoor classifications with fan for rigorous environment Built-in Samba client for NAS... - Page 10 Full HD Ultra-mini Vandal Dome ICA-5250 Password protection, IP address filtering, HTTPS encrypted data Security transmission, 802.1X Port-based authentication for network protection, QoS/DSCP Users 10 clients on-line monitoring at the same time System Integration Application Programming Open API for software integration...
-
Page 11: Chapter 2. Hardware Interface
Full HD Ultra-mini Vandal Dome ICA-5250 Chapter 2. Hardware Interface 2.1 Physical Descriptions 2.1.1 Identification of ICA-5250 physical details... -
Page 12: I/O Control Instruction
Full HD Ultra-mini Vandal Dome ICA-5250 Interface Description Image sensor User could adjust the sense manually. Micro-SD User can insert a micro SD card into this slot for event recording. This button is hidden in the pinhole. This button is used to restore the all factory default settings. -
Page 13: Hardware Installation
Full HD Ultra-mini Vandal Dome ICA-5250 Name Cable Color Function Yellow/Green Digital signal input Blue Digital signal output Orange The LAN socket is a RJ-45 connector for connections to 10Base-T Ethernet or 100Base-TX Fast Ethernet cabling. This Ethernet port built N-Way protocol can detect or negotiate the transmission speed Ethernet of the network automatically. -
Page 14: Installing Camera W/Stand With Screws
Full HD Ultra-mini Vandal Dome ICA-5250 2.2.2 Installing camera w/stand with screws 1. Open the stand kit, which includes a conversion ring and two sets of screws. 2. Use three screws to lock the conversion ring on the ceiling or the wall. -
Page 15: Initial Utility Installation
This chapter shows how to quick set up your H.264 camera. The camera is with the default settings. However to help you find the networked camera quickly the windows utility PLANET IP Installer can search the cameras in the network that will help you to configure some basic settings before you start advanced management and monitoring. - Page 16 Full HD Ultra-mini Vandal Dome ICA-5250 If the welcome screen does not appear, click “Start” at the taskbar. Then, select “Run” and type “D:\Utility\PLANETIPinstaller\PLANETIPinstaller.exe”, assuming D is your CD-ROM drive. 3. OS: Windows XP SP2 or above. If the following “Windows Security Alert” pops up, please click “Unblock”.
- Page 17 Camera IP subnet or PC IP subnet accordingly. (6) A quick way to access remote monitoring is to left-click the mouse twice on a selected IP camera listed on “Device list” of PLANET IP Installer. An IE browser will be opened.
-
Page 18: Using Upnp Of Windows Xp Or 7
Full HD Ultra-mini Vandal Dome ICA-5250 (7) Then, please key in the default “Username: admin” and “Password: admin” in the following message box. (8) If the user name and password are input correctly, the following web page will be displayed. - Page 19 Full HD Ultra-mini Vandal Dome ICA-5250 Please note that MS Windows 2000 does not support UPnP feature. Go to Start > Settings, and Click Control Panel. The “Control Panel” will display on the screen and double click “Add or Remove Programs” to continue.
- Page 20 Full HD Ultra-mini Vandal Dome ICA-5250 The following screen will appear, select “Networking Services” and click “Details” to continue. The “Networking Services” will display on the screen, select “Universal Plug and Play” and click “OK” to continue.
- Page 21 Full HD Ultra-mini Vandal Dome ICA-5250 Please click “Next” to continue. The program will start installing the UPnP automatically. You will see the pop-up screen below. Please wait while Setup configures the components.
- Page 22 Full HD Ultra-mini Vandal Dome ICA-5250 Please click “Finish” to complete the UPnP installation Double-click “My Network Places” on the desktop, and the “My Network Places” will display on the screen. Double-click the UPnP icon with Internet Camera to view your device in an internet...
-
Page 23: Windows 7
Full HD Ultra-mini Vandal Dome ICA-5250 2.4.2 Windows 7 Go to Start > Control Panel > Network and Internet > Network and Sharing Center, if network discovery is off; click the arrow button to expand the section. Click Turn on network discovery, and then click Apply. -
Page 24: Setting Up Activex To Use The Internet Camera
Full HD Ultra-mini Vandal Dome ICA-5250 2.5 Setting up ActiveX to use the Internet Camera The Internet Camera web pages communicate with the Internet Camera using an ActiveX control. The ActiveX control must be downloaded from the Internet Camera and installed on your PC. Your Internet Explorer security settings must allow for the web page to work correctly. -
Page 25: Internet Explorer 6 For Windows Xp
Full HD Ultra-mini Vandal Dome ICA-5250 2.5.1 Internet Explorer 6 for Windows XP From your IE browse ”Tools” ”Internet Options…” ”Security” ”Custom Level…”, please set up your “Settings” as follows: Set the first 3 items • Download the signed ActiveX controls •... -
Page 26: Internet Explorer 7 For Windows Vista
Full HD Ultra-mini Vandal Dome ICA-5250 By now, you have finished your entire PC configuration for Internet Camera. 2.5.3 Internet Explorer 7 for Windows Vista From your IE browse ”Tools” ”Internet Options…” ”Security” ”Internet” ”Custom Level…”, please set up your “Settings” as follows: •... - Page 27 Full HD Ultra-mini Vandal Dome ICA-5250 By now, you have finished your entire PC configuration for Internet Camera.
-
Page 28: Chapter 3. Web-Based Management
The Default IP: “http://192.168.0.20“ The login window of Internet Camera will appear, Default login username and password is: admin admin If the User Name and Password have been changed with PLANET IP Installer, please enter the new User Name and Password here. -
Page 29: Live Viewing
Full HD Ultra-mini Vandal Dome ICA-5250 Web browser may display the “Security Warming” window, select “Yes” to install and run the ActiveX control into your PC. After the ActiveX control is installed and run, the first image will be displayed. - Page 30 Full HD Ultra-mini Vandal Dome ICA-5250 (1)Configure Get into the administration page. (2)Snapshot Video Snapshot (3)Status Bar Show system time, video resolution, and video refreshing rate Select video screen “default, 1/2x, 1x, 2x” for view currently (4)Screen Size camera screen size...
- Page 31 Full HD Ultra-mini Vandal Dome ICA-5250 Snapshot Save a JPEG picture. Record the video in the local PC. It will ask you where to save the video. To stop recording, right-click the mouse again. Select Record Start “Record Stop”. The video format is AVI. Use Microsoft Media Player to play the recorded file.
-
Page 32: Configuration
Full HD Ultra-mini Vandal Dome ICA-5250 3.4 Configuration Click to get into the administration page. Click to go back to the live video page. 3.5 System 3.5.1 System Information 1. Server Information: Set up the camera name, select language, and set up the camera time. - Page 33 Full HD Ultra-mini Vandal Dome ICA-5250 This is the Camera name. This name will show on the Server Name IP Installer. There are English, Traditional Chinese, Simplified Chinese, French, Russian, Italian, Spanish, German, Portuguese and Polish to select. When changed, it...
- Page 34 Full HD Ultra-mini Vandal Dome ICA-5250 Server time setting:Select options to set up time - “NTP”, “Synchronize with PC’s time”, “Manual”, “The date and time remain the same”.
-
Page 35: User Management
Full HD Ultra-mini Vandal Dome ICA-5250 3.5.2 User Management IP camera supports three different users -- administrator, general user, and anonymous user. Yes:Allow anonymous login Anonymous User Login No:Need user name & password to access this IP camera Add user Type the user name and password, and then click “Add/Set”. -
Page 36: System Update
Full HD Ultra-mini Vandal Dome ICA-5250 3.5.3 System Update To update the firmware online, click “Browse…” to select the Firmware Upgrade firmware. Then click “Upgrade” to proceed. Reboot System Re-start the IP camera. Delete all the settings in this IP camera. -
Page 37: Network
Full HD Ultra-mini Vandal Dome ICA-5250 3.6 Network 3.6.1 IP Setting IP camera supports DHCP and static IP. - Page 38 Full HD Ultra-mini Vandal Dome ICA-5250 Using DHCP, IP camera will get all the network parameters DHCP automatically. Please type in IP address, subnet mask, gateway, and DNS Static IP manually. IPv6 is a newer numbering system that provides a much larger address pool than IPv4, which accounts for most of today’s...
- Page 39 Full HD Ultra-mini Vandal Dome ICA-5250 This IP camera supports UPnP. If this service is enabled on your computer, the camera will automatically be detected and a new UPnP icon will be added to “My Network Places.” Note: UPnP must be enabled on your computer.
-
Page 40: Advanced
Full HD Ultra-mini Vandal Dome ICA-5250 If your PC supports LLTD, enable this function then you can check the connection status, properties, and device position (like IP address) of this IP Camera in the network map. LLTD In the computer running Windows Vista or Windows 7, you can find LLTD through the path: Call out the Control Panel →... - Page 41 Full HD Ultra-mini Vandal Dome ICA-5250 Created Request: Setting the secure identification and apply it There are two ways to set Certificate- Install Signed Certificate or Create Self-Signed Certificate. SNMP (Simple Network Management Protocol) SNMP provides a simple framework for administering networked hardware. To manage the IP camera, you have to prepare an MIB browser or similar tools first.
- Page 42 Full HD Ultra-mini Vandal Dome ICA-5250 SNMPv3: For data security reason, the authentication and encryption assurances are added when developing SNMPv3. The user has to give not only the security name (the same as "community name" in v1&v2c, or sometimes we call it "context name") but the password in order to access the IP camera.
-
Page 43: Access List
Full HD Ultra-mini Vandal Dome ICA-5250 Access List You can deny an IP address or a range of IP address so that they cannot access the IP camera. Tick the "enable" box, key in the IP address you want to deny, select” deny" then click” Add" to add it to the list. - Page 44 Full HD Ultra-mini Vandal Dome ICA-5250 bandwidth is divided. For example, if you set 5, 10, and 20 for the three items, then the bandwidth of the three items is 5:10:20. There is no difference between setting "0, 0, 0" or "63, 63, 63"...
-
Page 45: Pppoe & Ddns
Full HD Ultra-mini Vandal Dome ICA-5250 3.6.3 PPPoE & DDNS PPPoE: Stands for Point to Point Protocol over Ethernet A standard builds on Ethernet and Point-to-Point network protocol. It allows Internet camera to connect to Internet with xDSL or cable connection; it can dial up your ISP and get a dynamic IP address. - Page 46 Full HD Ultra-mini Vandal Dome ICA-5250 The device supports DDNS If your device is connected to xDSL directly, you might need this feature. However, if your device is behind a NAT router, you will not need to enable this feature.
-
Page 47: Mail Setting
(6) Update Failed, please check the account information you provide:The server, user name, and password may be wrong. This model adds Planet easy DDNS that when this function enable will occur hostname with PLANET DDNS and end six of MAC automatically. User don’t go to web of www.planetddns.com... - Page 48 Full HD Ultra-mini Vandal Dome ICA-5250 Set up the server address and account information of your FTP. Click “Apply” to save the setting, then use “Test” button to test the server connection. A message box will tell you “OK!” if it works, and a test file will be uploaded to FTP space.
-
Page 49: A/V Setting
Full HD Ultra-mini Vandal Dome ICA-5250 Samba only support one layer folder. 3.7 A/V Setting 3.7.1 Image Setting For the security and privacy purposes, there are three areas that can be set up for privacy mask. Click Area button first and drag an area on the above image, and remember to save your setting. - Page 50 Full HD Ultra-mini Vandal Dome ICA-5250 Brightness, Contrast, Hue, Saturation, and Sharpness can be (1) Image adjust adjusted here. Automatic gain control. The sensitivity of camera can be adjusted with the environmental light. Enable this function and (2) AGC the brighter image can be got under dim light, but the level of noise may also increase Choose as the location of your camera or fixed shutter time.
-
Page 51: Video Setting
Full HD Ultra-mini Vandal Dome ICA-5250 resulting from over and under exposure. (6)Video Orientation Flip or mirror the image as per your requirement. Digital noise reduction. This function is able to filter the noise (7) DNR and blur from the image and show a clearer view. You can select DNR levels. -
Page 52: Advanced Mode
Full HD Ultra-mini Vandal Dome ICA-5250 RTSP Path Set the RTSP output connecting route. Advanced Mode: There are 5 resolutions that can be chosen. Resolution 1920x1080,1280x720 , 640x480, 320x240, or 176x144 There are CBR﹝Constant Bit Rate﹞ and VBR﹝Variable Bit Rate﹞to use. - Page 53 Full HD Ultra-mini Vandal Dome ICA-5250 It means “Group of Pictures”. The higher the GOP is, the better GOP Size the quality is. Video Format H.264,MPEG4, or M-JPEG RTSP Path RTSP output connecting route 3GPP Streaming mode: The RTSP here is separated from the RTSP setting in the "IP SETTING".3GPP Streaming can still work even you select "disabled"...
-
Page 54: Event List
Full HD Ultra-mini Vandal Dome ICA-5250 3.8 Event List 3.8.1 Event Setting... - Page 55 Full HD Ultra-mini Vandal Dome ICA-5250 IP camera allows 3-area motion detection. When motion is triggered, it can send the video to some specific mail addresses, transmit the video to remote ftp server and SAMBA, and trigger the relay. To set up the motion area, click “Area Setting”. Using mouse to drag and draw the area.
-
Page 56: Schedule
The interval between two snapshots. 3.8.3 I/O Setting The ICA-5250 supports 1 input/1 output. When input is triggered, it can send the video to some specific mail addresses, transmit the video to remote ftp server, and trigger the relay and SAMBA. -
Page 57: Log List
Full HD Ultra-mini Vandal Dome ICA-5250 The GPIO I/O port input activates related action when I/O input Alarm Input Setting is triggered. For example, if you select "10 sec" here, once the motion is Interval detected and action is triggered, it cannot be triggered again within 10 seconds. -
Page 58: Sd Card
Full HD Ultra-mini Vandal Dome ICA-5250 3.8.5 SD card Playback Please Insert Micro SD card before using it. Make sure t o push Micro SD card into the slot completely. Click the date listed on this page and it shows the list of the video. The video format is AVI. Click the video to start Microsoft Media Player to play it. -
Page 59: Copy To Pc
Full HD Ultra-mini Vandal Dome ICA-5250 The use of the SD card will affect the operation of the IP Camera slightly, such as affecting the frame rate of the video. Copy to PC You can insert the Micro SD card to PC and read the files directly, or use FlashGet instead to download the files from IP camera. - Page 60 Full HD Ultra-mini Vandal Dome ICA-5250 FlashGet will show you the link list, and you can tick the files you want to copy to your PC. Give the directory path in the new download window, and remember to enable "Login to Server": key in the IP camera username and password.
-
Page 61: Appendix A: I/O Configuration
Full HD Ultra-mini Vandal Dome ICA-5250 Appendix A: I/O Configuration 1. I/O Connection A. Please connect the G & DO pin to the external relay (buzzer) device When no event happens, DO output is 5V (DO and GND are disconnected). When the camera detects event happening and triggers external alarm, DO output is 0V (DO and GND are connected). - Page 62 Full HD Ultra-mini Vandal Dome ICA-5250 C. I/O PIN definition • GND (Ground): Initial state is LOW • DO (Digital Output): DC 5V • DI (Digital Input): Max. 50mA, DC 5V 2. I/O Setup A. Click I/O Setting from the system setup page via IE, and check “Out1” to enable I/O signal.
- Page 63 Full HD Ultra-mini Vandal Dome ICA-5250 2) Time Switch mode: Click "Pulse" and the camera will trigger the external output devise for several seconds. The duration length is according to the "interval" setting in Output Setting.
-
Page 64: Appendix B: Ping Ip Address
Full HD Ultra-mini Vandal Dome ICA-5250 Appendix B: PING IP Address The PING (stands for Packet Internet Groper) command is used to detect whether a specific IP address is accessible by sending a packet to the specific address and waiting for a reply. It’s also a very useful tool to confirm whether or not Internet camera installed or if the IP address conflicts with any other device over the network. -
Page 65: Appendix C: 3Gpp Access
Full HD Ultra-mini Vandal Dome ICA-5250 Appendix C: 3GPP Access To use the 3GPP function, in addition to the previous section, you might need more information or configuration to make this function work. To use the 3GPP function, it is strongly recommended to install the Networked Device with a public and fixed IP address without any firewall protection. -
Page 66: Appendix D: Planet Ddns Application
Appendix D: Planet DDNS Application Configuring PLANET DDNS steps: Step 1 Enable DDNS option through accessing web page of the ICA-5250. Step 2 Select on DDNS server provided, and register an account if you do not use yet. Let’s take dyndns.org as an example. Register an account at... -
Page 67: Appendix E: Configuring Port Forwarding Manually
Manually setup the device with a fixed IP address, for example, 192.168.0.100. 2. Access the Router with Your Web browser The following steps generally apply to any router that you have on your network. PLANET WNRT-620 is used as an example to clarify the configuration process. Configure the initial settings of the router by following the steps outlined in the router’s Quick Installation Guide. - Page 68 Full HD Ultra-mini Vandal Dome ICA-5250 Your WAN IP Address will be listed here. 3. Open/set Virtual Server Ports to enable remote image viewing The firewall security features built into the router and most routers prevent users from accessing the video from the device over the Internet. The router connects to the Internet over a series of numbered ports.
- Page 69 Enter valid ports in the Virtual Server section of your router. Please make sure to check the box on this line to enable settings. Then the device can be accessed from WAN by the router’s WAN IP Address. By now, you have finished your entire PC configuration for this device.
-
Page 70: Appendix F: Troubleshooting & Frequently Asked Questions
Do not connect device over a router. PLANET IP Installer PLANET IP Installer program program cannot detect device over a router. cannot find the device. If IP address is not assigned to the PC that runs PLANET IP Installer program, then PLANET IP Installer program cannot find... - Page 71 Microsoft’s Internet Explorer from the Microsoft webpage. PLANET IP Installer program fails Network may have trouble. Confirm the parameters and connections to save the network parameters.
- Page 72 The router needs Port Forwarding feature. Refer to your router's manual for details. Packet Filtering of the router may prohibit access from an external network. Refer to your router's manual for details. Access the Network Camera from the Internet with the global IP address of the router and port number of Network Camera.
- Page 73 Use the operating system of the selected language. Set the The unreadable characters are Encoding or the Character Set of the selected language on the displayed. Internet Explorer. The traffic of the network and the object of the image affect the frame rate.
-
Page 74: Appendix G: Micro Sd Card Compatibility
Appendix G: Micro SD Card Compatibility The following is the Micro SD Card recommended: Transcend SDHC class4 16GB SDHC class4 32GB class4 16GB class4 32GB SDHC class6 SDHC class6 SDHC class6 16GB class6 class6 class6 16GB SDHC class10 SDHC class10 SDHC class10 SanDisk...
Need help?
Do you have a question about the ICA-5250 and is the answer not in the manual?
Questions and answers