Table of Contents
Advertisement
Quick Links
APC-3580/3581 Panel PC
User Manual
Release Date
Revision
June 2005
V1.0
®2005 Aplex Technology, Inc.
All Rights Reserved.
Published in Taiwan
Aplex Technology, Inc.
9F-5, No. 2, Jian Pa Road, Chung Ho City, Taipei County, Taiwan
Tel: 886-2-82262881
Fax: 886-2-82262883
E-mail:
aplex@aplex.com.tw
URL: www.aplex.com.tw
APC-3580 User Manual
1
Advertisement
Table of Contents

Related Manuals for Aplex APC-3580


Summary of Contents for Aplex APC-3580
-
Page 1: User Manual
APC-3580/3581 Panel PC User Manual Release Date Revision June 2005 V1.0 ®2005 Aplex Technology, Inc. All Rights Reserved. Published in Taiwan Aplex Technology, Inc. 9F-5, No. 2, Jian Pa Road, Chung Ho City, Taipei County, Taiwan Tel: 886-2-82262881 Fax: 886-2-82262883 E-mail: aplex@aplex.com.tw... -
Page 2: Warning
Disclaimer This information in this document is subject to change without notice. In no event shall Aplex Technology Inc. be liable for damages of any kind, whether incidental or consequential, arising from either the use or misuse of information in this document or in any related materials. -
Page 3: Table Of Contents
Table of Contents______________________ Warning!…………………………………………………………………………….……..….2 Disclaimer………………………………………………………………….…………………2 Chapter 1 Getting Started 1.1 Features…..…………….……………………………………..…..…...…5 1.2 Specifications………………………………………….………………...…..5 1.3 Brief Description of APC-3580/3581………...……………………………7 1.4 Chassis Dimensions..…………………………………………………..…..9 Chapter 2 Installation 2.1 Unfastening of Back Cover……………………………………………..10 2.2 Removal of Back Cover..……………………….……………………..10 2.3 Opening of Back Cover..………………………………….…………….10 2.4 Unfastening of Inside Cover...………………………………………..11 2.5 Removal of Inside Cover……………………………………….....11... - Page 4 6.3 Uninstall PenMount Windows 2000/XP Driver…………………………124 Appendix Watchdog Timer…………..….…………..….……………………...…...126 Digital I/O…………………………….…………..………………....128 Panel/VESA Mounting………………………………..…………………131 Figures Figure 1.1: Front View ………………………………………………..…………7 Figure 1.2: Rear View……………………………………………………………8 Figure 1.3 System Layout……………………………………………………….8 Figure 1.4: Chassis Dimensions……………………………..…………………9 Figure 3.1: Board Layout….….………………..….…………….……………..15 Figure A: VESA Mounting…………………………………………………..131 APC-3580 User Manual...
-
Page 5: Features
2 x COM, 2 x USB, 1 x 100 base-T LAN port, 1 x PS/2 keyboard and mouse port VGA: Built-in Intel 852GM Compact Flash: 1 x compact flash connector Touch Screen (optional) : Resistive Mechanical Specifications APC-3580 User Manual... - Page 6 Construction: APC-3580: Sealed stainless steel chassis, NEMA 4X/IP65 rated front panel APC-3581: Sealed painting metal chassis, NEMA 4X/IP65 rated front panel Mounting: VESA 75 mounting holes Operating Temperature: 0~50 degrees C Storage Temperature: -10~75 degrees C Vibration: 5~17Hz, 0.1” double amplitude peak to peak...
-
Page 7: Brief Description Of Apc-3580/3581
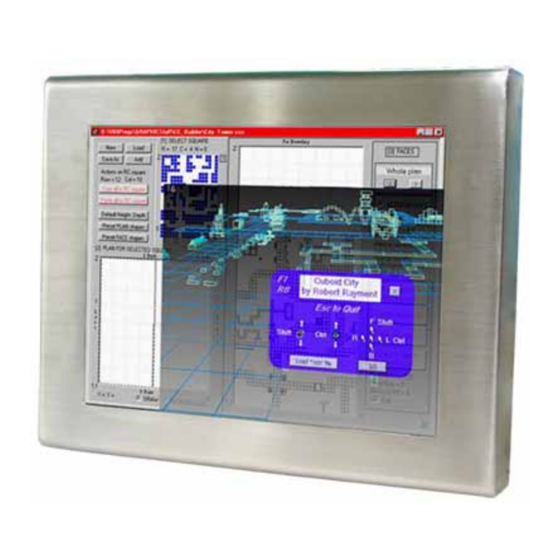
1.3 Brief Description of the APC-3580/3581 Out of the ordinary, the chassis of the APC-3580 is made of stainless steel with an ultra slim profile. It is built around the Intel® Celeron® M processor with a clock rate of 600MHz yet it is fanless. The model comes with a 15-inch high-brightness (380 nits) TFT LCD display, a NEMA 4/IP65 compliant front panel, space for one 2.5-inch HDD, an optional resistive touch screen, a DC 11~28V wide range... -
Page 8: Figure 1.2: Rear View
Figure 1.2: Rear View of APC-3580/3581 Figure 1.3: System Layout APC-3580 User Manual... -
Page 9: Chassis Dimensions
1.4 Chassis Dimensions Figure 1.4: Dimensions of the APC-3580/3581 APC-3580 User Manual... -
Page 10: Installation
If the back cover is swiftly opened at 90 degrees, the cables might be ripped apart. To totally remove the back cover from the enclosure, disconnect the three cables as circled. APC-3580 User Manual... -
Page 11: Unfastening Of Inside Cover
Circled in the picture are two HDD brackets used to mount the HDD on the system board. Before doing the mounting, place the brackets by the sides of the HDD and tighten them with the screws as shown by the arrows in the picture. APC-3580 User Manual... -
Page 12: Installation Of Hdd
*** Please note that to close the back cover of the Panel PC, please follow Steps 2.5, 2.4, 2.3, 2.2 and 2.1 as shown above. Location of DIMM Slot The location of the DIMM slot as circled in the picture is found on the reverse side of the board. DIMM Slot APC-3580 User Manual... -
Page 13: Chapter 3 Mainboard
Intel® 852GM + ICH4 System Memory: One 200-pin DDR SO-DIMM supporting DDR266 SDRAM up to 1GB Display: Display controller Intel GMCH integrated graphics controller Integrated AGP 4X 2D/3D engine One VGA port for CRT monitor 1600x1200@8bpp, 1280x1024@16bpp APC-3580 User Manual... - Page 14 4 input and 4 output (by pin header) WDT: Software programmable support 1~255 sec system reset Hardware Monitoring: CPU voltage/temperature/fan speed monitor Power Control Function: Meeting ACPI 1.1 specifications Single voltage +12V only Operating Temperature: 0˚~60 or 32˚~140 Relative Humidity: 5~95%, non-condensing APC-3580 User Manual...
-
Page 15: Figure 3.1: Board Layout
Detailed descriptions of these connectors can be found in section 3.2 on page 41. Connector Type Label 4-bit GPIO connector 10-pin header DIO1 ATX power button connector 2-pin header PWRON ATX power connector 3-pin header Audio connector 10-pin header AUDIO1 Battery connector 2-pin header APC-3580 User Manual... - Page 16 USB 2.0 internal USB connector 8-pin header USB3 Table 3-1: Peripheral Interface Connectors Table 3-2 lists the rear panel connectors on the MOTHERBOARD board. Detailed descriptions of these connectors can be found in Section 3.3on page 66. APC-3580 User Manual...
-
Page 17: Internal Peripheral Connectors
3.2 Internal Peripheral Connectors Internal peripheral connectors are found on the board and are only accessible when the board is outside of the chassis. This section has complete descriptions of all the internal, peripheral connectors on the MOTHERBOARD board. APC-3580 User Manual... - Page 18 CN Location: See Figure 3-4 CN Pinouts: See Table 3-5 The ATX power button connector supports ATX power switch and enables power on/off from the chassis. DESCRIPTION Button 1 Button 2 Table 3-5: Power Button Connector Pinouts APC-3580 User Manual...
- Page 19 CN Pinouts: See Table 3-7 The MOTHERBOARD has a built-in AC ’97 AUDIO CODEC connector directly connected to the MIC-IN, LINE-IN and LINE-OUT. MOTHERBOARD Motherboard DESCRIPTION DESCRIPTION LINE_OUT-R LINE_IN-R LINE_OUT-L LINE_IN-L MIC-IN Table 3-7: Audio Connector Pinouts APC-3580 User Manual...
- Page 20 CFII connector is for applications without external storage. The Compact Flash socket provides an alternative to hard disk drives in applications where hard disk drives may consume too much space and storage capacity is not a requirement. The CF card behaves like a secondary IDE master APC-3580 User Manual...
- Page 21 VCC-IN GROUND CHECK2 3.2.7 DDR SODIMM Socket CN Label: CN Type: 200 Pin DDR-SDRAM SODIMM Socket CN Location: See Figure 3-10 A 200 pin DDR-SDRAM SODIMM socket is located on the rear side of the MOTHERBOARD board. APC-3580 User Manual...
- Page 22 +12V Table 3-10: Fan Connector Pinouts 3.2.9 IDE Interface Connector CN Label: IDE1 CN Type: 2x22 pin header CN Location: See Figure 3-12 CN Pinouts: See Table 3-11 One IDE connector provides connectivity to two IDE devices. APC-3580 User Manual...
- Page 23 GROUND ACTIVE# GROUND Table 3-11: IDE Connector Pinouts 3.2.10 Inverter Connector CN Label: CN Type: 1x5 pin headers CN Location: See Figure 3-13 CN Pinouts: See Table 3-12 The inverter connector connects to the LCD backlight inverter. APC-3580 User Manual...
- Page 24 The integrated infrared (IrDA) connector supports both Serial Infrared (SIR) and Amplitude Shift Key Infrared (ASKIR) interfaces. PIN NO. DESCRIPTION Table 3-13: IR Interface Connector Pinouts 3.2.12 Keyboard/Mouse Connector CN Label: KBMS1 CN Type: 1x6 pin header CN Location: See Figure 3-15 CN Pinouts: See Table 3-14 APC-3580 User Manual...
- Page 25 CN Location: See Figure 3-16 CN Pinouts: See Table 3-15 This connector connects to the LED lights indicating the hard drive activity and the power status. DESCRIPTION VCC5 LED+ HDD LED+ HDD LED- Table 3-15: LED Connector Pinouts APC-3580 User Manual...
- Page 26 BY2- BY2+ BYCLK- BYCLK+ BY3- BY3+ LCDVCC LCDVCC LCDVCC LCDVCC Table 3-16: LVDS Connector Pinouts 3.2.15 Parallel Port Connector CN Label: LPT1 CN Type: 2x13 pin header CN Location: See Figure 3-18 CN Pinouts: See Table 3-17 APC-3580 User Manual...
- Page 27 DATA4 DATA5 DATA6 DATA7 ACKNOWLEDGE BUSY PAPER EMPTY PRINTER SELECT Table 3-17: Parallel Port Connector Pinouts 3.2.16 PC/104+ Connector CN Label: CN Type: 4x30 pin PCI slot CN Location: See Figure 3-19 CN Pinouts: See Table 3-18 APC-3580 User Manual...
- Page 28 IDSEL1 IDSEL2 AD24 CBE3 IDSEL3 AD26 AD25 AD29 AD28 AD27 AD30 AD31 REQ0 REQ1- REQ2- GNT0- GNT1- GNT2- PCICLK0 PCICLK1 PCICLK2 PCICLK3 INTD PCIRST +12V INTA- INTB- INTC- -12v REQ3- GNT3- GND/3.3V Table 3-18: PC/104+ Connector Pinouts APC-3580 User Manual...
- Page 29 See Figure 3-21 CN Pinouts: See Table 3-20 The MOTHERBOARD provides two first-generation SATA ports to connect with SATA drives. The SATA drives transmit data at speeds up to 150MB/s. DESCRIPTION TX0+ RX0+ Table 3-20: SATA Connector Pinouts APC-3580 User Manual...
- Page 30 3.2.20 Serial Port3 Connector 3.2.22 Serial Port4 Connector CN Label: COM3 CN Type: 2x5 pin header CN Location: See Figure 3-23 CN Pinouts: See Table 3-22 DESCRIPTION DESCRIPTION DCD# DSR# RTS# CTS# DTR# Table 3-22: COM3 Connector Pinouts APC-3580 User Manual...
- Page 31 See Figure 3-25 CN Pinouts: See Table 3-24 Two USB devices can be connected directly to the onboard USB connector. The onboard USB connector is USB 2.0 compliant. DESCRIPTION DESCRIPTION USBVCC4 D5F+ D4F+ USBVCC4 Table 3-24: USB Connector Pinouts APC-3580 User Manual...
-
Page 32: External (Rear Panel) Connectors
CN Pinouts: See Table 3-25 The MOTHERBOARD is equipped with LAN 10/100/1000-TX Ethernet controller. The Ethernet connector can be directly connected to a Local Area Network (LAN) through a network hub. An RJ-45 Ethernet connector is shown in Figure 3-27. APC-3580 User Manual... - Page 33 CN Location: See Figure 3-26 (labeled number 6) 3.3.3 Serial Port Connectors CN Label: COM1 CN Type: DB-9 CN Location: See Figure 3-26 (labeled number 1) CN Pinouts: See Table 3-27 The serial ports (COM1) can be connected to a serial communications device directly. APC-3580 User Manual...
- Page 34 See Table 3-28, Table 3-29 USB devices can be connected directly to the USB connectors on the rear panel. DESCRIPTION DESCRIPTION USBVCC0 USBVCC0 D0F+ D1F+ Table 3-28: USB1 Connector Pinouts DESCRIPTION DESCRIPTION USBVCC2 USBVCC2 D2F+ D3F+ Table 3-29: USB2 Connector Pinouts APC-3580 User Manual...
- Page 35 The standard 15-pin VGA connector connects to a CRT or LCD display monitor. PIN DESCRIPTION DESCRIPTION No Connect Green Ground Blue No Connect No Connect DDC DAT Horizontal Ground Synchronization Ground Vertical Synchronization Ground DDC Clock Ground Table 3-30: VGA Connector Pinouts APC-3580 User Manual...
-
Page 36: Onboard Jumper
The MOTHERBOARD board has the following four onboard jumpers: .CF card setup (JP1) C lear CMOS (JP4) C OM2 RS232/RS422/RS485 selector (JP2) L CD Voltage selector (JP6) P C104+ SERIRQ net to CN3 pin B1 selector (JP5) APC-3580 User Manual... - Page 37 Use this jumper (JP1) to set a compact flash card as either the slave device or the master device. DESCRIPTION Open Slave(Default) Close Master Table 3-31: JP1 Jumper Settings 3.4.2 Clear CMOS Jumper Jumper Label: JP4 Jumper Type: 3-pin header Jumper Settings: See Table 3-32 Jumper Location: See Figure 3-29 APC-3580 User Manual...
- Page 38 Table 3-32: JP4 Jumper Settings 3.4.3 COM2 Selector Jumper Label: 6-pin Jumper Type: header See Table Jumper Settings: 3-33 See Figure Jumper Location: 3-29 DESCRIPTION RS232 (default) closed RS422 closed RS485 closed Table 3-33: JP2 Jumper Settings 3.4.3 LCD Voltage Selector APC-3580 User Manual...
- Page 39 Table 3-34: JP6 Jumper Settings 3.4.4 PC/104+ Selector Jumper Label: JP5 Jumper Type: 2-pin header Jumper Settings: See Table 3-35 Jumper Location: See Figure 3-29 DESCRIPTION Open Disconnect (default) Close Connect Table 3-35: JP5 Jumper Settings APC-3580 User Manual...
-
Page 40: Chapter 4 Ami Bios Setup
CMOS Status Page Setup Menu and Option Page Setup Menu -- Exit current page and return to Main Menu “+” key Increase the numeric value or make changes “-“ key Decrease the numeric value or make changes OTHERBOARD Motherboard APC-3580 User Manual... -
Page 41: Main Menu
E xit Selects exit options and loads default settings 4.2 Main The Main BIOS menu (BIOS Menu 1) appears when the BIOS Setup program is entered. The Main menu gives an overview of the basic system information. APC-3580 User Manual... - Page 42 Count: The number of CPUs on the motherboard S ystem Memory: Displays the auto-detected system memory. o Size: Lists memory size The System Overview field also has two user configurable fields: S ystem Time [xx:xx:xx] APC-3580 User Manual...
-
Page 43: Advanced Menu
S uperIO Configuration (see Section 5.3.4) H ardware Health Configuration (see Section 5.3.5) A CPI Configuration (see Section 5.3.6) M PS Configuration (see Section 5.3.7) S mbios Configuration (see Section 5.3.8) U SB Configuration (see Section 5.3.9) APC-3580 User Manual... - Page 44 BIOS Menu 2: Advanced 4.3.1 CPU Configuration Use the CPU Configuration menu (BIOS Menu 3) to view detailed CPU specifications and configure the CPU. APC-3580 User Manual...
- Page 45 Disabled Disables the use of hyper threading technology Enabled DEFAULT Enables the use of hyper threading technology 4.3.2 IDE Configuration Use the IDE Configuration menu (BIOS Menu 4) to change and/or set the configuration of the IDE devices installed in the system. APC-3580 User Manual...
- Page 46 Disabled DEFAULT Allows hard disks to be overwritten Enabled Prevents hard disks from being overwritten I DE Detect Time Out (Sec) [35] The IDE Detect Time Out (Sec) BIOS option specifies the maximum time (in seconds) the AMI BIOS APC-3580 User Manual...
- Page 47 I DE Master and IDE Slave When entering setup, BIOS auto detects the presence of IDE devices. BIOS displays the status of the auto detected IDE devices. The following IDE devices are detected and are shown in the IDE APC-3580 User Manual...
- Page 48 IDE devices connected to the system. BIOS Menu 5: IDE Master and IDE Slave Configuration Auto-Detected Drive Parameters The “grayed-out” items in the left frame are IDE disk drive parameters automatically detected from the APC-3580 User Manual...
-
Page 49: Power
BIOS does not attempt to search for other types of IDE disk drives on the specified channel. This option specifies an ATAPI Removable Media Device. These include, ARMD but are not limited to: Z IP APC-3580 User Manual... - Page 50 PIO mode 2 selected with a maximum transfer rate of 8.3MBps 2 3 PIO mode 3 selected with a maximum transfer rate of 11.1MBps 4 PIO mode 4 selected with a maximum transfer rate of 16.6MBps APC-3580 User Manual...
- Page 51 Disabled DEFAULT Prevents the BIOS from using 32-bit data transfers. Enabled Allows BIOS to use 32-bit data transfers on supported hard disk drives. 4.3.3 Floppy Configuration Use the Floppy Configuration menu (BIOS Menu 6) to set or change the configurations for floppy disk drives. APC-3580 User Manual...
- Page 52 F loppy B [Disabled] The Floppy B configuration option determines the types of the floppy drive installed in the system. The following configuration options are available. D isabled (default) 3 60 KB 5¼” 1 .2 MB 5¼” APC-3580 User Manual...
- Page 53 S erial Port1 Address [3F8/IRQ4] Use the Serial Port1 Address option to select the Serial Port 1 base address. D isabled No base address is assigned to Serial Port Serial Port 1 I/O port address is 3F8 and 3 F8/IRQ4 the interrupt DEFAULT address is IRQ4 APC-3580 User Manual...
- Page 54 Disabled No base address is assigned to the Parallel Port 378 DEFAULT Parallel Port I/O port address is 378 278 Parallel Port I/O port address is 278 3BC Parallel Port I/O port address is 3BC MOTHERBOARD Motherboard P arallel Port Mode [Normal] APC-3580 User Manual...
- Page 55 Normal mode. The parallel port operates in the E CP & EPP extended capabilities port (ECP) mode. The ECP mode supports bi-directional communication between the APC-3580 User Manual...
- Page 56 Disabled No base address is assigned to serial port 3 3F8 Serial port 4 I/O port address is 3F8 2F8 Serial port 4 I/O port address is 2F8 3E8 Serial port 4 I/O port address is 3E8 APC-3580 User Manual...
- Page 57 10 DEFAULT Serial port 4 IRQ address is 10 11 Serial port 4 IRQ address is 11 4.3.5 Hardware Health Configuration BIOS Menu 8: Hardware Health Configuration The following system parameters and values are shown. The system parameters that are APC-3580 User Manual...
- Page 58 GMCH o +3.3V o +2.5V o VSB o VBAT 4.3.6 ACPI Configuration The ACPI Configuration menu (BIOS Menu 9) configures the Advanced Configuration and Power Interface (ACPI) and Power Management (APM) options. BIOS Menu 9: ACPI Configuration APC-3580 User Manual...
- Page 59 The system enters a S3(STR) sleep state. The CPU has S 3 (STR) power; RAM is in slow refresh; the power supply is in a reduced power mode. A uto The BIOS automatically selects DEFAULT system. APC-3580 User Manual...
- Page 60 Yes The VGA BIOS post is invoked 4.3.6.2 Advanced ACPI Configuration Use the Advanced ACPI Configuration menu (BIOS Menu 11) to select the ACPI state when the system is suspended. BIOS Menu 11: Advanced ACPI Configuration APC-3580 User Manual...
- Page 61 Use the Headless Mode option to update the ACPI FACP (Fixed ACPI Description Table) to indicate headless operations, i.e. a computer without a monitor, keyboard and mouse. The FACP is not updated to indicate headless mode Disabled DEFAULT The FACP is updated to indicate headless mode Enabled APC-3580 User Manual...
- Page 62 APIC. U SB Device Wakeup From S3/S4 [Disabled] The USB Device Wakeup From S3/S4 BIOS function enables activity on the specified USB device to rouse the system from a sleep state. APC-3580 User Manual...
- Page 63 Use the Multiprocessor Specification (MPS) for OS option to specify the MPS version to be used. 1.1 MPS version 1.1 is used 1.4 DEFAULT MPS version 1.4 is used 4.3.8 Smbios Configuration Use the Smbios Configuration menu (BIOS Menu 14) to configure SMBIOS parameters. APC-3580 User Manual...
- Page 64 SMBIOS SMI wrapper for the PnP function E nabled DEFAULT 50h – 54h supported 4.3.9 USB Configuration Use the USB Configuration menu (BIOS Menu 15) to read USB configuration information and configure the USB settings. APC-3580 User Manual...
- Page 65 2 USB Ports The USB controller activates 2 USB ports 4 USB Ports The USB controller activates 4 USB ports 6 USB Ports DEFAULT The USB controller activates 6 USB ports L egacy USB Support [Enabled] APC-3580 User Manual...
- Page 66 U SB Mass Storage Device Configuration The USB Mass Storage Device Configuration field appears if a USB drive is connected to one of the USB ports or connectors. If this option is selected a menu appears. APC-3580 User Manual...
- Page 67 No DEFAULT System does not clear NVRAM during system boot Yes System clears NVRAM during system boot P lug & Play O/S [No] Use the Plug & Play O/S BIOS option to APC-3580 User Manual...
- Page 68 P alette Snooping [Disabled] Use the Palette Snooping option to enable or disable the palette snooping function. Disabled DEFAULT Unless the VGA card manufacturer requires palette snooping to be enabled, this option should be disabled. APC-3580 User Manual...
- Page 69 Only select this slot if the adapter card is installed in PCI Slot 5. PCI Slot 6 is selected as the location of the OffBoard PCI IDE adapter card. PCI Slot 6 Only select this slot if the adapter card is installed in PCI Slot 6. I RQ# [Available] APC-3580 User Manual...
- Page 70 D M Channel 6 D M Channel 7 R eserved Memory Size [Disabled] Use the Reserved Memory Size BIOS option to specify the amount of memory that should be reserved for legacy ISA devices. APC-3580 User Manual...
- Page 71 4.5 Boot Use the Boot menu (BIOS Menu 17) to configure system boot options. BIOS Menu 17: Boot 4.5.1 Boot Settings Configuration Use the Boot Settings Configuration menu (BIOS Menu 18) to configure advanced system boot options. APC-3580 User Manual...
- Page 72 A ddOn ROM Display Mode [Force BIOS] Use the AddOn ROM Display Mode option to allow add-on ROM (read-only memory) messages to be displayed. F orce BIOS The system forces third party BIOS to DEFAULT display APC-3580 User Manual...
- Page 73 Only use this setting if there is a known reason for a BIOS error to appear. An example would be a system administrator must remote boot the system. The computer system does not have a keyboard currently APC-3580 User Manual...
- Page 74 BIOS interrupt 19. Disabled DEFAULT Does not allow optional ROM to trap interrupt 19 Enabled Allows optional ROM to trap interrupt 19 4.6 Security Use the Security menu (BIOS Menu 19) to set system and user passwords. APC-3580 User Manual...
- Page 75 After the password has been added, Install appears next to Change User Password. C lear User Password Use the Clear User Password to clear a user password. B oot Sector Virus Protection [Disabled] Disabled DEFAULT Disables the boot sector virus protection APC-3580 User Manual...
- Page 76 Setting the wrong values for the Chipset BIOS selections in the Chipset BIOS menu may cause the system to malfunction. BIOS Menu 20: Chipset 4.7.1 NorthBridge Configuration Use the NorthBridge Configuration menu (BIOS Menu 21) to configure the northbridge APC-3580 User Manual...
- Page 77 2 00MHz Sets the DRAM frequency to 200MHz 2 66MHz Sets the DRAM frequency to 266MHz 3 33MHz Sets the DRAM frequency to 333MHz A uto DEFAULT Automatically selects the DRAM frequency MOTHERBOARD Motherboard APC-3580 User Manual...
- Page 78 Memory is not reserved for ISA expansion cards Disabled DEFAULT Between 15MB and 16MB of memory is reserved for ISA 15MB – 16MB expansion cards APC-3580 User Manual...
- Page 79 256MB Graphics aperture size set as 256MB B oot Display Device [Auto] The Boot Display Device BIOS option selects the display device the system uses when it boots. The available options are listed below: A uto (Default) APC-3580 User Manual...
- Page 80 1 024x768 18 bit LVDS 1 600x1200 LVDS 8 00x600 24bit LVDS 8 00x600 18bit LVDS 1 024x768 36bit LVDS T ype 12 T ype 13 T ype 14 APC-3580 User Manual...
- Page 81 5.7.2 SouthBridge Configuration The SouthBridge Intel ICH4 Configuration menu (BIOS Menu 22) the southbridge chipset to be configured. BIOS Menu 22:SouthBridge Chipset Configuration O nBoard AC97 Audio DEVICE APC-3580 User Manual...
- Page 82 DEFAULT The system returns to its previous state. If it was on, it turns itself on. If it was off, it remains off. 4.8 Power Key The Power menu (BIOS Menu 23) allows the advanced power management options to be configured. APC-3580 User Manual...
- Page 83 The hard disk cannot be turned off in the Suspend or Standby mode Disabled The hard disk can be turned off in the Standby mode Standby The hard disk can be turned off in the Suspend mode Suspend DEFAULT APC-3580 User Manual...
- Page 84 4 Min 8 Min 1 0 Min 2 0 Min 3 0 Min 4 0 Min 5 0 Min 6 0 Min T hrottle Slow Clock Ratio [50%] APC-3580 User Manual...
- Page 85 The FDC/LPT/COM Ports option enables monitoring of activity on the FDC/LPT/COM ports and rouses the system from a sleep or suspend state. The system does not monitor the FDC/LPT/COM ports and does not rouse Ignore the system from a sleep or suspend state when an IRQ is detected. APC-3580 User Manual...
- Page 86 The system does not monitor the secondary master IDE device and does not Ignore rouse the system from a sleep or suspend state when an IRQ is detected. APC-3580 User Manual...
- Page 87 The Power Button Mode BIOS specifies how the power button functions. O n/Off When the power button is pressed the DEFAULT system is either turned on or off When the power button is pressed the S uspend system goes into suspend mode APC-3580 User Manual...
- Page 88 If selected, the following appears with values that can be Enabled selected: R TC Alarm Date (Days) S ystem Time After setting the alarm, the computer turns itself on from a suspend state when the alarm goes off. APC-3580 User Manual...
-
Page 89: Exit
If configuration changes are complete but do need to be saved, select this option to exit the BIOS menus. D iscard Changes If configuration changes are complete but do need to be saved but BIOS still needs to be run , select this option. L oad Optimal Defaults APC-3580 User Manual... - Page 90 This option loads optimal default values for each of the parameters on the Setup menus. F9 key can be used for this operation. L oad Failsafe Defaults This option loads failsafe default values for each of the parameters on the Setup menus. APC-3580 User Manual...
-
Page 91: Available Software Drivers
5.2 Chipset Driver Installation To install the chipset driver, please follow the steps below: Insert the APLEX Product CD into the system setup Autorun “in figure5-2-1 Step 1: Click “intel ® chipset Software installation utility”... - Page 92 Figure 5-2-1 The “InstallShield Wizard Preparation Screen” in Figure 6-1 appears. Step 2: Figure 6-1 APC-3580 User Manual...
- Page 93 The “setup chipset software installation Utility” in Figure 6-2 appears Step 3: Click “ Next” Figure 6-2: Welcome Screen Click “Next” and the license agreement shown in Figure 6-3 appears. Step 4: APC-3580 User Manual...
- Page 94 6: Click “Yes”. The driver is installed on the computer. After the installation is complete, the Step installation complete screen shown in Figure 6-5 appears. Select the preferred option and click “Finish” to complete the installation process. APC-3580 User Manual...
-
Page 95: Realtek Audio Driver Installation
5.3 RealTek Audio Driver Installation To install the RealTek AC’97 Audio driver, please follow the steps below: Insert the APLEX Product CD into the system setup Autorun “in figure Click “Realtek AC’97 Sound System” 2: Once double clicking the Setup icon, the install shield wizard for the audio driver starts. - Page 96 4: After install shield is prepared, the welcome screen shown in Figure 6-8 appears. To Step continue the installation process, click the “Next” button. The install shield starts to configure the new software as shown in Figure 6-9. APC-3580 User Manual...
- Page 97 To continue the installation process, click the “Yes” button. The installation notice shown Step 5 below appears. APC-3580 User Manual...
- Page 98 At this stage the clicking the “Yes” button in Figure 6-10 appears, the installation of the Step driver begins. See Figure 6-11. APC-3580 User Manual...
- Page 99 8: The confirmation screen shown in Figure 6-12 allows user to restart the computer Step immediately after the installation is complete or to restart the computer later. For the settings to take effect the computer must be restarted. Once decided when to restart the computer, click the “Finish” button. APC-3580 User Manual...
-
Page 100: Intel Graphics Media Accelerator Driver
5.4 Intel Graphics Media Accelerator Driver To install the GMA driver, please follow the steps below: 1: Insert the APLEX Product CD into the system setup Autorun “in figure Step Click “Intel® VGA Chipset driver” APC-3580 User Manual... - Page 101 2: Once double clicking the Setup icon, a Welcome screen shown in Figure 6-13 Step appears. APC-3580 User Manual...
- Page 102 3: To continue installing click “Next” and a license agreement shown in Figure 6-14 appears. Step Read through the license agreement. 4: Accept the terms and conditions stipulated in the license agreement by clicking the “Yes” Step button (Figure 6-14). The installation notice shown in Figure 6-15 appears. APC-3580 User Manual...
- Page 103 6: The confirmation screen shown in Figure 6-16 allows user to restart the computer Step immediately after the installation is complete or to restart the computer later. For the settings to take effect the computer must be restarted. Once decided when to restart the computer, click the “Finish” button. APC-3580 User Manual...
-
Page 104: Lan Driver Installation
5.5 LAN Driver Installation To install the LAN driver, please follow the steps below: Insert the APLEX Product CD into the system setup Autorun “in figure Step Click “intel® 8255IER Ethernet Controller Drivers” APC-3580 User Manual... - Page 105 “ ” APC-3580 User Manual...
- Page 106 MOTHERBOARD Motherboard After selecting the directory the driver is installed in, click “Next.” The screen in Figure 6-19 Step 4: appears. APC-3580 User Manual...
-
Page 107: Sata - Ali Raid Driver Installation
Locate the ALi installation driver folder within the Utility CD that came with the Step 2: motherboard. Copy files under a sub-directory named “SATA50XX” (taking Windows XP Step 3: installation as the example) to the root directory of floppy diskette (labeled driver diskette). The file names are listed below: APC-3580 User Manual... - Page 108 1: When the Found New Hardware Wizard windows appear (Mass Storage Controller), select Step Install from a list or specify location (Advanced) and click Next to continue. 2: In the follow-up window, please select "Don't search, I will choose the driver to install", Step APC-3580 User Manual...
- Page 109 A MIC input shared with Center and LFE output A LINE output A MIC input line. D.1.2 Driver Installation The driver installation has been described in Chapter 6, Section 6.3. After rebooting the sound effect configuration utility appears in the Windows Control Panel (see APC-3580 User Manual...
- Page 110 Click either: Step 10: T he Sound Effect Manager icon in the Notification Area of the system task bar (see Figure 6-21), or T he Sound Effect Manager icon in the Control Panel (Figure 6-22). APC-3580 User Manual...
- Page 111 Figure 6-23: Sound Effects Manager (ALC655) APC-3580 User Manual...
- Page 112 K araoke Mode E qualizer S peaker Configuration S peaker Test S /PDIF-In S /PDIF-Out C onnector Sensing H RTF Demo M icrophone Effect G eneral NOTE: APC-3580 User Manual...
- Page 113 H RTF Demo:- Adjust HRTF (Head Related Transfer Functions) 3D positional audio here before running 3D applications. M icrophone Effect:- Microphone noise suppression is enabled in this menu. G eneral:- General information about the installed AC’97 audio configuration utility is listed here. APC-3580 User Manual...
- Page 114 Follow the steps below to install the PenMount Windows 2000/XP driver. 1. When the system first detects the controller board, a screen appears that shows “Unknown Device”. Do not use this hardware wizard. Press Cancel. APC-3580 User Manual...
- Page 115 2. Insert the PenMount Driver CD-ROM. Go to the Windows 2000-XP Driver folder. Click setup.exe. 3. The screen displays the installation wizard for the PenMount software. Click “Next”. APC-3580 User Manual...
- Page 116 3. A License Agreement appears. Click “I accept…” and “Next”. 4. The “Ready to Install the Program” screen appears. Select “Install”. APC-3580 User Manual...
- Page 117 5. The next screen is “Hardware Installation”. Select “Continue Anyway”. 6. The “InstallShield Wizard Completed” appears. Click “Finish”. APC-3580 User Manual...
-
Page 118: Configuring Penmount Windows 2000/Xp Driver
Advanced Calibration Advanced Calibration uses 4, 9, 16 or 25 points to effectively calibrate touch panel linearity of aged touch screens. Click this button and touch the red squares in sequence with a stylus. To skip, press ‘ESC’. APC-3580 User Manual... - Page 119 The older the touch screen is, the more Advanced Mode calibration points you need NOTE: for an accurate calibration. Use a stylus during Advanced Calibration for greater accuracy. APC-3580 User Manual...
- Page 120 Plot Calibration Data Check this function and a touch panel linearity comparison graph appears when you have finished Advanced Calibration. The blue lines show linearity before calibration and black lines show linearity after calibration. APC-3580 User Manual...
- Page 121 Touch the screen with your finger or a stylus and the drawing screen will register touch activity such as left, right, up, down, pen up, and pen down. APC-3580 User Manual...
- Page 122 This panel displays information about the PenMount controller and this driver version. PenMount Monitor Menu Icon The PenMount monitor icon (PM) appears in the menu bar of Windows 2000/XP system when you turn on the PenMount Monitor in the PenMount Utilities. APC-3580 User Manual...
- Page 123 The PenMount Monitor has the following functions: APC-3580 User Manual...
- Page 124 • Intel 845G/GE Display Driver Rotating Function Configuring the Rotation Function 1. Install the rotation software package. 2. Choose the rotating function (0°, 90°, 180°, 270°) in the 3 party software. The calibration screen appears automatically. Touch this point and rotation is mapped. APC-3580 User Manual...
- Page 125 1. Exit the PenMount monitor (PM) in the menu bar. 2. Go to Settings, then Control Panel, and then click Add/Remove program. Select PenMount DMC9000 and click the Add/Remove button. 3. Select PenMount DMC9000 and DMC9100. Click the Remove button. APC-3580 User Manual...
- Page 126 4. Select “Yes” and “Close” to remove the PenMount Windows 2000/XP driver, and reboot the system. APC-3580 User Manual...
-
Page 127: Watchdog Timer
Note: When exiting a program it is necessary to disable the Watchdog Timer, otherwise the system will reset. Example Program: ; INITIAL TIMER PERIOD COUNTER W_LOOP: AX, 6F02H ;setting the time-out value APC-3580 User Manual... - Page 128 BL, 30 ;time-out value is 48 seconds ; ADD YOUR APPLICATION PROGRAM HERE ;is your application over? EXIT_AP, 1 ;No, restart your application W_LOOP ;disable Watchdog Timer AX, 6F02H BL, 0 ; EXIT APC-3580 User Manual...
-
Page 129: Digital I/O
: Digital I/O input value Example program: AX, 6F08H ;setting the Digital port is input AL low byte = value AH – 6FH Sub-function: AL – 9: Set the Digital port is OUTPUT : Digital I/O output value APC-3580 User Manual... -
Page 130: St Mb Memory Address Map
Intel 82852GM/GME Graphic Controller 3E8-3EF Serial Port 3 3F0-3F7 Floppy Disk Controller 3F8-3FF Serial Port 1 480-48F PCI BUS 1st MB Memory Address Map MEMORY ADDRESS DESCRIPTION 00000-9FFFF SYSTEM MEMORY A0000-BFFFF VGA BUFFER C0000-CFFFF VGA BIOS E0000-FFFFF SYSTEM BIOS APC-3580 User Manual... -
Page 131: Dma Channel Assignment
COM3 IRQ4 COM1 IRQ12 PS/2 mouse IRQ5 PCI DEVICES IRQ13 IRQ6 Available IRQ14 Primary IDE IRQ7 Printer IRQ15 Secondary IDE DMA Channel Assignment CHANNEL FUNCTION Available Available Available Available Cascade for DMA controller 1 Available Available Available APC-3580 User Manual... -
Page 132: Figure A: Vesa Mounting
Appendix C___________________________ VESA Mounting The APC-3580 display monitor is mounted by means of VESA. Just carefully mount the arm onto the rear of the unit by fastening the given four screws as shown in Figure B. Figure A: VESA Mounting of the APC-3580...
Need help?
Do you have a question about the APC-3580 and is the answer not in the manual?
Questions and answers