Table of Contents
Advertisement
Quick Links
B
AROLO
READ AND SAVE THESE INSTRUCTIONS!
Safety and the proper operation of your Casablanca fan both require a thorough knowledge of the product and proper
installation; therefore, before attempting to install and operate your Casablanca fan, read this owner's manual completely and
carefully. Retain this manual for future reference.
CAUTION: To avoid possible electrical shock, make certain that electricity is turned off at the circuit breaker or fuse box
before attempting any installation procedure.
Before You Start . . . . . . . . . . . . . . . . . . . . . . . . . . . . . . . . . . . . . . . . . . . . . . . . . . . . . . . . . . . . . . . . . . . . . . . . . . . . . . . . 2
Safe Use . . . . . . . . . . . . . . . . . . . . . . . . . . . . . . . . . . . . . . . . . . . . . . . . . . . . . . . . . . . . . . . . . . . . . . . . . . . . . . . . . . . . . . 2
General Guidelines . . . . . . . . . . . . . . . . . . . . . . . . . . . . . . . . . . . . . . . . . . . . . . . . . . . . . . . . . . . . . . . . . . . . . . . . . . . . . 3
Sloped Ceiling Installations . . . . . . . . . . . . . . . . . . . . . . . . . . . . . . . . . . . . . . . . . . . . . . . . . . . . . . . . . . . . . . . . . . . . . . . 3
Getting Started . . . . . . . . . . . . . . . . . . . . . . . . . . . . . . . . . . . . . . . . . . . . . . . . . . . . . . . . . . . . . . . . . . . . . . . . . . . . . . . . 4
Crossbar Mounting Bracket Installation . . . . . . . . . . . . . . . . . . . . . . . . . . . . . . . . . . . . . . . . . . . . . . . . . . . . . . . . . . . . . 4
Lag Screw Installation (Optional) . . . . . . . . . . . . . . . . . . . . . . . . . . . . . . . . . . . . . . . . . . . . . . . . . . . . . . . . . . . . . . . . . . 5
Canopy Installation . . . . . . . . . . . . . . . . . . . . . . . . . . . . . . . . . . . . . . . . . . . . . . . . . . . . . . . . . . . . . . . . . . . . . . . . . . . . . 5
Fan Preparation . . . . . . . . . . . . . . . . . . . . . . . . . . . . . . . . . . . . . . . . . . . . . . . . . . . . . . . . . . . . . . . . . . . . . . . . . . . . . . . . 6
Hanging the Fan . . . . . . . . . . . . . . . . . . . . . . . . . . . . . . . . . . . . . . . . . . . . . . . . . . . . . . . . . . . . . . . . . . . . . . . . . . . . . . . 7
Canopy Electrical Connections . . . . . . . . . . . . . . . . . . . . . . . . . . . . . . . . . . . . . . . . . . . . . . . . . . . . . . . . . . . . . . . . . . . . 7
Canopy Hatch Installation . . . . . . . . . . . . . . . . . . . . . . . . . . . . . . . . . . . . . . . . . . . . . . . . . . . . . . . . . . . . . . . . . . . . . . . 7
Blade Installation . . . . . . . . . . . . . . . . . . . . . . . . . . . . . . . . . . . . . . . . . . . . . . . . . . . . . . . . . . . . . . . . . . . . . . . . . . . . . . . 8
TROUBLESHOOTING TIPS . . . . . . . . . . . . . . . . . . . . . . . . . . . . . . . . . . . . . . . . . . . . . . . . . . . . . . . . . . . . . . . . . . . . 15
CARE RECOMMENDATIONS . . . . . . . . . . . . . . . . . . . . . . . . . . . . . . . . . . . . . . . . . . . . . . . . . . . . . . . . . . . . . . . . . . 16
AUTHORIZED SERVICE CENTERS . . . . . . . . . . . . . . . . . . . . . . . . . . . . . . . . . . . . . . . . . . . . . . . . . . . . . . . . . . . . 17
PRODUCT SPECIFICATIONS . . . . . . . . . . . . . . . . . . . . . . . . . . . . . . . . . . . . . . . . . . . . . . . . . . . . . . . . . . . . . . . . . . 19
Owner's Manual
™
CONTENTS
C5S63A/T AA1205
™ ™ ™ ™ ™
B B B B B
AROL
AR
AR
AR
AR
OL
OL
OLO O O O O
OL
1
Advertisement
Table of Contents

Related Manuals for Casablanca BAROLO


Summary of Contents for Casablanca BAROLO
-
Page 1: Table Of Contents
READ AND SAVE THESE INSTRUCTIONS! Safety and the proper operation of your Casablanca fan both require a thorough knowledge of the product and proper installation; therefore, before attempting to install and operate your Casablanca fan, read this owner’s manual completely and carefully. -
Page 2: Introduction
• This fan is designed to be installed on an existing electrical outlet box. The outlet box must be UL Listed for ceiling fan installations. If it is not, a new box must be installed. Casablanca extension poles are available for sloped or high ceiling installations. -
Page 3: Mounting Recommendations
OLO O O O O MOUNTING RECOMMENDATIONS GENERAL GUIDELINES Before mounting your Casablanca fan, read the following helpful recommendations. The location of the fan, air circulation, and fan size are all important factors to consider before installation. Location Ceiling fans have practical uses in almost every room in your home. We suggest you follow these mounting recommendations as you decide where to install your Casablanca fan. -
Page 4: Fan Installation
If you do not have an existing fixture located where you After turning the power OFF at its source (either the circuit wish to place your Casablanca fan, an approved ceiling breaker or fuse box), lower the old fixture and disconnect fixture outlet box must be installed and wired. -
Page 5: Lag Screw Installation (Optional)
Step 3. Attach the canopy to the crossbar mounting bracket with three of the 8-32 x 2 " long canopy screws (Screw Pack B) and lock washers provided with your Casablanca fan. Tighten using the provided screwdriver until snug against the ceiling. -
Page 6: Fan Preparation
FAN PREPARATION PERMA•LOCK™ HARDWARE (not to scale) Allen Wrench Perma•Lock™ Downrod and Ball Assembly Motor Wires Ground Wire (leave at least 6" long) (green) IMPORTANT SAFETY INFORMATION: Before starting the installation of your ceiling fan, install the threaded downrod into the motor coupling and lock the assembly. -
Page 7: Hanging The Fan
™ ™ ™ ™ ™ B B B B B AROL OLO O O O O HANGING THE FAN Step 5a. To hang the fan body in the canopy, hold the fan body firmly and insert the ball into the canopy opening. Check that no wires are pinched. -
Page 8: Blade Installation
BLADE INSTALLATION BLADE HARDWARE (not to scale) Pack C: Pack E: Blade Screws and Pack D: Switch Housing Cap Washers (21) Blade Iron Screws (11) Blade Irons (5) Blades (5) Screws (2) Attach Blade Irons Step 8. Using Screw Pack C and the provided screwdriver, attach the blades to the blade holders by aligning the screwholes of the blade iron with the holes in the blade. -
Page 9: Inteli•Touch™ Control Installation
3. Do not use more than one fan per wall control. 1. Use only the Casablanca W-32 wall control. 4. No other light fixtures or electrical appliances may be 2. Do not use any additional control with your Inteli- connected on the circuit controlled by the W-32 wall Touch fan (for example, dimmer, fan speed control, etc.). -
Page 10: Automatic Demonstration Program
POWER The POWER button is normally left in the on position. Always turn the power off during cleaning or servicing the fan and during thunderstorms. It is also used to exit or enter additional programs. POWER must be left on to retain a previously set fan speed or light level. SPEED CONTROL There are six individual speed settings for the fan;... - Page 11 ™ ™ ™ ™ ™ B B B B B AROL OLO O O O O LIGHT -MINDER PROGRAM The Light-Minder program automatically turns OFF the fan mounted lights after two hours. To enter the Light-Minder Program: 1. Turn the POWER OFF for at least three seconds. 2.
-
Page 12: Advan•Touch™ Control Installation
ADVAN•TOUCH™ CONTROL INSTALLATION W-62 BRACKET / HOLSTER REMOVAL Step 1. Remove the two 6-32 x 5/ 16” screws holding the bracket to the holster. Save screws for later. Bracket Holster CONTROL BRACKET INSTALLATION SAFETY FIRST: To reduce the risk of electrical shock, this fan must be installed with an isolating wall control/switch. - Page 13 ™ ™ ™ ™ ™ B B B B B AROL OLO O O O O BATTERY INSTALLATION Open Battery Door by Install 4 “AAA” alkaline pressing down on the batteries in the space provided. insert tab provided. Please observe proper polarity placement.
- Page 14 SECURITY FEATURE Pressing the ‘SECURITY’ button will start the Security lighting program. The controller beeps and indicates ‘SECURITY’. The light will automatically turn ON and OFF in a seemingly random manner over an eight and a quarter hour programmed cycle that is designed to give the home a “lived-in”...
-
Page 15: Troubleshooting Tips
Increase the separation between the equipment and receiver, Connect the equipment into an outlet on a circuit different from that to which the receiver is connected. Consult the dealer or an experienced radio/TV technician for help. Note: Any changes or modifications to the transmitter or receiver not expressly approved by Casablanca Fan Company may void one’s authority to operate this... -
Page 16: Care Recommendations
An antistatic agent may be used, but never use abrasive cleaning agents as these will damage the finish. No Need for Lubrication • Never lubricate this fan! The precision motor at the heart of your Casablanca fan features sealed bearings that are lubricated for life. • Do not attempt to oil the motor. -
Page 17: Authorized Service Centers
™ ™ ™ ™ ™ B B B B B AROL OLO O O O O AUTHORIZED SERVICE CENTERS STATE/CITY SERVICE CENTER NAME PHONE TYPE STATE/CITY SERVICE CENTER NAME PHONE TYPE ALABAMA LOVELAND 80538 FIRESIDE LIGHTING INC. 970-669-3540 OWTS MOBILE 36618 AZALEA CITY SERVICE CENTER 251-341-0663 COLORADO SPRINGS 80903 HOME LIGHTING INC. - Page 18 STATE/CITY SERVICE CENTER NAME PHONE TYPE STATE/CITY SERVICE CENTER NAME PHONE TYPE IOWA (CONTINUED) NEBRASKA SIOUX CENTER 51250 HILLS HOME SYSTEMS 712-722-2539 OMAHA 68104 D & L ELECTRONICS 402-571-5233 DES MOINES 50311 ADVANCED LIGHTING 515-255-5009 OWTS GRAND ISLAND 68803 QUALITY SEW & VAC. 308-382-7310 MONTICELLO 52310 REM ELECTRIC INC.
-
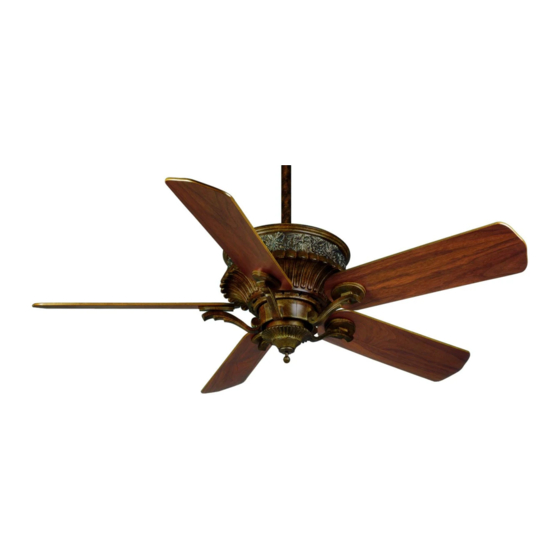
Page 19: Product Specifications
75460 HARGIS ELECTRIC 903-785-8055 ST. THOMAS 00805 DUANE LOBERG 809-775-2399 SAN ANTONIO 78212 CEILING FAN SERVICE CTR. 210-804-1362 PRODUCT SPECIFICATIONS Collection: Casablanca Designer Series Finishes: Tuscan Sunset Model Name: Barolo® Motor: XLP2000 Model Number: C5S63X Blade Span: 52" & 42"...