
Related Manuals for Pioneer DVR-560HX-K


Summary of Contents for Pioneer DVR-560HX-K
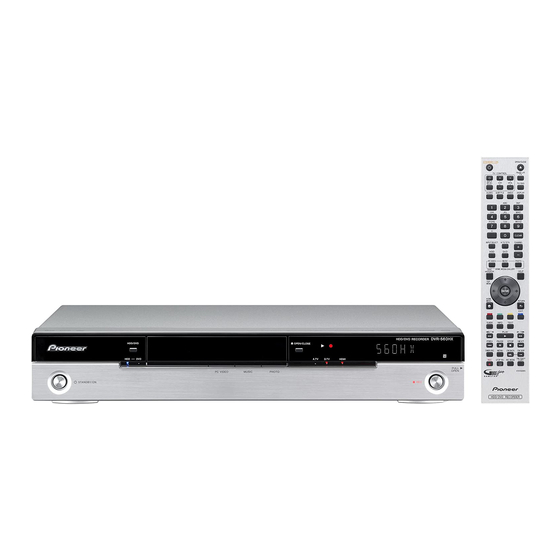
- Page 1 DVR-560HX-K HDD/DVD Recorder DVR-560HX-S Operating Instructions Discover the benefits of registering your product online at http://www.pioneer.co.uk (or http://www.pioneer.eu)
- Page 2 Thank you for buying this Pioneer product. Please read through these operating instructions so you will know how to operate your model properly. After you have finished reading the instructions, put them away in a safe place for future reference.
-
Page 3: Operating Environment
Operating Environment CAUTION D3-4-2-1-7c_A_En D3-4-2-2-2a_A_En POWER-CORD CAUTION S002_En Replacement and mounting of an AC plug on the power supply cord of this unit should be performed only by qualified service personnel. IMPORTANT: THE MOULDED PLUG This appliance is supplied with a moulded three pin mains plug for your safety and convenience. A 5 amp fuse is fitted in this plug. Should the fuse need to be replaced, please ensure that the replacement fuse has a rating of 5 amps and that it is approved by ASTA or BSI to BS1362. -
Page 4: Table Of Contents
Contents 01 Before you start 05 Using the GUIDE Plus+® What’s in the box ....6 electronic programme guide Putting the batteries in the remote The GUIDE Plus+®... - Page 5 Displaying and switching subtitles ..83 15 Copying files from a PC Switching DVD and DivX soundtracks. . . 83 (Connect PC) Switching audio channels ... . 84 Connecting the PC .
-
Page 6: What's In The Box
Before you start Chapter 1 Before you start What’s in the box • Remove batteries from equipment that isn’t going to be used for a month or Please confirm that the following more. accessories are in the box when you open it; •... -
Page 7: Compatibility
Before you start • You can control this recorder using the The following table shows older Pioneer DVD remote sensor of another Pioneer recorders’ limited compatibility with component via the CONTROL IN jack on DVD-RW ver. 1.2 discs. the rear panel. See Rear panel... -
Page 8: Before You Start
Before you start HDD/DVD Recording and playback compatibility This recorder can play and record all widely-used DVD disc types, and additionally provides HDD functionality. The table below shows some specific compatibility differences between the different disc types. DVD-R DVD-RW DVD+R -RAM Marks used in this DVD (VR) -
Page 9: Compressed Audio Compatibility
Before you start Using DVD-R DL/DVD+R DL discs The DVD side of a DualDisc plays in this product. DVD-Audio content will not play. DVD-R DL (Dual-Layer) and DVD+R DL (Double-Layer) discs contain two recordable For more detailed information on the layers on a single side, giving about DualDisc specification, please refer to the 1.8 times the recording capacity of a... - Page 10 Before you start • Sampling rates (MP3/WMA): 32 kHz, DivX video compatibility 44.1 kHz or 48 kHz • Bit-rates: Any (128 kbps or higher recommended) • Variable bit-rate (VBR) WMA/MP3 playback: Yes DivX is a compressed digital video format • WMA encoder compatibility: Windows ®...
- Page 11 Before you start Some DivX VOD content may only be PC-created disc compatibility playable a fixed number of times. When you Discs recorded using a personal computer load a disc containing this type of DivX VOD may not be playable in this unit due to the content, the remaining number of plays is setting of the application software used to shown on-screen and you then have the...
-
Page 12: About The Internal Hard Disk Drive
DVD discs in order to protect material will be possible. In this case it against accidental loss. will be necessary to replace the HDD Pioneer cannot under any circumstances unit. accept responsibility for any direct or indirect loss arising from any inconvenience or loss of Optimizing HDD performance recorded material resulting from HDD failure. -
Page 13: Symbols Used In This Manual
Before you start Symbols used in this manual The following icons are provided to help you quickly identify which instructions you need for which kind of disc. Any type of DVD disc (recordable or playback only), finalized or not. DVD-Video Commercially produced DVD, finalized Video mode DVD-R/-RW. -
Page 14: Rear Panel Connections
10 CONTROL IN Use to control this recorder from the remote HDMI OUT HDMI output for high quality digital audio sensor of another Pioneer component with a and video. CONTROL OUT terminal and bearing the Pioneer mark. Connect the CONTROL... -
Page 15: Front Panel Connections
Connections connect the other supplied RF antenna 12 AC IN – Power inlet Connect to a power outlet using the supplied cable to connect an antenna to the power cable after making all other ANTENNA IN (RF IN) connector. Lastly, connections. -
Page 16: Easy Connections
Connections We strongly recommend using an outdoor antenna for better broadcast picture quality. Antenna/cable TV If, however, you want to use an indoor To antenna wall outlet input antenna, use one with a signal amplifier From antenna output rated at 5 V, 30 mA and set Aerial Power to On in the Initial Setup menu (see page 136). -
Page 17: Output
Connections Using other types of audio/ Using the S-Video or component video output video output To component If you can’t use the SCART AV connector to video input connect your TV to this recorder, there are To video standard audio/video output jacks, as well as input To audio input... -
Page 18: Receiver
Connections Connecting to a cable box or satellite receiver Satellite dish/ To antenna antenna/cable TV input From antenna If you have a cable box or satellite receiver wall outlet output with a built-in decoder, connect it to this recorder and your TV as shown on this Cable/Satellite From SCART AV receiver... -
Page 19: Decoder Box (1)
Connections Position the IR transmitter end of the • It is not possible to watch one TV G-LINK™ cable so that the IR receiver on programme and record another using your cable/satellite receiver will pick up the this setup. control signals (see diagram). Antenna/cable TV wall outlet SCART AV... -
Page 20: Decoder Box (2)
Connections Connecting an external Use a SCART cable (not supplied) to connect the AV1 (RGB)-TV AV connector decoder box (2) to a SCART AV connector on your TV. This enables you to watch discs. If you only have a decoder, connect it to this Use another SCART cable to connect recorder and your TV as shown on this the AV2 (INPUT 1/DECODER) AV... -
Page 21: Connecting Using Hdmi
Connections Connecting using HDMI AUDIO VIDEO ANTENNA COAXIAL S-VIDEO INPUT 3 AC IN AV 2 (INPUT 1/DECODER) DIGITAL OUT HDMI OUT 30 mA G-LINK If you have an HDMI or DVI-equipped CONTROL ANTENNA(DIGITAL) AV 1 (RGB) – TV COMPONENT VIDEO OUT OUTPUT monitor or display , you can connect it to... -
Page 22: About Hdmi
HD AV converter automatically not output). change inputs when playback begins on this • If you have connected to a Pioneer Flat unit (including when you have a GUI (such Screen TV, please select the HDMI setup as Disc Navigator) set to display on this on the display (refer to the supplied unit). -
Page 23: Connecting Other Av Sources
(white) audio jack to this components other than those made by device. Doing so will allow the same Pioneer. sound track to be recorded to both channels. You must connect to the INPUT 2 jack on the front panel. -
Page 24: Connecting A Usb Device
Connections Connecting a DV camcorder Important You can connect a DV camcorder or DVD • The Mass Storage Class (MSC) device recorder with DV output to the front panel should be FAT-compatible. Note that if DV IN jack. the device is partitioned, this recorder may not recognize it. -
Page 25: Plugging In
Connections JPEG file storage devices Using a PC • Digital still camera • Note that you can connect a PC to this device via USB to copy WMA/MP3, JPEG • Memory card reader (any type of memory and DivX files. For more information, see card) Copying files from a PC (Connect PC) on •... -
Page 26: Front Panel
Controls and displays Chapter 3 Controls and displays Front panel OPEN/CLOSE HDD/DVD HDMI A.TV D.TV STANDBY/ON COMMON INTERFACE DV IN INPUT 2 S-VIDEO VIDEO L(MONO) AUDIO ONE TOUCH STOP REC COPY INPUT A.TV/D.TV SELECT HDD indicator 10 Front panel display and IR remote Lights when the hard disk (HDD) is selected. -
Page 27: Common Interface
30 minute blocks. Note that neither CA modules nor smart cards are supplied or sold by Pioneer. Inserting a CA module The Common Interface card slot is located on the front panel of the recorder. -
Page 28: Display
Controls and displays Display Recording quality indicators (page 65) Lights during playback; blinks when playback is paused. Lights when the recording mode is set to XP (high quality). Lights when copying. Lights when the recording mode is set to Lights during recording;... -
Page 29: Remote Control
Controls and displays Remote control SUBTITLE (page 83) Press to display/change the subtitles included in multilingual DVD-Video discs. STANDBY/ON OPEN/CLOSE While watching D.TV, press to change PAUSE LIVE TV CONTROL the D.TV subtitles. INPUT SELECT TV/DVD ANGLE (page 84) AUDIO SUBTITLE ANGLE DISPLAY... - Page 30 Controls and displays DISC NAVIGATOR (pages 79, 91)/ While paused, press to advance a single TOP MENU (page 76) frame in either direction. Press to display the Disc Navigator screen, ® When GUIDE Plus+ is displayed, use or the top menu if a DVD-Video or finalized to display the previous/next day.
- Page 31 Controls and displays REC MODE (page 65) Press repeatedly to change the recording mode (picture quality). ONE TOUCH COPY (page 100) Press to start One Touch Copy of the currently playing title to DVD or the HDD. 16 OPEN/CLOSE Press to open/close the disc tray.
-
Page 32: Switching On And Setting Up
Getting started Chapter 4 Getting started Switching on and setting up Start the Setup Navigator. ENTER When you switch the recorder on for the first k Setting time, you can make several basic settings Complete this setup before you t Line System start using your recorder. -
Page 33: Getting Started
Getting started • The country setting will apply to both the • Downloading channels from your TV digital and analog TV tuners. Use the Download from TV option to download all the channels that your TV is • The clock will also be set automatically tuned to. -
Page 34: Manual Clock Setting
Getting started • If no channels were found when • Manual clock setting If no stations in your area are scanning for digital TV channels then broadcasting time signals, you can set this screen does not appear and the EPG the clock manually. -
Page 35: Services
Getting started For users receiving digital scan for available channels, as these are all used by the GUIDE Plus+ system. If any of broadcast services these things are not yet set, please run the Setup Navigator first (see Switching on and This unit can set its internal clock setting up on page 32). - Page 36 Getting started • Select your reception method (Terrestrial, Cable or Satellite). • Select your provider (if applicable). ENTER Enter your postal • Select the brand of your external code. receiver. • Identify which input your external receiver is connected to. After completing these steps the recorder will try and communicate with your external receiver and change the channel via the...
- Page 37 Getting started A If you are not using an external About EPG download receiver, this recorder will automatically • EPG data can only be received when the scan all channels for the Host Channel: recorder is in standby. (When not using the recorder, therefore, please switch it •...
- Page 38 Getting started Checking the downloaded data the following day Change the programme GUIDE Display the GUIDE Plus+ screen. numbers as you like. Changing the programme numbers allows you to decide the order in which the channels change when stepping through them sequentially.
-
Page 39: The Guide Plus+® System
Using the GUIDE Plus+® electronic programme guide Chapter 5 ® Using the GUIDE Plus+ electronic programme guide This chapter is only applicable if the EPG Type GEMSTAR-TV GUIDE INTERNATIONAL, INC. AND/ OR ITS RELATED AFFILIATES BE LIABLE FOR ANY Select setting made in the Setup Navigator (or AMOUNTS REPRESENTING LOSS OF PROFITS, LOSS the Initial Setup menu) is set to GUIDE Plus+. - Page 40 Using the GUIDE Plus+® electronic programme guide 5 Menu bar – Gives access to the various One-Button-Record areas of the GUIDE Plus+ system. The RED Action button (Record) is visible anytime you can highlight a programme 6 Grid – Shows TV listings information for title, including from the Grid, after a search, the next seven days by channel and time.
-
Page 41: Areas
Using the GUIDE Plus+® electronic programme guide Lock/Unlock video window cursor buttons, then press ENTER to return to the previous screen on that channel. When you enter the GUIDE Plus+ system, the channel you were watching remains visible in the video window. The date stamp Areas above the window lets you know the channel, ®... - Page 42 Using the GUIDE Plus+® electronic programme guide • Tune to a programme that’s currently showing Select ‘Search’ from the Menu • Set a programme to record bar. • Lock or unlock the video window • Access Information panels Select a category and a subcategory.
- Page 43 Using the GUIDE Plus+® electronic programme guide My TV Area Using My Choice keywords for a search In addition to the standard categories, you The My TV Area allows you to set up a can also set your own keywords. personal profile.
- Page 44 Using the GUIDE Plus+® electronic programme guide To add a channel to your profile, To add a keyword to your profile, press the YELLOW Action button. highlight ‘Keywords’ and press the YELLOW Action button. Select a channel from the mosaic of channel Use the ///...
- Page 45 Using the GUIDE Plus+® electronic programme guide Editing a scheduled recording Enter a name for the scheduled recording. You can edit any parameter in a scheduled recording, or delete it if you no longer require Highlight the left tile of a scheduled recording.
- Page 46 Using the GUIDE Plus+® electronic programme guide • Auto Replace Recording is only available Press the GREEN Action button (Frequency) to change the recording as an option with regular daily or weekly recordings. frequency. Press to access the extended recording options.
- Page 47 Using the GUIDE Plus+® electronic programme guide Deleting a scheduled recording Use the number buttons to enter a PlusCode programming number. Highlight the left tile of a scheduled recording. Please enter the PlusCode programming number and press ENTER to confirm. •...
- Page 48 Using the GUIDE Plus+® electronic programme guide Use the number and /// The Editor Area buttons to enter the recording date, then The Editor Area is the central location for you press the GREEN Action button (Next). to manage your channels. Any changes you make here will affect what is displayed in the Grid Area.
- Page 49 Using the GUIDE Plus+® electronic programme guide The Setup Area Changing the source and programme number The Setup Area is where you can set up the GUIDE Plus+ system for your particular Select ‘Editor’ from the Menu bar. region, TV reception conditions, and so on. Making changes to your GUIDE Plus+ setup Select ‘Setup’...
-
Page 50: Troubleshooting
Using the GUIDE Plus+® electronic programme guide ® Manual Host Channel setup GUIDE Plus+ FAQ and The GUIDE Plus+ system will automatically troubleshooting identify your Host Channel as soon as the recorder is put into standby for the first time. This FAQ covers only a few questions. - Page 51 Using the GUIDE Plus+® electronic programme guide Switch this recorder into standby. The terrestrial or cable connection only to next morning, please perform the GUIDE receive data this way. It is important that Plus+ setup again to see if your external you identify your Host Channel correctly receiver can now be controlled.
- Page 52 Using the GUIDE Plus+® electronic programme guide • I used the One-Button-Record feature • The automatic Host Channel search failed (RED Action button) to set a recording, or the GUIDE Plus+ system identified the but I recorded the wrong channel. wrong Host Channel for my region.
-
Page 53: The Digital Epg System
Using the digital electronic programme guide Chapter 6 Using the digital electronic programme guide Indicates the programme set for This chapter is only applicable if the EPG Type recording Select setting made in the Setup Navigator (or the Initial Setup menu) is set to Digital EPG. Appears when other programmes (often short ones) have been scheduled for the The Digital EPG system... -
Page 54: Using The Digital Epg
Using the digital electronic programme guide Using the Digital EPG • To quit the display of detailed information, press INFO again (or Using the Digital EPG you can check the RETURN/EXIT). schedule of digital TV programmes, view D007 13:40 - 14:05 ************ information about desired programmes,... - Page 55 Using the digital electronic programme guide Enter the timer recording settings. If you want to change the recording Use the / buttons to select a field; use mode, recording destination, etc., select the / buttons to change the value ‘Set Detailed’. In this area you can set: Record to –...
- Page 56 Using the digital electronic programme guide (UK only) – Choose whether or not This screen shows all the timer programmes EPG Link to have this device automatically record currently set. scheduled programmes from the Digital EPG even if the times in which they are Timer Programme View SUN 25/3 15:00 broadcast change.
- Page 57 Using the digital electronic programme guide • Standby – The recorder is in timer recording standby. Press then select ‘Modify’ ENTER • Valid Until ... (eg., Valid Until 13/8) (UK from the command menu panel. only) – When you have set to make a Alternatively, press ENTER.
- Page 58 Using the digital electronic programme guide Deleting a timer programme TIMER REC Press TIMER REC. You can delete timer programmes you no longer need. Highlight the timer programme TIMER REC you want to search. Press TIMER REC. ENTER Press then select ‘Alternate Highlight the timer programme Search’...
-
Page 59: Other Useful Epg Functions
Using the digital electronic programme guide Highlight the timer programme In the ‘Date’ field select a date you want to search. (within one week) to search in. Press then select Date ENTER Sun.12.Sep Time 12:00 ‘Recommendation Search’ from the Genre Select command menu panel. -
Page 60: About Dvd Recording
Note 1 Some DVD players, such as some Pioneer models, are compatible with VR mode discs. Check the operating instructions for your player for VR mode compatibility information. -
Page 61: About Hdd Recording
HDD after the disc (DVD-RW only), or use a new the maximum number of titles has been disc. Pioneer is not responsible for lost reached. recordings, damaged discs or other • The maximum continuous recording losses in these cases. -
Page 62: Restrictions On Video Recording
Recording on the LPCM setting, use the Bilingual Recording equipment and Recording setting (page 139) to select the copyright A/L or B/R audio channel to record before Recording equipment should be used only recording starts. In other cases, both for lawful copying. You are advised to check channels of a bilingual broadcast will be carefully what constitutes lawful copying in recorded and you can switch on playback. - Page 63 Recording For example, to select channel 4 (digital INFO • Press to display the channel channel D004), press 4 then ENTER; for banner for the current channel. channel 34 (digital channel D034), press 3, 4, ENTER. D001 ************ Wed.30.Apr 12:46 11:30 12:00 ********************...
- Page 64 Recording Using the MHEG application • If the NICAM audio setting (see NICAM Select on page 138) is set to NICAM and (UK only) you are watching a NICAM broadcast, Some stations bring you programmes with you can switch between NICAM and the MHEG (Multimedia and Hypermedia Regular (non-NICAM) audio.
-
Page 65: Recording Time
Recording Switching between TV and DVD When recording to DVD+R/+RW, SLP is the longest recording time available. If you When the recorder is stopped or recording select SEP or MN1 to MN3, the recording you can choose whether to have the audio/ mode will automatically revert to SLP. -
Page 66: Basic Recording From The Tv
Recording Basic recording from the TV AUDIO If you’re recording from the A.TV tuner, select the audio channel to record. DVD (VR) DVD (Video) DVD+R DVD+RW DVD-RAM HDD See Changing A.TV audio channels on page 64 for more on this. Basic recording from the TV involves just •... -
Page 67: Pause Live Tv
Recording TV tuner setup for Pause Live TV STOP REC Press to stop recording. To use this feature with an external TV tuner, • If you set the recording time in the the recorder must be connected to your TV previous step, you can still stop the using a SCART cable, and the AV. - Page 68 Recording Using the recorder’s internal tuner for STOP REC Press to stop the recording. Pause Live TV The operation is slightly different depending If you haven’t connected to your TV using a on the viewing source. See the Operation SCART cable (or your TV is not compatible table below for details.
-
Page 69: About Timer Recordings
Recording About timer recordings Important • A timer recording can’t be set if there are DVD (VR) DVD (Video) DVD+R DVD+RW DVD-RAM HDD already 32 timer programmes waiting to be recorded. Using the timer recording features you can program up to 32 timer recordings up to a •... - Page 70 Recording • VPS/PDC may not work with all Preventing use of the recorder broadcast stations in your country/area. before a timer recording (child Check with the stations for compatibility. lock) • The hours between 3:00 and 5:00 in the You can make all the front panel and remote morning are used by the GUIDE Plus+ control buttons inoperative using the child system to download programme...
-
Page 71: Component
Recording • What happens when two or more timer DISC NAVIGATOR programmes overlap? • Press during recording to select Basically, the programme with the another title to play. earlier recording start time has priority. You can use all the usual playback controls, However, the recorder will start such as pause, slow-motion play, scan and recording the programme with the later... -
Page 72: Players
Finalize the disc and DVD+R discs. A number of players again to generate a new title menu. (including many Pioneer models) can also play DVD-RW discs recorded in VR mode, Important finalized or not. Most players will not play VR •... -
Page 73: Initializing Recordable Dvd Discs
• Discs recorded partially or fully on the finalizing. Pioneer DVR-7000 DVD recorder do not support this feature. These discs will • DVD-R DL (Video mode) discs and have only a text title menu when finalized DVD+R DL discs must be finalized in on this recorder. -
Page 74: Dvd-Rw Auto Initialize
Recording DVD+RW and DVD-RAM discs can also be DVD-RW Auto Initialize initialized in order to erase the contents of the disc. DVD-RW Important • Default setting: VR Mode • Initializing a DVD-RW, DVD+RW or Initialization mode is automatically carried DVD-RAM disc will erase everything out when you insert a blank DVD-RW. -
Page 75: Introduction
Playback Chapter 8 Playback Introduction playback controls to operate at certain points in the disc. This is not a Most of the features described in this malfunction. chapter make use of on-screen displays. Navigate these using the cursor buttons and Select the HDD or DVD for ENTER. - Page 76 Playback Playing DVD discs While paused, press and hold The table below shows the basic playback to start slow-motion playback. controls for DVD-Video, and recordable DVD Press repeatedly to change the discs. playback speed. While paused, press to advance Press to start playback. PLAY a single frame in either If RESUME is displayed on-...
- Page 77 Playback Press to skip to previous/next Press to skip to previous/next PREV NEXT PREV NEXT chapter/title. (During playback track. you can also use the front panel CH +/– buttons.) Playing Video CDs/Super VCDs The table below shows the basic playback During playback, enter a title controls for Video CDs/Super VCDs.
-
Page 78: Playing Divx Video Files
Playback Playing DivX video files During playback, enter a track The table below shows the basic playback number then press ENTER to controls for DivX video files. skip directly to that track. Press CLEAR to clear a number Press to start playback. PLAY entry and start again. -
Page 79: Contents Of A Disc
Playback Using the Disc Navigator to Play the highlighted title. ENTER browse the contents of a disc • Press , then you can also select Play from the command menu panel. Use the Disc Navigator to browse the contents of a disc and start playback. Changing the display style of the Disc Navigator Using the Disc Navigator with... -
Page 80: Scanning Discs
Playback Using the Disc Navigator with • For instructions on playing Audio CD and WMA/MP3 discs, see Playing and playback-only discs copying music (Jukebox) on page 111. DVD-Video Video CD Super VCD Scanning discs Select DVD. HOME You can scan discs at various speeds, MENU Display the Home Menu. -
Page 81: Frame Advance/Frame Reverse
Playback • Select Play Mode from the command Press repeatedly to change menu for Audio CDs or WMA/MP3 files the slow motion speed. by pressing in the Jukebox (see One of four slow motion play speeds can be Playing music from the Jukebox on selected during playback. -
Page 82: Programme Play
Playback A-B Repeat programme play to repeat the tracks/ chapters in the programme list (see DVD HDD Video CD Super VCD DivX Programme play below). The A-B Repeat function allows you to specify two points (A and B) within a track or ENTER •... -
Page 83: Displaying And Switching Subtitles
Playback After pressing ENTER to add the title/ • From the programme menu you can chapter/album/track, the step number also: automatically moves down one. Start Programme Play – Starts playback of a saved programme list • To insert a step into the programme list, Cancel Programme Play –... -
Page 84: Switching Audio Channels
Playback Check the disc packaging for details of the HDD DVD (VR) DVD-RAM soundtrack options. L+R – Both channels (default) AUDIO • Change the audio soundtrack. L – Left channel only The current audio language is shown on- R – Right channel only screen and in the front panel display. -
Page 85: On-Screen
Playback Displaying disc information Shows recording restrictions for the current channel programme on-screen Stop ABC Pr 1 DVD-RW VR Resume Stereo You can display various on-screen Original XP (1h00m/DVD) Rem. 0h35m Copy Once Finalized information about the disc loaded or the Disc Name : Comedy shows HDD. -
Page 86: Playing From A Dv Camcorder
Playing and recording from a DV/HDD camcorder Chapter 9 Playing and recording from a DV/HDD camcorder You can also play back and record video • To record the incoming video, press from a DV camcorder connected to the DV HDD or DVD to select the HDD or a DVD for recording, then press ... - Page 87 Playing and recording from a DV/HDD camcorder Important ENTER Select ‘Start Rec’. • Some camcorders cannot be controlled using this recorder’s remote. Stop Stop • For best results when recording from a 1.02.22 DV camcorder to this recorder, we Control with these Start Rec buttons Pause Rec...
-
Page 88: About Dv
Playing and recording from a DV/HDD camcorder • If a timer recording is scheduled to start, From the Initial Setup menu, check that the DV audio input is setup as you and in some other instances, the disc will not be finalized. require. -
Page 89: Copying From An Hdd Camcorder
Playing and recording from a DV/HDD camcorder • Audio input to the DV IN jack should be 32 kHz or 48 kHz (not 44.1 kHz). ENTER Select ‘Yes’ to confirm or ‘No’ • Picture disturbance in the recording to cancel. may occur if the source component Select Yes and press ENTER. -
Page 90: Editing Options
Editing Chapter 10 Editing Editing options The table below shows which commands you can use with the HDD and different disc types. DVD-R/-RW DVD-R/-RW, DVD-RAM (Video mode), (VR mode) DVD+R/+RW Original Play List Create (page 92) ... -
Page 91: The Disc Navigator Screen
Editing The Disc Navigator screen PREV NEXT • When in the title list, press to display the previous/next page if there The Disc Navigator screen is where you can are more titles than can be displayed. edit video content on unfinalized Video mode and DVD-R/-RW (VR mode) discs, DVD+R/ DISPLAY •... -
Page 92: Hdd Genres
Editing HDD genres The large capacity of the HDD means that Highlight the title you want to there may be many hours of video in the play. recorder. To help you organize your HDD video content you can assign different ENTER Select ‘Play’... - Page 93 Editing • For discs formatted on a different DVD recorder, you will see only a limited character set. • You can erase a title quickly by pressing CLEAR when the title is highlighted. Confirm the edit by pressing ENTER. ENTER Select ‘OK’...
- Page 94 Editing The thumbnail setting screen appears and Using a USB keyboard to enter a name the playback starts from the beginning of the Using a USB keyboard connected to this title. recorder makes entering names very quick and convenient. When in USB keyboard Use the playback controls (, , , input mode, a USB icon ( ) appears in the...
- Page 95 Editing Divide ENTER HDD only: Select the type of HDD DVD (VR) DVD-RAM Play List only edit. Use this command to divide a title into two. HDD/DVD RECORDER Note that once divided, the two new HDD Please select the type of editing. titles cannot be recombined into one again.
-
Page 96: Chapter Edit
Editing Chapter Edit You can keep dividing the chapter as many times as you wish (up to DVD (VR) DVD-RAM HDD 999 chapters per DVD-R/-RW/-RAM disc or 99 chapters per HDD title). When editing a VR mode DVD or video on •... - Page 97 Editing Set Genre ENTER Select ‘Edit’ > ‘Lock’ from the command menu panel. An unlocked title will become locked; a Use this command to assign a genre to a locked title will be unlocked. Locked titles are title. shown in the Disc Navigator with a padlock icon.
- Page 98 Editing ENTER Highlight the title you want to Select one of the user- combine. definable genre names. This title will remain in the same place after combining with another title. Disc Navigator (HDD) 10Titles 23:00 FRI 3/12 Pr 4 SP 11/29 MON 7:00PM Play 23:00 Fri 3/12 Pr 4 SP...
-
Page 99: Frequently Asked Questions
Editing about your edits requires a certain amount of disc space. As you edit, this ENTER Select the command that you information builds up, eventually want applied to all the marked titles. preventing you from editing further. For example, select Erase to erase all the marked titles. -
Page 100: One Touch Copy
Copying and backup Chapter 11 Copying and backup Introduction Restrictions on copying Commercial DVD-Video discs are protected Use the copying features of this recorder to: using Copy Guard. These discs cannot be copied to the HDD. • Back up important recordings stored on the HDD to a DVD. - Page 101 Copying and backup HDD to DVD copies are made in the same 40 characters of a name are copied. recording mode. When copying DVD to • The chapter markers in the copy may not HDD, the copy is made in whatever be in exactly the same positions as the recording mode is currently set.
-
Page 102: Using Copy Lists
Copying and backup • Thumbnail picture markers and chapter HOME MENU markers for the Disc Navigator are Display the Home Menu. copied, but their position in the copy may be slightly changed from the original. Select ‘Copy’ > ‘HDD DVD’. ENTER •... - Page 103 Copying and backup Depending on the title , high-speed copying • Erase Section – Erase part of a title (see may not be possible to DVDs. Erase Section on page 94). • Move – Change the order of titles in the Copy List (see Move on page 97).
-
Page 104: Copying From Dvd To Hdd
Copying and backup Copying from DVD to HDD ENTER Select ‘Next’ to proceed. Important 2 Title Copy HDD DVD (Video mode) • The DVD to HDD Copy screen isn’t Title Edit 1 > 2 > 3 20:00 Wed 29/03 Pr 2 SP accessible when a finalized Video mode 20:00 Wed 22/03 Pr 2 SP Back... -
Page 105: Recording Mode
Copying and backup ENTER ENTER Select ‘Next’ from the Select a recording mode for the command menu panel to proceed to the copy. • High-Speed Copy – The Copy List is title edit screen. copied at the same recording quality as the original. -
Page 106: Using Disc Backup
Copying and backup ENTER ENTER Select a bilingual audio option. Select ‘Start’. Disc Back-up Using disc backup Read from disc and save to HDD. Start reading? * See also Copyright on page 100. This feature offers a simple way to make a Cancel Start backup copy of finalized DVD-R/-RW (Video... - Page 107 Copying and backup Select ‘Start’ to start writing the backed-up data to the blank disc. Disc Back-up Write back-up data from Hard Disk Drive. The disc contents will be overwritten. OK to start? Cancel Start • To see the progress of the backup, press DISPLAY.
-
Page 108: Playing Divx Files
Playing and copying DivX files (PC VIDEO) Chapter 12 Playing and copying DivX files (PC VIDEO) The PC VIDEO function is used to play DivX • Press SUBTITLE or ANGLE to change files recorded on the HDD, DVD, or CD-R/ the page. -
Page 109: Copying Divx Files To The Hdd
Playing and copying DivX files (PC VIDEO) • For a description of operations during • Copy VIDEO FILE from a USB Device – playback, see Playing DivX video files on Copies DivX files from a USB device onto page 78. the HDD. -
Page 110: Editing Files On The Hdd
Playing and copying DivX files (PC VIDEO) Editing files on the HDD Erasing a title or folder Select the title or folder you want to erase. • Erasing a folder will erase all the titles contained in it. Please be careful! ENTER Select ‘Erase’... -
Page 111: Copying Music To The Hdd
Playing and copying music (Jukebox) Chapter 13 Playing and copying music (Jukebox) The Jukebox feature allows you to use the recorder’s HDD to store and playback music ENTER Select the location of the files from your CDs. WMA/MP3 files recorded on you want to copy. - Page 112 Use the Update reload function. Disc with the latest data downloaded from the Pioneer website to update the built-in Gracenote database (see Navigate to the last entry in the Gracenote Database on page 146).
-
Page 113: Playing Music From The Jukebox
Playing and copying music (Jukebox) ENTER ENTER Select ‘Acquire Track Name’ Select the artist you want to from the command menu panel. play back. The screen below shows artists stored on the HDD: Playing music from the Jukebox (HDD) Jukebox Artist List 10 Artists 1 Artist1... -
Page 114: Repeat Play
Playing and copying music (Jukebox) • For a description of operations during Playing your favourite music (Play playback, see Playing Audio CDs and List) WMA/MP3 discs on page 77. You can collect and play back only your favourite songs stored on the HDD. Playing music files on the HDD in Creating a play list random order... -
Page 115: Copying Albums/Tracks
Playing and copying music (Jukebox) Changing the display style of the Cancel – Cancels the switching of the display. Jukebox • Display Mode Album – Displays the folders of the WMA/MP3 files. Track – Displays the tracks of the WMA/ ENTER Select an artist/album you MP3 files. -
Page 116: Editing The Hdd Jukebox
Playing and copying music (Jukebox) Editing the HDD Jukebox A number of commands are available for editing and changing the playback behavior of albums. HOME MENU Display the Home Menu. ENTER Select ‘Jukebox’ > ‘Play/Edit Music on the HDD’. ENTER Select what you want to edit. -
Page 117: Locating Jpeg Picture Files
Playing and copying photos (PhotoViewer) Chapter 14 Playing and copying photos (PhotoViewer) From the PhotoViewer you can view JPEG • From the Folder Information column, photos and picture files stored on the HDD, you can change thumbnails via the / ... -
Page 118: Playing A Slideshow
Playing and copying photos (PhotoViewer) • Press PREV or NEXT to change the page. Display the view options panel. • You can change folders via the / The view options panel buttons. • If you encounter a disc that will not play, PhotoViewer (HDD) check that the disc and file formats are Folder2... - Page 119 Playing and copying photos (PhotoViewer) Zooming an image During a slideshow you can zoom in to Display the command menu enlarge a portion of the picture by a factor of panel. two or four. You can also move the area of The command menu panel the picture displayed.
-
Page 120: Creating Photo Movies
Playing and copying photos (PhotoViewer) Creating photo movies etc.). Normal (OFF) - Photos are displayed on Use this procedure to create photo movies the entire screen and switch. combining the photos and music recorded • Play List on the HDD. Photo movies are stored on the Select the music to be used for the photo HDD as video titles and can be copied to movie. -
Page 121: Copying Files To A Dvd-R/-Rw
Playing and copying photos (PhotoViewer) An orange check mark box () is shown by the item you selected. A blue check mark Select a file to import. box () appears on the folder select screen • To import multiple files, use the Multi- when files from that folder are selected. -
Page 122: A Dvd-R/-Rw
Playing and copying photos (PhotoViewer) • After backing up the pictures in your Load a blank (or unfinalized Video digital camera to DVD, we recommend mode) DVD-R or DVD-RW disc. verifying that they have been recorded HOME MENU properly before deleting anything from Display the Home Menu. - Page 123 Playing and copying photos (PhotoViewer) • There can be up to 999 folders on the • Copying a folder will copy all the files HDD. contained in it. • To copy multiple files or folders, use the Erasing a file or folder Multi-Mode;...
-
Page 124: Printing Files
Playing and copying photos (PhotoViewer) Locked files are shown with a padlock icon PhotoViewer (HDD) next to them. To remove all locks within a Folder2 Folder Size 999 MB given folder, choose ‘Folder Option’ > 001 PIOR0000 Start Slideshow Erase ‘Unlock Folder Contents’. -
Page 125: Connecting The Pc
Copying files from a PC (Connect PC) Chapter 15 Copying files from a PC (Connect PC) When the recorder is connected to a PC Verify that the import screen is using the USB port, WMA/MP3, JPEG and displayed on the device. DivX files stored on the PC can be copied If no actions are carried out for 20 minutes, the onto the recorder’s HDD. - Page 126 • Artists, albums and track names that do not conform to the ISO8859-1 standard •If synchronization fails, make sure that may display differently in Windows the Pioneer. HDD/DVD-Recorder Media Player 11 and the Jukebox. device is selected at the synchronization screen of Windows •...
-
Page 127: Copying Jpeg And Divx Files
In Windows Explorer, the recorder’s folder structure shown below. It is not folder is displayed as shown below. possible to place JPEG files directly into the Picture folder. Also, it is not possible Pioneer Pictures Fixed to create more folders under folders you HDD/DVD-Recorder storage have created. -
Page 128: Basic Settings
The Disc Setup menu Chapter 16 The Disc Setup menu From the Disc Setup menu you can name Lock Disc discs, lock the contents to prevent DVD (VR) DVD-RAM accidental recording and erasure, initialize and finalize discs. The Disc Setup menu is •... -
Page 129: Initialize Settings
The Disc Setup menu Initialize settings Undo Finalize DVD-RW DVD-R DVD-RW DVD+RW DVD-RAM You can undo the finalization on DVD-RW You can initialize a recordable DVD-R/-RW discs recorded on this recorder in Video disc for either VR mode or Video mode mode. -
Page 130: Initialize Hdd
The Disc Setup menu HOME MENU Display the Home Menu. ENTER Select ‘Setup’ > ‘Disc Setup’. ENTER Select ‘Optimize HDD’ then ‘Start’. Disc Setup Start Basic Optimize HDD Initialize Finalize Optimize HDD Optimize HDD Optimize HDD A progress bar indicates how long there is left to go. -
Page 131: And External Inputs
The Video Adjust menu Chapter 17 The Video Adjust menu Using the Video Adjust menu you can set up • DTV/LDP – suitable for digital the picture quality for the built-in tuner and broadcasts and Laserdiscs external inputs, for disc playback, and for •... -
Page 132: Playback
The Video Adjust menu • PureCinema – This setting optimizes the Setting the picture quality picture for film material when the video for disc playback output is set to progressive. Usually set to Auto; but try switching to Off if the This setting determines how the picture will picture appears unnatural. - Page 133 The Video Adjust menu • Black Setup – Corrects the standard reference black level. The Black Setup ENTER Select the picture quality setting is only valid for NTSC output setting you want to adjust. signals. Black Setup is ineffective for HDMI output.
-
Page 134: Using The Initial Setup Menu
The Initial Setup menu Chapter 18 The Initial Setup menu Using the Initial Setup menu The Initial Setup menu is where you can set various recorder options for sound, picture, language and so on. Some settings can only be changed when the recorder is stopped. During playback and recording these settings are grayed out in the Initial Setup menu. - Page 135 The Initial Setup menu Setting Options Explanation Setup Start Select to start the Setup Navigator. See also Switching on and setting up on page 32. Navigator Digital Tuner Scans for digital channels and replaces all the channel Replace Next Screen presets with the results.
- Page 136 The Initial Setup menu Setting Options Explanation Signal Check Next Screen Use this screen to check the signal level and quality of digital channels. Use the / buttons to change the RF channel; select Add New Channels then press ENTER to scan for new channels;...
- Page 137 The Initial Setup menu Setting Options Explanation Manual CH Next Screen Proceed to the next screen if you need to adjust any of the settings made by auto tuning. Select your country, then Setting proceed to the manual channel setting screen: •...
- Page 138 The Initial Setup menu Setting Options Explanation AV1 Out Video • Sets the AV1 (RGB)-TV SCART output to standard composite video (compatible with all TVs). Sets the AV1 (RGB)-TV SCART output to S-Video. S-Video Recommended if you are using a long SCART cable. Sets the AV1 (RGB)-TV SCART output to RGB.
- Page 139 The Initial Setup menu Setting Options Explanation Bilingual A/L • Record the left (A) channel of a bilingual source when recording to HDD with HDD Recording Format set to Video Recording Mode On, to DVD-R/-RW (Video mode) or DVD+R/+RW or in LPCM mode, from an external source.
- Page 140 The Initial Setup menu Setting Options Explanation Language English • Sets the language of the on-screen displays to English. Language Choose from the languages displayed for the on-screen available displays. languages Sets the default audio language for DVD-Video playback to Audio English •...
- Page 141 The Initial Setup menu Setting Options Explanation DVD Menu w/Subtitle Sets the language of DVD-Video menus to the same as that set for the subtitle language. Language Language • Sets the language of DVD-Video menus to English. English Choose from the displayed languages to set the default available language for DVD-Video menus.
- Page 142 The Initial Setup menu Setting Options Explanation Set Thumbnail 0 seconds • Sets the default thumbnail picture in the Disc Navigator to the first frame of the title. Sets the default thumbnail picture to 30 seconds into the 30 seconds title.
- Page 143 The Initial Setup menu Setting Options Explanation Playback TV Screen Size Select if you have a standard 4:3 TV and prefer the letter box format presentation for widescreen material. (Letter Box) Select if you have a standard 4:3 TV and prefer the pan and scan presentation for widescreen material.
- Page 144 The Initial Setup menu Setting Options Explanation HDMI Output (only available when an HDMI device is connected) Screen 1920 x 1080p Constant 1920 x 1080p output. Resolution 1920 x 1080i Constant 1920 x 1080i output. 1280 x 720p Constant 1280 x 720p output. 720 x 576p Constant 720 x 576p output (when setting the Input Line System to 525 System, video is output in 720 x 480p).
- Page 145 HDMI Control On • Enables the HDMI Control function. Select this option when connected to an HDMI Control-compatible Pioneer Flat Screen TV, AV system (amplifier or AV receiver etc.) or HD AV converter. Disables the HDMI Control function. Select this option when...
- Page 146 The Initial Setup menu Setting Options Explanation Options 2 Restart USB If the connected USB device does not respond to the recorder, try using this option to restart it. If the device still Device does not work properly try switching it off then back on, and/ or disconnecting then reconnecting the USB cable.
-
Page 147: Language Options
Disc created with the latest data Access the Software Update screen from the downloaded from the Pioneer website. Options menu. For details, visit the Pioneer website. There are three options available: Manual (http://www.pioneer.eu) Update, Auto Update and Technical DISPLAY Information. - Page 148 The Initial Setup menu About NTSC on PAL TV ENTER Depending on the Input Line System setting Select ‘Setup’ > ‘Initial Setup’ > and the NTSC on PAL TV setting, the signal ‘Option2’ > ‘Gracenote Database’ > format output when the recorder is stopped ‘Database Update’.
-
Page 149: Additional Information
Additional information Chapter 19 Additional information Setting up the remote to Maker Code(s) control your TV ACURA 44 ADMIRAL 31 AIWA 60 You can use the supplied remote to control AKAI 32, 35, 42 your TV. To be able to use this feature you AKURA 41 first have to program the remote with a ALBA 07, 39, 41, 44... - Page 150 WHITE WESTINGHOUSE 07 OTTO VERSAND 31, 32, 07, 42 YOKO 07, 42, 46 PALLADIUM 38 ZENITH 03, 20 PANAMA 46 PIONEER 00, 31, 32, 07, 36, 42, 51 PANASONIC 31, 07, 08, 42, 22 PATHO CINEMA 42 PAUSA 44 PHILCO 32, 42...
-
Page 151: Minimum Copying Times
Additional information Minimum copying times The table below shows the minimum HDD to DVD copying time for one hour of video. Please note that not all discs are compatible with high-speed copying. Check with the disc manufacturer for compatibility. Rec mode DVD disc type 10 h DVD-R/1x... -
Page 152: Manual Recording Modes
Additional information Manual recording modes The table below shows the approximate recording times for different DVD types in each manual recording mode, as well as the standard recording mode equivalents. For recording time on the HDD, see Specifications on page 168. Rec. -
Page 153: Troubleshooting
Investigate the other components and electrical appliances being used. If the trouble cannot be rectified even after checking the points below, ask your nearest Pioneer authorized service center or your dealer to carry out repair work. General... - Page 154 Additional information Problem Remedy No picture • Check that everything is connected properly (page 14). • Check that the connected TV and/or the AV amp/receiver is set to the correct input. • The recorder may be set to progressive scan with an incompatible TV.
- Page 155 Additional information Problem Remedy Audio/subtitle • Note that audio and subtitle languages cannot be changed during the recording of a digital broadcast. language cannot be • You can only use the audio track and subtitles for the language that changed were selected at the time of recording a digital broadcast.
- Page 156 Additional information Problem Remedy Timer programme • When setting the recording channel, make sure you set the recorder’s built-in TV tuner, not the TV’s built-in tuner. doesn’t record • When recording to a DVD-R/-RW (Video mode) or DVD+R/+RW, successfully programmes that are copy-once protected cannot be recorded. Use a VR mode formatted disc for copy-once material (page 62).
- Page 157 Additional information Problem Remedy The device connected • Check that the device is compatible with this recorder (page 24). • Use a USB cable less than 5 m in length. to the USB port is not • Check that the USB cable is inserted fully. recognized •...
- Page 158 Additional information HDMI Problem Remedy • Try disconnecting then reconnecting the HDMI cable (while the The connected HDMI or power of both components is on). DVI device does not display any picture • Try switching the power of the HDMI/DVI device off then back on. •...
- Page 159 Pioneer. When using HDMI Control-compatible components manufactured by companies other than Pioneer, set the HDMI Control to Off (page 145). If the unit does not operate normally due to external effects such as static electricity, disconnect...
-
Page 160: Working
Erase titles/chapters or combine data. chapters. The disc was finalized on a non-Pioneer DVD • This disc cannot be recorded. Undo the finalization. recorder. Undo the finalization in order to recording/editing. - Page 161 Note that contents on the HDD cannot be read. The HDD may be damaged or broken. Please ask your nearest the HDD may be erased when servicing this unit. Pioneer-authorized service center or your dealer to carry out repairs.
- Page 162 Additional information Message Explanation/Action As the HDD info cannot be properly read, no new • The Hard Disk Drive info is incorrect. Use the Disc Setup menu to reinitialize. recordings can be made. Reinitializing the HDD (page 130) may result in your being able to make recording again.
-
Page 163: Front Panel Displays
Message Explanation/Action The HDD may be damaged or broken. Please ask your nearest Pioneer-authorized • E01 service center or your dealer to carry out repairs. As the HDD info cannot be properly read, no new recordings can be made. Reinitializing •... -
Page 164: Language Code List
Additional information Language code list Language (Language code letter), Language code Japanese (ja), 1001 Bhutani (dz), 0426 Kirghiz (ky), 1125 Serbo-Croatian (sh), 1908 English (en), 0514 Esperanto (eo), 0515 Latin (la), 1201 Sinhalese (si), 1909 French (fr), 0618 Estonian (et), 0520 Lingala (ln), 1214 Slovak (sk), 1911 German (de), 0405... -
Page 165: Screen Sizes And Disc Formats
Additional information Screen sizes and disc formats When viewing on a standard TV or monitor Screen format of disc Setting Appearance The programme is shown in widescreen with 16:9 4:3 (Letter Box) black bars at the top and bottom of the screen. -
Page 166: Handling Discs
Although not as fragile as the recorded side, product. Pioneer disclaims all liability scratches can still result in a disc becoming arising in connection with the use of shaped unusable. -
Page 167: Hints On Installation
Additional information Hints on installation Moving the recorder We want you to enjoy using this unit for years If you need to move the recorder, first to come, so please bear in mind the remove the disc, if loaded, and close the disc tray. -
Page 168: Specifications
Additional information Specifications DVD-R DL/DVD+R DL Fine (XP) ..... . . Approx. 1 h 51 m Standard Play (SP)....Approx. 3 h 35 m Long Play (LP) . - Page 169 Additional information Input/Output AV Connectors (21-pin connector assignment) AV connector input/output ..21-pin connector Antenna This connector provides the video and audio signals ..75 Ω IEC 169-2 connector for VHF/UHF in/out (analog) for connection to a compatible colour TV or monitor.
- Page 170 Additional information...
- Page 171 Additional information...
- Page 172 Additional information Follow the instructions for ‘Replace Channels’ (page 135).
- Page 173 Additional information payment to you for any information that you provide. ® This product includes FontAvenue fonts licenced You agree that Gracenote, Inc. may enforce its rights by NEC Corporation. FontAvenue is a registered under this Agreement against you directly in its own trademark of NEC Corporation.
- Page 174 253 Alexandra Road, #04-01, Singapore 159936 TEL: 65-6472-7555 PIONEER ELECTRONICS AUSTRALIA PTY. LTD. 178-184 Boundary Road, Braeside, Victoria 3195, Australia, TEL: (03) 9586-6300 PIONEER ELECTRONICS DE MEXICO S.A. DE C.V. Blvd.Manuel Avila Camacho 138 10 piso Col.Lomas de Chapultepec, Mexico,D.F. 11000 TEL: 55-9178-4270 K002_B_En Printed in UK <VRB1486-A>...
Need help?
Do you have a question about the DVR-560HX-K and is the answer not in the manual?
Questions and answers