Table of Contents
Advertisement
Advertisement
Table of Contents

Related Manuals for Kenmore 120-volt portable electric dryers


Summary of Contents for Kenmore 120-volt portable electric dryers
- Page 1 Owner's Manual and Installation Instructions ® 120-Volt PORTABLE ELECTRIC DRYERS imrmm m. mm_m mm_l IMPORTANT: Read and follow all safety and operating instructions before first use of this product. Sears, Roebuck and Co., Hoffman Estates, IL 60179 U.S.A. PART NO. 3406895 PRINTED IN U.S.A.
-
Page 2: Troubleshooting
Please read this manual, It will help you Use the space below to record the model number and serial number of install and operate your new Kenmore portable dryer in the safest and most your new Kenmore portable dryer, economical way. - Page 3 One Year W arranty o n " Mechanical and Electrical Parts Warranty service is available by For one year from the date of purchase, contacting your nearest Sears if this dryer is installed and operated Service Center in the United States. according to the instructions in this This warranty applies only while this manual, Sears will repair or replace...
-
Page 4: Your Safety I Simportant Tous
YOUR SAFETY I SIMPORTANT TOUS. WARNING: To reduce the risk of fire, • Do not tamper with controls. electric shock, or injury to persons when • Do not repair or replace any part of the using your dryer, follow basic precautions, dryer or attempt any servicing unless including the following: specifically recommended in the Owner's... -
Page 5: Installation
INSTALLATION OVERVIEW For a complete list of tools and parts needed, see pages 5-7. A. SELECT LOCATION FOR YOUR DRYER (pgs. 8-18) Recessed Areal Standard Installation (p. 8) Closet Installation Instructions (p. 9) r---- B. INSTALL CORD BRACKETS (p, 11) Tools Needed: Parts Needed: screwdriver... -
Page 6: Install Casters
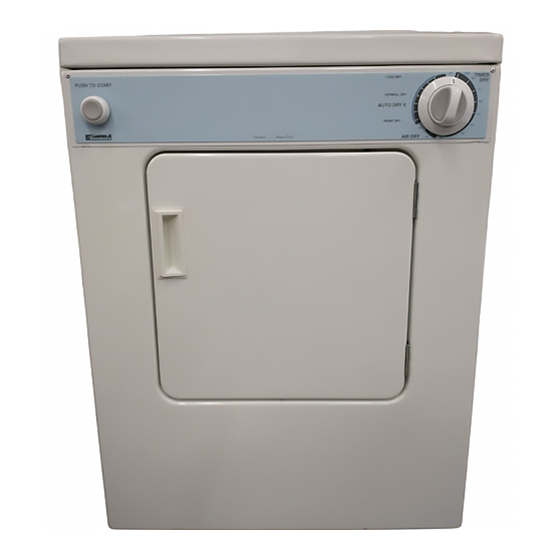
INSTALL CASTERS (p. 11) Tools Needed: PaNs Needed: A_u_able w_nch Fl._,llight (optional 4 casters (supplied with dryer) depending on installation) - Page 7 D. INSTALL KNOBS (p. 11) L-----q Parts Needed: 2 knobs (supplied with dryer) PUSH TO START CYCLE SELECTOR E. CONNECT EXHAUST (pgs. 13-16) Parts Needed: Tools Needed: 4-Inch rigid 4-Inch metal elbow(s) or flexible heavy (optional depending metal vent Tin snips Duct tape on installation) Flashlight...
-
Page 8: Standard Installation
A. SELECT LOCATION FOR YOUR DRYER Selecting the proper location for your dryer makes installation easier and Explosion Hazard gives you the best drying performance. Keep flammable materials and vapors, STANDARD INSTALLATION such as gasoline, away from dryer. Place dryer at least 18 inches above Check location where dryer will be installed. -
Page 9: Product Dimensions
RECESSED AREA/CLOSET PRODUCT DIMENSIONS INSTALLATION INSTRUCTIONS Location must be large enough to fully Check governing codes and ordinances. open dryer door. This dryer may be installed in a recessed area or closet. Confined or Recessed Area Installation An exhaust system is not required for operation of the portable dryer. - Page 10 STAND KIT CLEARANCES 3" 12" ***48+sq+ in_+. D minimum ventilation area Dryer 12" ***24sq,in_+ minimum ventilation 3" al_a 23'_16" _'1"_ 281/4"_ FrontView SideView FrontView StackStand StackStand (DoorNotShown) (DoorShown) (DoorWith Vent) * 1" dimensionmustbe from frontof timerknob. ** Additional clearances for wall, door and lloor moldings may be required. *** Opening is minimunl for closet door.
- Page 11 B. INSTALL CORD BRACKETS STEP 3. Now stand the dryer up. Be careful that the dryer does not roll away from you. The power supply cord may be wrapped around the brackets for D. INSTALL KNOBS storage convenience when the dryer is not in use.
-
Page 12: Electrical Requirements
ELECTRICAL REQUIREMENTS GROUNDING INSTRUCTIONS This appliance must be grounded. It is your responsibility: In the event of malfunction or breakdown, • To assure that the electrical installation grounding will reduce the risk is adequate and in conformance with of electric shock by providing a path the National Electrical Code, ANSI/NFPA of least resistance for electric current. - Page 13 E. CONNECT EXHAUST ROUTE THE VENT Typical installations exhaust from the rear of the dryer. A properly exhausted dryer will give Avoid pushing the dryer tightly against you the shortest drying time, lower a wall, This can crush or kink the vent, your utility bill, and extend the life of Use the straightest path you can, where the dryer.
-
Page 14: Determine Vent Length
DETERMINE VENT LENGTH STANDARD OFFSET CONNECTIONS Using 4-inch rigid heavy metal vent: Maximum Exhaust Lengths: NOTE: Do not secure exhaust vent • The maximum length of the rear joints with screws. Screws can catch lint exhaust system depends on the and slow the drying process. - Page 15 STEP 4. Connect vent to elbow. Tape the STEP 5. Place a clamp on each end of vent elbow, Install one end of elbow on joint with duct tape. Tighten clamp. vent, the other end to the exhaust hood. STEP 5, Install one end of elbow on vent, Tape joints and tighten clamps.
- Page 16 OFFSET CONNECTIONS WITH CLOSE CLEARANCES When your exhaust vent is in a close NOTE: Vent systems come in many clearance behind the dryer, or if you are varieties. Select the type that best fits installing your dryer in a recessed area or your installation.
-
Page 17: Final Steps
It will help assure you that you have a proper installation and increase your satisfaction with your Kenmore dryer. I Check that all parts you removed Check to make sure you have all from the parts packages are now the tools you started with. -
Page 18: Stopping/Restarting Your Dryer
STARTING YOUR DRYER Fire Hazard Explosion Hazard No washer can completely Keep flammable materials and remove oil. vapors, such as gasoline, away from dryer. Do not dry anything that has ever had any type of oil on it (including Do not dry anything that has ever cooking oils). -
Page 19: Cycle Description
CYCLE DESCRIPTION Moist air indicates clothes are still damp, dry air indicates that moisture has been removed. The AUTO DRY Cycle saves you time • The End-of-Cycle Signal sounds once by providing the best drying results the cycle is completed. in the shortest time. -
Page 20: End Of Cycle Signal
USING AIR DRY END-OF-CYCLE SIGNAL irjmml- Using this cycle gives you all Your dryer sounds a signal when the benefits of hang drying with a drying cycle is finished. a shorter drying time. The signal is helpful when you are Use the AIR DRY Cycle to get 10 minutes drying permanent press, synthetics, and other items, These items should... -
Page 21: Sorting Clothes
SORTING CLOTHES Follow these recommendations to help save on utility bills and prolong the life of your garments. PREPARING CLOTHES FOR DRYING • Refer to your Washer Owner's Manual for proper washing techniques and additional laundry tips. • See page 4 of this book for Important Safety Instructions. -
Page 22: Drying Tips
USING DRYER DRYING TIPS FABRIC SOFTENERS Dryer fabric softeners are recommended for reducing static cling. Always fellow package instructions carefully. • Put one fabric softener sheet on top of the load before starting the dryer. Do not add a fabric softener sheet after the drying cycle has started. -
Page 23: Cleaning Your Dryer
This section explains how to care for your dryer properly and safely. To clean dryer drum: STEP 1. Make a paste with detergent and very warm water and apply to a soft Proper care of your dryer can extend cloth. Continue with STEPS 2-4. its life and help you avoid costly service calls. -
Page 24: Cleaning The Lint Screen
CLEANING THE LINT SCREEN IMPORTANT: • Do not run the dryer with the lint screen Remove Lint Before Every Load loose, damaged, blocked, or missing. The lint screen is located on the back wall Doing so can cause overheating and of your dryer, Clean it before every load. -
Page 25: Removing Accumulated Lint
REMOVING ACCUMULATED LINT Lint can gather inside the exhaust To remove accumulated lint from vent or dryer and be fuel for a fire. Lint exhaust vent (if used): should be removed every 2 to 3 years, STEP 1, Disconnect exhaust vent from the or more often, depending on dryer usage. - Page 26 Most laundering problems are easily and money by helping you avoid solved if you understand the cause, unnecessary service calls, Using these tables will save you time Problem Possible Cause Solution Not Drying The portable dryer operates Expect longer drying times. atisfactorily at a Iower wattage.
- Page 27 Problem Possible Cause Solution Dryer Will Using a regular fuse. Replace with a time-delay fuse. Not Run Dryer door not firmly closed. Close dryer door tightly. (cont'd) PUSH TO START Button Press PUSH TO START Button again. not firmly pressed. Controls not set in an Reset controls in an ON position.
- Page 28 The Sears Maintenance Agreement assurance that you can depend on Sears • Is your way to buy tomorrow's for service, Your Kenmore Electric Dryer service at today's prices. has added value when you consider that • Eliminates repair bills resulting Sears has service units nationwide, from normal use.
- Page 29 Forthe repair or replacement partsyou need delivered directly to your home Call7 am - 7 pm, 7 days a week 1-800-366-PART (1-800-366-7278) Forin-home major brandrepair service Call24 hours a day, 7 days a week 1-800-4-REPAIR (1-800-473-7247) Forthe location of a Sears Parts and Repair Center in your area Call24 hours a day, 7 days a week 1-800-488-1222...
Need help?
Do you have a question about the 120-volt portable electric dryers and is the answer not in the manual?
Questions and answers