
Subscribe to Our Youtube Channel
Related Manuals for Beyerdynamic MCS 20


Summary of Contents for Beyerdynamic MCS 20
-
Page 1: Operating Instructions
BEDIENUNGSANLEITUNG OPERATING INSTRUCTIONS NOTICE D’UTILISATION MCS 20 Kabelgebundenes Konferenzsystem Wired Conference System Système de conférence à fil... -
Page 3: Table Of Contents
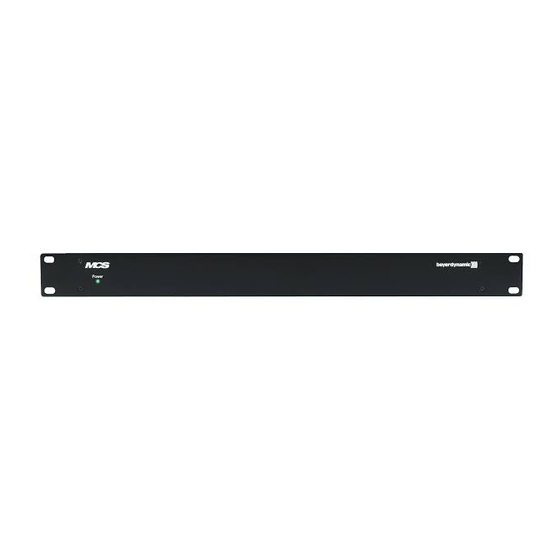
MCS 20 power supply unit ........ -
Page 4: Introduction
Exemption from liability • beyerdynamic GmbH & Co. KG will not be liable if any damage, injury or accident occurs due to negligent, incorrect or inappropriate operation of the product. - Page 5 • If you connect defective or unsuitable accessories, the equipment could be damaged. Only use connection cables available from or recommended by beyerdynamic. If you use cables you have made up yourself, all claim to warranty is null and void.
-
Page 6: Controls And Indicators
• Make sure the power cable cannot be damaged or severed by sharp objects. • Connect the MCS 20 power supply unit to the mains. Make sure the mains cable is firmly connected to the MCS 20 power connection . -
Page 7: Cabling
• To avoid an overload of the cables never connect two or more power supply units with T-adapters! • Several MCS 20 units can be stockpiled in a rack. For a sufficient ventilation leave a space of one height unit (U) over and under the unit. -
Page 8: Microphone Units
• Make sure that the connector is tightly connected to the microphone unit. If it is loose it can cause interferences. Exemption from liability • beyerdynamic GmbH & Co. KG will not be liable if any damage, injury or accident occurs due to negligent, incorrect or inappropriate operation of the product. -
Page 9: How To Operate The Mcs 221 Delegate Microphone Unit
MCS 20 – MCS 221 Microphone Unit Bottom view Top view Configuration switches (DIP switches) Gooseneck microphone with LED ring Microphone button with LED Loudspeaker 3.2.1 How to operate the MCS 221 delegate microphone unit • For speaking, the microphone of the MCS 221 delegate microphone unit has to be activated. When the micro-... -
Page 10: Configuration Switch
MCS 20 – MCS 221 Microphone Unit 3.2.2 Configuration switch • At the bottom of the delegate microphone units there are configuration switches. Depending on the “ON” or “OFF” position, the functions listed in the table below are allocated. For programming functions of the MCS 223 chairman microphone unit, please refer to chapter 3.3.8 “Programming mode”... - Page 11 MCS 20 – MCS 221 Microphone Unit 2 OFF – Microphone unit is not counted to the limit in the “VOICE” operation This switch refers only to the MCS 221 delegate microphone unit. 3 OFF – Limit does not refer to this microphone unit The speaker can also turn on his microphone unit or enter a request-to-speak, when the limit is already achieved.
-
Page 12: Mcs 223 Chairman Microphone Unit - Controls And Indicators
MCS 20 – MCS 223 Microphone Unit 3.3 MCS 223 chairman microphone unit - controls and indicators Rear view Top view Conference socket to connect to the next microphone unit or to the power supply unit Headphone connection, mini jack (3.5 mm) -
Page 13: Operating Modes
MCS 20 – MCS 223 Microphone Unit – “Limit” buttons to set the allowed number of activated or registered microphone units – Volume buttons to set the system volume for all microphone units – Activate / deactivate timer mode (button combination “Prior” + “Clear”) –... -
Page 14: Priority Function (Prior)
MCS 20 – MCS 223 Microphone Unit FiFo (first in - first out) • The “FiFo” operating mode is selected with the button combination “Free” and “Requ” . Both LEDs of the “Free” + “Requ” buttons will illuminate. • When another microphone unit is activated, the microphone unit of the current speaker is deactivated. The limit in this operating mode is 01. -
Page 15: How To Adjust The Volume
MCS 20 – MCS 223 Microphone Unit • Select the operating mode, for which the limit is to be set. The selected operating mode is displayed by the illuminated LED. • Set the limit by pressing the [+] or [-] button, until the desired number is displayed... - Page 16 MCS 20 – MCS 223 Microphone Unit • Step 1 – Set limit to 01 The limit for the selected operating mode (“Free” or “Request”) should be set to 01. With a limit of >1 the displayed speech time of the microphone unit turned on first applies to all microphone units turned on within the limit.
-
Page 17: Programming Mode
MCS 20 – MCS 223 Microphone Unit • Step 4 – Leave timer function without clearing turned on microphones Hold down the “Prior” button and press the “Clear” button briefly. The limit of the activated operating mode is displayed Leave the timer function with clearing turned on microphones Hold down the “Clear”... - Page 18 MCS 20 – MCS 223 Microphone Unit • Step 4 – How to change the selected value Press one of the “Vol” buttons , until the requested value is displayed • Step 5 – How to return to the function display...
- Page 19 MCS 20 – MCS 223 Microphone Unit How to load the configuration • The procedure for loading a setup is almost the same as when saving a setup. Please note in step 4 you have to press the “Prior” button instead of the microphone button •...
-
Page 20: Table Of Programmble Functions
MCS 20 – MCS 223 Microphone Unit 3.3.9 Table of programmable functions No. Description Value Factory range setting Save or load setups 1 ... 7 Max. volume 0 ... 32 Volume setting with the “Vol” buttons 0 or 1 1 = enabled 0 = disabled Max. - Page 21 MCS 20 – MCS 223 Microphone Unit No. Description Value Factory range setting “FiFo” = “Requ” + “Free”: 0 or 1 0 = MCS 223 does not turn off another microphone unit 1 = MCS 223 turns off another microphone unit “FiFo”...
-
Page 22: Mcs 263 System Unit
MCS 20 – MCS 263 System Unit MCS 263 system unit The MCS 263 system unit allows flexible and discreet installations. It provides a 5-pin XLR connector for microphones and phantom power. A terminal strip allows connecting loudspeakers, up to three buttons such as microphone button, priority button and clear button as well as an LED for microphone on (illuminating) and request-to-speak (flashing). -
Page 23: Installation
MCS 20 – MCS 263 System Unit Microphone unit is counted to the limit Microphone unit is not counted to the limit Microphone unit is counted to the limit in the Microphone unit is not counted to the limit in the “VOICE”... - Page 24 MCS 20 – MCS 263 System Unit Installation into an armrest • Provide appropriate holes for the button, microphone and loudspeaker in the armrest. • Mount the system unit with the mounting clips and appropriate (or supplied) screws under the armrest.
- Page 25 MCS 20 – MCS 263 System Unit Top view with dimensions...
-
Page 26: How To Use The Mcs 263 As A Delegate Microphone Unit
MCS 20 – MCS 263 System Unit 3.4.4 How to use the MCS 263 as a delegate microphone unit • Connect a microphone button to the “Mic” connection of the terminal strip • Connect a microphone to the microphone connection •... -
Page 27: How To Use The Mcs 263 As A Sub-Chairman Microphone Unit
MCS 20 – MCS 263 System Unit 3.4.5 How to use the MCS 263 as a sub-chairman microphone unit • If you would like to operate the MCS 263 as a chairman microphone unit you can enter a so-called sub-chairman mode to make the functions “Prior”... -
Page 28: Examples For A System Configuration
MCS 20 – System Configuration Examples for a system configuration Configuration with a MCS 20 power supply unit further MCS 221 MCS 20 MCS 221 MCS 221 MCS 223 Note: A maximum of 60 microphone units can be connected to one power supply unit. - Page 29 MCS 263 Note: When using MCS 221 microphone units up to 60 microphone units can be connected to one MCS 20 power supply unit with a maximum cable length of 2.5 metres between each microphone unit. When using the MCS 263...
-
Page 30: Technical Specifications
MCS 20 – Technical Specifications Technical specifications MCS 20 power supply unit Frequency response......50 - 20,000 Hz Input power . -
Page 31: Maintenance
MCS 20 – Accessories Pin assignment of 11-pin terminal strip 1 = 24 V DC MPR 211 Connection 2 = Ground 3 = Microphone Mic Status blue 4 = Clear button 5 = Prior button 6 = Ground green 7 = LED +... -
Page 32: Cable Specifications For Self-Made Cables
MCS 20 – Cable Specifications CA 1813 T-Adapter ............Order # 486.612 CA 1835 Connector 8-pin Renk . - Page 33 MCS 20 – Notes...
-
Page 34: Ec-Declaration Of Conformity
Type of Equipment: Conference & Discussion System Model Numbers: MCS 20, MCS 221, MCS 223 I, the undersigned, as an employee of beyerdynamic, hereby declare that the equipment specified conforms to the above Directive and Standards. Manufacturer’s signature: Full Name:... - Page 36 Theresienstr. 8 | 74072 Heilbronn – Germany Tel. +49 (0) 7131 / 617 - 0 | Fax +49 (0) 7131 / 617 - 204 info@beyerdynamic.de | www.beyerdynamic.com Weitere Vertriebspartner weltweit finden Sie unter www.beyerdynamic.com For further distributors worldwide, please go to www.beyerdynamic.com...
Need help?
Do you have a question about the MCS 20 and is the answer not in the manual?
Questions and answers