Advertisement
Quick Links
båÅçêÉ=smñ=fåëí~ää~íáçå=dìáÇÉ
få=qÜáë=dìáÇÉ
This guide provides installation instructions for the Encore VPx. The following topics are
discussed in this guide:
•
•
•
•
•
•
•
•
•
•
fãéçêí~åí=fåëí~ää~íáçå=kçíáÅÉ==
`Ü~åÖÉ=eáëíçêó
The table below lists the changes to this guide.
Table 1. Change History
Rev
Date
ECP #
00
4/2/08
556520
Encore VPx Installation Guide • 08-0311105-00 Rev 00
Important Installation Notice
Change History
Copyrights and Notices
Company Address
Operators Safety Summary
Terms and Equipment Marking
VPx Overview
VPx Hardware
Installation
Technical Specifications
Important
Software version 1.22 (or higher) must be installed first in
your Encore Controller, prior to connecting your VPx
processor(s).
page 16 for details.
Description
Encore VPx Installation Guide
Refer to the
"Installing
VPx" section on
K. Vogel
Approved By
1
Advertisement

Subscribe to Our Youtube Channel
Related Manuals for Barco Encore VPx


Summary of Contents for Barco Encore VPx
- Page 1 This guide provides installation instructions for the Encore VPx. The following topics are discussed in this guide: • Important Installation Notice • Change History • Copyrights and Notices • Company Address • Operators Safety Summary • Terms and Equipment Marking •...
- Page 2 30 days after the transfer of risks. In the event of justified notice of compliant, Barco can repair the fault or provide a replacement at its own discretion within an appropriate period. If this measure proves to be impossible or unsuccessful, the purchaser can demand a reduction in the purchase price or cancellation of the contract.
- Page 3 Not included in the guarantee coverage are system failures which are attributed to programs or special electronic circuitry provided by the purchaser, e.g. interfaces. Normal wear as well as normal maintenance are not subject to the guarantee provided by Barco either.
- Page 4 To avoid fire hazard, use only the fuse having identical type, voltage rating, and current rating characteristics. Refer fuse replacement to qualified service personnel. aç=kçí=léÉê~íÉ=áå=bñéäçëáîÉ=^íãçëéÜÉêÉë To avoid explosion, do not operate this product in an explosive atmosphere. Encore VPx Installation Guide • 08-0311105-00 Rev 00...
- Page 5 Ein Ausrufungszeichen innerhalb eines gleichwinkeligen Dreiecks dient dazu, den Benutzer auf wichtige Bedienungs-und Wartungsanweisungen in der Dem Great beiliegenden Literatur aufmerksam zu machen. Encore VPx Installation Guide • 08-0311105-00 Rev 00...
- Page 6 Source Link Scaler A Background Channel Mixer Source Link Scaler B Background Channel Figure 1. M/E Board Block Diagram, VPx The VPx accepts computer input resolutions up to 1920 x 1200, via DVI. Encore VPx Installation Guide • 08-0311105-00 Rev 00...
- Page 7 Full support for seamless transitions, window borders, drop shadows and keying lìíéìí=cäÉñáÄáäáíó Each Encore VPx incorporates one output board, which provides all output interface functions as well as the blending and data-doubling functions required to support wide screen applications. Supported output resolutions include: •...
- Page 8 The Status LED, behind the right-hand Air Intake Port, indicates the following: Solid Red: the unit is initializing Solid Green: the unit is ready for use Blinking Red: an error has occurred Encore VPx Installation Guide • 08-0311105-00 Rev 00...
- Page 9 Following are descriptions of each rear panel connector and section on the VPx. Preview Out DVI One DVI connector is provided for Digital Preview Output. Preview Out Analog One 15-pin D connector is provided for Analog Preview Output. Encore VPx Installation Guide • 08-0311105-00 Rev 00...
- Page 10 All M/E boards are identical on a VPx. See the “VPx M/E Connectors” section on page 12 for details. Refer to the “M/E Connector Priority” section on page 13 for important information on connector priority. Encore VPx Installation Guide • 08-0311105-00 Rev 00...
- Page 11 One 9-pin D connector is provided for RS-232 serial communications with VPx. 16) AC Connector One AC Connector is provided to connect the VPx to your AC source. See the “Program Output Notes” section on page 14 for more information on VPx outputs. Encore VPx Installation Guide • 08-0311105-00 Rev 00...
- Page 12 In all cases, the looped inputs are “pre-scaler.” Source Link In One DVI connector is provided for the M/E’s Source Link Input. For wide screen and multi-screen applications, this connector accepts the looped outputs from the Encore VPx Installation Guide • 08-0311105-00 Rev 00...
- Page 13 DSK will be connected to the M/E 1 board. M/E 2 connectors are the lowest priority, and appear as Mixer 1. Background sources will be connected to the M/E 2 board. M/E 3 connectors are not installed. Encore VPx Installation Guide • 08-0311105-00 Rev 00...
- Page 14 DVI Program Outputs — DVI Program outputs are digital only. They do not have analog connections. • Program 1 Outputs — Edge feathering and data doubling are present on all Program 1 Outputs, provided that those features are enabled in the system’s Output Menu. Encore VPx Installation Guide • 08-0311105-00 Rev 00...
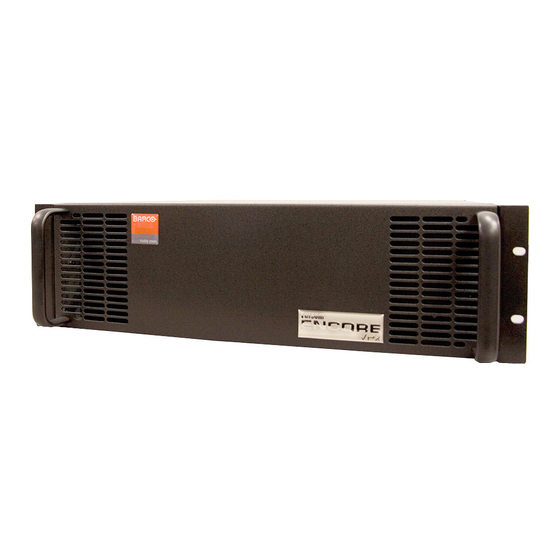
- Page 15 DVI Plug to VGA Cable Adapter o~ÅâJjçìåí=fåëí~ää~íáçå Encore VPx units are designed to be rack mounted, and are supplied with front rack-mount hardware. Rear rack-mount brackets are available as a kit, and are recommended when units are mounted in transit cases.
- Page 16 The following installation procedures are provided: • Installing VPX in a Wide Screen Configuration • Installing VPx in a Wide Screen Preview Configuration • Installing VPx in a Wide Screen Stack Configuration Encore VPx Installation Guide • 08-0311105-00 Rev 00...
- Page 17 Program Source VP or VPx #3 Link Link PG 2 Unscaled Sources PG 1 Routers ScreenPRO-II PresentationPRO-II Ethernet Switch Controller SC or LC ImagePRO Figure 5. Block Diagram, Wide Screen Encore Configuration Encore VPx Installation Guide • 08-0311105-00 Rev 00...
- Page 18 VPx. To connect an unscaled background source in a triple processor system (each VPx with three M/Es): • Connect the computer’s “head 1” to processor 1, input 3A Encore VPx Installation Guide • 08-0311105-00 Rev 00...
- Page 19 Remember that you can redefine IDs using numbers 17 - 32 from the Miscellaneous Menu. 12. Power On — Refer to Chapter 6 of the Encore Presentation System User’s Guide for all power on instructions. Encore VPx Installation Guide • 08-0311105-00 Rev 00...
- Page 20 PG 2 (DVI) PVW (Analog) Unscaled PVW (DVI) Sources PG 1 Routers ScreenPRO-II PresentationPRO-II ImagePRO Ethernet Switch Controller SC or LC Figure 6. Block Diagram, Wide Screen Encore Configuration with Wide Screen Preview Encore VPx Installation Guide • 08-0311105-00 Rev 00...
- Page 21 “Installing VPX in a Wide Screen Configuration” section on page 17. You do not need to install the six individual monitors for program and preview displays, because you will be using one monitor instead. Encore VPx Installation Guide • 08-0311105-00 Rev 00...
- Page 22 Controller. For full instructions, in Chapter 3 of the Encore Presentation System User’s Guide, refer to the “Completing Wide Screen Preview Setup” section. Encore VPx Installation Guide • 08-0311105-00 Rev 00...
- Page 23 Program Link Source Link Important: Software version 1.22 (or higher) must be installed in the Controller. Routers ScreenPRO-II PresentationPRO-II ImagePRO Ethernet Switch Controller LC Only Figure 8. Block Diagram, Wide Screen Stack Configuration Encore VPx Installation Guide • 08-0311105-00 Rev 00...
- Page 24 For each VPx, follow the rack mount procedures as outlined in the “Rack-Mount Installation” section on page 15. Important Remember that master units (ID#1 and ID#2) must be VP, not VPx. “Slave” units can be VP or VPx. Encore VPx Installation Guide • 08-0311105-00 Rev 00...
- Page 25 1A Note Input 1A resides on the highest priority M/E in a 3 M/E Encore system. If you wish to connect a backup (or alternate) DSK, use input 1B on both stacks. Encore VPx Installation Guide • 08-0311105-00 Rev 00...
- Page 26 12. System ID — Using the Unit ID Selector: On the first stack, set the ID of the bottom stack Processor to 1 (VP only) Set the ID of the top stack Processor to 2 (VP or VPx). Encore VPx Installation Guide • 08-0311105-00 Rev 00...
- Page 27 Remember that master units (ID#1 and ID#2) must be VP only, not VPx. 13. Power On — Refer to Chapter 6 of the Encore Presentation System User’s Guide for all power on instructions. Encore VPx Installation Guide • 08-0311105-00 Rev 00...
- Page 28 Per DDWG 1.0 on DVI-I connector • Input Computer Resolutions: SVGA (800 x 600) through Resolutions UXGA (1600 x 1200) • HDTV Resolutions (720p, 1080p) • 2048 x 1080p (Digital Cinema format) • Plasma Display Resolutions Encore VPx Installation Guide • 08-0311105-00 Rev 00...
- Page 29 UXGA (1600 x 1200) • HDTV Resolutions up to 1920 x 1080 (720p,1080i, 1080p) • 2048 x 1080 (Digital Cinema format) • Plasma Display Resolutions Delay 50Hz 30ms max. 60Hz 25ms max. Encore VPx Installation Guide • 08-0311105-00 Rev 00...
- Page 30 Technical Specifications mÜóëáÅ~ä=~åÇ=bäÉÅíêáÅ~ä=péÉÅáÑáÅ~íáçåë= The table below lists VPx physical and electrical specifications. Table 8. Encore VPx Physical and Electrical Specifications Parameter Detail Specification Power 120-240 VAC - 50/60 Hz., Auto-selecting 1.0A maximum Mechanical 3 RU Rackmount Chassis H: 5.25 inches (13.34 cm) W: 17.00 inches (43.18 cm)
Need help?
Do you have a question about the Encore VPx and is the answer not in the manual?
Questions and answers