Barco MatrixPRO User Manual
8x8 dvi router
Hide thumbs
Also See for MatrixPRO:
- User manual (90 pages) ,
- Brochure & specs (4 pages) ,
- Installation and operator's manual (52 pages)
Table of Contents
Advertisement
Quick Links
Advertisement
Table of Contents

Related Manuals for Barco MatrixPRO


Summary of Contents for Barco MatrixPRO
- Page 1 UñU=asf=oçìíÉê rëÉêÛë=dìáÇÉ • Manual # 26-0503000-00 • Revision A...
- Page 2 30 days after the transfer of risks. In the event of justified notice of compliant, Barco can repair the fault or provide a replacement at its own discretion within an appropriate period. If this measure proves to be impossible or unsuccessful, the purchaser can demand a reduction in the purchase price or cancellation of the contract.
- Page 3 If the purchaser or a third party carries out modifications or repairs on goods delivered by Barco, or if the goods are handled incorrectly, in particular if the systems are commissioned operated incorrectly or if, after the transfer of risks, the goods are subject to influences not agreed upon in the contract, all guarantee claims of the purchaser will be rendered invalid.
- Page 4 Use only the power cord and connector specified for your product. Use only a power cord that is in good condition. Refer cord and connector changes to qualified service personnel. aç=kçí=léÉê~íÉ=áå=bñéäçëáîÉ=^íãçëéÜÉêÉë To avoid explosion, do not operate this product in an explosive atmosphere. MatrixPRO • 8x8 DVI Router • User’s Guide...
- Page 5 Ein Ausrufungszeichen innerhalb eines gleichwinkeligen Dreiecks dient dazu, den Benutzer auf wichtige Bedienungs-und Wartungsanweisungen in der Dem Great beiliegenden Literatur aufmerksam zu machen. MatrixPRO • 8x8 DVI Router • User’s Guide...
- Page 6 `Ü~åÖÉ=eáëíçêó The table below lists the changes to the MatrixPRO 8x8 DVI Router User’s Guide. Table 0-1. Change History Date ECO # Description Approved By 5/26/06 1640 MatrixPRO 8x8 DVI Router User’s Guide M. Lettau MatrixPRO • 8x8 DVI Router • User’s Guide...
-
Page 7: Table Of Contents
Conventions ..........13 About the MatrixPRO 8x8 DVI Router ......14 Features . - Page 8 Recall Configuration Menu ....... . . 47 MatrixPRO Operating Procedures ....... . . 48 Performing a Take .
- Page 9 RS-232 Mode ..........93 MatrixPRO Remote Commands ........94 MatrixPRO 8x8 DVI Router Serial Command List .
- Page 10 Contact Information ......... . . 102 fåÇÉñ =K=K=K=K=K=K=K=K=K=K=K=K=K=K=K=K=K=K=K=K=K=K=K=K=K=K=K=K=K=K=K=K=K=K=K=K=K=K=K=K=K=K=K=K=K=K=K=K=K=K=K=KNMP MatrixPRO • 8x8 DVI Router • User’s Guide...
-
Page 11: Chapter Structure
NK==fåíêçÇìÅíáçå få=qÜáë=`Ü~éíÉê This chapter is designed to introduce you to the MatrixPRO™ 8x8 DVI Router. Areas to be covered are: • Chapter Structure • How to Use This Guide • Conventions • About the MatrixPRO 8x8 DVI Router • Features •... - Page 12 NK==fåíêçÇìÅíáçå Chapter Structure `Ü~éíÉê=píêìÅíìêÉ The following chapters provide instructions for all aspects of MatrixPRO 8x8 DVI Router operations: • Chapter 1, “Introduction” provides a system overview, a list of features, and a system connectivity diagram. • Chapter 2, “Hardware Orientation” on page 17 provides detailed diagrams of the system’s front and rear panels.
- Page 13 Chapter 5, “GUI Installation and Operation” on page page 53. Should you have any questions regarding the installation or operation of the MatrixPRO 8x8 DVI Router, please consult with the factory. Refer to Appendix C, “Contact Information” on page 101 for contact information.
- Page 14 DVI cables are used, or if cable extenders are used. • Vertical interval switching mode, with selectable input channel lock source. • Local or external control via Ethernet or RS-232. • Optional remote switching panels via Ethernet communications. MatrixPRO • 8x8 DVI Router • User’s Guide...
-
Page 15: Connectivity Diagram
^ééäáÅ~íáçå=nìÉëíáçåë At Barco, we take pride in offering unique solutions to demanding technical problems. If you have application questions, require further information or would like to discuss your application requirements in more detail, please call (916) 859-2500. Our Customer Support Engineers will be happy to supply you with the support you need. - Page 16 NK==fåíêçÇìÅíáçå Connectivity Diagram MatrixPRO • 8x8 DVI Router • User’s Guide...
-
Page 17: Matrixpro 8X8 Dvi Router Front Panel
This chapter provides detailed diagrams of the system’s front and rear panels. The following topics are discussed: • MatrixPRO 8x8 DVI Router Front Panel • MatrixPRO 8x8 DVI Router Rear Panel MatrixPRO • 8x8 DVI Router • User’s Guide... -
Page 18: Display Section
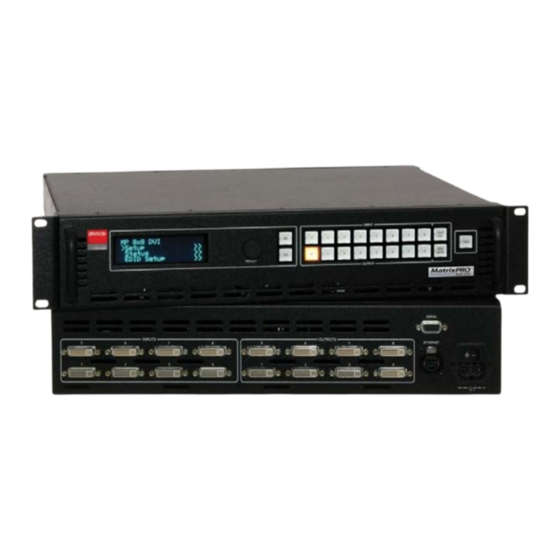
2. Hardware Orientation MatrixPRO 8x8 DVI Router Front Panel j~íêáñmol=UñU=asf=oçìíÉê=cêçåí=m~åÉä The figure below illustrates the MatrixPRO 8x8 DVI Router front panel: INPUT Visibly yours MP 8x8 DVI TEST > Setup >> TAKE Status >> EDID Setup >> MUTE ADJUST OUTPUT MatrixPRO Figure 2-1. - Page 19 TAKE Button Once input and output selections have been made, press the TAKE button to complete a route. In Chapter 4, refer to the “Performing a Take” section on page 48 for details. MatrixPRO • 8x8 DVI Router • User’s Guide...
- Page 20 ESC — press to exit a menu without making changes, cancel an operation, or answer “No” to certain menu queries. Each press takes you back up the menu tree by one level. MatrixPRO • 8x8 DVI Router • User’s Guide...
-
Page 21: Matrixpro 8X8 Dvi Router Rear Panel
Serial Port One 9-pin D connector is provided for RS-232 serial communications with the MatrixPRO 8x8 DVI Router chassis and for downloading code in the field. In Appendix A, refer to the “Serial Connector” section on page 90 for pinouts. - Page 22 Connector” section on page 89 for pinouts. AC Connector One AC Connector is provided to connect the MatrixPRO 8x8 DVI Router to your facility’s AC power source. The integral switch turns the chassis on and off. MatrixPRO • 8x8 DVI Router • User’s Guide...
-
Page 23: Safety Precautions
PK==fåëí~ää~íáçå få=qÜáë=`Ü~éíÉê This chapter provides detailed instructions for installing the MatrixPRO 8x8 DVI Router hardware. The following topics are discussed: • Safety Precautions • Unpacking and Inspection • Site Preparation • Rack-Mount Installation • Power Installation • Signal Installation MatrixPRO • 8x8 DVI Router • User’s Guide... - Page 24 If there is damage, notify the shipping carrier immediately for all claims adjustments. páíÉ=mêÉé~ê~íáçå= The environment in which you install your MatrixPRO 8x8 DVI Router(s) should be clean, properly lit, free from static, and have adequate power, ventilation, and space for all components.
- Page 25 3. Installation Rack-Mount Installation o~ÅâJjçìåí=fåëí~ää~íáçå MatrixPRO 8x8 DVI Routers are designed to be rack mounted. Please note the following important points: • When rack mounting the unit, remember that maximum ambient operating temperature for the unit is 40 degrees C.
-
Page 26: Power Installation
Power Installation mçïÉê=fåëí~ää~íáçå Use the following steps to install power to the MatrixPRO 8x8 DVI Router: Connect an AC power cord to the AC Power Connector on the rear of the MatrixPRO 8x8 DVI Router, and then to an AC outlet. -
Page 27: Signal Installation
3. Installation Signal Installation páÖå~ä=fåëí~ää~íáçå The figure below illustrates a sample MatrixPRO 8x8 DVI Router system diagram. Use this figure for reference during the signal installation process. To Ethernet devices: • ScreenPRO-II Controller • Remote MatrixPRO panels • Encore Controller From DVI •... - Page 28 3. Installation Signal Installation MatrixPRO • 8x8 DVI Router • User’s Guide...
-
Page 29: Control Overview
QK==léÉê~íáçå få=qÜáë=`Ü~éíÉê This chapter provides detailed operating instructions for the MatrixPRO 8x8 DVI Router. The following topics are discussed: • Control Overview • Power-Up Initialization • Menu Tree • Menu System Overview • Quick Function Reference • Using the Main Menu •... - Page 30 The unit can be controlled remotely by Barco controllers (such as Encore) or by third-party controllers. mçïÉêJré=fåáíá~äáò~íáçå After plugging in the MatrixPRO 8x8 DVI Router, locate the power switch on the back of the chassis, and turn the power ON. After a brief interval, the following actions occur: •...
-
Page 31: Setup Menu
4. Operation Menu Tree jÉåì=qêÉÉ The figure below illustrates the MatrixPRO 8x8 DVI Router Menu Tree. Use this diagram for reference throughout this chapter. Main Menu Cable Vertical Setup Status EDID Setup Test Pattern Save Preset Recall Preset Equalization Switching... - Page 32 4. Operation Menu System Overview jÉåì=póëíÉã=lîÉêîáÉï This section lists the rules and conventions for using the MatrixPRO 8x8 DVI Router’s menu system. The figure below illustrates a sample menu: TE ST P AT TERN > 1400 x1 050 @59. 94...
- Page 33 The display itself is four lines high, and the ADJUST knob is used to scroll through the various menu lines. Throughout this chapter, entire menus will be shown for clarity — rather than a series of four-line sections. MatrixPRO • 8x8 DVI Router • User’s Guide...
-
Page 34: Status Menu
Cable Equalization Menu page 42 Set test pattern resolution Using the Test Pattern page 44 Unlock the control panel Unlocking the Control Panel page 52 Use the menu system Menu System Overview page 32 MatrixPRO • 8x8 DVI Router • User’s Guide... - Page 35 Re ca ll Preset > > Figure 4-3. MatrixPRO Main Menu The Main Menu provides access to all MatrixPRO menus and sub-menus: • Select Setup to access the Setup Menu, which enables you to adjust system parameters, perform a factory reset or obtain the Tech Support number. Refer to “Setup...
-
Page 36: System Menu
On the System Menu, scroll to the VFD Brightness line and press Rotate the knob to select the desired brightness. Values range from 0 to 15. Press to accept the new setting. MatrixPRO • 8x8 DVI Router • User’s Guide... - Page 37 192.168 .000. 243 Figure 4-7. MatrixPRO IP Address Menu When this menu item is selected (and DHCP is off), the cursor ( ) is positioned under the right-most digit in the address. MatrixPRO • 8x8 DVI Router • User’s Guide...
- Page 38 To accept the new Subnet Mask, press ESC at any time to exit the menu. The new Subnet Mask will take effect at this point. MatrixPRO • 8x8 DVI Router • User’s Guide...
- Page 39 The Tech Support Menu shows the installed version of software, as well as the phone number for factory support. In Appendix C, refer to the “Contact Information” section on page 102 for additional information. MatrixPRO • 8x8 DVI Router • User’s Guide...
- Page 40 The label “T” indicates that a Test Pattern is routed to the selected output. The label “B” indicates that RGB Mute is enabled for the selected output. The label “ ” indicates that the selected output is blanked. This output is inactive. MatrixPRO • 8x8 DVI Router • User’s Guide...
- Page 41 1400x105 0 @59. 94 Re se t Figure 4-12. MatrixPRO EDID Resolution Menu (sample) The EDID Resolution Menu enables you to set MatrixPRO's preferred EDID resolution, either for all 8 inputs simultaneously, or individually for a particular input. Important This menu is designed for advanced users only. Do not reprogram the EDID unless it is necessary.
-
Page 42: Cable Equalization Menu
2. Press SEL to display the edit cursor (#). Please note: If All is selected and all equalization values match, the “global” value is shown on the line. MatrixPRO • 8x8 DVI Router • User’s Guide... -
Page 43: Test Pattern Menu
Set the “global” output resolution of the test pattern. • Enable the Raster Box for a “test pattern” route already in effect. Menu instructions are provided in the following sections: • Using the Test Pattern • Using the Raster Box MatrixPRO • 8x8 DVI Router • User’s Guide... - Page 44 The selected pattern is routed to the selected output only. All other routes are unaffected. 10. To clear the test pattern from the output: In the Output Selection Section, select the desired output. Press TEST PAT or select an input. Press TAKE. MatrixPRO • 8x8 DVI Router • User’s Guide...
-
Page 45: Vertical Switching Menu
Use the following steps to enable or disable vertical switching. From the Main Menu, select Vertical Switch to show the Vertical Switching Menu. Scroll to the “Function” line and press SEL to display the edit cursor (#). MatrixPRO • 8x8 DVI Router • User’s Guide... -
Page 46: Save Configuration Menu
When you press SEL, the message “Saving” appears. The input/output configuration is now saved, and can be recalled using the “recall” configuration procedure. Refer to the “Recall Configuration Menu” section on page page 47 for details. MatrixPRO • 8x8 DVI Router • User’s Guide... -
Page 47: Recall Configuration Menu
Press SEL to recall the configuration from the selected file, or press ESC to exit the function without recalling a configuration. When you press SEL, the message “Recalling” appears, and the router in instantly updated with the recalled configuration. MatrixPRO • 8x8 DVI Router • User’s Guide... -
Page 48: Matrixpro Operating Procedures
If you pend a route to output 1 (e.g., input 5 to output 1), then you switch to output 2, and then you switch back to output 1 — the selected route is still pending (and input 5 will still be blinking). MatrixPRO • 8x8 DVI Router • User’s Guide... - Page 49 (including the TEST PAT and RGB MUTE buttons), the output is blanked. • Press and hold a button in the Output Selection Section to check if any “groups” have been configured that include the selected output. MatrixPRO • 8x8 DVI Router • User’s Guide...
- Page 50 An RGB Mute route can be cleared in the same manner that a “standard” route is cleared. Once performed, the previously selected channel route is restored. Refer to the “Clearing a Route” section on page 49 for details. MatrixPRO • 8x8 DVI Router • User’s Guide...
- Page 51 MatrixPRO Operating Procedures tçêâáåÖ=ïáíÜ=dêçìéë The MatrixPRO 8x8 DVI Router enables you to set up groups of input and output channels, in order to prevent certain inputs from being switched to selected outputs. Once established, routes can only be performed within the group.
- Page 52 Use the following steps to unlock the control panel (from the panel itself). Press SEL + ESC + TAKE buttons simultaneously. After a brief pause, front panel control is restored and the Main Menu is displayed. MatrixPRO • 8x8 DVI Router • User’s Guide...
-
Page 53: Control Gui Installation
RK==drf=fåëí~ää~íáçå=~åÇ=léÉê~íáçå få=qÜáë=`Ü~éíÉê This chapter describes the installation and operation of the MatrixPRO 8x8 DVI Router interactive Control GUI. The following topics are discussed: • Control GUI Installation • Running the GUI • GUI Overview • Using the Menu Bar •... - Page 54 Control GUI Installation `çåíêçä=drf=fåëí~ää~íáçå The MatrixPRO 8x8 DVI Router Control GUI is an interactive Graphical User Interface application designed to assist users with MatrixPRO operation. The software is only available via download from either the Barco Folsom website or the FTP server.
- Page 55 Welcome Dialog. Figure 5-1. Welcome Dialog Click Next to display the Choose Destination Dialog: Figure 5-2. Choose Destination Dialog If desired, click Browse to select a different destination folder than the default. MatrixPRO • 8x8 DVI Router • User’s Guide...
- Page 56 Start > Programs > Barco Folsom > MatrixPRO DVI 8x8 Software #.## > MatrixPRO DVI GUI If desired, create a shortcut to the MatrixPRO DVI GUI on your desktop, in the normal manner. MatrixPRO • 8x8 DVI Router • User’s Guide...
- Page 57 Use the following steps to run the MatrixPRO GUI: Turn on MatrixPRO and wait for a complete system boot up. Ensure that your PC (or laptop) is connected to MatrixPRO either via serial (RS- 232) or via Ethernet. For Serial Connection: •...
- Page 58 To troubleshoot Serial connection problems: If you selected Yes in step 4, and MatrixPRO’s baud rate was not set to 115200 (or the wrong PC port was connected to MatrixPRO), a series of error messages will be shown.
-
Page 59: Gui Overview
5. GUI Installation and Operation GUI Overview drf=lîÉêîáÉï The MatrixPRO 8x8 DVI Router Control GUI consists of a main window, a menu bar and six function tabs. Each is explained in the following sections. Please note: • The GUI is used by multiple Barco products. When connected to a specific hardware chassis, functions (such as input and output buttons) are dynamically enabled or disabled accordingly. -
Page 60: Using The Menu Bar
The following functions are provided: • Click File > Open Configuration File to recall a configuration file (of MatrixPRO parameters) from disk. The standard Open Dialog appears. Navigate to the desired folder, select the desired file and click Open to recall the file. - Page 61 The Serial Port > Settings (Adv user only) function is grayed out, and currently not available. • Click Serial Port > Connect to MatrixPRO DVI if you lose communications, or if you change parameters and want to re-establish communications. Note This function will be grayed out if proper communications are currently established.
- Page 62 On the Menu Bar, click About to display the About Dialog: Figure 5-11. About Dialog The About Dialog lists the system’s version, the minimum required resolution, plus the company websites and support email address. Click OK to clear the dialog. MatrixPRO • 8x8 DVI Router • User’s Guide...
-
Page 63: Using The Video Switching Tab
All other input buttons are grayed out. Please note: If you have configured mnemonics on the Labeling Tab, the selected names will appear on the appropriate input buttons. Unselected input buttons are gray. Selected input buttons are yellow. MatrixPRO • 8x8 DVI Router • User’s Guide... - Page 64 A TAKE is not required to perform an RGB Mute route. The following additional controls are provided: At the bottom of the Inputs Section, click Read from MatrixPRO to update the GUI with the current state of the physical MatrixPRO chassis.
-
Page 65: Performing A Take
Using the Video Switching Tab drf=pïáíÅÜáåÖ=léÉê~íáçåë Operating procedures are covered in the following sections: • Performing a Take • Performing a Multi-Take • Clearing a Route • Using RGB Mute • Saving Presets • Recalling Presets MatrixPRO • 8x8 DVI Router • User’s Guide... - Page 66 Repeat steps 1 and 2 for as many input-to-output routes as desired. In the Inputs Section, click TAKE. The selected input numbers appear in bright green boxes in the Video column — indicating active routes. Repeat from step 1 to perform another multi-take. MatrixPRO • 8x8 DVI Router • User’s Guide...
- Page 67 The channel is immediately muted — pressing TAKE is not required. Repeat from step 1 to mute another output channel. Please note the following important points: • To clear an RGB Mute route, simply disable the check box. MatrixPRO • 8x8 DVI Router • User’s Guide...
- Page 68 The section will automatically hide to confirm the “save.” Repeat from step 1 to save another preset. Note You can click Cancel to cancel the procedure, prior to clicking a selected preset register. MatrixPRO • 8x8 DVI Router • User’s Guide...
- Page 69 (and associated input digits) adjacent to all output buttons. Click TAKE or Confirm to complete the route. Note You can click Cancel to cancel the procedure, prior to clicking TAKE. MatrixPRO • 8x8 DVI Router • User’s Guide...
-
Page 70: Using The Labeling Tab
Enter for the label to take effect. To clear an individual label, click in the desired cell and re-type. To clear all labels in a particular group, click the group’s associated Reset button. MatrixPRO • 8x8 DVI Router • User’s Guide... -
Page 71: Using The Grouping Tab
Inputs and outputs can only be in one group at a time. Unavailable inputs and outputs are grayed out. • When an output within a group is selected, you can only route the inputs currently assigned to that group. Inputs “outside” the group cannot be selected. MatrixPRO • 8x8 DVI Router • User’s Guide... - Page 72 Use the following steps to completely remove (clear) an existing group: In the Group column, click the radio button for the group that you want to remove. Click Remove Group. Use the following steps to remove all groups: Click Remove All Group. MatrixPRO • 8x8 DVI Router • User’s Guide...
-
Page 73: Using The Sequencing Tab
Use the following steps to create a sequence: Ensure that you have saved the desired presets. Enable the “On” check boxes for the presets that you wish to include in the sequence. MatrixPRO • 8x8 DVI Router • User’s Guide... - Page 74 As the sequence plays, you can click the Video Switching Tab and watch the input assignments change. To stop sequence playback, click Stop on the Sequencing Tab. MatrixPRO • 8x8 DVI Router • User’s Guide...
-
Page 75: Using The Setup Tab
Troubleshooting” section on page 58 for details. • If you need to change the IP address in order to match that of MatrixPRO, click in the IP Address field, enter the correct address, then click Change IP Address. Note The default IP address is 192.168.000.243. -
Page 76: Using The "About" Tab
Note that the About Tab also provides an RS-232 terminal window that can be used to issue commands directly to MatrixPRO. Important The “terminal” window function is designed for advanced MatrixPRO users only, and it is recommended that you do not use the function. If required, refer to Appendix B, “Remote Control Protocol”... -
Page 77: Software Upgrade Overview
This chapter provides detailed instructions for upgrading system software. The following topics are discussed: • Software Upgrade Overview • Hardware Requirements • Software Requirements • Downloading Software • Serial Upgrade Method • Ethernet Upgrade Method MatrixPRO • 8x8 DVI Router • User’s Guide... - Page 78 Software Upgrade Overview pçÑíï~êÉ=réÖê~ÇÉ=lîÉêîáÉï Firmware files for the MatrixPRO 8x8 DVI Router system are loaded into the hardware at power-up. These files are stored in the unit’s onboard flash memory, which can be upgraded using a serial or Ethernet connection to a PC (or laptop).
-
Page 79: Downloading Software
6. Upgrading Software Downloading Software açïåäç~ÇáåÖ=pçÑíï~êÉ Two different methods can be used to download MatrixPRO software and the Flash File Loader utility: • Via FTP Site • Via Web Site sá~=cqm=páíÉ Barco Folsom's FTP site address is: ftp.folsom.com To download from the FTP site: Create a target folder on your PC (e.g., MatrixPRO). -
Page 80: Serial Upgrade Method
Start > Programs > Barco Folsom. Connect the Serial port on the back of MatrixPRO to the COM 1 port on your PC. In Chapter 2, refer to the “MatrixPRO 8x8 DVI Router Rear... - Page 81 Repeat steps 7 and 8 above, then re-check the status lights. With communication status OK, continue with step 10. 10. To upload files to MatrixPRO, click "Open script file to read and upload." 11. In the dialog, select "Complete_Load.sld" and click Open. The MatrixPRO menu should immediately display the "System in LOADER MODE"...
-
Page 82: Ethernet Upgrade Method
IP connections to the outside world. Power-up MatrixPRO. Make a note of MatrixPRO’s IP address — if DHCP is enabled on MatrixPRO, its IP address may not be the default address. In Chapter 4, refer to the “IP... - Page 83 6. Upgrading Software Ethernet Upgrade Method In the dialog, enter MatrixPRO’s IP address (as noted in step 5 above), and enter the default port number: 23. Click the Connect button. If the connection is successfully, the message “Connect via Ethernet successful” appears in the Flash Loader’s Status Bar. If you cannot connect, refer to the “Troubleshooting Ethernet...
- Page 84 6. Upgrading Software Ethernet Upgrade Method If you see a “Request timed out” message, the PC is unable to locate and communicate with MatrixPRO. If this is the case: • Check your network connections and settings as described above, or ...
- Page 85 ^K==péÉÅáÑáÅ~íáçåë få=qÜáë=^ééÉåÇáñ This appendix provides detailed technical specifications for the MatrixPRO 8x8 DVI Router. The following topics are discussed: • Input Specifications • Output Specifications • Physical and Electrical Specifications • Communications Specifications • Agency Specifications • Pinouts MatrixPRO • 8x8 DVI Router • User’s Guide...
-
Page 86: Input Specifications
^K==péÉÅáÑáÅ~íáçåë Input Specifications fåéìí=péÉÅáÑáÅ~íáçåë= The table below lists MatrixPRO 8x8 DVI Router input specifications. Table A-1. MatrixPRO 8x8 DVI Router Input Specifications Parameter Detail Specification Video Input Connectors 8 x DVI Signal Type TMDS Signal Speeds 25 - 165 MHz pixel clock... -
Page 87: Physical And Electrical Specifications
^K==péÉÅáÑáÅ~íáçåë Physical and Electrical Specifications mÜóëáÅ~ä=~åÇ=bäÉÅíêáÅ~ä=péÉÅáÑáÅ~íáçåë= The table below lists MatrixPRO 8x8 DVI Router physical and electrical specifications. Table A-3. MatrixPRO 8x8 DVI Router Physical and Electrical Specifications Parameter Detail Specification Power Connector Standard IEC, integral on/off switch Power 50-60 Hz, 100-240 VAC... -
Page 88: Pinouts
T.M.D.S. Data 0/5 Shield Analog Vertical Sync T.M.D.S. Data 5- T.M.D.S. Data 1- T.M.D.S. Data 5+ T.M.D.S. Data 1+ T.M.D.S. Clock Shield T.M.D.S. Data 1/3 Shield T.M.D.S. Clock + T.M.D.S. Data 3- T.M.D.S. Clock - MatrixPRO • 8x8 DVI Router • User’s Guide... -
Page 89: Ethernet Connector
Table A-7. Ethernet Connector Pinouts Signal Wire Color TX Data + White / Orange TX Data - Orange RX Data + White / Green Blue White / Blue RX Data - Green White / Brown Brown MatrixPRO • 8x8 DVI Router • User’s Guide... -
Page 90: Serial Connector
The table below lists Serial connector pinouts. Table A-8. Serial Connector Pinouts RS-232 Signal Description Carrier Detect Received Data Transmitted Data Data Terminal Ready Signal Ground Data Set Ready Request To Send Clear To Send Unused MatrixPRO • 8x8 DVI Router • User’s Guide... - Page 91 _K==oÉãçíÉ=`çåíêçä=mêçíçÅçä få=qÜáë=^ééÉåÇáñ This appendix provides information regarding external remote control protocol. The following topics are discussed: • Default Serial Parameters • Default IP Address • RS-232 Mode • MatrixPRO Remote Commands MatrixPRO • 8x8 DVI Router • User’s Guide...
-
Page 92: Default Serial Parameters
The system returns to this value after a factory reset. • This default address can be changed using the menu system. In Chapter 4, refer to the “IP Address” section on page 37 for instructions. MatrixPRO • 8x8 DVI Router • User’s Guide... -
Page 93: Rs-232 Mode
_K==oÉãçíÉ=`çåíêçä=mêçíçÅçä RS-232 Mode opJOPO=jçÇÉ The MatrixPRO 8x8 DVI Router will respond with a “#” prompt when the command processor is ready for a command. The command syntax is shown below cmd arg1 arg2 … argn<CR> Table B-1. RS-232 Command Syntax... -
Page 94: Matrixpro Remote Commands
_K==oÉãçíÉ=`çåíêçä=mêçíçÅçä MatrixPRO Remote Commands j~íêáñmol=oÉãçíÉ=`çãã~åÇë The table below lists MatrixPRO 8x8 DVI Router remote commands. Table B-2. MatrixPRO 8x8 DVI Router Remote Commands Command Description Page CLEAR Clear all matrix video routings DHCP Enable/disable DHCP mode FPLOCK en Lock/unlock the front panel from user input... -
Page 95: Clear
[InNum] Input number to add; [1-8] / 101 if no input to add Examples: GADD 1 4 2 (Add output 4 and input 2 to group 1.) GADD 1 101 5 (Add input 5 to group 1.) MatrixPRO • 8x8 DVI Router • User’s Guide... -
Page 96: Loadr
Description: Remote panel communication, begin command MPRC [Node] lpq^q== • Description: Show output status OSTAT Returns: FPLock 0 Out[1]: Video 253, PVideo 253, VRoute 1, RGBMute 0 Out[2]: Video 253, PVideo 253, VRoute 1, RGBMute 0 etc. MatrixPRO • 8x8 DVI Router • User’s Guide... -
Page 97: Pstat
0=No, 1=Yes (default) RESET F (Resets system to factory defaults and resets all presets.) obs== • Description: MatrixPRO board revision and main software version information Returns: PCB Rev 1.0, Assembly Rev 1.0 MatrixPro DVI Software Version Upper Board Fab: B, Assembly: 0... -
Page 98: Rgbmute
Mode; [0|1], Cancel all pending|Activate all pending. Note Issuing parameter 0 is the equivalent of pressing CANCEL. Issuing 1 is the equivalent of pressing the TAKE button. TAKE 1 (Activates all pending video routes.) MatrixPRO • 8x8 DVI Router • User’s Guide... -
Page 99: Tpat
Description: Displays a list of available commands on a terminal emulator such as ProComm or Hyperterminal. • Parameters: None Example: HELP (Returns the command list.) • Description: Display specific command plus parameter description. Type command followed by ? for specific command parameters. MatrixPRO • 8x8 DVI Router • User’s Guide... - Page 100 _K==oÉãçíÉ=`çåíêçä=mêçíçÅçä MatrixPRO Remote Commands MatrixPRO • 8x8 DVI Router • User’s Guide...
-
Page 101: In This Appendix
Warranty related repairs include parts and labor, but do not include faults resulting from user negligence, special modifications, lightning strikes, abuse (drop/crush), and/or other unusual damages. The customer shall pay shipping charges when unit is returned for repair. Barco will cover shipping charges for return shipments to customers. oÉíìêå=j~íÉêá~ä=^ìíÜçêáò~íáçå=Eoj^F... -
Page 102: Contact Information
BELGIUM • Phone: +32 56.36.82.11 • Fax: +32 56.35.16.51 • Website: www.events.barco.com Technical Support Information • Tech Line: (866) 374-7878 — 24 hours per day, 7 days per week • E-mail: folsomsupport@barco.com MatrixPRO • 8x8 DVI Router • User’s Guide... - Page 103 ......35, 42 MatrixPRO ......14 equalization menu .
- Page 104 EDID value ......42 MatrixPRO ......75 IP address .
- Page 105 ..51, 72 Introduction to MatrixPRO ....11 enable/disable raster box ... . .45 IP .
-
Page 106: Ipinfo
....23 MatrixPRO ......29 hardware orientation . -
Page 107: Sparams
HELP ......99 Reset MatrixPRO ..... . .75 IP . - Page 108 ..... . .50 menu ......18, 43 MatrixPRO • 8x8 DVI Router • User’s Guide...
Need help?
Do you have a question about the MatrixPRO and is the answer not in the manual?
Questions and answers