Draytek VigorAP 700 User Manual
802.11n access point
Hide thumbs
Also See for VigorAP 700:
- Quick start manual (1 page) ,
- User manual (68 pages) ,
- Quick start manual (1 page)
Table of Contents
Advertisement
Quick Links
- 1 Familiar with Your New Vigorap 700
- 2 Installing Vigorap 700 to Your Network
- 3 Chapter II: System and Network Setup
- 4 Connecting to Vigorap 700 by Using Web Browser
- 5 Connecting to Web Management Interface
- 6 Select an Operating Mode for Wireless Access Point
- 7 Ap Mode
- 8 Universal Repeater
- Download this manual
See also:
User Manual
Advertisement
Table of Contents

Subscribe to Our Youtube Channel
Related Manuals for Draytek VigorAP 700


Summary of Contents for Draytek VigorAP 700
- Page 1 VigorAP 700 User’s Guide...
- Page 2 VigorAP 700 User’s Guide...
- Page 3 User’s Guide Version 1.1 Date: 13/01/2011 VigorAP 700 User’s Guide...
- Page 4 2. Increase the separation between the equipment and receiver. 3. Connect the equipment into an outlet on a circuit different from that to which the receiver is connected. 4. Consult the dealer or an experienced radio technician for help. VigorAP 700 User’s Guide...
- Page 5 However, special attention must be paid to the dangers of electric shock and static electricity when working with electrical equipment. All guidelines of this and of the computer manufacture must therefore be allowed at all times to ensure the safe use of the equipment. VigorAP 700 User’s Guide...
- Page 6 The ETSI version of this device is also authorized for use in EFTA member states: Iceland, Liechtenstein, Norway, and Switzerland. EU Countries Not intended for use None. Please visit http://www.draytek.com/user/AboutRegulatory.php This product is designed for 2.4GHz WLAN network throughout the EC region and Switzerland with restrictions in France. VigorAP 700 User’s Guide...
-
Page 7: Table Of Contents
1-4 Familiar with your new VigorAP 700 ................... 4 Chapter II: System and Network Setup ............7 2-1 Installing VigorAP 700 to your Network................7 2-2 Connecting to VigorAP 700 by Using Web Browser ............8 2-2-1 Windows 95/98/Me IP address setup..................8 2-2-2 Windows 2000 IP address setup.....................10 2-2-3 Windows XP IP address setup ....................11... - Page 8 2-13 Restart ..........................53 Chapter III: Troubleshooting ...............55 Appendix: Glossary ..................57 VigorAP 700 User’s Guide viii...
-
Page 9: Chapter I: Product Information
Chapter I: Product Information 1-1 Introduction Thank you for purchasing this VigorAP 700! With this high cost-efficiency VigorAP 700, computers and wireless devices which are compatible with 802.11n can connect to existing wired Ethernet network via this VigorAP 700, at the speed of 300Mbps. -
Page 10: Safety Information
If you smell something strange or even see some smoke coming out from the access point or power supply, remove the power supply or switch the electrical power off immediately, and call dealer of purchase for help. VigorAP 700 User’s Guide... -
Page 11: Package Contents
1-3 Package Contents Before you starting to use this access point, please check if there’s anything missing in the package, and contact your dealer of purchase to claim for missing items: VigorAP 700 (main body, 1 pcs) □ Antenna (2 pcs) □... -
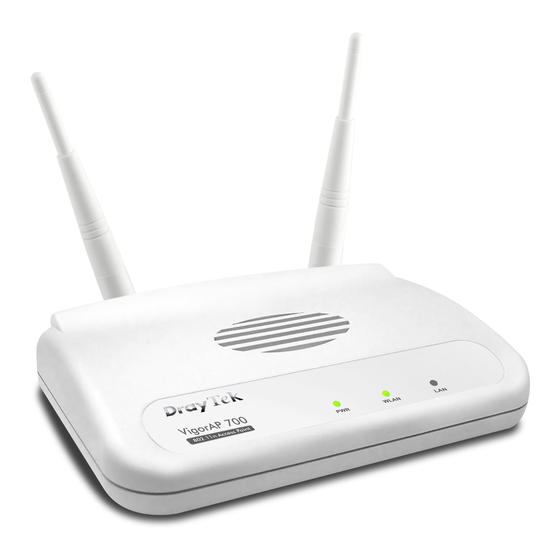
Page 12: Familiar With Your New Vigorap 700
1-4 Familiar with your new VigorAP 700 Front Panel Status Description The device is powered on. The device is powered off. Wireless WPS mode is enabled. WLAN Blinking Data is transmitting (sending/receiving). LAN port is connected LAN port is not connected Blinking Data is transmitting (sending/receiving). -
Page 13: Back Panel
Reset / Restore the default settings. Usage: Turn on the VigorAP 700. Press the button and keep for more than 10 seconds. Then the AP will restart with the factory default configuration. Press the button and keep it less than 5 seconds, the WPS connection will be enabled. - Page 14 This page is left blank. VigorAP 700 User’s Guide...
-
Page 15: Chapter Ii: System And Network Setup
Please follow the following instruction to build the network connection between your new VigorAP 700 and your computers, network devices: 1. Connect VigorAP 700 to ADSL modem, router, or switch/hub in your network through the LAN port of the access point by Ethernet cable. -
Page 16: Connecting To Vigorap 700 By Using Web Browser
2-2 Connecting to VigorAP 700 by Using Web Browser After the network connection is built, the next step you should do is setup the access point with proper network parameters, so it can work properly in your network environment. Before you can connect to the access point and start configuration procedures, your computer must be able to get an IP address automatically (use dynamic IP address). - Page 17 2. Select Specify an IP address, then input the following settings in respective field and click OK when finish. IP address: 192.168.1.9 Subnet Mask: 255.255.255.0 VigorAP 700 User’s Guide...
-
Page 18: Windows 2000 Ip Address Setup
Area Connection, and Local Area Connection Properties window will appear. Select Internet Protocol (TCP/IP), then click Properties. 2. Select Use the following IP address, then input the following settings in respective field and click OK when finish. IP address: 192.168.1.9 Subnet Mask: 255.255.255.0 VigorAP 700 User’s Guide... -
Page 19: Windows Xp Ip Address Setup
Connections, and then double-click Local Area Connection, Local Area Connection Status window will appear, and then click Properties. Select Use the following IP address, then input the following settings in respective field and click OK when finish: IP address: 192.168.1.9 Subnet Mask: 255.255.255.0. VigorAP 700 User’s Guide... -
Page 20: Windows Vista Ip Address Setup
Connection Properties window will appear, select Internet Protocol Version 4 (TCP / IPv4), and then click Properties. 2. Select Use the following IP address, then input the following settings in respective field and click OK when finish: IP address: 192.168.1.9 Subnet Mask: 255.255.255.0. VigorAP 700 User’s Guide... -
Page 21: Connecting To Web Management Interface
The following screen should be shown: Please input user name and password in the field respectively. The default user name is admin and no password needed. Next, press OK, and you can see the web management interface of this access point: VigorAP 700 User’s Guide... -
Page 22: View System Status And Information
/ wireless computer / devices. You can click Home on the left, and the system status and information will be displayed, as shown below: VigorAP 700 User’s Guide... - Page 23 Here are descriptions of every item: System Uptime Displays the total passed time since the VigorAP 700 is powered. Hardware Version Displays hardware version. This information is helpful when you need online help from the dealer of purchase. Firmware Version Displays current firmware version.
-
Page 24: Select An Operating Mode For Wireless Access Point
AP Bridge-Point to Point Establish wireless connection with another VigorAP 700 using the same mode, and link the wired network which these two VigorAP 700s connected together. Only one access point can be connected in this mode. -
Page 25: Ap Mode
If you select 2.4GHz (B), 2.4GHz (N), or 2.4GHz (G), only wireless clients using the wireless band you select (802.11b, 802.11n, or 802.11g) will be able to connect to this access point. If you select 2.4GHz (B+G), then only wireless clients using 802.11b VigorAP 700 User’s Guide... - Page 26 If you want to allow 802.11b, 802.11g, and 802.11 n clients to connect to this access point, select 2.4GHz (B+G+N). Main SSID Please input the SSID (the name used to identify this VigorAP 700) here. You can input up to 32 alphanumerical characters. PLEASE NOTE THAT SSID IS CASE SENSITIVE.
- Page 27 PLEASE NOTE THAT SSID IS CASE SENSITIVE. Broadcast SSID Decide if the VigorAP 700 will broadcast its own SSID or not. You can hide the SSID of your VigorAP 700 (set the option to ‘Disable’), so only people who know the SSID of your VigorAP 700 can get connected.
-
Page 28: Station-Infrastructure
802.11g) will be able to connect to this access point. If you select 2.4GHz (B+G), then only wireless clients using 802.11b and 802.11g band will be able to connect to this access point. If you want to allow 802.11b, 802.11g, and 802.11n clients to VigorAP 700 User’s Guide... - Page 29 2.4GHz (B+G+N). Main SSID Please input the SSID (the name used to identify this VigorAP 700) here. You can input up to 32 alphanumerical characters. PLEASE NOTE THAT SSID IS CASE SENSITIVE. Site Survey...
- Page 30 Click this button to refresh the table. Connect Select an access point and click this button to choose the network. The SSID name of the access point you have selected will be displayed in the Main SSID in the Basic Setting page. VigorAP 700 User’s Guide...
-
Page 31: Ap Bridge-Point To Point Mode
2-4-3 AP Bridge-Point to Point Mode In this mode, this VigorAP 700 will connect to another VigorAP 700 which uses the same mode, and all wired Ethernet clients of both VigorAP 700s will be connected together. You can use this mode to connect a network to another network which is physically isolated. - Page 32 MAC address 1 Please input the MAC address of the VigorAP 700 you wish to connect. After you finish with setting, please click Apply, and the following screen will be displayed: When you see this message, the settings you made is successfully save. You can click Continue to return to previous page and continue on other setting items, or click Apply button to restart the VigorAP 700.
-
Page 33: Ap Bridge-Point To Multi-Point Mode
2-4-4 AP Bridge-Point to Multi-Point Mode In this mode, this VigorAP 700 will connect to up to four VigorAP 700s which uses the same mode, and all wired Ethernet clients of every VigorAP 700s will be connected together. You can use this mode to connect a network to other networks which is physically isolated. -
Page 34: Ap Bridge-Wds Mode
VigorAP 700. The changes will take effect after about 30 seconds. 2-4-5 AP Bridge-WDS Mode In this mode, this VigorAP 700 will connect to up to four VigorAP 700s which uses the same mode, and all wired Ethernet clients of every VigorAP 700s will be connected together. You can use this mode to connect a network to other networks which is physically isolated. - Page 35 If you want to allow 802.11b, 802.11g, and 802.11n clients to connect to this access point, select 2.4GHz (B+G+N). MAIN SSID Please input the SSID (the name used to identify this VigorAP 700) here. You can input up to 32 alphanumerical characters. PLEASE NOTE THAT SSID IS CASE SENSITIVE.
-
Page 36: Universal Repeater
When you see this message, the settings you made is successfully save. You can click Continue to return to previous page and continue on other setting items, or click Apply button to restart the VigorAP 700. The changes will take effect after about 30 seconds. 2-4-6 Universal Repeater In this mode, the access point can act as a wireless repeater;... - Page 37 If you want to allow 802.11b, 802.11g, and 802.11n clients to connect to this access point, select 2.4GHz (B+G+N). MAIN SSID Please input the SSID (the name used to identify this VigorAP 700) here. You can input up to 32 alphanumerical characters. PLEASE NOTE THAT SSID IS CASE SENSITIVE.
-
Page 38: Wps Setting
When you see this message, the settings you made is successfully save. You can click Continue to return to previous page and continue on other setting items, or click Apply button to restart the VigorAP 700. The changes will take effect after about 30 seconds. 2-5 WPS Setting Wi-Fi Protected Setup (WPS) is the simplest way to build connection between wireless network clients and this access point. - Page 39 WPA (AES) and generate a set of passphrase key for WPS connection. Passphrase Key: Displays the WPA passphrase here, all characters will be replaced by asterisk for security reason. If encryption is not VigorAP 700 User’s Guide...
- Page 40 Note: When you’re using PBC type WPS setup, you must press PBC button (hardware or software) of wireless client within 2 minutes. If you didn’t press PBC button of wireless client within this time period, please press PBC button (hardware or software) of this access point again. VigorAP 700 User’s Guide...
-
Page 41: Advanced Wireless Settings
2-6 Advanced Wireless Settings This VigorAP 700 has many advanced wireless features. Please note that all settings listed here are for experienced users only. If you’re not sure about the meaning and function of these settings, please don’t modify them, otherwise the wireless performance will be reduced. - Page 42 TX Power You can set the output power of wireless radio. Unless you’re using this VigorAP 700 in a really big space, you may not have to set output power to 100%. This will enhance security (malicious / unknown users in distance will not be able to reach your VigorAP 700).
-
Page 43: Wireless Security
VigorAP 700. The changes will take effect after about 30 seconds. 2-7 Wireless Security This VigorAP 700 provides many types of wireless security (wireless data encryption). When you use data encryption, data transferred by radio signals in the air will become unreadable for those people who don’t know correct encryption key (encryption password). - Page 44 There are several things you can do to improve wireless security: 1. Always enable data encryption. Only disable it when you want to open your VigorAP 700 to the public. 2. Never use simple words as encryption password. Use the random combination of symbols, numbers, and alphabets will greatly improve security.
-
Page 45: Disable Security
When you see this message, the settings you made is successfully save. You can click Continue to return to previous page and continue on other setting items, or click Apply button to restart the VigorAP 700. The changes will take effect after about 30 seconds. 2-7-2 WEP WEP (Wired Equivalent Privacy) is a common encryption mode. - Page 46 0-9, a-f, and A-F. You must enter at least one encryption key here. If you entered multiple WEP keys, they should not be the same with each other. Enable 802.1x Check this box to enable 802.1x user authentication. Please refer to VigorAP 700 User’s Guide...
-
Page 47: Wpa Pre-Shared Key
When you see this message, the settings you made is successfully save. You can click Continue to return to previous page and continue on other setting items, or click Apply button to restart the VigorAP 700. The changes will take effect after about 30 seconds. 2-7-3 WPA Pre-shared Key WPA Pre-shared key is the safest encryption method currently, and it is recommended to be used to ensure the safety of your data. -
Page 48: Wpa Radius
When you see this message, the settings you made is successfully save. You can click Continue to return to previous page and continue on other setting items, or click Apply button to restart the VigorAP 700. The changes will take effect after about 30 seconds. 2-7-4 WPA RADIUS WPA Radius is the combination of WPA encryption method and RADIUS user authentication. -
Page 49: 802.1X Authentication
When you see this message, the settings you made is successfully save. You can click Continue to return to previous page and continue on other setting items, or click Apply button to restart the VigorAP 700. The changes will take effect after about 30 seconds. 2-7-5 802.1x Authentication You can enable 802.1x user identification (based on RADIUS user authentication server) by... - Page 50 When you see this message, the settings you made is successfully save. You can click Continue to return to previous page and continue on other setting items, or click Apply button to restart the VigorAP 700. The changes will take effect after about 30 seconds. VigorAP 700 User’s Guide...
-
Page 51: Radius Server
Check this box to enable internal radius server function. User Profile You can add or delete radius user here. Please input username, password, confirm password in corresponding field, and click Add button to add the user to radius server database. You can click VigorAP 700 User’s Guide... - Page 52 When you see this message, the settings you made is successfully save. You can click Continue to return to previous page and continue on other setting items, or click Apply button to restart the VigorAP 700. The changes will take effect after about 30 seconds. VigorAP 700 User’s Guide...
-
Page 53: Mac Filtering
You can pre-define a so-called ‘white-list’, which contains MAC addresses of the wireless clients you trust. All other wireless clients with the MAC addresses which not in your list will be denied by this VigorAP 700. To setup MAC filtering, please click MAC Filtering on the left of web management interface... - Page 54 When you see this message, the settings you made is successfully save. You can click Continue to return to previous page and continue on other setting items, or click Apply button to restart the VigorAP 700. The changes will take effect after about 30 seconds. VigorAP 700 User’s Guide...
-
Page 55: System Utilities
When you see this message, the settings you made is successfully save. You can click Continue to return to previous page and continue on other setting items, or click Apply button to restart the VigorAP 700. The changes will take effect after about 30 seconds. VigorAP 700 User’s Guide... -
Page 56: Ip Address Of The Wireless Access Point
2-10-2 IP Address of the Wireless Access Point You can change the IP address of this VigorAP 700 to make it becoming one part of your local network. Please remember this address, or you will not be able to connect the configuration menu of this VigorAP 700. -
Page 57: Dhcp Server
2-10-3 DHCP Server This VigorAP 700 is capable to act as a DHCP server for your network. It is disabled by default. If you want to activate this function, please click System Utility on the left, and the following screen will be displayed:... - Page 58 When you see this message, the settings you made is successfully save. You can click Continue to return to previous page and continue on other setting items, or click Apply button to restart the VigorAP 700. The changes will take effect after about 30 seconds. VigorAP 700 User’s Guide...
-
Page 59: Configuration Backup And Restore
After the configuration is uploaded, the access point’s configuration will be replaced by the file you just uploaded. Factory Reset Click this button to remove all settings you made, and restore the configuration of this access point back to factory default settings. VigorAP 700 User’s Guide... -
Page 60: Firmware Upgrade
2-12 Firmware Upgrade If there is new firmware of this VigorAP 700 available, you can upload the firmware to the access point to change the firmware with new one to get extra functions. To perform firmware upgrade, please click Firmware Upgrade on the left of web management interface. - Page 61 Please click Apply. A popup message will ask you again to make sure you really want to restart the access point: Click OK to reset the access point or click Cancel to abort. Please remember all connections between wireless clients and this access point will be disconnected. VigorAP 700 User’s Guide...
- Page 62 This page is left blank. VigorAP 700 User’s Guide...
- Page 63 If encryption is enabled, please check WEP or WPA VigorAP 700 passphrase settings on your wireless client again. b. Try to move closer to VigorAP 700. c. Unplug the power plug of access point, and plug it back again after 10 seconds.
- Page 64 A/C power adapter, please disconnect the access point and A/C power adapter from utility power (make sure it’s safe before you’re doing this!), and call your dealer of purchase for help. VigorAP 700 User’s Guide...
- Page 65 “.”: bbbbbbbb.bbbbbbbb.bbbbbbbb.bbbbbbbb, where each “b” can either be 0 or 1. A network mask is also a 32-bit binary pattern, and consists of consecutive leading 1 is followed by consecutive trailing 0’s, such as VigorAP 700 User’s Guide...
- Page 66 Internet from any computer on your home network without having to purchase more IP addresses from your ISP. Port: Network Clients (LAN PC) uses port numbers to distinguish one network application/protocol over another. Below is a list of common applications and protocol/port numbers: Application Protocol Port Number VigorAP 700 User’s Guide...
- Page 67 Web-based management Graphical User Interface (GUI): Many devices support a graphical user interface that is based on the web browser. This means the user can use the familiar Netscape or Microsoft Internet Explorer to Control/configure or monitor the device being managed. VigorAP 700 User’s Guide...
Need help?
Do you have a question about the VigorAP 700 and is the answer not in the manual?
Questions and answers