Table of Contents
Advertisement
Modem No.WESY78730
Seria!No.
Writetheserial n umber i nthe
spaceabove forfuturereference.
Serial N umber D ecal ( under seat)
QUESTIONS?
As a manufacturer,
we are com-
mitted to providing
compmete
customer
satisfaction,
if you
have questions,
or if there are
missing
or damaged
parts, we
witl guarantee
complete
satis-
faction through
direct assis-
tance from our factory.
TO AVOID DELAYS, PLEASE
CALL DIRECT TO OUR TOLL-
FREE CUSTOMER HOT LINE.
The trained
technicians
on our
customer
hot line wiii provide
immediate assistance,
free of
charge.
CUSTOMER HOT LINE:
1°800°999°3756
Mon.=Fri., 6 a.m.=6 p.m. MST
A CAUTION
Read all precautions
and instruc=
tions in this manual before
using this equipment.
Save this
manual for future reference,
'TM
our webs_
www.TheCrossBow.com
1
Advertisement
Table of Contents

Related Manuals for Weider CrossBow Platinum WESY78730


Summary of Contents for Weider CrossBow Platinum WESY78730
- Page 1 Modem No.WESY78730 Seria!No. Writetheserial n umber i nthe spaceabove forfuturereference. Serial N umber D ecal ( under seat) QUESTIONS? As a manufacturer, we are com- mitted to providing compmete customer satisfaction, if you have questions, or if there are missing or damaged parts, we witl guarantee...
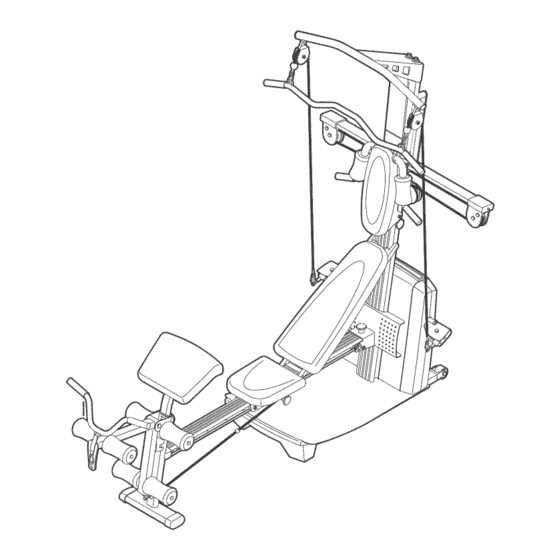
- Page 2 TABLE OF CONTENTS Note: A PART IDENTIFICATION CHART and a PART LIST/EXPLODED DRAWING are attached in the center of this manual. Remove the PART iDENTiFiCATiON CHART and PART LIST/EXPLODED DRAWING before begin= ning assembly. WARNtNG DECAL PLACEMENT The decats shown here have been p{aced on the resistance system.
- Page 3 IMPORTANT PRECAUTIONS AWARNING: To reduce the risk ofse.oua _ .jury, read t he fo.owing _mportant precautions before using the resistance system. Read all instructions in this manual before 11. Pult on the lower cable only while sitting using the resistance system.
- Page 4 BEFORE YOU BEGIN Thank you for selecting the innovative CrossBow by after reading this manual, please call our Customer WBDER '_PLATINUM resistance system. The resist z Service Department toll-free at 1_800-999-3756, ance system offers a selection of stations designed to Monday through Friday, 6 a.m.
- Page 5 Tighten all parts as you assemble them, unless Make Things Easier for Yourself instructed to do otherwise. This manual is designed to ensure that the reslsl- As you assemble the resistance system, make ance system can be assembled successfully by sure all parts are oriented as shown in the draw z most people.
- Page 6 Insert the Upper Wire Harness (71) through the hole in the Upright Cover (3). Pull the lower end of the Upper Wire Harness out of the hole in the back of the Upright (2). Attach the Upright Cover (3) and Upright (2) to the Base Plate (1) with an MI0 x 25mm Button Screw (88), an MI0 Washer (106), an MI0 x 92mm Button Bolt (83), and an M10 Nylon...
- Page 7 insert the four connectors of the lower wire har- ness (C) into the sockets of the Upper Wire Harness (71). The connectors should slide easi- ly into the sockets and snap into ptace, if a con- nector does not slide easily and snap into place, turn the connector over and then insert it.
- Page 8 PulltheSeatKnob(48)outandslidetheSeat Carriage (44)ontotheRail(4)as shown. E ngage theKnobintoa holein theRail. Press the RailCap(49)ontothe Leg(5).Attach theLegtotheRail(4)withtwoMI0 x 64mm Button Bolts(80),four M10Washers (106), a nd twoM10NylonLocknuts ( 103). \ Holes on this side Press a 45mm Square inner Cap (110) into the Rail insert (31). Attach the Rail Insert (31) inside of the Rail (4) with two MI0 x 64mm Button Bolts (80), four M10 Washers (106), and two MI 0 Nylon Locknuts...
- Page 9 12.Attach theSquatBackrest (25)tothe Squat Carriage (19)withfourM6x 16ram Screws (41). 13. insert t heSquat P in(66)intotheUpright (2). SlidetheSquat C arriage ( 19)ontotheUpright ( 2). 14. Press two38mmRound innerCaps(38)intothe TopFrame (37). AttachtheTopFrame (37)tothe Upright ( 2)with twoMI0 x 25mmButton Screws (88),an MI0 x 75mmButton Screw(84),threeM10Lock Washers ( 75),andan M10Washer ( 106).
- Page 10 15. insert t heconnector ontheConsole (67)intothe socket o nthe Upper W ireHarness (71).Thecon- nectorshouldslideeasilyintothesocketand snap into place, if the connector does not slide easily and snap into place, turn the connector over and then insert it. Make sure that the connector and wires appear as shown in the inset drawing.
- Page 11 19. insert the Resistance Bow (9) between the Crossbar Guides (15), and center it on the Crossbar Block (not shown). Remove the paper backing from a Bracket Plate (11) and stick it to the end of Resistance Bow (9). Press a Pulley Bracket (10) onto the Resistance Bow.
- Page 12 23. Attach the Backrest (35) to the Backrest Frame (32) with four M6 x 38mm Screws (105) and four M6 Washers (107). 24. insert the rod on the Backrest Frame (32) into the slot in the Seat Carriage (44). Hold the Backrest Frame vertically over the Beat Carriage and slide the rod into the slot, as shown in the...
- Page 13 26. Press two 19mm Round inner Caps (51) into a Pad Tube (50). Slide the Pad Tube into the Leg Lever (56). Slide two Large Foam Pads (52) onto the Pad Tube. Attach the other two Pad Tubes (50) to the Leg Lever (56) and the Leg (5) in the same manner.
- Page 14 ADJUSTMENTS This section explains how to adjust the resistance system. See the EXERCISE GUIDELINES on page 22 for important information about how to get the most benefit from your exercise program. Also, refer to the accompa- nying exercise guide to see the correct form for each exercise. Make sure all parts are properly tightened each time the resistance system is used.
- Page 15 ATTACHING THE ACCESSORIES To attach the Lat Bar (82) to the high pulleys, first attach the high pulley to the resistance system (see ATTACHING THE HiGH PULLEYS on page 14). Then, attach the Lat Bar to a High Cable (101)with a Cable Clip (94).
- Page 16 ADJUSTING THE SQUAT ARM To adjust the Squat Arm (20), remove the Squat Knob (27) from Squat Carriage (19). Move the Arm to the up or down position, and reengage the Knob into the Squat Carriage. ATTACHNG THE SQUAT STATION To use the squat station, first remove the backrest (see ADJUSTING THE BACKREST below).
- Page 17 ADJUSTING THE SEAT The Seat (45) can be secured at various positions on the Rail (4). To move the Seat, pull the Seat Knob (48) out as far as it will go and slide the Seat to the desired position. Engage the Seat Knob into an adjustment hole in the Rail.
- Page 18 CONSOLE OPERATION FEATURES OF THE CONSOLE PLUGGING IN THE RESISTANCE SYSTEM Plug the indicated end of the 'i '/ Transformer (72) into the Back Mech Console -- Cover (8). Plug the other end of the Transformer into a 120-volt outlet. All indicators and dis- plays on the console will flash once;...
- Page 19 Note: To see the correct form for the cardio row Enter the numbers of sets and repetitions t hat exercise, see the included exercise guide. If the you plan to complete foran exercise. resistance setting is too high or too low, select a To enter the number of sets that you plan to do, different resistance setting by pressing the resist- press the SETS + and - buttons.
- Page 20 CABLE DHAGRAM The cable diagram shows the proper routing of the upper cable (A). Use the diagram to make sure that the cable has been assembled correctly, if the cable has not been correctly routed, the resistance system will not function properly and damage may occur. The numbers show the correct route for the cable.
- Page 21 ADJUSTING THE CABLE TENSION When the resistance setting changes, the motor will be heard. To prevent damage to the motor, do not pull any of the cables while the resistance setting is changing. If a cable is pulled, the words RELEASE HANDLES AND READJUST RESiST- ANCE AS DESIRED may appear in the main display on the console.
- Page 22 EXERCISE GUIDELINES THE FOUR BASIC TYPES OF WORKOUTS PERSONALIZING YOUR EXERCISE PROGRAM Muscle Building Determining the exact length of time for each workout, To increase the size and strength of your muscles, as well as the number of repetitions or sets completed, push them close to their maximum capacity.
- Page 23 Rest for a short period of time after each set. The slowly as you stretch and do not bounce. Ease into ideal resting periods are: each stretch gradually and go only as far as you can • Rest for three minutes after each set for a muscle without strain.
- Page 25 PART IDENTIFICATION CHART--Model No. WESY78730 ROIO4A M5 x 56mm Screw (108) M12 x 58mm Button Bolt (87) MIO x 44mm Button Bolt (93) M12 x 62mm Button Bolt (81) M6 x 38mm Screw (105) MIO x 64ram Button Bolt (80) M4 x 38ram Screw (100)
- Page 26 22ram Spacer (61) 3/8" x 38mm Tension Screw (13) M10NylonLocknut(103) 31mm Spacer (30) 38mm Spacer (121) M12Nylon Locknut(119) 19ram Round Inner Cap (51) 1/2" Lock Washer (12) 25mm Square Inner Cap (34) M1O Thick Washer (54) '\\\ M10 Washer (106) 38mm Round Inner Cap (38) M10 Lock Washer (75)
- Page 27 PART LiST--Model No. WESY78730 R0104A Key No. Qty. Description Key No. Qty. Description Key No. Qty. Description Base Plate Seat Knob M10 x 25mm Upright Rail Cap Button Screw Pad Tube M1O x 125mm Upright Cover Rail 19mm Round Button Bolt Inner Cap M1O x 58mm Mech Frame...
- Page 28 103_ ,.< ¢¢ >...
- Page 29 ORDERING REPLACEMENT PARTS To order replacement parts, simply call our Customer Service Department toil-free at 1-800-999-3756, Monday through Friday, 6 a.m. until 6 p.m. Mountain Time (excluding holidays). To help us assist you, please be pre- pared to give the following information: •...
Need help?
Do you have a question about the CrossBow Platinum WESY78730 and is the answer not in the manual?
Questions and answers