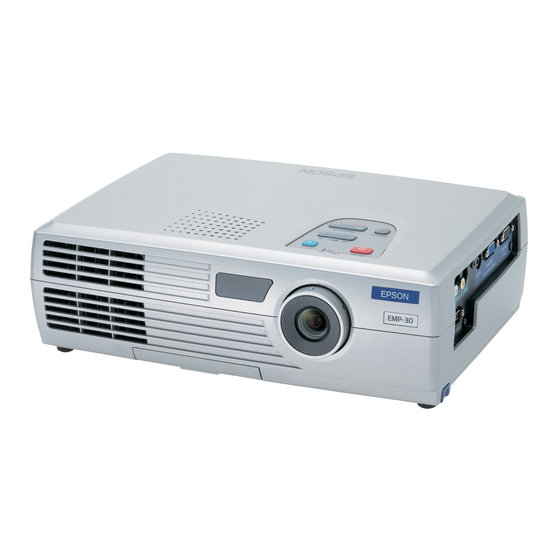
Epson EMP-30 User Manual
Multipurpose entertainment projector
Hide thumbs
Also See for EMP-30:
- Setup manual (13 pages) ,
- Specifications (2 pages) ,
- User manual (28 pages)
Table of Contents
Advertisement
Advertisement
Table of Contents

Related Manuals for Epson EMP-30


Summary of Contents for Epson EMP-30
-
Page 2: About The Manuals And Notations Used
About the Manuals and Notations Used Types of Manual The documentation for your EPSON projector is divided into the following four manuals. Refer to the manuals in the order given below. Unpacking and Installation Guide This manual contains information on the procedures from unpacking the projector through to starting to use the projector, and also describes the included accessories. -
Page 3: Table Of Contents
Adjusting the Image Angle ... 12 Correcting Keystone Distortion ... 13 Adjusting the Image Quality... 14 Using the EPSON Cinema Filter ... 14 Selecting the Colour Mode ... 15 Wide-screen Projection of Component Video and Video Images (Changing the Aspect Ratio) ... 15 Adjusting Computer Images ... -
Page 4: Features Of The Projector
Features of the Projector EPSON cinema filter function You can boost the quality of films by attaching the EPSON cinema filter that is supplied with the projector and then changing the "EPSON Cinema Filter" setting in the "Video" menu to "ON". This automatically causes video images such as films to be projected at the optimum tint. - Page 7 Adjusting the Image Angle ... 12 Correcting Keystone Distortion ... 13 Adjusting the Image Quality... 14 Using the EPSON Cinema Filter... 14 Selecting the Colour Mode... 15 Wide-screen Projection of Component Video and Video Images (Changing the Aspect Ratio) ... 15 Adjusting Computer Images ...
-
Page 8: Turning On The Projector
Connect the accessory power cable to the projector. Check that the power cable connector is facing the same way as the power inlet on the projector, and then insert the power cable connector securely into the projector. Connect the other end of the power Lit orange cable to an earthed electrical outlet. -
Page 9: Turning On The Power And Projecting Images
Turning On the Power and Projecting Images Procedure Changes from flashing to lit green The projector's control panel and remote control buttons cannot be operated while the Power indicator is flashing green. Depending on the settings, the message "No-Signal." may appear. See "Setting" - "No- Signal Msg."... - Page 10 If a laptop computer or a computer with an LCD screen has been connected to the projector, the images may not be projected straight away. After making the connections, check that the computer has been set up to output signals externally. The following table shows examples of how to toggle output settings.
-
Page 11: Turning Off The Projector
Stops flashing and lights orange Do not disconnect the power cable from the outlet while the Power indicator is still flashing orange, otherwise it may result in errors in projector operation and reduce the lamp unit operating life. Turn off the power for the signal sources that are connected to the projector. - Page 12 Gently push down on the projector while simultaneously pressing the two foot adjust buttons. Attach the lens cover. Attach the lens cover to the lens when not using the projector, in order to stop the lens from getting dusty or dirty. Lens cover...
-
Page 13: Adjusting The Screen Image
You can correct and adjust the screen image in order to obtain the best possible picture. Adjusting the Image Size The size of the projected image is basically determined by the distance from the projector to the screen. (Setup Guide) If further minor adjustment is required, press the [Zoom] button on the projector's control panel to make the adjustment. -
Page 14: Adjusting The Image Angle
If it is not possible to set up the projector so that it is perpendicular to the screen, it can be set up at a slight vertical angle instead. You can extend or retract the front adjustable feet to adjust the projection angle within a maximum range of 10º. -
Page 15: Correcting Keystone Distortion
Correcting Keystone Distortion When the projector is tilted, it will cause keystone distortion to appear in the image, but this distortion can be corrected using the keystone correction function as long as the vertical angle of tilt is within a range of approximately 15º. -
Page 16: Adjusting The Image Quality
The quality of the screen images can be adjusted as follows. Using the EPSON Cinema Filter When the accessory EPSON cinema filter is attached to the projector and the "EPSON Cinema Filter" command is set to "ON", the images are adjusted to the optimum tint for movie theatre images. -
Page 17: Selecting The Colour Mode
DVDs can be viewed in 16:9 wide-screen format. When images in squeeze mode are projected at 4:3 Using the EPSON Cinema Filter Changing the Aspect Ratio Selecting the Colour Mode Application The colour mode changes as follows... -
Page 18: Adjusting Computer Images
In such cases, use the configuration menu commands to adjust the tracking and sync settings manually. (p.17, 18) Press the [Menu] button on the remote EPSON Cinema Filter control, and then select "Aspect Ratio" Position Adjust Brightness from the "Video"... -
Page 19: Adjusting The Tracking
After making the adjustment, press the [Menu] button to exit the configuration menu. The image will flash when continuous tracking adjustment is carried out, but this is normal. Using the EPSON Cinema Filter Selecting the Colour Mode If vertical stripes appear in the projected images, and this cannot be fixed using automatic setup, you will need to adjust the tracking manually using the following procedure. -
Page 20: Adjusting The Sync
It may also be possible to fix flickering and fuzziness by adjusting the brightness, contrast , sharpness and keystone correction settings. Using the EPSON Cinema Filter Changing the Aspect Ratio Selecting the Colour Mode If flickering, fuzziness or interference appear in images that are input from the computer, and this cannot be fixed using automatic setup, you will need to adjust the sync manually using the following procedure. -
Page 21: Settings And Useful Functions
Settings and Useful Functions This chapter describes the configuration menus and useful functions that can be used when a computer is connected. Using the Configuration Menu Functions...20 "Video" Menu... 20 • Video...20 • Computer/RGB video ...22 "Audio" Menu ... 23 "Setting"... -
Page 22: Using The Configuration Menu Functions
: Select "Video" Menu The functions in the "Video" menu apart from "EPSON Cinema Filter", "Input Signal", "Auto Setup" and "Video Signal" cannot be adjusted while no image signal is being input. The functions which appear in the "Video" menu will change depending on the type of input source being used for the image signal. - Page 23 Sets the aspect ratio for projected images. Reset Resets all adjustment values for the "Video" menu functions except for the "EPSON Cinema Filter", "Input Signal" and "Video Signal" setting to their default settings. Press the [Enter] button to display the confirmation screen, and select "Yes".
-
Page 24: Computer/Rgb Video
When set to "ON", the proper effect will not be obtained unless the accessory EPSON cinema filter is attached to the lens of the projector. (p.14) Moves the image display position vertically and horizontally. -
Page 25: Audio" Menu
"Video" Menu "Audio" Menu "Audio" Menu Video Volume Audio Tone Setting Audio Input Computer Advanced Reset Execute About Reset All : Select : Enter Sub-menu Volume Adjusts the volume. Tone Adjusts the tone. Audio Input Selects the input source for audio signals. The default setting varies depending on the type of signal being input (for component video, RGB video and computer input signals: Computer;... -
Page 26: Advanced" Menu
When set to "ON", projection stops automatically and then after the cool- down period is finished, the projector changes to sleep mode if no operations are carried out for 30 minutes while the "No-Signal." message is being displayed. (The Power indicator lights orange.) Projection starts again when the [Power] button on the projector's control panel or the remote control is pressed. -
Page 27: About" Menu
Use when projecting images from behind a translucent screen. When set to "ON", the projected images are horizontally reversed. Ceiling Use when installing the projector to a ceiling. When set to "ON", the projected images are horizontally and vertically reversed. Reset Resets all adjustment values for the "Advanced"... -
Page 28: Reset All" Menu
Press the [Enter] button to display the confirmation screen, and select "Yes". Select "Reset" in an individual menu to reset only the settings for the items in each sub-menu. The "EPSON Cinema Filter", "Input Signal", "Video Signal", "Lamp" and "Language" settings will not return to their default settings. Default... -
Page 29: Using The Configuration Menus
"Video" Menu "Audio" Menu Using the Configuration Menus The configuration menus can be operated using the remote control only. Procedure Remote control Menu Main menu Video EPSON Cinema Filter Audio Position Setting Brightness Advanced Contrast About Color Reset All Tint... - Page 30 Refer to list of functions for details on the functions of each menu item. (p.20) "Video" Menu "Setting" Menu "About" Menu "Audio" Menu "Advanced" Menu "Reset All" Menu Select a setting value. EPSON Cinema Filter Position Press the [ ] and [ ] buttons to change the Adjust Brightness Contrast setting value.
-
Page 31: Useful Functions When A Computer Is Connected
Useful Functions When a Computer is Connected This section describes the various useful functions that can be used to enhance presentations. A/V Mute This function momentarily pauses the image and sound. For example, it can be used when you do not want to show viewers details of operations such as selecting different files while computer images are being projected. -
Page 32: E-Zoom
Useful Functions When a Computer is Connected E-Zoom This function lets you enlarge and reduce a part of projected images such as graphs and tables. Procedure The selected area can be enlarged to between 1– 4 times, in 25 steps of x0.125. Press the [E-Zoom Remote control remote control. -
Page 33: Troubleshooting
Troubleshooting This section describes how to identify problems and what to do if a problem is found. Using the Help ...32 When Having Some Trouble ... 33 (Warning) Indicator ... 33 Power Indicator ... 34 When the Indicators Provide No Help ...35... -
Page 34: Using The Help
Using the Help If a problem occurs with the projector, the Help function uses on-screen displays to assist you in solving the problem. It uses a series of menus in a question and answer format. The questions vary depending on the type of image source. -
Page 35: When Having Some Trouble
When Having Some Trouble If you are having a problem with the projector, first check the projector's indicators. The projector is provided with the following two indicators. These indicators alert you to problems with projector operation. Power indicator Warning indicator The following tables show what the indicators mean and how to remedy problems that they indicate. -
Page 36: Power Indicator
Green progress If the projector is not operating properly even though the indicators are all showing normal, refer to "When the Indicators Provide No Help" on the following page. If an indicator is showing a status which does not appear in the previous tables, contact your dealer or the nearest address provided at "International Warranty Conditions"... -
Page 37: When The Indicators Provide No Help
Remedy Wait until cool-down has finished. You can then use the [Power] buttons. (p.9) Turn the projector power back on. To cancel the sleep mode setting, set "Sleep Mode" to "OFF". "Setting" - "Sleep Mode" (p.24) Press the [Power] button on either the projector's control panel or the remote control to turn on the power for the projector. - Page 38 Set the projector up in the room approximately one hour before it is to be used. If condensation forms on the lens, turn off the power and wait for the condensation to disappear. Remove the EPSON cinema filter and reattach it. (p.14)
- Page 39 (When connected to a computer) Remedy If a component video , RGB video or computer source is connected to the projector, use the "Input Signal" command to select the signal format which matches the signal connected source. "Video" - "Input Signal" (p.21, 22)
- Page 40 "Video" - "Color", "Tint" (p.20, 21) When this happens, the lamp should be replaced with a new one. (p.46) Change the "EPSON Cinema Filter" setting in the "Video" menu to "OFF". "Video" - "EPSON Cinema Filter" (p.20, 22) Remedy...
- Page 41 "Video" - "Brightness" (p.20, 22) If connecting a computer to the projector to give presentations, remove the EPSON cinema filter and set the "EPSON Cinema Filter" command to "OFF". "Video" - "EPSON Cinema Filter" (p.20, 22) Use the "Contrast" command to adjust.
- Page 42 Is the battery inserted incorrectly? Probable cause The Power indicator remains orange. This projector is designed so that the Power indicator remains lit even when after the power has been turned off. Adjust the volume so that the sound is audible.
- Page 43 Probable cause The cooling fan does not stop. After the [Power] button is pressed to turn off the power, the cool-down period starts. Remedy After the cool-down the Power period is complete, indicator changes to a steady orange, and you can then disconnect the power cable from the electrical outlet.
-
Page 45: Appendices
Maintenance ...44 Cleaning... 44 • Cleaning the Projector Case...44 • Cleaning the Lens and EPSON Cinema Filter...44 • Cleaning the Air Filter ...44 Replacing Consumables ... 45 • Inserting the Battery...45 • Lamp Replacement Period...46 •... -
Page 46: Maintenance
These can cause the case to warp and make the coating finish peel off. Cleaning the Lens and EPSON Cinema Filter Use a commercially-available air blower, or use lens cleaning paper to gently wipe the lens and the EPSON cinema filter. -
Page 47: Replacing Consumables
Replacing Consumables This section describes how to replace the remote control battery, the lamp and the air filter. Inserting the Battery Use the following type of battery as a replacement. 1 CR2025 lithium battery Be sure to read the Safety Instructions/World-Wide Warranty Terms before handling the battery. -
Page 48: Lamp Replacement Period
If the lamp stops working and needs to be replaced, there is the danger that the lamp may break when handled. If replacing the lamp of a projector that has been installed to the ceiling, you should always assume that the lamp is broken and remove the lamp cover very carefully. - Page 49 Install the new lamp. Hold the lamp so that it faces the correct way to fit into the projector, and then insert the lamp and tighten the two lamp fixing screws. Install the lamp cover. Slide the cover in from the outside, and then push...
-
Page 50: Resetting The Lamp Operating Time
Dispose of used lamps properly in accordance with your local regulations. Resetting the Lamp Operating Time The projector has a built-in counter which keeps track of the lamp operating time. When the cumulative operating time reaches a certain point, it causes the replacement warning message to be displayed. Therefore, the counter needs to be reset after the lamp has been replaced with a new one. -
Page 51: Replacing The Air Filter
Procedure Dispose of used air filters properly in accordance with your local regulations. Cleaning Replacing Consumables Turn off the projector power, wait for the cool-down period to end, and then disconnect the power cable. The cool-down period lasts for about 20 seconds. -
Page 52: Optional Accessories
This is the same remote control as the projector's accessory remote control. ELPKC19 Soft carry case Use this case if you need to carry the projector by hand. source. Image presentation camera Use when projecting books, OHP films and slides. -
Page 53: List Of Supported Monitor Displays
List of Supported Monitor Displays Component Video Input/RGB Video Input Signal SDTV (525i) (D1) SDTV (625i) SDTV (525p) (D2) HDTV (750p) 16:9 (D4) HDTV(1125i) 16:9 (D3) Composite Video/S-Video Input Signal TV (NTSC) TV (PAL, SECAM) Computer Signal PC98 VGACGA VGAEGA VGA text VESA SVGA... -
Page 54: Specifications
Storage temperature Weight Connectors Multipurpose Entertainment Projector EMP-30 309 (W) x 93 (H) x 219 (D) mm (12.2 (W) x 3.7 (H) x 8.6 (D) in.) (not including feet and lens) 0.5 in. Polysilicon TFT active matrix Full-line 6-phase block sequential writing... - Page 55 Safety UL1950 3 Edition Canada CSA C22.2 No.950-95 (cUL) European Community The Low Voltage Directive (73/23/EEC) IEC60950 2 Edition, +Amd.1, +Amd.2, +Amd.3, +Amd.4 FCC 47CFR Part15B Class B (DoC) Canada ICES-003 Class B European Community The EMC Directive (89/336/EEC) EN55022, 1998 Class B EN55024, 1998 IEC61000-4-2, IEC61000-4-3, IEC61000-4-4, IEC61000-4-5, IEC61000-4-6, IEC61000-4-8, IEC61000-4-11,...
-
Page 56: Appearance
Appearance Centre of projector Centre of lens 53.9 67.5 117.6 M4X8-3 77.3 161.8 76.7 Units: mm... -
Page 57: Part Names And Functions
( Setup Guide ) Store the accessory remote control in here when not using it. Lens cover Attach when not using the projector to prevent the lens from becoming dirty or damaged. Front/Top Control Panel (Warning) indicator (p.33) The colour and on status (illuminated/flashing) indicates problems with the projector. -
Page 58: Control Panel
Part Names and Functions Control Panel [Power] button (p.7 Turns the projector power on and off. [Source] button (p.7) Switches the input source between the Computer/ Component Video port, S-Video port and Video port each time the button is pressed. -
Page 59: Rear
These holes are for the fixing screws that are used to secure the projector. Air filter (air intake vent) (p.44 Prevents dust and other foreign particles from being drawn into the projector. When replacing the lamp, replace the air filter also. Base Remote Control... -
Page 60: Remote Control
Front/Top Left Side Base Control Panel Rear Remote Control [Power] button (p.7 Turns the projector power on and off. [Color Mode] button (p.15) Selects the colour mode. The colour mode changes in the order of Normal, Meeting, Presentation, Theatre, Game... -
Page 61: Glossary
"refresh rate", and is expressed in hertz (Hz). Resize display This function is use to project computer images that have a resolution or more than or less than the projector's panel resolution to be projected so that they fill the whole of the projection area. SDTV An abbreviation for Standard Definition Television. - Page 62 It refers to images which consist of two independent signals: Y (luminance signal), and C (colour signal). The signals output from computers have a specific frequency. If the projector frequency does not match this frequency, the resulting images will not be of a good quality. The process of matching the phases of these signals (the relative position of the crests and troughs in the signal) is called "synchronisation".
-
Page 63: Index
Audio port ... 56, Setup Guide Auto Setup...16, 22 Battery holder...45 Brightness...20, 22 Ceiling ...25 Cleaning the Air Filter ...44 Cleaning the EPSON Cinema Filter...44 Cleaning the Lens...44 Cleaning the Projector Case...44 Color...20 Color Adjustment...24 Color Mode ...15, 21, 22 Color Mode Prompt ...24... - Page 64 Resized display... 51 Resolution... 25 RGB... 24 Screen size ...Setup Guide Security lock... 57 "Setting" Menu ... 23 Setting Up the Projector ...Setup Guide Sharpness... 21, 22 Sleep mode ... 24 Speaker ...55, Setup Guide Specifications... 52 Squeeze mode... 15 sRGB ...
-
Page 65: Declaration Of Conformity
Type of Product Model DECLARATION of CONFORMITY According to 47CFR, Part 2 and 15 Personal Computers : EPSON AMERICA, INC. : 3840 Kilroy Airport Way MS: 3-13 Long Beach, CA 90806 : 562-290-5254 : EPSON : Projector : EMP-30 / ELP-30... - Page 66 FCC Compliance Statement For United States Users This equipment has been tested and found to comply with the limits for a Class B digital device, pursuant to Part 15 of the FCC Rules. These limits are designed to provide reasonable protection against harmful interference in a residential installation. This equipment generates, uses, and can radiate radio frequency energy and, if not installed and used in accordance with the instructions, may cause harmful interference to radio or television reception.
- Page 67 CORPORATION’s operating and maintenance instructions. SEIKO EPSON CORPORATION shall not be liable against any damages or problems arising from the use of any options or any consumable products other than those designated as Original EPSON Products or EPSON Approved Products by SEIKO EPSON CORPORATION.
- Page 68 Printed in Japan Printed on 100% recycled paper. 404003503 02.09-2.4A(C05)
Need help?
Do you have a question about the EMP-30 and is the answer not in the manual?
Questions and answers