Table of Contents
Advertisement
Quick Links
Download this manual
See also:
Service Manual
Advertisement
Table of Contents

Related Manuals for Epson 200


Summary of Contents for Epson 200
- Page 1 ® ® EPSON PowerLite Cinema 200 Home Theater Projector User’ s Guide...
-
Page 2: Copyright Notice
SEIKO EPSON CORPORATION. The information contained herein is designed only for use with this EPSON product. EPSON is not responsible for any use of this information as applied to other products. -
Page 3: Table Of Contents
Registration and Warranty Projector Parts Projection Controls Optional Accessories Using This Manual Getting More Information Setting Up the Projector Choosing a Location Connecting the Cables Other Connections Displaying and Adjusting the Image Focusing and Zooming the Image Inverting and Mirroring the Image... - Page 4 Brightness and Contrast Settings Sharpness and Picture Quality Settings Color Settings Adjustments for Computer Images Saving and Resetting Menu Selections Creating Memory Settings Resetting the Projector Customizing Projector Features Image Sizing Screen Options Other Setup Options Using Cinema Color Editor...
- Page 5 Maintenance Cleaning the Lens Cleaning the Projector Case Changing the Remote Control’s Batteries Cleaning and Replacing the Air Filter Replacing the Lamp Resetting the Lamp Usage Timer Storing the Projector Transporting the Projector Problem Solving What To Do When the Lights Flash...
- Page 6 Notices Important Safety Information Remote Control Information FCC Compliance Statement Declaration of Conformity Epson America, Inc., Limited Warranty Index...
-
Page 7: Introduction
Home Service. In the unlikely event of an equipment failure, you won’t have to wait for your unit to be repaired. Instead, EPSON will ship you a replacement unit anywhere in the United States or Canada, usually via overnight delivery. See your Extra Care Home Service brochure for details. -
Page 8: Projector Parts
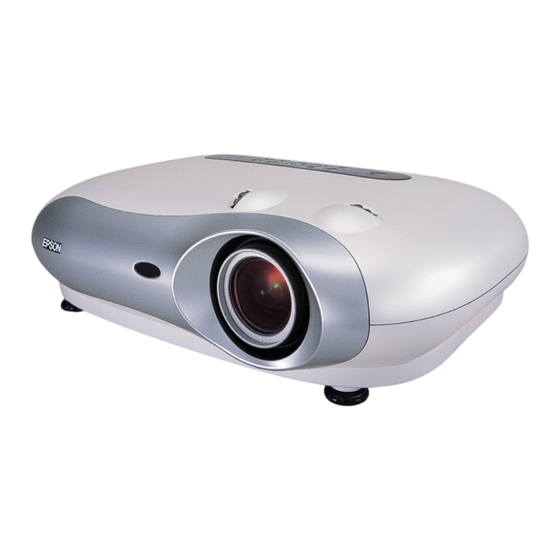
Projector Parts Vertical lens shift knob Control panel Horizontal lens shift knob Lamp cover Lens cover Ventilation slots Infrared receiver Adjustable foot S-Video port Input B Control (RS-232C) port (computer VGA port) Input A USB port (component video) Infrared receiver... -
Page 9: Projection Controls
Projection Controls Menu navigation buttons Focus button Indicator lights Power button Menu button Displays the projector’s menus Memory button Recalls custom picture settings Menu navigation buttons Menu selection/Line menu Selects menu items or opens Line Menu Blank button Turns off the screen image... -
Page 10: Optional Accessories
(includes monitor adapter and desktop adapter) S-video cable You can purchase many of these accessories from your dealer, by calling EPSON at (800) 873-7766, or by visiting the EPSON Store (U.S. sales only). In Canada, please call (800) 463-7766 for dealer referral. -
Page 11: Using This Manual
Tips: Contain helpful projection tips. Getting More Information Need additional help? Take advantage of EPSON’s automated support services 24 hours a day at http://support.epson.com. Use this site to download FAQs or product information and e-mail your questions to EPSON support. -
Page 13: Setting Up The Projector
Front/Ceiling Front If you install the projector in a rear or overhead position, you’ll need to flip and/or mirror the image by selecting the correct Projection option (see page 18). For overhead projection, you’ll also need to install the optional ceiling mount bracket (see page 10 for ordering information). - Page 14 If you place the projector off to the side, aim it straight ahead (rather than at the center of the screen), then use the horizontal lens shift knob to center the image. Do not place the projector farther to the left or right than the edge of the screen, or you will not be able to project a square (or rectangular) image.
-
Page 15: Connecting The Cables
Connecting the Cables You can connect the projector to any type of video equipment, such as a VCR, DVD player, HDTV tuner, cable or satellite box, video game console, camcorder, or digital camera. You can also connect it to a desktop or laptop PC or Apple... -
Page 16: Other Connections
(see page 18). Other Connections Power cable Plug the power cable into the projector and a grounded electrical outlet. The P power light on the projector’s control panel turns orange when the projector is receiving power and is in standby mode. -
Page 17: Displaying And Adjusting The Image
Connect to it using a 3.5-mm mini jack cable, as shown. Displaying and Adjusting the Image Make sure your video or computer equipment is turned on, then turn on the projector as described on page 21. If necessary, select the correct source to display the image (see page 22). -
Page 18: Inverting And Mirroring The Image
Rear/Ceiling the screen and mounted overhead. Selecting the Input Signal Setting If you’re using the projector’s Input A port, select the correct setting for the type of video equipment you’ve connected to it: 1. Press the button on the remote control. -
Page 19: Positioning The Image
If the projected image looks like Note: If the image is shaped like screen and angled toward it. Face the projector straight ahead (instead of at the center of the screen), then use the horizontal lens shift knob to center the image. -
Page 21: Basic Operation
Basic Operation Make sure the projector is set up as described on page 13, then follow the instructions below to turn it on and display an image. Turning On the Projector 1. Remove the lens cap. 2. Press the button on the remote control, or press the button on the projector. -
Page 22: Turning The Projector Off
Caution: Turn the projector off when not in use. Continuous 24-hour-a-day use may reduce its overall life. Never unplug the projector without pressing the Off button and letting it cool, or you could damage the projector and reduce lamp life. -
Page 23: Choosing The Aspect Ratio
Note: If you display a 4:3 image using the Zoom setting, the edges of the image will be cut off. You can use the Zoom Caption option to resize and reposition the image to your liking (see page 35). For details on how the projector resizes the picture size when you choose an Aspect setting, see page 66. -
Page 24: Choosing The Color Mode
Note: You can fine-tune the color and other image quality settings using the projector’s menu system (see page 29) or the Cinema Color Editor software (see page 39). You can also create your own customized groups of settings (see page 33). -
Page 25: Locking The Projector
Locking the Projector The projector includes various Lock settings to prevent the image from being accidentally changed once it’s adjusted, and to keep children from turning on the projector without adult supervision. To access the Lock settings, follow these steps: 1. -
Page 27: Making Adjustments
Making Adjustments You can use the projector’s on-screen menus to adjust the image quality, such as the brightness, contrast, sharpness, and color. You can also change how the menus display, sleep mode settings, and other projector features. Using the Menu System You can access the menu system either from the remote control or by using the buttons on the projector’s control panel. -
Page 28: Changing How The Menu Displays
Changing How the Menu Displays Use these options to control how the menu displays on the screen. Language Setting ! Language Select from nine languages to use in the menu system. Menu Position Setting ! On-Screen Display ! Menu Position Use the arrow buttons to choose a position on the screen for displaying the menu. -
Page 29: Adjusting The Image Quality
Brightness and Contrast Settings The Brightness setting controls how much light is produced by the projector lamp, and the other settings listed below control how the projector interprets the light and dark areas of the picture. -
Page 30: Sharpness And Picture Quality Settings
White Level/Black Level Image ! Picture Quality ! Input Adjustment ! White Level/Black Level Adjust the White Level so that details in the brightest parts of the image are not washed out. Then adjust the Black Level so that shadow-level details are still visible in the darkest parts of the image. -
Page 31: Color Settings
If you only need to make slight adjustments, you can fine-tune the picture with the last two settings. Note: You can also make color adjustments by attaching a PC or laptop to the projector and using the Cinema Color Editor software. See page 39. -
Page 32: Adjustments For Computer Images
In addition to the settings described above, you can adjust the Tracking and Sync settings for analog RGB computer images. Normally, these settings are adjusted automatically by the projector. If you notice that the image is blurry or contains dark vertical bands, you may need to adjust the settings yourself. -
Page 33: Saving And Resetting Menu Selections
This lets you easily recall them, and switch from one group of settings to another. You can save up to six groups of settings. If necessary, you can use the projector’s reset options to restore its factory-default settings. You can clear all the settings, or just the settings in a specific menu. -
Page 34: Resetting The Projector
Image menu: Open the Image menu . . . You can also reset the lamp usage timer, clear the memory settings, or restore all the projector settings to their original values. Follow these steps: 1. Press the button on the remote control. -
Page 35: Customizing Projector Features
Customizing Projector Features Use the settings in this section to adjust the image size and position, suppress on-screen text, and select basic setup options. Image Sizing Before adjusting any of these settings, make sure you have already selected an appropriate aspect ratio for the type of picture you’re viewing (see page 23). -
Page 36: Screen Options
EPSON logo on a black background. Logo Startup Screen Setting ! On-Screen Display ! Startup Screen Turn this setting off if you want to prevent the EPSON logo from appearing while the projector is warming up. Other Setup Options Keystone... - Page 37 Setting ! Operation ! Lock Setting Lets you lock the projector’s focus and zoom settings. Also lets you lock the buttons on the projector’s control panel, or set a child lock that makes it more difficult to turn on the projector. See page 25.
-
Page 39: Using Cinema Color Editor
Using Cinema Color Editor You can use the Cinema Color Editor software that came with your projector to adjust each color in the picture individually. You can also use the software to operate the projector in place of your remote control, letting you switch image sources, adjust the picture’s aspect ratio, or change image quality settings. -
Page 40: Installing The Software
Installing the Software Follow these steps to install the software: 1. Insert the Cinema Color Editor CD-ROM in your computer. 2. Turn off any anti-virus software that may be running, then click 3. Read the license agreement and click You see this screen: 4. -
Page 41: Connecting To The Computer
Note: You can use any standard (commercially available) USB or serial cable. 2. Turn on the projector. 3. Make sure the projector’s COM Port setting is correct for the type of cable you’re using (see page 37). Select either cable). -
Page 42: Using Cinema Color Editor
Using Cinema Color Editor To start Cinema Color Editor, follow these steps: 1. Make sure the projector is connected and turned on, as described on the previous page. 2. Windows: Click Macintosh: From the Applications folder on your hard drive, open the... -
Page 43: Remote Control Operations
Remote Control Operations You can use Cinema Color Editor to change the image source, adjust the aspect ratio, or turn the power off—just as you would from the remote control. 1. Click the Remote Control Select Remote Control 2. Click one of the buttons for the options shown above. tab. -
Page 44: Adjusting The Picture Quality
Adjusting the Picture Quality You can use Cinema Color Editor in place of the projector’s menu system to adjust the image. 1. Click the Picture Quality First, select Picture Quality Then click one of these buttons to access additional settings 2. -
Page 45: Adjusting The Color
Adjusting the Color You can use the Color Adjustment settings to fine-tune the color of the image. If you select RGB as the color mode, you can adjust the offset, gamma, and gain for each signal color (red, green, and blue). Or select RGBCMY to adjust the hue and saturation for each of six colors. 1. -
Page 46: Saving And Recalling Picture Settings
Saving and Recalling Picture Settings Once you’ve adjusted the picture using Cinema Color Editor, you can save your settings in the projector’s memory. Then you can use the remote control (or Cinema Color Editor) to easily recall them for future use. - Page 47 To use a memory setting you’ve saved on the projector: Access the projector’s memory settings either from the remote control (see page 33) or by using Cinema Color Editor as follows: 1. Select , then click Picture Quality 1. Select Picture Quality 2.
-
Page 48: Managing Your Settings
Managing Your Settings In addition to your projector’s twelve memory settings (six standard and six advanced), you can store any number of settings on your computer’s hard drive. You can also use Cinema Color Editor to rename or delete memory settings stored on your projector. -
Page 49: Maintenance
Maintenance Your projector needs little maintenance. All you need to do on a regular basis is keep the lens clean. You also need to clean the air filter periodically to prevent overheating. Warning: Before you clean any part of the projector, turn it off and unplug the power cord. -
Page 50: Changing The Remote Control's Batteries
Changing the Remote Control’s Batteries The remote control uses two AA batteries. If you suspect they are weak, take the remote control to a darkened room and press the illumination button. If the buttons on the remote control do not glow red, replace the batteries as described below. Warning: Keep batteries away from children. -
Page 51: Cleaning And Replacing The Air Filter
Cleaning and Replacing the Air Filter Clean the air filter on the bottom of the projector after every 100 hours of use. If it’s not cleaned periodically, it can become clogged with dust, preventing proper ventilation. This can cause overheating and damage the projector. -
Page 52: Replacing The Lamp
Note: Lamp life results will vary depending on mode selected, environmental conditions, and usage. Contact your dealer or call EPSON at (800) 873-7766 in the United States for a replacement lamp. Request part number Be sure to read the “Important Safety Information” on page 69 before replacing the lamp. -
Page 53: Resetting The Lamp Usage Timer
Caution: Don’t touch the glass portion of the lamp assembly. Touching the glass could result in premature lamp failure. 8. Replace the cover and tighten its screws. (The projector won’t work if the lamp cover is open or loose.) 9. Reset the lamp usage timer, as described in the next section. -
Page 54: Storing The Projector
Make sure the temperature and humidity of the storage area are within the recommended range for the projector (14 to 140 °F [-10 to 60 °C] and 10 to 90% relative humidity). Attach the lens cover and retract the feet. -
Page 55: Problem Solving
The lamp is cooling down. Wait until the light stops flashing, then press the The P power light does not come on. Make sure the power cord is connected securely both at the power outlet and the projector. Power light Warning light button to turn it on. -
Page 56: Checking The Projector Status
The projector is too hot, which turns off the lamp automatically. Let it cool for five minutes, then turn it back on. Make sure there is plenty of space around and under the projector for ventilation. Also, clean or replace the filter if necessary (see page 51). -
Page 57: Solving Picture Problems
Check that the P power light is green, not flashing, and the lens cover is off. The projector may be in standby (or sleep) mode. If the P power light is orange, press the button to turn the projector back on. - Page 58 If you’re using a Macintosh with OS X: 1. Select System Preferences 2. Click Detect Displays 3. To display the entire desktop on both your projector screen and LCD screen, click Arrange window.) 4. Click Mirror Displays of the screen. One of the monitor icons automatically moves on top of the other.
- Page 59 Note: You won’t have to use the Keystone function to correct the image, as long as you place the projector level (not angled up or down) and at a height between the top and bottom of the screen. Then use the vertical lens shift knob to position the image.
-
Page 60: Solving Remote Control Problems
30° in any direction. You may need to replace the remote control’s batteries (see page 50). Dim the room lights and turn off any fluorescent lights. Make sure the projector is not in direct sunlight. -
Page 61: Where To Get Help
To use the EPSON PrivateLine Support service, call (800) 637-7661 and enter the PIN on the EPSON PrivateLine Support card that came with your projector. This is the fastest way of speaking to a live representative, and it’s free. This service is available 6 Time, Monday through Friday, for the duration of your warranty period. -
Page 63: Specifications
28 dB (Natural/Theatre/sRBG color mode) Keystone correction Vertical: -15 to +15° Lamp Type UHE (Ultra High Efficiency) Power consumption 200 W Lamp life Approx. 1700 hours (Dynamic/Living Room color mode) Approx. 3000 hours (Natural/Theatre/sRBG color mode) Part number V13H010L28 Remote Control Range Approx. -
Page 64: Dimensions
12.6 inches (320 mm) 11.8 lb. (5.3 kg) 50/60 Hz AC 100 to 120 VAC, 3.0 A 200 to 240 VAC, 1.4 A Operating: 270 W max. Standby: 0.3 W Operating: 41 to 95 °F (5 to 35 °C) Storage: 14 to 140 °F (-10 to 60 °C) -
Page 65: Compatible Video Formats
The projector also supports digital video (SDTV, HDTV) and various monitor display formats. The projector’s Input A port accepts SDTV and HDTV in either component video or RGB video format; the Input B port accepts computer monitor signals (analog RGB). -
Page 66: Aspect Ratio Settings
Aspect Ratio Settings Images can be automatically resized to display at the projector’s native resolution (1280 × 720) when the Aspect setting is set to Auto. If necessary, you can select a different Aspect setting to optimize the image (see page 23). The resolution at which the image displays for a given setting depends on the currently active picture source, as listed below. - Page 67 × 1280 1280 × × 1280 1280 × × 1280 1280 — × × 1280 1280 — ICs are used in this projector. Squeeze Through × × × × × × 1066 — — × × × × 1109 —...
-
Page 69: Important Safety Information
service;... -
Page 70: Remote Control Information
Don’t place the projector where the cord can be walked on. This may result in fraying or damage to the plug. Unplug the projector from the wall outlet before cleaning. Use a damp cloth for cleaning. Do not use liquid or aerosol cleaners. -
Page 71: Fcc Compliance Statement
FCC Compliance Statement This equipment has been tested and found to comply with the limits for a Class B digital device, pursuant to Part 15 of the FCC Rules. These limits are designed to provide reasonable protection against harmful interference in a residential installation. This equipment generates, uses, and can radiate radio frequency energy and, if not installed and used in accordance with the instructions, may cause harmful interference to radio or television reception. -
Page 72: Epson America, Inc., Limited Warranty
Possessions). Shipments to other locations will be made freight collect. You are responsible for securely packaging the defective unit and returning it to EPSON within five (5) working days of receipt of the replacement. EPSON requires a debit or credit card number to secure the cost of the replacement projector in the event that you fail to return the defective one. - Page 73 EPSON is not responsible for warranty service should the EPSON label or logo or the rating label or serial number be removed or should the product fail to be properly maintained or fail to function...
-
Page 75: Index
Contrast setting, 29 Control panel, projector, 9 Declaration of Conformity, 72 Desktop adapter, Macintosh, 10 Documentation, 11 Electrical requirements, 64 EPSON accessories, 10, 61 Home Service, 7 PrivateLine Support, 61 technical support, 11, 61 warranty, 7, 72 to 73 FCC Compliance Statement, 71... - Page 76 53 safety instructions, 69 to 70 specifications, 63 Language setting, 28 Lens shift knobs, 19 Lens, cleaning, 49 Lights, projector, 55 to 56 Lock Kensington, 8, 10 settings, 25 Macintosh desktop adapter, 10 Memory button, 9, 33...
- Page 77 Tint, 31 Tracking, 32 Transporting projector, 54 Trigger Out setting, 37 Trigger port, 17 Turning on and off projector, 21 to 22, 57 USB cable, 37, 41 Video, compatible formats, 65 Warranty, 7, 72 to 73 Where to Get Help, 61...
- Page 78 Zoom adjustment, 17 Zoom Caption setting, 23, 35 Zoom setting, 23...
Need help?
Do you have a question about the 200 and is the answer not in the manual?
Questions and answers