Table of Contents
Advertisement
Advertisement
Table of Contents
Troubleshooting

Subscribe to Our Youtube Channel
Related Manuals for Brady Tagus


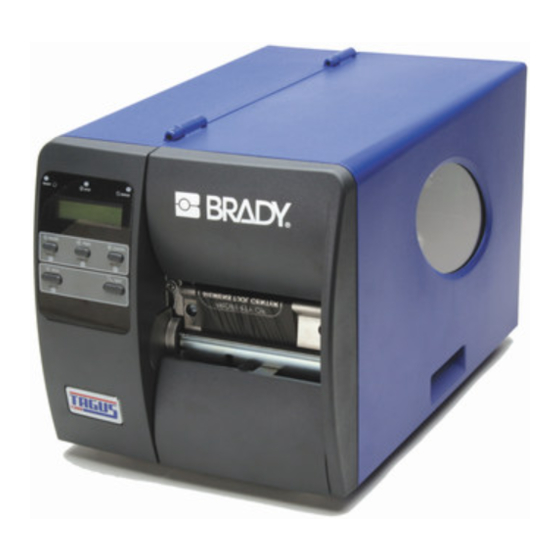
Summary of Contents for Brady Tagus
-
Page 3: Copyright Information
Information in this document is subject to change without notice and does not represent a commitment on the part of Brady Barcode Products Corporation. No part of this manual may be reproduced or transmitted in any form or by any means, for any purpose other than the purchaser's personal use, without the expressed written permission of Brady Corporation. - Page 4 Agency Compliance and Approvals UL60950 Information Technology Equipment C22.2 No. 950-M93 C US Listed For 230 Volt Operation (Europe): Use a cord set, marked "HAR," consisting of a min H05VV-F cord which has a minimum 0.75 square mm diameter conductors, provided with an IEC 320 receptacle and a male plug for the country of installation rated 6A, 250V.
-
Page 5: Important Safety Instructions
Important Safety Instructions This printer has been carefully designed to provide many years of safe, reliable performance. As with all electrical equipment, there are a few basic precautions you should take to avoid hurting yourself or damaging the printer: Carefully read the installation and operating instructions provided with your printer. •... -
Page 6: Table Of Contents
Contents ..................1-1 RINTER VERVIEW Introduction......................1-1 About this Printer ....................1-2 Standard Features ..................1-2 Optional Features ..................1-3 ..................2-1 ETTING TARTED Before Using the Printer ..................2-1 Removing the Packaging .................. 2-1 Inspecting the Printer .................. 2-2 Additional Requirements ................ - Page 7 (T300)..............5-1 SING THE RONT ANEL Introduction ......................5-1 Ready Mode: Normal Operation (Ready Light ‘On’) ........5-2 Menu Mode: Configuration (Ready Light ‘Flashing’) ........5-3 Quick Test Mode: Print Test Labels ............5-4 Indicator Lights ..................5-5 LCD ......................5-5 The Menu System .....................5-6 Entrance and Exit Prompts ................5-7 Media Settings ..................5-8 Print Control ....................5-10 Printer Options ..................5-11...
- Page 8 Introduction......................6-1 Cleaning the Printhead ..................6-2 Media Width Adjustment ................... 6-4 Printhead Burn Line Adjustment ................ 6-6 BRADY T300 and Raised-Panel Labels ............6-7 Print Head Leveling Adjustment ..............6-11 Printhead Pressure Adjustment ............... 6-14 Ribbon Wrinkle Adjustment ................6-16 Printhead Replacement ...................
-
Page 9: Printer Overview
Printer Overview Introduction Congratulations on your purchase of a Brady Tagus printer. The Tagus family, hereafter referred to as ‘the printer,’ blends the rugged durability of die-cast construction with state-of-the-art electronics and user-friendly features to redefine the standard in industrial thermal printers. The... -
Page 10: About This Printer
1.1 About this Printer This printer offers the following standard and optional features: 1.1.1 Standard Features Printing Thermal Transfer Printing • • On Demand and Batch Printing 203 DPI (T-200) 300 DPI (T-300) Printhead • Date and Time Stamp • AGFA Scalable Font Engine •... -
Page 11: Optional Features
1.1.2 Optional Features FLASH Memory Expansion (requires new main PCB) An optional main PCB assembly is available with 4MB (T-200) 8MB (T-300)) Flash memory expansion for International Language Printing Capability (ILPC) and/or additional fonts and graphics. ILPC The International Language Print Capability consisting of one of the following: CG-Times (western European) Scalable font •... - Page 12 MCL (printers with front display only) A software tool suite designed for data collection applications. Once enabled, the printer can accept input data from peripheral devices such as barcode scanners, weigh scales, and keyboards without the need of a host computer, requesting and sending data to locally resident lookup files or remote databases, enhancing communication capabilities within your system while reducing your hardware investment.
-
Page 13: Getting Started
Getting Started 2. Before Using the Printer 2.1 Removing the Packaging Inspect the shipping container(s) for damage; if damage is evident notify the shipping company to report the nature and extent of the damage. The printer is carefully packaged to avoid any damage during transit. In order to operate the printer you will need to remove the packaging materials (i.e., tape and foam) that were placed in the printer for shipment. -
Page 14: Inspecting The Printer
• Any special or additionally purchased items. 2.1.2 Additional Requirements The following items are necessary for generating labels from your printer. Contact Brady customer support or sales representative for advice on which media and software may best be suited for your application. •... -
Page 15: Setting Up The Printer
Setting up the Printer Introduction This chapter explains how to connect your printer, load media (and ribbon, if equipped for thermal transfer). 3.1 Connecting the Printer 3.1.1 Power Connection Note: When connecting the AC Power Cord or interface cables to the printer, ensure the Power On/Off Switch is in the ‘Off’... -
Page 16: Interface Connection
3.1.2 Interface Connection The printer can be connected to the host via a USB, serial or parallel cable. The Printer will automatically connect to the first port (USB, serial or parallel) that transmits valid data. After this connection has been made, the printer’s power must be cycled ‘Off’ and ‘On’ to change the interface connection. -
Page 17: Loading Media
Loading Media Load media into the printer as follows: Open the media cover and lower the Media Hub Guide and Media Guide. Press in on the Printhead Latch and raise the Printhead Assembly. Loading Media 3-3 Rev A... -
Page 18: Loading Media
Slide the Roll Media onto the Media Hub and raise the Media Hub Guide. The Media Hub Guide should be pushed inward so that it is just touching the Roll Media. Route the Media through the printer as shown. Raise the Media Guide. The Media Guide should be pushed inward so that it is just touching the edge of the Media. - Page 19 Close the Printhead Assembly and press down until it locks into place. FEED Close the cover and press the button several times to position the media and ensure proper tracking. If the printer does not correctly sense the top of each label, as denoted by the light, it ERROR may be necessary to:...
-
Page 20: Media Sensor Adjustment
3.3 Media Sensor Adjustment The Media Sensor needs to be positioned so that the printer can detect the presence of media and the top-of-form (except for continuous stock, where the TOF is set through the front panel). To adjust: With media loaded, as described in Section 3.2, grasp the Slide Tab and move the Sensor Eye Mark into position over media according to the table below. -
Page 21: Loading Ribbon
3.4 Loading Ribbon Ribbon is required with thermal transfer media. It is recommended that the width of the ribbon be slightly wider than the media being used. The printer must use ribbons with the ‘coating side out’. To load: Note: Using a ribbon that is slightly wider than your media (and liner, if any) will help protect against printhead wear. -
Page 22: Loading Ribbon
4. Close the Printhead Assembly and press down until it locks into place. 5. Route the ribbon up and then around to the Ribbon Take-Up Hub, winding it several times in a clockwise direction to secure it in place. FEED 6. -
Page 23: Ribbon Routing (Coated Side Out)
These types are NOT interchangeable for use with the printer. Note: Ensure the inked side of the ribbon faces the media and NOT the printhead. Ribbon Routing Diagram ‘Coating Side Out’ Brady Ribbon Supply Hub Loading Ribbon 3-9 Rev A... - Page 24 3-10 Rev A Loading Ribbon...
-
Page 25: Using The Front Panel ( Non - Display Printers )
Using the Front Panel (non-display printers) Introduction The Front Panel consists of three indicator lights and three function buttons. The functions of these lights and controls are listed in the following sections. Rev A... -
Page 26: Lights
4.1 Lights READY STOP Both the Lights will be on during power-up • initialization and a warm reset. 4.2 Buttons FEED PAUSE CANCEL The three buttons, , and perform different functions based on the printer’s operational mode. The printer operates in one of the following modes: Normal printer functions. -
Page 27: Normal Mode - Button Functions
4.3 Normal Mode - Button Functions In ‘Normal’ mode, the printer’s buttons control normal operations such as pause, feed, and cancel, as well as the test and reset functions by using button combinations as detailed below. Button Combinations (push buttons simultaneously) Prints the Test Label, see Section 4.8.2. -
Page 28: Express Setup Mode - Button Functions
4.4 Express Setup Mode - Button Functions The Express Setup is a unique printer feature that allows users quick access to the most commonly used printer settings. The selected setting is represented by a specific combination of the printer’s indicator lights for each of the three items, (Sensor Type, Media Type, and Option Control). -
Page 29: Printer Setup Mode - Button Functions
4.5 Printer Setup Mode - Button Functions In ‘Printer Setup’ mode, the buttons control the setting of the printer’s operational items such as media settings, communications, and options as detailed below. Notes: • Printer and cutter faults are disabled during , but can still occur while printing “test”... -
Page 30: Printer Setup Menu List
4.5.1 Printer Setup Menu List The Printer Setup Menu List label, shown below, contains the printer’s current values for each menu item that can be modified via the front panel (see Section 4.5.2 for a detailed item description.) The Menu Item Numbers correspond to the item’s position in the Menu List for selection FEED when pressing the button during the Printer Setup Procedure (see Section 4.5). -
Page 31: Menu Items And Values
4.5.2 Menu Items and Values The table below details the Printer Setup Menu List items with a brief description of the item’s function, and the possible values. A “*” indicates the default setting. 1) MEDIA TYPE 2) SENSOR TYPE 3) PRESENT SENSOR Sets printing for direct thermal Selects the sensor type used Enables/Disables the optional... - Page 32 10) CONT FORM LENGTH 11) OOS MAXVOLT 12) TOF GAIN Sets the page (label) size Sets the media sensor level for Sets media sensor Top of when the ‘SENSOR TYPE’ is the Out Of Stock condition. Form gain value. set to continuous media. Possible Values: Possible Values: Possible Values:...
- Page 33 21) INPUT MODE 22) DPL EMULATION Selects between the standard This instructs the firmware to process specific DPL data (Start of or template interpretation of Print, DPI, and Imaging function) according to the selected incoming data. printer emulation. Possible Values: Possible Values: •...
-
Page 34: Step By Step Modification Of The Printer Setup
4.5.3 Step by Step Modification of the Printer Setup The following is an example of Printer Setup modification. Although this example will detail how to modify the serial Baud Rate, the same method can be used to change any of the printer’s menu item settings. - Page 35 FEED 6. To confirm that your changes have been made press the CANCEL buttons simultaneously, this will print the Database Configuration Label. The label should show the new Baud Rate value of 19200. Label 1 Label 2 WED NOVEMBER 10, 2003 21:41:31 CONFIGURATION SERIAL PORT SELECTED VER: T-200 - 05.08 11/07/03...
-
Page 36: Label Alignment
4.6 Label Alignment The Label Alignment function is intended for use when the label length is less than the distance between the printhead and the media sensor or where label waste at power-up is a concern. Label Alignment (see table below) is not recommended for label lengths greater than 6.5 inches or for media containing 2 or more form lengths. -
Page 37: Label Alignment = Auto
4.6.2 Label Alignment = AUTO In this mode, the printer automatically calculates the ‘ALIGN LENGTH’ thus eliminating the need to physically measure the label. This mode is usually preferred in applications that require frequent media changes to labels of different lengths. FEED To perform an Auto Alignment, in Normal Mode press and hold the button (about 4... -
Page 38: Label Alignment Troubleshooting
4.6.4 Label Alignment Troubleshooting If you experience label alignment problems, the following table offers possible causes and solutions. Problem Possible Cause Solution • Attempting to perform With the Present Sensor Set Label Alignment to AUTO, press and Label Alignment results in enabled, Label Alignment FEED hold... - Page 39 • Label Alignment is Label Alignment Length is not Set Label Alignment to AUTO. Press incorrect. Pressing correct. The default Label FEED and hold until paper moves for Alignment Length is 1.00”, FEED successively automatic Label Alignment Length and will result in this behavior results in a short label measurement.
-
Page 40: Calibration Mode - Button Functions
4.7 Calibration Mode – Button Functions In ‘Calibration’ mode, the buttons allow the printer to adjust to the media being used. Calibration can be performed either automatically or manually, as detailed below. Notes: • Before calibrating, ensure that the Printhead Carrier Assembly is latched down, that the cover is closed, and that the media sensor has been set for the appropriate media type, see Section 4.5.2. -
Page 41: Auto Media Sensor Calibration
4.7.1 Auto Media Sensor Calibration Auto Media Sensor Calibration automatically establishes the optimum sensing values for the media you are using in the printer. Note: Before calibrating, be sure the media sensor is set for the appropriate media type, see Section 4.5.2; also, ensure that the Printhead Carrier Assembly is latched down and the cover is closed. -
Page 42: Manual Media Sensor Calibration
4.7.2 Manual Media Sensor Calibration The Manual Media Sensor Calibration procedure should be used in cases where the printer continues to suffer from media sensing problems after performing or attempting to perform the Auto Media Sensor Calibration (see Section 4.7.1). Note: Before calibrating, set the media sensor for the appropriate media type, see Section 4.5.2;... -
Page 43: Internal Labels
4.8 Internal Labels The following section details the printer’s internally generated configuration and test labels. 4.8.1 Database Configuration and Test Labels The Database Configuration Label provides valuable printer information including the firmware version, memory allocations, enabled options, and label-counter data. To print the Database Configuration and Test Labels: With the printer on, loaded with media (at least 4 inches wide) and ribbon (if printing with thermal FEED... - Page 44 The second label printed is the Test Label. This label is used to test the condition of the printhead, as shown below: Good Print Quality Label: Even pattern consistency indicates correct printhead operation. Faulty Print Quality Label: Streaks indicate a dirty or faulty printhead. See Section 6.1 for cleaning instructions.
-
Page 45: Test Label
4.8.2 Test Label The Test Label is used to evaluate the current printer setup for print quality, label tracking, and print positioning. To print the Test Label: With the printer loaded with media (at least 4 inches wide), and ribbon (if printing with thermal FEED transfer media), simultaneously press the PAUSE... - Page 46 4-22 Rev A Internal Labels...
-
Page 47: Using The Front Panel (T300)
Using the Front Panel (T300) Introduction 5.1 Controlling Printer Settings with Internal Print Server If your printer is equipped with the optional Internal Print server , many of the printer’s setting and parameters can be modified and controlled via the built-in HTML pages resident in the printer. These pages can be accessed using any web browser by simply entering the IP address in the URL bar. -
Page 48: Ready Mode: Normal Operation (Ready Light 'On')
5.1.1 Ready Mode: Normal Operation (Ready Light ‘On’) The PAUSE Key temporarily suspends printing. Pressing it again will return the printer to normal operation. The FEED Key advances one label, and clears any corrected faults. Pressing and holding causes the printer to perform a Quick Media Calibration;... -
Page 49: Menu Mode: Configuration (Ready Light 'Flashing')
5.1.2 Menu Mode: Configuration (Ready Light ‘Flashing’) The LEFT ARROW Key scrolls to the previous menu item on the same menu level. It also decrements numerical values in most menu selections. The RIGHT ARROW Key scrolls to the next menu item. It also increments numerical values in most menu selections. -
Page 50: Quick Test Mode: Print Test Labels
5.1.3 Quick Test Mode: Print Test Labels Note: The Quick Test Mode functions are disabled while processing data from communications interfaces until the Host Timeout value expires. The LEFT ARROW Key scrolls to the previous test function. The RIGHT ARROW Key scrolls to the next test function. -
Page 51: Indicator Lights
5.1.4 Indicator Lights • ‘On’ indicates that the printer is powered ‘On’ and, after initialization, it indicates the Ready Mode. • ‘Slow Flashing’ indicates Menu Mode. • ‘Fast Flashing’ indicates data is being received and processed. • ‘On’ indicates a ‘Paused’ condition. •... -
Page 52: The Menu System
5.2 The Menu System Printer operation can be controlled through the user interface, allowing the operator access to these six menu system branches: • • Media Settings System Settings • • Print Control Communications • • Printer Options Diagnostics While in the menu system, the current selection is indicated with an asterisk (*) next to the displayed item on the LCD. -
Page 53: Entrance And Exit Prompts
5.2.1 Entrance and Exit Prompts MENU With ‘Ready’ displayed on the LCD, press the Key to enter Menu Mode. Note: While in Menu Mode, the printer will stop processing new DPL (or bitmapped) data. MENU MODE Depending upon the configuration of the printer, the following Entrance and Exit Prompts may be displayed when accessing or leaving the Menu System. -
Page 54: Media Settings
5.2.2 Media Settings MEDIA TYPE Selects the printing method. DIRECT THERMAL For use with heat sensitive media. THERMAL TRANSFER For use with media requiring a ribbon to create an image. SENSOR TYPE Selects the top-of-form (TOF) sensing method for the media. The printer recognizes the TOF by sensing gaps in the media. - Page 55 PRINTHEAD CLEANING Controls the printhead cleaning routine. CLEAN HEAD SCHEDULE Specifies the inch (or centimeter) count to reach 000 in. (* 1000) before prompting a printhead cleaning. If the number specified is exceeded three times, the printer will fault until cleaning is initiated. Notes: The default value (zero) disables this function.
-
Page 56: Print Control
5.2.3 Print Control HEAT Controls the ‘burn-time’ of the printhead. This is the equivalent of Heat 10 (0-30) Setting on most label software programs. PRINT SPEED Controls the rate of label movement during the printing process. T-200 > 6 in/s (2-6) T-300 >... -
Page 57: Printer Options
5.2.4 Printer Options MODULES Memory available for user storage of graphics, fonts and label formats. (The physical presence of the respective memory module must be detected to show the function selections in the menu system. PRINT DIRECTORY Prints a label directory of selected, or of all available modules, the available space on these modules, the files present, and the type of module and files. - Page 58 GPIO PORT ♦ Used to interface the printer to external controlling devices (see Appendix D). GPIO DEVICE Sets the GPIO Port to work with a specific type of device. DISABLED Disables the GPIO Port. APPLICATOR Enables the GPIO for a label applicator. BARCODE VERIFIER Enables the GPIO for a bar code verifier.
-
Page 59: System Settings
5.2.5 System Settings CONFIGURATION FILE ♦ Options for storage and recall of printer configuration files. See Appendix E for details. RESTORE AS CURRENT Provides a list of available configuration files. Selecting a file from the list causes a printer reset; afterward, the printer is configured according to the activated file. - Page 60 This function is used to upgrade the software feature level of the printer. Brady authorization is required. UNLOCK FEATURE This function is used to unlock the additional optional features within the printer. Brady authorization is required. 5-14 Rev A The Menu System...
- Page 61 System Settings (continued) SET FACTORY DEFAULTS Parameters in this menu listing with the ‘ ’ symbol are the designated defaults. SET FACTORY DEFAULTS Overwrite the current settings with the factory default settings or, if selected, will restore the Factory Setting File. Note: The reset will be automatic.
- Page 62 System Settings (continued) PEEL MODE Specifies that a Feed operation be prevented when the label is presented and not removed, or if the printer is to wait for the GPIO start of print signal. ENABLED Feed is inhibited according to the above criteria. DISABLED Feed is always enabled.
- Page 63 System Settings (continued) DPL EMULATION ♦ Determines SOP Emulation (start of print (<STX>O)) see above, (not available with T-300) Column Emulation (see above), positions barcodes as does selected printer. STANDARD Start of print 220; the below exceptions are disabled. Allegro, Prodigy Plus, and Prodigy emulations enabled: •...
- Page 64 May help prevent the curling of the label edge. FONT EMULATION ♦ The selected font is substituted for all Brady internal fonts. This function provides the printer to define a new default font without changing the host DPL data streams.
- Page 65 System Settings (continued) FAULT HANDLING♦ When a fault condition (ribbon out, media out, etc.) is detected, this setting determines the level of intervention and the disposition of the label being printed at the time the fault occurred. LEVEL Selects the printer’s action, the action required by the operator, and the label’s reprint status.
-
Page 66: Communications
5.2.6 Communications SERIAL PORT A ♦ Controls the communications settings for Serial Port A. BAUD RATE Determines the serial communication rate. 38400 38400 bits per second 28800 28800 bits per second 19200 19200 bits per second 9600 9600 bits per second 4800 4800 bits per second 2400... - Page 67 Communications (continued) NIC ADAPTER♦ Network Interface Card Adapter (optional). If not present, this displays ‘NOT INSTALLED’ when accessed. After making changes to these parameters, save the changes, exit the menu system, the printer will then reset for the changes to take effect. IP ADDRESS* The static IP address of the NIC Adapter.
- Page 68 ESC sequences are ignored and the data is processed. Bitmapped font downloads are disabled in this mode. HEAT COMMAND Allows the user to disable the DPL Heat Command, providing compatibility with other BRADY printers. ENABLED Normal printer operating mode. DISABLED DPL Heat commands are ignored.
- Page 69 Communications (continued) SYMBOL SET COMMAND Allows the user to disable the DPL Single and Double Symbol Set selection commands. ENABLED Normal printer operating mode. DISABLED DPL Symbol Set commands are ignored. The Symbol Set selection is controlled via the menu setting; see Section 5.1.5. CNTRL-CODES (DATA) Allows the user to remove control codes (data <...
-
Page 70: Diagnostics
5.2.7 Diagnostics HEX DUMP MODE ♦ Most commonly used for troubleshooting. Prints data and instructions received from the host rather than interpreting them as label formats; see Section 7.2. ENABLED Prints raw ASCII data received from the host rather than executing the commands. -
Page 71: Mcl Options
5.2.8 MCL Options MCL AT POWER-UP ♦ MCL (Macro Command Language) is tool suite designed for data collection applications. The printer will accept input data from peripheral devices and the application can request and send data to locally resident lookup files or remote databases. ENABLED After power to the printer is turned ‘Off’... - Page 72 5-26 Rev A The Menu System...
-
Page 73: Display Messages
5.3 Display Messages The printer displays several different types of information (if not in the menu system or Quick Test Mode): User Prompts and Condition Messages (also see Section 5.1.1 for a listing of the Enter/ • Exit Prompts) Application and Boot Loader Updating Messages (see Section 6.8) •... -
Page 74: User Prompts And Condition Messages
5.3.1 User Prompts and Condition Messages User Prompts alert the operator to a required action. Condition Messages are used to indicate an operational state. User Prompts and Condition Messages Displayed Message Description Condition(s) The printer is trying to clear a Occurs when the FEED Key is pressed after the CLEARING FAULTS fault condition. -
Page 75: Quick Test Mode
5.4 Quick Test Mode This section explains the functions of the resident Quick Tests, accessible by pressing the Key on the Front Panel. Notes: • With the exception of the Configuration Label, all Quick Test labels require 4- inch (102mm) wide media to print the entire format. If using narrower media, change the Label Width setting (Section 5.1.2) to match your media’s width to avoid printing on the platen. - Page 76 To print a Print Quality Label: Press the Key. Use the Key to scroll to ‘Print Quality Label’. Use the Key to select a quantity; see Section 5.0.3. Press the Key to start printing. Good Print Quality Label: Even pattern consistency indicates correct printhead operation.
-
Page 77: Configuration Label
5.4.2 Configuration Label The Configuration Label provides printer valuable database information, as detailed in Section 5.1. To print a Configuration Label: Press the Key. Use the Key to scroll to ‘Print Configuration’. Press the Key to print. Note: The contents of this label may vary with the application version and printer model and equipped options. -
Page 78: Quick Ribbon Test Label
5.4.3 Quick Ribbon Test Label The Quick Ribbon Test Label features a compliant picket-fence bar code that can be used to verify thermal transfer and print quality functions. To print a Quick Ribbon Test Label: Press the Key. Use the Key to scroll to ‘Print Quality Label’. -
Page 79: Validation Label
5.4.4 Validation Label The Validation Label is another useful tool for evaluating overall print quality. To generate a Validation Label: Press the Key. Use the Key to scroll to ‘Print Quality Label’. Use the Key to select a quantity; see Section 5.0.3. Press the Key to start printing. -
Page 80: User Defined Label
5.4.6 User Defined Label The User Defined Label reprints from a list of previously printed label formats. Use the Key to scroll through the listing, then use the Key to select and print the label. Note: If a job was cancelled prior to its completion, or if power has been removed since the last print job and the request for this label, ‘NO FILES AVAILABLE’... -
Page 81: Quick Calibration
5.4.8 Quick Calibration When ‘Uncalibrated’ is displayed, follow the Media Sensor Calibration procedure in Section 5.4.2. At the factory, the printer is calibrated to sense a wide range of media types. Quick Media Calibration fine-tunes the media sensor for your gap, notch or reflective media application. Note that this is not required if you are using continuous media. -
Page 82: Standard Calibration
5.4.9 Standard Calibration Standard Calibration is appropriate for most media types. During the process, the printhead assembly can be raised for visual access to the media and media sensor. In addition, displayed sensor readings can be used to indicate the best position over the media, which is helpful when using small, position-critical TOF notches or marks. - Page 83 Step Operator Action Displayed Message Comment Proceed according to your media This sets the parameter for the type: ‘gap’ or ‘mark’ value. SCAN BACKING PRESS ESC KEY <YYY> Die-cut stock: strip the media from the backing and then reinsert it into Where ‘yyy’...
- Page 84 Step Operator Action Displayed Message Comment Exit upon successful calibration: The printer is now ready to Back out of the menu tree by begin printing. THU 11:34 a 25 MAR 2007 repeatedly pressing the READY If this calibration was Key. unsuccessful, go to Section 5.4.3.
-
Page 85: Advanced Entry Calibration
5.4.10 Advanced Entry Calibration Advanced Entry Calibration is the alternate method for special-case media types. The procedure has two parts: You must list the sensor readings for the label and TOF values using different algorithms. From your list the best algorithm is chosen, new readings taken and those values entered. Advanced Entry Calibration will override all previous calibration settings;... - Page 86 Step Operator Action Displayed Message Comment Press the Key. Press the Key to abort ADVANCED ENTRY this procedure. SENSOR LEVELS You are beginning the Press the Key. Advanced Entry Calibration. ADVANCED ENTRY SENSOR GAIN Press the Key. GAIN TRAN <yyy> *00 <0 - 31>...
- Page 87 Step Operator Action Displayed Message Comment From the data collected in Steps 10 Both sensor readings must be and 11, where both the sensor above 20. GAIN TRAN <yyy> *00 readings are above 20, subtract <0 - 31> each Label Value from the corresponding TOF Value.
- Page 88 Step Operator Action Displayed Message Comment Selection is denoted with an ‘*’. Using the Key, select the GAIN TRAN <yyy> *00 Gain Number determined in Step <0 - 31> 12. Press the Key to select the setting. Or for reflective media: GAIN RFL <yyy>...
- Page 89 Step Operator Action Displayed Message Comment The selection will flash and the Press the Key. display heading will change to PAPER SENSOR LEVEL indicate the item for entry. P* 198 G* 084 E*014 Using the or the Key, set the ‘Paper’ level to the value determined in the previous step.
- Page 90 Step Operator Action Displayed Message Comment After all entries have been made, From ‘Ready’, press the FEED Key to advance to the next label press the Key to back out of SAVE CHANGES? TOF. ENTER KEY = YES the menu and then press the Key to save the settings and return to the Ready Mode.
-
Page 91: Maintenance And Adjustments
Maintenance and Adjustments Introduction This chapter details the cleaning, adjusting, and troubleshooting tips for the printer. The following table outlines the recommended maintenance schedule for the various printer parts. Area Method Interval Printhead Turn off the printer before cleaning the After every roll of printhead. -
Page 92: Cleaning The Printhead
6.1 Cleaning the Printhead If print quality declines (symptoms include non-compliant bar codes, print dropouts, streaks), the typical cause is debris build-up on the printhead. Furthermore, when the build- up is not removed it may lead to element failure, greatly reducing the life of the printhead. To clean the printhead: 1. -
Page 93: Automated Printhead Cleaning
This procedure is only for printers with a display. 1. Remove media and ribbon. 2. Place a Brady Cleaning Card, P/N 70-2013-01 under the printhead. Lower and lock the printhead. Ensure that the Leveling Cam is not engaged (in left-most position). -
Page 94: Media Width Adjustment
6.2 Media Width Adjustment When printing on less than full width media, the printer has a printhead-leveling cam to adjust the right side of the printhead for even pressure distribution. To adjust the leveling cam: With media loaded in the printer, print a label and examine it: Non-display printers: Simultaneously press FEED... -
Page 95: Printhead Burn Line Adjustment
6.5-mil (.0065 inch) media. In extreme cases, if media of a different thickness or rigidity is used (e.g., heavy tag stock), print quality can change. If you have questions, contact a qualified technician or Brady Technical Support before proceeding. - Page 96 To adjust the burn line: 1. Release the print head by pressing the print-head lock. 2. Remove media and ribbon. Do not lock the print head into place. Loosen the two print-head locking screws approximately ¼-turn counter-clockwise. 6-6 Rev A Printhead Burn Line Adjustment...
- Page 97 To position the burn line, make equal adjustments of ¼ turn (or a 1/8 turn for finer adjustments) to each adjustment screw in the appropriate direction: Typically, thick media requires a slight backward adjustment and thin Note: media requires a slight forward adjustment. Position burn line backward: turn each adjustment screw clockwise.
-
Page 98: Brady T300 And Raised-Panel Labels
1. Edit the print driver properties (this example uses LabelMark software): a. Select Start > Settings > Printers and Faxes. b. In the Printers and Faxes window, right click on the Brady printer T300 print driver and select Printing Preferences. - Page 99 Select the Stock tab and check None in the Post Print Action box. 2. Load labels with the notched side against the inside wall of the printer. BRADY T300 and Raised-Panel Labels 6-9 Rev A...
- Page 100 3. Position the green media edge guide against the outside edge of the media so that it touches but does not fold or bend the liner. 6-10 Rev A BRADY T300 and Raised-Panel Labels...
- Page 101 If the label registration continues to drift, try placing the sensor eye mark in the center of the media to register the label correctly (except for labels with a die-cut hole in the center). Press FEED a few times to advance the media. BRADY T300 and Raised-Panel Labels 6-11 Rev A...
-
Page 102: Print Head Leveling Adjustment
6.5 Print Head Leveling Adjustment When printing on a variety of media sizes and materials, adjustments to the print head may be needed. Use the print-head-leveling cam to adjust the print head for even pressure distribution. CAUTION! Incorrectly adjusting the leveing cam can result in problems such as ribbon wrinkling, label tracking, platen roller and print head wear. -
Page 103: Print Head Leveling Adjustment
To adjust the leveling cam: 1. Print a label and examine the media. A correctly adjusted print head should produce an image with consistent contrast across the label. Correct Adjustment Image Fades from Right Image Fades from Left Print Head Leveling Adjustment 6-13 Rev A... - Page 104 2. If the printed label does not contain a consistent image, adjust the cam as follows: • Image fades from right: move cam to the right. Image fades from left: move cam to the left. • Note: To prevent over adjustment, move the cam in small increments. 3.
- Page 105 4. If image is skewed, check the following: • Media: Labels are loaded with the inner edge of the media against the inside wall of the printer. Position the green media edge guide against the outer edge of the media so that it touches the liner but does not folder it over.
-
Page 106: Printhead Pressure Adjustment
6.6 Printhead Pressure Adjustment The pressure applied by the print-head assembly is adjustable to accommodate a variety of media thicknesses. To achieve consistent print across the label, print head pressure may need to be adjusted by turning the pressure adjustment screws located on the top of the print head. - Page 107 4. Adjust the applied pressure by turning the print-head pressure adjustment screws to achieve a consistent print contrast across the media. Note: To avoid removing the ribbon, carefully pull slack in the ribbon and move it out of the way to reach the pressure adjustment screws. Note: To prevent ribbon smudging when using narrow media, it may be necessary to increase the pressure on the inner (closest to center plate) print-...
-
Page 108: Ribbon Wrinkle Adjustment
6.7 Ribbon Wrinkle Adjustment Correct ribbon alignment ensures a smooth, taut ribbon flow during the print process. On thermal transfer-equipped models, irregular voids that extend diagonally through the printed images may be a sign of ribbon overlapping (wrinkling). CAUTION: Do not perform this procedure until the following adjustments and checks have been completed: - Print Head Pressure Adjustment - Print Head Burn Line Adjustment... - Page 109 Press the FEED button several times to normalize the ribbon and media tracking. Note: Continuous excessive side-to-side [lateral] movement of the labels must be corrected before continuing this procedure. Typical causes include uneven print head pressure, worn platen roller, or worn platen bearings. 6.
- Page 110 9. Fine-tune using the ribbon shield: Note: The ribbon does not need to be removed to perform this adjustment. a. Slightly loosen the ribbon shield adjustment screws. b. Move either side of the ribbon shield ‘in’ or ‘out’ to smooth the ribbon and remove any wrinkle-related voids from the printed labels.
-
Page 111: Printhead Replacement
Printheads are fragile; use extreme care when handling and never use a sharp object on the surface. If you have questions, contact a qualified technician or Brady Technical Support before proceeding. 1. Touch a bare metal part of the printer’s frame to discharge any static electricity that may be present on your body. -
Page 112: Darkness Adjustment (Non-Display Printers Only)
6.9 Darkness Adjustment (non-display printers only) The Darkness Adjustment allows the operator to match the print contrast following a printhead replacement. Turning the Darkness Adjustment clockwise will darken the print, while turning it counterclockwise will lighten the print. Compare a label printed with the old printhead and make this adjustment so that the new printhead matches the darkest portion of that label. -
Page 113: Display Printers
Display Printers: Depending upon the method used, there are three reset levels possible: Soft Reset To reset the printer and clear any temporary host settings: With the printer ‘On’, press and hold the CANCEL Key for approximately four seconds. • Level One Reset To return the printer to the factory default settings or, if saved, to restore the Factory Setting File: Turn ‘Off’... -
Page 114: Downloading Firmware And Fonts
PCB. When program updates and/or new features are added, they can be downloaded to the printer as follows: 1. Identify the new version for your model of printer from the Brady Web site at www.BradyID.com and download it onto your computer’s hard drive or a floppy disk. -
Page 115: Troubleshooting
Section 7.1. for information on displayed messages.) Items denoted with an ‘*’ are for printers with displays only. If you have questions, or if problems persist, contact a qualified technician or Brady Technical Support at (800) 643-8766. If experiencing this problem…... - Page 116 If experiencing this problem… Try this solution… • The Printhead Leveling Cam may be incorrectly adjusted; see Light print on the right side Section 6.2. (facing the printer) of the label: • The Printhead or Platen Roller may be dirty or worn; clean or call for service.
- Page 117 Adjust the Heat and Print Speed settings through the Front Panel or by host commands; non-display printers see Section 4.5.2, display printers see Section 5.1.3. • The media/ribbon combination may not be compatible; contact Brady Technical Support. • The Printhead Leveling Cam may be incorrectly adjusted; see Section 6.2.
- Page 118 If experiencing this problem… Try this solution… • Media Calibration may be needed; non-display printers see Skips labels when printing: Section 4.7, display printers see Section 5.4 • The Media Sensor may be out of position; readjust the position; see Section 3.3.
-
Page 119: Fault And Warning Messages (Display Printers Only)
Fault and Warning Messages (Display Printers Only) All printer functions are internally monitored. If a problem (Fault) or a potential problem (Warning) is detected, the Error Indicator will be illuminated. A corresponding message will be displayed. These messages, along with possible solutions, are described below. Fault Messages: Fault Messages receive the highest display priority. - Page 120 Printer Fault Messages Displayed Message Description Possible Solution(s) Consistently high sensor Press any key to continue. Ensure that media GAP MODE readings were detected. was removed from the media sensor during FAULTY SENSOR the appropriate calibration steps; also ensure that no labels are stuck in the media sensor. Retry the calibration.
- Page 121 Printer Fault Messages Displayed Message Description Possible Solution(s) Consistently high sensor Press any key to continue. REFLECTIVE MODE readings were detected. Ensure that media was removed from the FAULTY SENSOR media sensor during the appropriate calibration steps; also ensure that no labels are stuck in the media sensor.
- Page 122 Printer Fault Messages Displayed Message Description Possible Solution(s) The printer could not find the If media is moving: TOP OF FORM FAULT TOF mark within the Press the FEED Key. It may be maximum label length setting necessary to re-calibrate the or it found a TOF in an printer;...
-
Page 123: Warning Messages
Printer Warning Messages Displayed Message Description Action(s) The printer has detected Contact Brady Technical Support. DOT FAILURE defective printhead elements. The printer measured only a Transparent backing or notched media GAP MODE WARNING small difference between the typically gives this indication. -
Page 124: Hex Dump Mode
7.3 Hex Dump Mode The Hex Dump Mode is a useful tool for diagnosing problems, including communication and DPL™ syntax errors, allowing a comparison of input strings (sent by host) to output data (received by printer). This output can be used for debugging the label format. In addition, by repeatedly sending a format, this mode can uncover handshaking problems (if they exist). -
Page 125: Display Printers
As a final note, many software programs use bit mapping to construct the label, making diagnosis difficult. Contact Brady Technical Support with any questions. Note: To return to Ready Mode, re-enter the Diagnostics Menu and disable the Hex Dump Mode, exit the menu, then save the changes. - Page 126 7-12 Rev A Hex Dump Mode...
-
Page 127: Specifications
Specifications Mechanical 9.8” (24.9 cm) Width 18.06” (45.9 cm) Depth 10.3” (26.2 cm) Height 21.5 lbs. (9.77 kg) Weight 40 ° F to 95 ° F (4 ° C to 35 ° C) Operating Temperature 10% − 95% non-condensing Humidity 115/230 VCA Q 50/60 Hz AC Input Voltage Printing... - Page 128 Media/Ribbon Roll-Fed, Die-Cut, Continuous, Fan-Fold Media Types: 4.65" (118 mm) Max. Media Width: 1" (25.4 mm) Min. Media Width: 4.25” (108 mm) T-200 Max. Print Width: 4.16” (106 mm) T-300 .25 - 99" (6 - 2475 mm) Print Length Range: .0025 - .01"...
-
Page 129: Embedded Bar Codes
BRADY brand media and ribbons. These supplies are specially formulated for use in our printers; use of non-Brady supplies may affect the print quality, performance, and life of the printer or its components. For a current list of approved media and ribbons for use in direct thermal and thermal transfer applications, please contact a Customer Service Representative at (800) 643-8766. - Page 130 Media Dimensions Designator Description Maximum Minimum label width 4.65 1.00 liner width 4.65 1.00 .100 gap (or notch) between labels – .250 label length media thickness .0100 .0025 notch opening width .500 .200 distance from the media’s edge to the media 2.250 .200 sensor aperture (left justified)
- Page 131 Appendix A ASCII Control Chart Char Char Char Char Ctrl @ Ctrl A Ctrl B “ Ctrl C Ctrl D Ctrl E Ctrl F & Ctrl G ‘ Ctrl H Ctrl I Ctrl J Ctrl K Ctrl L Ctrl M Ctrl N Ctrl O Ctrl P...
-
Page 132: Appendix A: Ascii Control Chart
XON =Ctrl Q (DC1) XOFF =Ctrl S (DC3) • The Euro character has been added to the table above at 255 (FF) as a Brady standard for resident bit-mapped fonts 0,1,2,3,4,5,6, and 9 (CG Triumvirate). A-2 Rev A ASCII Control Chart... -
Page 133: Appendix B: Embedded Fonts And Barcodes
Appendix B B. Embedded Fonts and Barcodes All character fonts and barcodes available with the printer are described in this section. Each font and barcode has a name associated with it for use in programming. Human-readable fonts have numeric names while barcode fonts have alpha names. B.1 Fonts Fonts 0 through 8 use the slash zero (Ø) conventions for distinguishing between the zero and the alphabetic O. - Page 134 The table below lists the font sizes. The numbers indicate the number of dots. FONT HEIGHT WIDTH SPACING Font 0 Font 1 Font 2 Font 3 Font 4 Font 5 Font 6 Font 7 Font 8 Font 0 96-character Font 1 145-character upper and alphanumeric, upper and lower lower case alphanumeric w/ case.
- Page 135 Font 4 62-character Font 5 62-character alphanumeric, uppercase. alphanumeric, uppercase. Font 6 62-character alphanumeric, uppercase. Font 7 OCR-A, size I. Font 8 OCR-B, size III. Embedded Fonts and Barcodes B-3 Rev A...
- Page 136 Font 9 Internal Triumvirate font. Point sizes are selected by the number in the barcode height. Larger point sizes can be obtained by increasing the height and width multipliers, 48pt and 72pt fonts are generated by doubling the 24pt and 36pt fonts respectively (see the Programmer's Manual for more information).
- Page 137 B.2 Barcodes Bar Code fonts have alpha names (left column in the table below). Uppercase alpha names will print barcodes with human-readable interpretations. Lowercase alpha names will print barcodes only. The table is followed by visual samples. Barcode Valid ASCII Characters, Type Length Check-sum...
- Page 138 UPS MaxiCode Alphanumeric UPS MaxiCode with Byte Specified Alphanumeric Count A, B, C, D PDF417 Varies PDF417 with Byte Count Specified DataMatrix Varies All 8-bit values DataMatrix with Byte Count Specified All 8-bit values QR Code – Auto format Varies Alphanumeric QR Code –...
- Page 139 Barcode A Code 39 Barcode B UPC-A (regular) Barcode C UPC-E (zero suppression) Barcode D Interleaved 2 of 5 Barcode E Code 128 Barcode F EAN-13 Barcode G EAN-8 Barcode H Health Industry Bar Code (Code 39 Mod and 43 checksum) Embedded Fonts and Barcodes B-7 Rev A...
- Page 140 Barcode I Codabar Barcode J Interleaved 2 of 5 w/module 10 checksum Barcode K Plessey Barcode L ITF SCC-14/ I 2 of 5 Shipping Container Code Barcode M 2 Digit UPC addendum Barcode N 5 Digit UPC addendum Barcode O Code 93 Barcode p Postnet B-8 Rev A Embedded Fonts and Barcodes...
- Page 141 Barcode Q SSCC-18/Serial Shipping Barcode R UCC/EAN Code 128 KMART Container Code NON EDI Barcode S UCC/EAN 128 Random Weight Barcode T Telepen Barcode U UPS MaxiCode Embedded Fonts and Barcodes B-9 Rev A...
- Page 142 Barcode v FIM Barcode z PDF417 Barcode W1c DataMatrix Barcode W1d QR Code Barcode W1f Aztec Barcode W1g USD8 (Code 11) Barcode WI EAN 128 Barcode WJ Code 128 Auto (Code 128 with Auto Subset Switching between B/C) Barcode W1k RSS Barcode W1z MicroPDF417 (Reduced Space Symbology) B-10 Rev A...
- Page 143 Barcode W1T TCIF Linked Barcode 3 of 9 (TLC39) Embedded Fonts and Barcodes B-11 Rev A...
- Page 144 B-12 Rev A Embedded Fonts and Barcodes...
-
Page 145: Appendix C: Optional Internal Ethernet Printer Driver
Appendix C C. Optional Internal Ethernet Printer Driver Note: This procedure is only for printers with a display. C.1 Indicators and Connector Indicates a valid 10-megabit Ethernet connection is present when lit. 100M Indicates a valid 100-megabit Ethernet connection is present when lit. Flashes when data is being received by the print server . - Page 146 C.2 Setup and Configuration The Internal Ethernet Print Server can be configured in one of two ways: Using ‘IP Discovery’ (DHCP) • - OR - • Using a static IP set using the printer’s front panel. Note: The factory default has IP Discovery ‘Enabled’. If you do not wish to use the IP Discovery function be sure to set it to ‘Disable’...
- Page 147 Configuration Using IP Discovery (DHCP, BootP, and RARP) Once the Ethernet Print Sever has been installed and connected, p lug in the power cord and Ethernet cable then turn the printer’s power switch ‘On’. DHCP, BootP, and RARP are server services that provide a method for assigning and maintaining IP addresses.
- Page 148 C.3 Configuration Using a Static IP Address Once the Ethernet Print Sever has been installed, p lug in the power cord, but do not connect the Ethernet cable, then turn the printer’s power switch ‘On’. 1. Verify the printer is in the ‘Ready Mode’ WED 10:16A 02J UL 2007 READY...
- Page 149 8. Use the buttons to increment/ IP ADDRESS decremnt the flashing value. Press the button *192.000.000.192 to move to the next field. Once all fields are correct press the button once. The value will automatically be saved. SUBNET MASK *000.000.000.000 You can then use the to scroll to the ‘SUBNET...
- Page 150 C.4 Using the HTML Pages The printer has resident HTML (Web) pages that allow configuration of network and printer settings as well as performing status queries and diagnostic tests. To configure the Print Server and other internal printer settings you can access the printer via HTML pages using any Web browser.
-
Page 151: Network Status
Network Status Note: The Network Information screen contains an overview of the current network settings including discovery methods, address settings, network topology and speed. Optional Internal Ethernet Printer Driver C-7 Rev A... - Page 152 TCP/IP Configuration Notes: * Fixed IP Address users define the address here (usually printers in a network get a fixed IP Address because they are referred to by address rather than by name). * Enter a subnet mask. Printer responses can only get across address ranges (subnet mask) if the Printer Server sends them to the network’s gateway server, which transfers messages from one address range to another.
- Page 153 C.5 System Settings, Media Settings, and Print Control Many of the printer's internal menu settings can be controlled from the following next six screens. This allows the user to adjust many of the printer's settings remotely without using the printer's front panel.
- Page 154 System Settings, Media Settings, and Print Control (continued) C-10 Rev A Optional Internal Ethernet Printer Driver...
- Page 155 C.6 Printer Options, Communications, and Diagnostics Optional Internal Ethernet Printer Driver C-11 Rev A...
- Page 156 Printer Options, Communications, and Diagnostics (continued) C-12 Rev A Optional Internal Ethernet Printer Driver...
- Page 157 Printer Options, Communications, and Diagnostics (continued) Optional Internal Ethernet Printer Driver C-13 Rev A...
- Page 158 C.7 Network Print Options Note: This page will allow the user to print either a Status or Test label from the printer. C-14 Rev A Optional Internal Ethernet Printer Driver...
- Page 159 C.8 Reset Network Parameters Note: This page will allow the user to reset all network settings to factory defaults. Optional Internal Ethernet Printer Driver C-15 Rev A...
- Page 160 C.9 Change Password Note: To change the default password of the Print Server (sysadm), enter the old password, the new password and confirmation here. C-16 Rev A Optional Internal Ethernet Printer Driver...
- Page 161 This printer provides the user with the ability to download new menu system languages and/or replace the Brady provided translations. A Microsoft® Excel Spreadsheet defines the menu dictionary – the user adds a new language column or modifies an existing column in the spreadsheet, clicks on the ‘Generate DPL file(s)’...
- Page 162 D.1 Creating a Menu Language: 1. Start Excel and open the gemmsglst.xls file. Excel opens the file and the following screen appears. 2. Click the “Enable Macro” box and the following appears: D-2 Rev A Menu System Multi-Language Support (printers with display only)
- Page 163 3. Click On Column J and enter your new language, or modify an existing one. Notes: • A) Message Size – When entering new messages, reference the ‘MAX’ column: this is the maximum number of characters allowed for this field. Warnings are displayed when the number of characters is exceeded or when trying to modify the MAX value.
- Page 164 This is the only method to determine whether the download was successful. If the menu system displays the new language selection, but all displayed messages remain in English an error has occurred. Re-check the process. Contact Brady Technical Support if problems continue (be prepared to provide the Gemmsglst.xls and the DPL download file that you have created).
- Page 165 To restore the factory generated EFIGS image, download the file 832296.08A to the printer. This file is located on the Brady FTP site. The letter at the end of the file name (e.g., A) specifies the revision. The latest revision will be available on the FTP site.
- Page 166 D-8 Rev A Menu System Multi-Language Support (printers with display only)
-
Page 167: Appendix E: Saving A Configuration File ( Display Printers Only
Appendix E E.1 Saving a Configuration File (printers with display only) The printer can save and restore complete printer settings, including media calibration parameters, as internal Configuration Files. Here are the highlights and restrictions of this feature: Configuration files eliminate the need to repeat the manual steps of a special printer setup, •... - Page 168 When using the front panel to save a configuration file the keypad functions within the ‘Save Setting As’ submenu are as follows: The DOWN ARROW Key scrolls down through the alphanumeric, underscore, and delete character. The UP ARROW Key scrolls up through the alphanumeric and underscore characters, and the delete function.
- Page 169 To save a manually entered setup (for example, an application that required an Advanced Entry Calibration before beginning) as a configuration file using the front panel: Displayed Step Message Operator Action Comment(s) You are entering ‘Menu Mode’. MENU Press the Key.
- Page 170 E-4 Rev A Saving a Configuration File (printers with display only)
-
Page 171: Appendix F: Gpio Port Description
Appendix F GPIO Port Description The printer can easily be programmed to interface with most applicator devices. The GPIO functions are enabled and configured using the menu system of the printer (see Section 5.1.4). These parameters are stored in non-volatile memory and saved for subsequent power-ups. When the GPIO is enabled, the printer will not print a label unless the Start of Print signal is active. - Page 172 GPIO Port Connections and Functions Pin # Signal Signal Signal Signal Description Names State Direction +5 VDC Output Printer +5 VDC Printer Fault Low Output Goes low if the printer detects any fault. Applicable only if cutter not equipped. . To activate set GPIO Option to “YES” and Cutter Equipped to “NO”...
- Page 173 External Start of Print Control Circuit Sample Connections for an external Start of Print control can be made (1) directly to Pin 4 using a TTL-level input or (2) with an interface circuit similar to the one shown here (for additional interfacing data, see the table below).
- Page 174 F-4 Rev A GPIO Port Description...
-
Page 175: Appendix G: Warranty Information
C. Printheads. The thermal printhead warranty is valid only if a Brady approved thermal label media is used, as defined in the Brady list of approved thermal/thermal transfer media in use at the time of the warranty claim, a copy of which is available from Brady upon request. Failure to use Brady-approved media may void the thermal printhead warranty. - Page 176 Failure by the end user or any third party to use Brady printheads or other parts; or Failure by the end user or any third party to use only Brady media if use of such media causes or contributes to the damage for which warranty service is sought; or Failure by the end user to follow the Return Appointment Process set forth below.
-
Page 177: Glossary
(DataMatrix, MaxiCode, PDF417, etc.). BPL (Brady Programming Language): Programming commands used specifically for control of and label production in Brady printers. A complete listing of commands can be found in the Programmer’s Manual. burn line: The row of thermal elements in the printhead that create the images on the media. - Page 178 die-cut media: Media that has been cut into a pattern using a press, where the excess paper is removed leaving individual labels, with gaps between them, attached to a backing material. direct thermal: The printing method that uses a heat sensitive media and only the heat of the thermal printhead to create an image on the label.
- Page 179 notched stock: Media, typically tag stock, with holes or notches in the material that is used to signal the top of form. The printer must be set to ‘gap’ to use this media type. preprinted media: Label stock that contains borders, text, or graphics, floodcoating, etc. perforation: Small cuts extending through the backing and/or label material to facilitate their separation.
- Page 180 GL-4 Rev A Glossary of Terms...
Need help?
Do you have a question about the Tagus and is the answer not in the manual?
Questions and answers