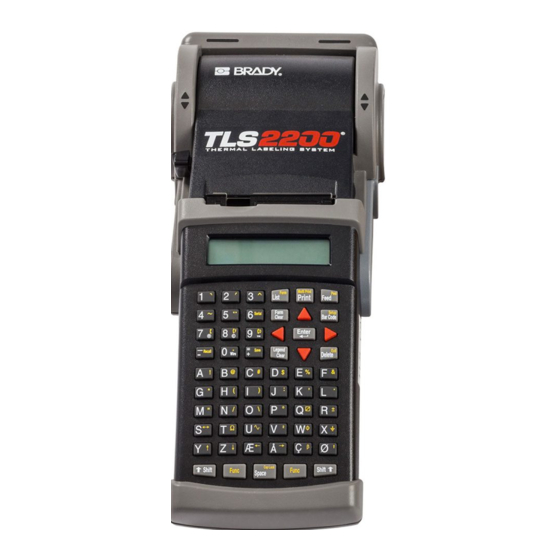
Brady TLS2200 User Manual
Brady users manual thermal transfer printer tls2200
Hide thumbs
Also See for TLS2200:
- User manual (594 pages) ,
- User manual (82 pages) ,
- User manual (84 pages)

Related Manuals for Brady TLS2200


Summary of Contents for Brady TLS2200
- Page 1 ™ TLS2200 TLS2200 T H E R M A L T R A N S F E R P R I N T E R T H E R M A L T R A N S F E R P R I N T E R...
-
Page 2: Fcc Notice (U.s. Only)
Brady’ s satisfaction to have been defective at the time Brady sold it. This warranty does not extend to any persons obtaining the product from the buyer. -
Page 3: License Agreement
BRADY's entire liability and your exclusive remedy under this warranty (which is subject to you returning the software to BRADY) will be, at the option of BRADY, to attempt to correct or help you around errors, to replace the software with functionally equivalent software or diskettes, or to refund the license fee of the software and terminate this agreement. - Page 4 Brady Worldwide, Inc. While every precaution has been taken in the preparation of this document, Brady assumes no liability to any party for any loss or damage caused by errors or omissions or by statements resulting from negligence, accident, or any other cause.
-
Page 5: Technical Support
Sales/Customer Support: (800) 537- 8791 Technical Support Brady Worldwide, Inc. provides several TLS2200 System support options: To speak with a technical support representative, call (800) 643-8766; Monday - Friday 7:00 a.m. - 7:00 p.m. (CST), or FAX your inquiry to (414) 358-6767, or... -
Page 6: Table Of Contents
Setting the Center-to-Center Spacing 23 Creating Bar Code Labels 23 Setting Bar Code Options 23 Code 39 Bar Code Symbology 24 TLS2200 System Bar Code Parameters 24 Maximum Bar Code Characters 24 Notes on Bar Coding 25 Tutorial Guide 26... -
Page 7: Introduction
Never before has there been a printer quite like the TLS2200 Thermal Labeling System. It’ s so easy - simply choose the type of labels you want to print and load them in. The TLS2200 printer takes care of the rest. Thanks to its innovative smart-cell technology, the TLS2200 printer recognizes the label you’... -
Page 8: Tls2200 Printer Specifications
TLS2200 Printer Specifications Thermal Transfer Print Mechanism (203 dpi) Optical Registration System for Precise Print Registration Elastomeric Keypad 2-Line by 16-Character Liquid Crystal Display Custom True Type Font (Arial) Labels up to 2” Wide Printable Area - 1.81” x 1.81” (Width x Height) -
Page 9: Quick Label Making Instructions
Quick Label Making Instructions The following steps are all you need to create a simple label. Read the rest of this manual for detailed information on each of these steps, as well as other functions not listed here. Follow these steps: Install a fully charged battery pack. -
Page 10: Setting Up
Using the Battery Pack and Charger The TLS2200™ Thermal Labeling System is shipped with a battery pack and a battery charger unit. Use these items to power the unit as shown below: Battery Charger Jack Connect the charger unit here. -
Page 11: Installing A Ribbon Cartridge
Installing a Ribbon Cartridge Install a ribbon cartridge as shown below: Installing a Label Roll Use the following instructions to install a label roll into your printer (follow steps 1-8 in order). Guide Slot Feed the leading edge of the label roll through... -
Page 12: Typing And Editing Text
Typing and Editing Text This section describes how to use the keypad to type and edit text for your labels. Typing Text Characters • Alphabetic letters: Type lower-case letters (a-z) by pressing the appropriate keys. Press the <Space> key to add a space between words. Type an upper-case letter by holding down the <Shift>... - Page 13 the label line:...
-
Page 14: Cursor And Editing Keys
<= =< <= < TLS2200 THERMAL_ The status bar indicates that the cursor is located at the 16 character position Cursor and Editing Keys Enter Activates a screen selection When composing a legend, inserts a non-visible end of line character and moves the cursor down to the next line. - Page 15 Moves the cursor one position to the right. Will insert a space at Space Bar the current cursor position.
-
Page 16: The Text Editor
STATUS BAR (located on the first line of the LCD). When a label roll is loaded and the unit is turned ON, the TLS2200 System will read the label size information stored in the smart-cell on the label core. This information will be used to automatically set an initial font size for your label. -
Page 17: Default Font Size
TLS2200 Printer Fonts FONT POINT... -
Page 18: Text Editing Notes
OFF. If the TLS2200 System detects a label size change when turned ON, or if a different label size is loaded while the unit is ON, text on the display will be cleared, the default font size will be set, and the previously saved legend will be lost. -
Page 19: Saving And Recalling A Legend
Once you have finished entering and editing your text, you may wish to save your legend for retrieval at some later point in time. The TLS2200 System allows you to save a legend by simply pressing the <Func> + <Save> keys. -
Page 20: The Setup Menu
These options provide you with many ways to customize the formatting of your labels. See Setup Menu Tree on page 19. Printer The Printer menu contains the following user options: Adjusts first vertical print position from top of label. * Top Margin Adj: Adjusts first horizontal print position from left edge of label. -
Page 21: Barcode
0.125 mm increments (1 dot). <Shift> + < > > , <Shift> + < ? > increase/decrease value by 1mm increments (8 dots) Clean Printer: Performs printer cleaning routine (To be used with the cleaning card shipped with the unit.). Values range from -0.625 mm to +1.375 mm. -
Page 22: Serial
Serial The Serial menu contains the following user options: Standard: Defaults serial number scheme to Decimal (0-9) or Alpha (A-Z, a-z) based on character type entered. Octal: Defaults serial number scheme to Octal (Base 8). 0-7 numeric serialization. -
Page 23: Setup Menu Tree
Printer Left Peel Burn Margin Feed Margin Time Temp + 1-5 · Range: -0.625 to +1.375mm seconds · to increase/decrease in Default = 0 125mm increments (1 dot) · Range: -1.000 to +1.000mm · to increase/decrease in 125mm increments (1 dot) ·... -
Page 24: Units
Setup Menu section starting on page 17. Setting Peel Time After your label(s) are printed, the TLS2200 printer will feed the last printed label to the cut- off position. If you wish to remove (peel) the last printed label from the liner without cutting, the Peel function can be used. -
Page 25: Reloading Label Rolls And Ribbons
Reloading Label Rolls and Ribbons If the label roll runs out of labels while printing, the TLS2200 System will stop printing and the following message will appear: “Error Out of Label” When the label roll runs out, the print job is permanently cancelled. Any legends remaining to be printed will be aborted. -
Page 26: General Guidelines For Serializing
Serialized text is limited to one line and one sequence only per label. The printer will first serialize the character the cursor is highlighted on when the <Func> + <Serial> keys are pressed. When this character reaches its maximum value... -
Page 27: Creating Terminal Block Labels
NOTE: Press <Feed> after printing to advance the terminal strip label to the cut position. Creating Bar Code Labels The TLS2200 System allows you to create Code 39 bar codes for your labels. Legends made utilizing the bar coding feature can consist of a single bar code, several barcodes, or bar codes together with text. -
Page 28: Code 39 Bar Code Symbology
(text and/or bar code) will print at the rotation selected. Lines cannot be rotated independently. Code 39 Bar Code Symbology The bar code symbology used by the TLS2200 System is Code 39 . The character set for this symbology consists of the following characters: The capital letters:... -
Page 29: Notes On Bar Coding
Press the < > key once to select “Barcode”, then press <Enter>. With the cursor highlighted on “Bar Height”, press <Enter>. > Use the < > and < > keys to set the height of your bar code(s), then press <Enter>. -
Page 30: Tutorial Guide
With the exception of “Creating a Terminal Block Label”, the label part used in all tutorial examples is PTL-19-423. A sample roll of this 1” x 1” label is provided in your TLS2200™ Thermal Labeling System package. Creating a One-Line Legend, Component Marker... -
Page 31: Creating A Wiremarker
Press <Func> + <Serial>. When “No. to Serial? “ prompt appears, enter 5 , then press <Enter>. When “No. of Copies?” prompt appears, enter 2 Press <Enter> or <Print>. The printer will begin printing two each of the five wiremarkers listed above. -
Page 32: Creating A Label With Rotated Text, Printing Multiple Copies
10. Enter ROTATE on line 1, then press <Enter>. 11. Enter TEXT on line 2. 12. Press <Multi Print>. 13. When “No. of Copies?” prompt appears, enter 3. 14. Press <Print>. The printer will print 3 copies of the legend created above. -
Page 33: Creating A Bar Code Label
With the cursor highlighted on line 1, press <Shift> + < font size from 9 to 11. 10. Enter BRADY on line 1, then press <Enter>. 11. Press the <Type> key to toggle the Legend Type for line 2 from “Text” to “Barcode”... -
Page 34: Creating A Serialized Bar Code Label
When “No. to Serial? “ prompt appears, enter 5 , then press <Enter>. When “No. of Copies?” prompt appears, enter 1 Press <Enter> or <Print>. The printer will begin printing one each of the five serialized barcode labels from A101 to A105. -
Page 35: Maintenance
Remove the cutter mechanism by loosening the screw that holds it in place. Lift the cutter away from the the top of the printer mechanism and clean the print head with a cotton swab dipped in isopropyl alcohol. Replace the cutter mechanism. -
Page 36: Accessory Parts List
replaced. Order a new battery and replace it following the accompanying instructions. Accessory Parts List Description Part No. Battery Charger 18551 Hard Side Carrying Case 18552 Dust Cover 18553 Battery Pack 18554 AC Adapter 18555 Cleaning Kit 18556 User’ s Manual 18557 R4310 Black Ribbon 18558... - Page 37 All rights reserved. Part No. 18557 Rev. A 08-EC-98-PM Canada 56 Leek Crescent Richmond Hill Ontario L4B 1H1 CANADA Phone: 1-800-263-6179 Fax: 1-800-387-4935 TLS2200™ is a trademark of BRADY Worldwide, Inc. ©1998 BRADY Worldwide, Inc. Printed in U.S.A.
Need help?
Do you have a question about the TLS2200 and is the answer not in the manual?
Questions and answers