Table of Contents
Advertisement
Quick Links
Advertisement
Table of Contents

Subscribe to Our Youtube Channel
Related Manuals for Brady THT-BP Precision


Summary of Contents for Brady THT-BP Precision
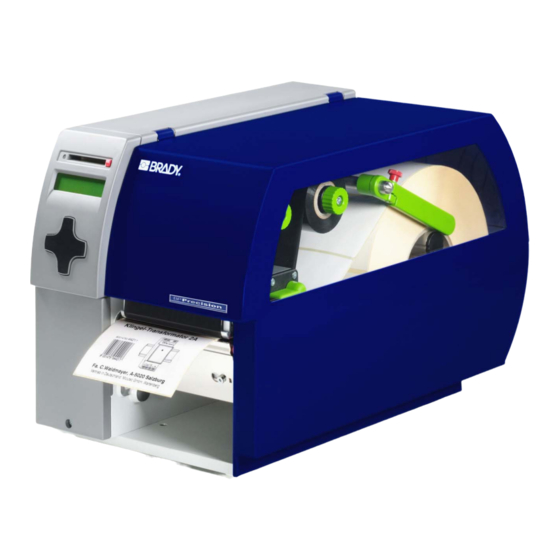
- Page 1 Transfer Printer THT-BP Precision Operator’s Manual Edition 2/05...
- Page 2 Industriepark C3 9240 Zele Belgium Tel.: +32 52 457 811 e-mail: support@brady.be All specifications about delivery, design, performance and weight are given to the best of our current knowledge and are subject to change without prior notice. Transfer Printer THT-BP Precision...
- Page 3 No part of this manual nor any translation may be reproduced or transmitted in any form or by any means, for any purpose other than the purchaser's personal use, without the express written permission of W.H. Brady Co. Edition 2/05...
-
Page 4: Table Of Contents
Preparation for Rewind Mode ....................39 Loading Labels ........................40 Loading Labels from Roll ......................40 Adjustment of the Printhead Support ..................45 Loading Fanfold Labels ......................46 Loading Transfer Ribbon ......................48 Adjustment of the Transfer Ribbon ..................50 Transfer Printer THT-BP Precision... - Page 5 Appendix B - Pin Assignment of the Interface Connectors ............. B-1 Pin Assignment of the RS-232 Interface ................. B-1 Interface Cable for RS-232 ....................B-2 Pin Assignment of the Parallel Interface Connector ..............B-3 Parallel Interface Cable ......................B-3 Transfer Printer THT-BP Precision...
-
Page 6: Trademarks
Macintosh-Computer is a product of Apple Computer, Inc. Microsoft ® is a registered trademark owned by Microsoft Corporation. Bitstream ® is a registered trademark owned by Bitstream Inc. TrueType ™ is a registered trademark owned by Apple Computer Inc. Transfer Printer THT-BP Precision... -
Page 7: A General Guide To The Documentation
NOTICE ! The figures in this manual normally show the Transfer Printer THT-BP Precision 600 ! If there are important differences between the printer types you will find a notice ! Transfer Printer THT-BP Precision... -
Page 8: Product Description
BP Precision 300 BP Precision 300P 600 dpi BP Precision 600 BP Precision 600P Basic Devices : Printer types for tearing-off the labels P-Versions : Printer types with internal rewinder and dispense plate for peeling-off the labels Transfer Printer THT-BP Precision... -
Page 9: Particular Features Bp Precision 200P / 300P
Then, place a clean paper towel or tissue under the head to provide a clean surface for it to rest on. When removing the head, hold it on the sides only. Failure to observe the instructions above can lead to a reduced printhead life. Transfer Printer THT-BP Precision... -
Page 10: Compliances
Instructions for the Lithium Battery The PCB of the printer is equipped with a Lithium battery. Take necessary precautions against a possible short circuit if the battery is not fully discharged. Properly remove the battery should the printer be scrapped. Transfer Printer THT-BP Precision... -
Page 11: Technical Specifications
Supply roll Diameter : up to 7.9 in (200 mm) Core Diameter : 1 to 3 in (25.4-76 mm) Material thickness : 0.003-0.01 in (0,07-0,25 mm) Weight : 60-250 g/sqm Transfer Printer THT-BP Precision... - Page 12 CompactFlash Type 1 up to 512 MB Real time clock : Printout of time and date Control panel : Navigator Pad with the active key illuminated indicating operating mode Lighted graphic LCD display LCD can be set to display in different languages Transfer Printer THT-BP Precision...
- Page 13 Bitmap fonts : 0°, 90°, 180°, 270° Scaleable fonts : 360° in 1° increments Graphics Graphic elements : line, box, circle, ellipse, fill-in segment, arrow Graphic file types : .PCX, .IMG, .BMP, .TIF, .GIF and .MAC Graphic files Transfer Printer THT-BP Precision...
- Page 14 50° to 95° F (10 to 35°C) at a humidity of 30 to 85% Transport : at -13° to 158° F (-25 to +70°C) at a max. humidity of 95% non-condensing Storage : at 41° to 104° F (5 to 40 °C) at a humidity of 5 to 85% Transfer Printer THT-BP Precision...
-
Page 15: Options
The printer is equipped with a slot to connect an additional interface. It is possible to install an USB interface or an ethernet interface allowing the printer to be connected to several different types of interfaces and networks. Transfer Printer THT-BP Precision... -
Page 16: Print Media
The surface of the material is very often the main factor, but not the only factor determining suitability. There are many materials available for labeling and your local distributor can offer suggestions to meet your particular needs. Transfer Printer THT-BP Precision... -
Page 17: Print Media For Direct Thermal Printing
Your Dealer can give you expert advice as to which combination of materials will best meet your requirements. Your Dealer can also assist you by testing the different materials you may be considering for your labeling needs. Transfer Printer THT-BP Precision... -
Page 18: Label / Tag Media Specifications
Height of the perforation mark .08 - .4 (2-10) Width of the reflective mark (black) >.2 (>5) Height of the reflective mark (black) .08 - .4 (2-10) Table 1 Media values are displayed in inches (values in brackets are mm) Transfer Printer THT-BP Precision... -
Page 19: Transfer Ribbon
"trailer", which attaches the end of the ribbon to the core. NOTICE ! Make certain before purchasing transfer ribbon that the "trailer" (see above) is not more than 2.3in (60mm) long. Transfer Printer THT-BP Precision... -
Page 20: Software
Windows Applications. In some cases these programs use the Windows Printer Driver. Some applications have integrated internal drivers to operate the BP Precision printers. These applications offer the best solution for creating and printing labels. Transfer Printer THT-BP Precision... -
Page 21: General Safety Instructions
Be sure to preserve the original packaging for possible later shipment! The shipping container will contain the following standard components: Thermal Transfer Printer Cardboard Core for the transfer ribbon rewinder Tear-off Plate (Basic devices only) Dispense Plate (P-Versions only) Power Cord Documentation Transfer Printer THT-BP Precision... -
Page 22: Removing The Securing Devices
3. Unpacking Removing the Securing Devices Fig. 3 Removing the securing devices 1. Place the printer on a solid flat surface. 2. Open the cover. 3. Remove the securing devices (1, 2). Transfer Printer THT-BP Precision... -
Page 23: Printer Component Location
- Warning label ''End of Ribbon'' - Control panel - Present sensor (Option for P-Version) - Print mechanism - Internal rewinder (P- Versions only) - Ribbon take up hub - Ribbon supply hub - Media hub - Media Retainer Transfer Printer THT-BP Precision... - Page 24 - Printhead support - Screw to adjust the printhead support - Printhead lever - Screw to adjust the ribbon shield - Thermal printhead - Media guide - Swing (BP Precision 200/300: Guide axle) - Allen Key Transfer Printer THT-BP Precision...
- Page 25 - Screw for adjusting locking system - Screw for adjusting printhead support - Allen key - Swing (BP Precision 200P/300P: Guide axle) - Media guide - Thermal printhead - Screw to adjust the ribbon shield - Printhead lever Transfer Printer THT-BP Precision...
- Page 26 Fig. 4d Control panel - Slot for the additional interface card (Ethernet or USB-slave) - Bi-directional parallel interface - USB master interface for keyboard or scanner - RS-232-interface - Power switch - Power supply connector Fig. 4e Back view Transfer Printer THT-BP Precision...
-
Page 27: Connecting The Printer
Make sure the power switch (1) is in position "O" (OFF) before connecting the printer to a power supply ! Fig. 5a Power supply Insert the power cable supplied in the accessories carton into the power supply connector (2) and contact the cable to a grounded outlet. Transfer Printer THT-BP Precision... -
Page 28: Connection To A Computer
CAUTION ! Make sure that all connected computers and their connecting cables are correctly grounded. Information for the optional interfaces (Ethernet, USB) can be found in the documentation for the respective interface. Transfer Printer THT-BP Precision... -
Page 29: Switch On The Printer
If a hardware failure occurs during the system test, the symbol and a description of the failure will be displayed on the LCD. In this case the printer should be powered off and on again. If the failure re-occurs, call for service. Transfer Printer THT-BP Precision... -
Page 30: Control Panel
The section "Printer Configuration" will indicate whether it is possible to change the settings of the front panel via software. NOTICE ! Whenever possible, use the software command during print jobs to control the printer's settings. Transfer Printer THT-BP Precision... -
Page 31: Structure Of The Control Panel
The function and operation of the keys depends on the current mode. The available functions are marked by illuminating the valid symbols and text in the keys. Transfer Printer THT-BP Precision... -
Page 32: Functions Of The Control Panel During Printing
Repeats the print of the last label, after the previous print job has been completed. (Only when setup parameter "Pause reprint" is on.) (on) Clears internal memory of the previous print job. "Pause reprint" is no longer available. Transfer Printer THT-BP Precision... - Page 33 During powersave mode, certain functions such as the background lighting of the display are powered off. The display shows . The illumination of the keys is switched off. To leave this mode press any key or send a print job. Transfer Printer THT-BP Precision...
- Page 34 Description Function flashes Short press - cancels the current print job Long press - cancels the current print job and deletes all jobs contained in the internal memory Transfer Printer THT-BP Precision...
-
Page 35: Functions Of The Control Panel In The Offline Menu
Menus and options marked with * can be protected by a PIN from unauthorized access. Functions marked with [...] are only accessible, if an optional device has been installed. Table 6 Structure of the Offline Menu Transfer Printer THT-BP Precision... - Page 36 - Return from a secondary menu - Move the cursor to the left during numeric settings - Finish a setting with rejecting the selected settings - At the start of the menu, return to the system mode "Online" Transfer Printer THT-BP Precision...
- Page 37 Fig. 6f Display during change of a parameter Transfer Printer THT-BP Precision...
-
Page 38: Media Loading
4. If you do not use the printer for an extended period of time, lift the printhead to avoid possible flattening of the print roller. 5. If you want to move or ship the printer to another location, remove the media and the ribbon from the printer. Fig. 7a Warning label Transfer Printer THT-BP Precision... -
Page 39: Preparation For Rewind Mode
4. Place the slotted holes on the rewind guide plate (1) over the screws (2) on the front of the printer and slide the plate to the left until it stops. 5. Tighten the two screws (2). Transfer Printer THT-BP Precision... -
Page 40: Loading Labels
Make sure that the labels between the media hub and the print mechanism are facing up. Slide the roll onto the media hub (9) until its stops. Transfer Printer THT-BP Precision... - Page 41 Fig. 7d Feed path in Tear-off Mode 8. Slide the media guide ring (6) inward until it lightly touches the side of the media strip. Transfer Printer THT-BP Precision...
- Page 42 10. Lower the printhead by rotating the lever (7) counter-clockwise until it locks. 11. When the printer is operated in peel-off mode continue with point 12. When the printer is operated in rewind mode continue with point 17. Transfer Printer THT-BP Precision...
- Page 43 The alignment is correct if the pinch roller (17) is placed in the middle of the label strip. 15. Swing the locking system (18) to the rewind assist roller (20) and tighten the screw (19). 16. For further informationen about operating in the peel-off mode see appendix A. Transfer Printer THT-BP Precision...
- Page 44 (13). Hold the internal rewind hub (13) and rotate the nut (24) counter-clockwise until it is tight. The media strip will now be fastened to the internal rewind hub (13). 21. Rotate the internal rewind hub (13) counter-clockwise to tighten the media strip. Transfer Printer THT-BP Precision...
-
Page 45: Adjustment Of The Printhead Support
(2) touches the printhead mounting (1). 4. Tighten the screw (3). 5. Remove the second label strip. NOTICE ! Incorrect adjustments of the printhead support may cause wrinkles in the transfer ribbon. Transfer Printer THT-BP Precision... -
Page 46: Loading Fanfold Labels
8. Slide the media guide (6) inward until it lightly touches the side of the media strip. Rotate the media guide (6) upwards against the media retainer (5) and tighten the knurled screw (7). Transfer Printer THT-BP Precision... - Page 47 9. Slide the media guide ring (3) inward until it lightly touches the side of the media strip. 10. Lower the printhead by rotating the lever (1) counter-clockwise until it stops. NOTICE ! When printing narrow label stock please activate the printhead support as described in the previous chapter ! Transfer Printer THT-BP Precision...
-
Page 48: Loading Transfer Ribbon
In figure 7l the solid line represents ribbon with ink on the inner side, and the broken line represents ribbon with ink on the outer side. 3. Rotate the knurled knob (6) counter-clockwise to clamp the roll of transfer ribbon (4) onto the ribbon supply hub (5). Transfer Printer THT-BP Precision... - Page 49 (1) using a piece of tape or a label. 6. Turn the ribbon take up hub (2) counter-clockwise until the ribbon is taut and without any wrinkles. 7. Rotate the printhead lever (7) counter-clockwise until it stops, thereby locking the printhead into position. Transfer Printer THT-BP Precision...
-
Page 50: Adjustment Of The Transfer Ribbon
Rotating it in the direction of "+" will tighten the transfer ribbon the inner edge of the transfer ribbon. Rotating it in the direction of "-" will tighten the outer edge of the tranfer ribbon. To eliminate the wrinkles, tighten the side where the wrinkles are originating. Transfer Printer THT-BP Precision... - Page 51 7. Media Loading This page is intentionally left blank Transfer Printer THT-BP Precision...
-
Page 52: Printer Configuration
7. Press the key to confirm the change. To cancel the change press the key. In both cases the symbol appears on the top line again. Transfer Printer THT-BP Precision... - Page 53 The "Setup" menu can be protected from unauthorized access by using a PIN. [...] The parameters in the brackets are only accessible after installing an optional device Table 8a Structure of the "Setup" Menu under the Offline-Menu Transfer Printer THT-BP Precision...
-
Page 54: Local Settings
Select the method of daylight savings adjustment Default : USA Set date Set the printer's date 31.12.2069 Default : current 01.01.1970 Set time Set the printer's time 23:59:59 Default : current 00:00:00 Table 8b Overview of the "Local settings" Menu Transfer Printer THT-BP Precision... - Page 55 When printed, the current time is given in the format selected based on the "Country" parameter. It is possible to change the time with software, but the change will not be saved permanently. Transfer Printer THT-BP Precision...
-
Page 56: Machine Parameters
0 ms Default : 250 ms in 50 ms increments Limit peel-off Limitation of the print speed in the spd. peel-off mode to 100 mm/s Default : On Table 8c Overview of the "Machine parameters" Menu Transfer Printer THT-BP Precision... - Page 57 The Printhead position X value to be changed will be flashing on the display. It is possible to adjust the value for individual jobs using software. The front panel values and software command values will be totaled together for printing. Transfer Printer THT-BP Precision...
- Page 58 Using "Backfeed delay" should prevent labels from becoming jammed between the printhead and print roller when the liner is fed back too quickly. Transfer Printer THT-BP Precision...
- Page 59 Detailed information is available in the applicator documentation. Brightness LCD This parameter adjusts the level of brightness for the background on the display. Contrast LCD This parameter adjusts the level of contrast to improve readability on the display. Transfer Printer THT-BP Precision...
-
Page 60: Print Parameters
BP Precision 300: 50-150 mm/s BP Precision 600: 50-100 mm/s in steps of 25mm/s Transfer print Basic selection of thermal transfer mode / direct thermal mode Default : On Table 8d Overview of the "Print parameters" Menu Transfer Printer THT-BP Precision... - Page 61 The heat level can be set using the software commands. The front panel value and software command value will be totaled together when printing. The setting of the "Heat level" parameter also affects the printer test prints (see Test functions section). Transfer Printer THT-BP Precision...
- Page 62 You can find detailed information in the cutter documentation. Tear-off mode When the "Tear-off mode" is active, an additional feed forward will take place after completion of the print job. This additional feed makes it possible to cut Transfer Printer THT-BP Precision...
- Page 63 The ASCII Dump mode (see chapter 9) provides a method to print the control sequences sent to the interface. In this mode the data received will be printed in text format depending on the selected character set. Transfer Printer THT-BP Precision...
-
Page 64: Interfaces
(Menu is only displayed when an external keyboard is installed.) 1. Layout Automatic and Default : Automatic = current all country settings setting "Country" listed in "Local settings, Country" 2. NumLock Default: On Table 8e Overview of the "Interfaces" Menu Transfer Printer THT-BP Precision... - Page 65 "Local settings / Country". With the parameter "Keyboard" a key assignment can be chosen that differs from the setting "Country". Keyboard - NumLock Turns the Keyboard NumLock option on and off. Transfer Printer THT-BP Precision...
-
Page 66: Security
To change the PIN, select "Change". The directions to change a PIN are the same as entering a new PIN number. To disable the PIN, select "Off". The previous PIN will be erased permanently. Transfer Printer THT-BP Precision... - Page 67 8. Printer Configuration This page is intentionally left blank Transfer Printer THT-BP Precision...
-
Page 68: Test Options
3. Select the required test function by pressing the key or the key and confirm the selection by pressing the key. 4. For more details on each test option, see the appropriate section. Transfer Printer THT-BP Precision... - Page 69 Short status Status print Font list Device list Printhead profile* ASCII Dump Mode Test grid Label profile* Setup Service * not available for BP Precision 600 Table 9a Structure of the "Test" Menu in the Offline Menu Transfer Printer THT-BP Precision...
-
Page 70: Short Status
The second line will display the version of firmware. (Feb 9 2005) Fig. 9c Short status 3 The third line displays the date of the firmware. PCB: Rev. 5 Fig. 9d Short status 4 The fourth line displays the revision number of the CPU. Transfer Printer THT-BP Precision... - Page 71 Fig. 9k Short status 10 If you are using a memory card, the capacity of the memory card is displayed on the tenth line. 5. To leave the "Short status" display and return to the "Test" menu, press the key. Transfer Printer THT-BP Precision...
-
Page 72: Status Print
D) the current values of printhead temperature and heat voltage E) details about the operation of the sensor used for recognizing the media front edge F) a test pattern to display the quality of the print image. Transfer Printer THT-BP Precision... - Page 73 9. Test Options Fig. 9l Status Print Transfer Printer THT-BP Precision...
-
Page 74: Font List
5. The "Font list" will be printed with the heat level and the print speed set in the "Setup" menu. 6. To cancel the "Font list" print, press the key. 7. After completing the printout, the printer returns to the selection list of the "Test" menu. Fig. 9m Font List Transfer Printer THT-BP Precision... - Page 75 Type Type of the font. Determines how the font is sized and what options are available when programming. (see the T command in the programming guide) Description A detailed description of the font's name, size, etc. Transfer Printer THT-BP Precision...
-
Page 76: Device List
5. The "Device list" is printed using the heat level and print speed set in the "Setup" menu. 6. To cancel the "Device list" printing, press the key. 7. After completing the printout, the printer will return to the selection list on the "Test" menu. Fig. 9n Device List Transfer Printer THT-BP Precision... - Page 77 USB device, which is connected to device a identifying number of the device b port, which is connected to device a Speed : Low- or High-Speed-USB-device * Will only be printed if the respective devices are installed. Transfer Printer THT-BP Precision...
-
Page 78: Printhead Profile
In the scale section of the diagram, a dot with an increased resistance value appears around 22.5 mm. Using this comparison makes it clear that the image fault on the top line is caused by a defective printhead and not a case of a dirty printhead surface. Transfer Printer THT-BP Precision... - Page 79 9. Test Options Fig. 9o Printhead Profile Transfer Printer THT-BP Precision...
-
Page 80: Ascii Dump (Monitor) Mode
In some cases, the last few lines of text have to be printed by pressing the key. 8. To cancel the ASCII Dump mode printout, press the key. 9. Press the key to return to "Online" mode. Transfer Printer THT-BP Precision... - Page 81 The following shows the "normal" appearance of a printed label, followed by the appearance of the same label when its commands are printed in ASCII Dump mode. Fig. 9q Output Label Fig. 9r Label commands printed in ASCII Dump mode Transfer Printer THT-BP Precision...
-
Page 82: Test Grid
6. The "Test grid" printout will be printed with the heat level and print speed set in the "Setup" menu. 7. The "Test grid" printout can be canceled by pressing the key. Once the printout has been canceled, the printer returns to the selection list of the "Test" menu. Transfer Printer THT-BP Precision... - Page 83 9. Test Options Fig. 9s Test Grid Transfer Printer THT-BP Precision...
-
Page 84: Label Profile
10. The "Label profile" printout is printed with the heat level and print speed set in the "Setup" menu. 11. After completing the printout, the printer will return to the selection list of the "Test" menu. Transfer Printer THT-BP Precision... - Page 85 F) Settings for use by Maintenance technicians. A more detailed explanation can be found in the Service Manual. G) Settings for use by Maintenance technicians. A more detailed explanation can be found in the Service Manual. Transfer Printer THT-BP Precision...
-
Page 86: 10. Memory Cards
Although memory cards have non-volatile memory, it is recommended that you make backup copies in case the original card malfunctions or is lost. Type 1 CompactFlash cards with a maximum capacity of 512 MegaByte can be used. Fig. 10a CompactFlash Memory Card Transfer Printer THT-BP Precision... -
Page 87: Installation And Removing The Memory Card
Press the eject button (3) and remove the card from the slot (2) by hand. CAUTION ! To avoid loss of data on the memory card, do not eject the memory card if the LED (1) next to the slot (2) is illuminated. Transfer Printer THT-BP Precision... -
Page 88: Preparing The Memory Card
If you want the operator to specify an amount of labels to be printed, move the A command statement after the second "Ms" command in the example above. Transfer Printer THT-BP Precision... -
Page 89: Memory Card Options In The Offline Menu
Table 10a Structure of the "Memory card" Menu on the Offline Menu Access to the menu shown in table 10a is only available when a memory card is installed. The following sections will provide detailed information about the memory card functions listed in the table. Transfer Printer THT-BP Precision... -
Page 90: Label From Card
9. Label selection or the number of labels selected, can be canceled by pressing the key. Access to the stored data on the memory card is also possible using the connected interface and computer. Transfer Printer THT-BP Precision... -
Page 91: Print Directory
- information about the data saved on the memory card - the amount of space remaining on the memory card 5. After completing the printout, the "Memory card" selection is displayed on the LCD. Fig. 10c Printout of the Directory of a Memory Card Transfer Printer THT-BP Precision... -
Page 92: Copy Memory Card
6. The printers LCD will indicate the progress with a progress bar. Once around 2 MByte is read from the source card the "Insert dest." request appears on the LCD. 7. Remove the source card and insert the destination card. Transfer Printer THT-BP Precision... - Page 93 LCD will display "OK ". 11. Press the key to return to the "Memory card" menu selection list. When the destination card cannot store any more information the LCD will display "Card full". Transfer Printer THT-BP Precision...
-
Page 94: Format Card
During formatting, DO NOT remove the memory card from the printer! 6. After completing the memory card formatting, the memory card capacity is displayed on the bottom line of the LCD. 7. Press any key to return to the "Memory card" menu selection list. Transfer Printer THT-BP Precision... -
Page 95: Ascii Dump (Card)
6. In "ASCII dump (card)" mode, the printout starts after four lines of data has been received. It is often necessary to press the key to print the remaining lines. 7. The printout may be canceled by pressing the key. 8. Press the key to return to "Online" mode. Transfer Printer THT-BP Precision... -
Page 96: 11. External Keyboard
All USB keyboards with a Type A USB connector are compatible. Connecting the External Keyboard Fig. 11a Connecting the External Keyboard Plug the cable (2) of the keyboard (1) into the keyboard interface connector (3) located on the rear of the printer. Transfer Printer THT-BP Precision... -
Page 97: Key Assignment
(Has the same effect as CANCEL when printing). [SPACE] Will PAUSE the printer if labels are currently printing. [Shift]-[Del] Delete the inputed data on variable fields and prompts. [ ],[ ] Scroll up and down the directory of the memory card. Transfer Printer THT-BP Precision... -
Page 98: Special Characters Available With An External Keyboard
GR : Deutschland SU : Suomi FR : France IT : Italia UK : United Kingdom SP : España US : DK : Danmark SG : Schweiz CZ : Ceska republika SF : Suisse BE : Belgie Transfer Printer THT-BP Precision... - Page 99 For example : For the letter "ñ", type the first character [~], then type the second character [ALT-n] NOTICE ! Use the data in table 11a to enter the Z1 character if it is not available on your keyboard. Transfer Printer THT-BP Precision...
- Page 100 11. External Keyboard This page is intentionally left blank Transfer Printer THT-BP Precision...
-
Page 101: Appendix A - Operation In Peel-Off Mode
To guarantee a maximum of reliability in the peel-off mode the printer is additionally equipped with a pair of rollers (5,6) to cause the dispense tension. Fig. A-1 Components for Peel-off Mode Transfer Printer THT-BP Precision... -
Page 102: Preliminary Tests
Present Sensor PS6 : The indication of the label in the peel-off position is also done via see-through sensor. With an additional peripheral interface the peel-off process can be controlled by an external application. Detailed information about the present sensors can be found in the concerning Operator's Manuals. Transfer Printer THT-BP Precision... -
Page 103: Appendix B - Pin Assignment Of The Interface Connectors
Carrier Detect Transmit Data Receive Data Data Terminal Ready (not used) Ground Data set ready (not used) Request to send Clear to send Ring Indication (not used) Table B-1 Pin Assignments of the RS-232 Interface Connector Transfer Printer THT-BP Precision... -
Page 104: Interface Cable For
Use the pin assignment of the printer as shown in Table B-1 to obtain a compatible cable. Printer 9 pin connector 9 pin plug Fig. B-2 Interface Cable with 9 pin Connector Transfer Printer THT-BP Precision... -
Page 105: Pin Assignment Of The Parallel Interface Connector
If problems occur, please contact the manufacturer of your computer on the pin assignment of the computer's parallel interface. Use the pin assignment of the printer as shown in Table B-2 to obtain a compatible cable. Transfer Printer THT-BP Precision... - Page 106 Appendix B - Pin Assignment of the Interface Connectors This page is intentionally left blank Transfer Printer THT-BP Precision...
-
Page 107: Appendix C - Error Messages / Problem Solution
Short press - Cancels the current print job Long press - Cancels the current print job and deletes all jobs from the internal memory Table C-1 Function of Keys in the Recoverable Error Mode Transfer Printer THT-BP Precision... -
Page 108: Non-Recoverable Errors
If a hardware-error occurs, the symbol appears on the LCD and the type of error is displayed. If this happens, power the printer off, then on again. If the error is still present, call for Service. Transfer Printer THT-BP Precision... -
Page 109: List Of Error Messages
Hardware error on the optional Switch printer off, then on again. "Cutter". If error reoccurs, contact Service. dRAM Hardware error Switch printer off, then on again. malfunction If error reoccurs, contact Service. Table C-3 Error Messages Transfer Printer THT-BP Precision... - Page 110 If error reoccurs, contact Service. Memory overflow Current print job contains too much Cancel the current print job. information (selected fonts, large Reduce the amount of information on graphics) the label format. Table C-3 Error Messages (continued) Transfer Printer THT-BP Precision...
- Page 111 The supply roll of transfer ribbon is Tighten the roll of transfer ribbon by not secured to the ribbon supply hub. turning the knurled knob on the ribbon supply hub. Table C-3 Error messages (continued) Transfer Printer THT-BP Precision...
- Page 112 Repeat the write process or reformat encountered a hardware error. the memory card. Wrong revision Error during a firmware update. Load a valid firmware version. Firmware version is not valid for the present hardware version. Table C-3 Error Messages (continued) Transfer Printer THT-BP Precision...
-
Page 113: Problem Solution
Choose a ribbon that is compatible. Printer is skipping every other The label height in the software is set too large. Correct the label when printing. setting and print the format again. Table C-4 Problems / Solutions Transfer Printer THT-BP Precision... - Page 114 Readjust the printhead support (see chapter 7). "Ribbon out" message appears Transfer ribbon is not secured to the ribbon supply hub. when ribbon is loaded Tighten the knob on the ribbon supply hub (see chapter 7). Table C-4 Problems / Solutions (continued) Transfer Printer THT-BP Precision...
-
Page 115: Appendix D - Maintenance / Cleaning
Accumulations of dirt on the print roller can lead to impaired media transport. Clean the roller as follows : 1. Open the printhead. 2. Remove the media from the printer. 3. Remove all deposits with a rubber cleaner or isopropyl alcohol and a soft cloth. Transfer Printer THT-BP Precision... -
Page 116: Cleaning The Printhead
3. Clean the surface of the printhead with a cleaning pen, or use a cotton swab dipped in isopropyl alcohol. 4. Let the printhead dry approximately 2 to 3 minutes before powering-on and restarting the printer. Transfer Printer THT-BP Precision... -
Page 117: Cleaning The Label Edge Sensor
! 4. Clean the label edge sensor and its optical sensors (3) with a soft brush or a cloth dipped in isopropyl alcohol. 5. Slide the label edge sensor back into its original position. Transfer Printer THT-BP Precision... - Page 118 Appendix D - Maintenance / Cleaning This page is intentionally left blank. Transfer Printer THT-BP Precision...
-
Page 119: Appendix E - Replacing Assembly Units
(3), that attach the printhead to the head plate. Fig. E-1 Printhead For easy distinction between the printheads, a label (4) with information about the printer type is located on the head plate. Transfer Printer THT-BP Precision... - Page 120 3. Loosen the printhead locking screw (5) using the Allen key (7). 4. To lift the printhead assembly, swing the lever (6) clockwise until it stops. 5. Remove the printhead (1) from the pins (11) on the printhead carriage. Transfer Printer THT-BP Precision...
- Page 121 9. Tighten the locking screw (5) by hand. Check that the printhead is completely secured in the printhead carriage. 10. Swing the lever (6) again into the position shown in figure E-2. 11. Tighten the locking screw (5) completely. Do not over-tighten the locking screw (5). Transfer Printer THT-BP Precision...
-
Page 122: Replacing The Print Roller And The Rewind Assist Roller
2. Take the Allen key (8), loosen the screws (3) and remove the dispense plate (2). 3. Remove the three screws (7). 4. Remove the plate (9) and the printhead support (6) from the axle of the print roller (1) and the rewind assist roller (4). Transfer Printer THT-BP Precision... - Page 123 (10, 13) on the shaft (11, 12). 7. Reinstall the plate (9) and printhead support (6). 8. Tighten the screws (7) a screw first, then the b screw and then the c screw. 9. Reassemble the dispense plate (2). Transfer Printer THT-BP Precision...
- Page 124 Appendix E - Replacing Assembly Units This page is intentionally left blank. Transfer Printer THT-BP Precision...
-
Page 125: Appendix F - Firmware Updates
6. During the firmware upload, the printer's LCD will indicate the progress with a progress bar. After completing the update process, the LCD will display "OK ". This indicates the completion of the updating. 7. Press the key and the printer returns to "Online" mode. Transfer Printer THT-BP Precision... -
Page 126: Firmware Update From Memory Card
LCD will indicate the progress with a progress bar. After completing the update process, the LCD will display "OK ". This indicates the completion of the updating. 8. Press the key and the printer returns to "Online" mode. Transfer Printer THT-BP Precision... -
Page 127: Error Messages During The Firmware Update
In this case, upload a previous firmware file over the parallel interface after powering Transfer Printer THT-BP Precision... - Page 128 Appendix F - Firmware Updates This page is intentionally left blank. Transfer Printer THT-BP Precision...
-
Page 129: Index
Invalid data C-4 Daylight saving 54f. Invalid outline C-4 Invalid setup C-4 Debug mode 57,60 Demand Sensor 54,56,58f. Device list 69,76f. Keyboard 64f. Direct programming 20 Keyboard, external 15,96ff. Direct thermal print 17 Keyboard interface 26,96 Transfer Printer THT-BP Precision... - Page 130 No record found C-5 Read error C-6 Navigator pad 26,31ff. Replacing the printhead E-1ff. Replacing the print roller E-4f. Offline menu 32,35f.,89ff. Rewind assist roller 25,43 Online (System mode) 29,32 Rewind assist roller, replacement E-4f. Options15 Transfer Printer THT-BP Precision...
- Page 131 System mode POWERSAVE 33 System mode PRINT 33 Tear-off mode 39ff.,61,63 Tear-off plate 21,24,39 Tear-off position 56,58 Technical Specifications 11ff. Test (menu) 35,68ff. Test grid 69,82f. Thermal printhead 9,24f. Thermal transfer print 17 Time powersave 57,60 Transfer Printer THT-BP Precision...
-
Page 132: Eu - Conformity Declaration
EN 55024:1998 + A1:2001 + Limits and methods of measurement A2:2003 Signed for, and on behalf of, the Manufacturer : cab Produkttechnik Sömmerda Gesellschaft für Computer- und Automationsbausteine mbH 99610 Sömmerda Sömmerda, 28.01.05 Erwin Fascher Managing Director Transfer Printer THT-BP Precision...
Need help?
Do you have a question about the THT-BP Precision and is the answer not in the manual?
Questions and answers