
Related Manuals for Electrolux EKC607601


Summary of Contents for Electrolux EKC607601
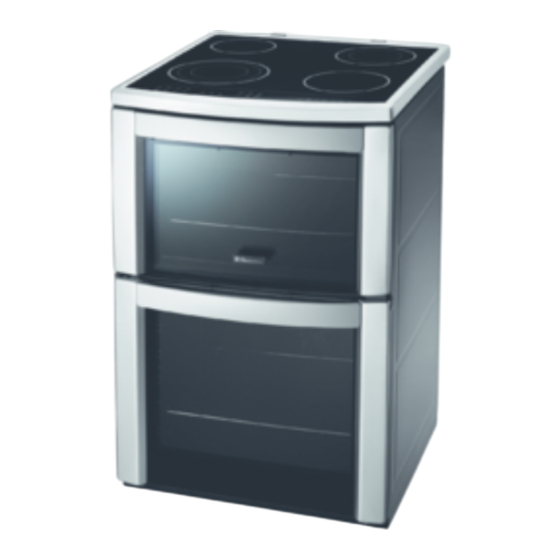
- Page 1 ..EKC607601 EN COOKER USER MANUAL...
-
Page 2: Table Of Contents
2 electrolux Share more of our thinking at www.electrolux.com CONTENTS Safety information Product description Before first use Hob - Daily use Hob - Helpful hints and tips Hob - Care and cleaning Oven - Control panel Oven - Daily use... -
Page 3: Electrical Connection
• Be careful when you remove or install the accessories to prevent damage to the appliance enamel. • Cookware made of cast iron, cast alumi- nium or with damaged bottoms can electrolux 3... -
Page 4: Care And Cleaning
4 electrolux scratch the hob surface if you move them on the surface. • Discoloration of the enamel has no effect on the performance of the appliance. • To prevent damage or discoloration to the enamel: – do not put any objects directly on the appliance floor and do not cover it with aluminium foil;... -
Page 5: Product Description
Triple cooking zone 800/1600/2300 W • The roasting pan grid To put in the deep roasting pan. • Oven shelf For cookware, cake tins, roasts. INITIAL CLEANING • Remove all parts from the appliance. • Clean the appliance before first use. electrolux 5... -
Page 6: Setting The Time
6 electrolux Important! Refer to chapter "Care and Cleaning". SETTING THE TIME The oven only operates after time set. When you connect the appliance to the electrical supply or in case of a power cut, the Time function indicator flashes automat- ically. -
Page 7: Heat Setting Displays
You can get a necessary heat setting in a shorter time if you activate the Automatic Heat Up function. This function sets the highest heat setting for some time (see the graphic), and then decreases to the neces- sary heat setting. electrolux 7 function... -
Page 8: Starting The Stop+Go
8 electrolux To start the Automatic Heat Up function: 1. Touch comes on in the display. 2. Touch again and again until comes on in the display. 3. Immediately touch until the necessary heat setting comes on. After 3 seconds display. -
Page 9: Hob - Helpful Hints And Tips
20-45 Add a few tablespoons of liquid 20-60 Use max. ¼ l water for 750 g of po- tatoes 60-150 Up to 3 l liquid plus ingredients as re- Turn halfway through quired 5-15 Turn halfway through electrolux 9... -
Page 10: Hob - Care And Cleaning
10 electrolux HOB - CARE AND CLEANING Warning! Refer to "Safety information" chapter. Clean the appliance after each use. Always use cookware with clean bottom. Scratches or dark stains on the glass ceramic have no effect on how the ap- pliance operates. -
Page 11: Oven - Daily Use
SWITCHING THE APPLIANCE ON AND Press the On/Off button appliance on or off. To bake and roast on one oven level. To brown. To bake cakes with crispy or crusty bases. To pre- serve food. electrolux 11 Description Description to switch the Application... -
Page 12: Setting The Oven Function
12 electrolux Oven function Dual Circuit Grill Light Bottom (main) oven functions Oven function Thermaflow® Conventional Cooking Pizza Setting Low Temperature Cook- Thermal Grill Dual Circuit Grill Keep Warm Drying Defrost Light SELECTING AN OVEN 1. Switch on the appliance using the On/ button. -
Page 13: Oven - Clock Functions
“00.00” and the related function indica- tor flash. The appliance switches off. 4. Use any button to switch off the acous- tic signal. electrolux 13 , Conventional again and again until the dis- to set the necessary... -
Page 14: Oven - Additional Functions
14 electrolux With Minute Minder be switched on to set the clock func- tion. With Duration and End switches off automatically. With Duration and End set the oven function and the tempera- ture first, then you can set the clock function. -
Page 15: Oven - Helpful Hints And Tips
The supports of the roasting pan grid must point down. 2. Put the deep roasting pan in the appli- ance, on the necessary shelf level. The temperature and baking times in the tables are guidelines only. They de- electrolux 15... - Page 16 16 electrolux pend on the recipes, quality and quan- tity of the ingredients used. Caution! Use a Deep grill roasting pan for very moist cakes. Fruit juices can cause permanent stains on the enamel. TOP OVEN The top oven is the smaller of the two ovens.
- Page 17 190 - 200 190 - 210 180 - 200 220 - 230 190 - 200 170 - 180 180 - 190 180 - 190 electrolux 17 Approx Cook Time [°C] (mins) 10 - 20 30 - 35 10 -15 18 - 25...
- Page 18 18 electrolux Food Yorkshire Pudding Large Yorkshire Pudding In- dividual Roasting Meat, Poultry MAIN OVEN CONVENTIONAL BAKING Food Biscuits Bread Cakes: Small & Queen Cakes: Sponges Cakes: Madeira Cakes: Rich Fruit Cakes: Christmas Cakes: Apple Pie - Shortbread Fish Fruit Pies, Crumbles...
-
Page 19: Pizza Setting
• Use the deep roasting pan in the middle or the top shelf level of the top oven. MAIN OVEN electrolux 19 Approx Cook Time [°C] (mins) 60 - 80... - Page 20 20 electrolux Meat Beef/Beef boned Mutton/Lamb Pork/Veal/Ham Chicken Turkey/Goose Duck Pheasant Rabbit GRILLING Always use the grilling function with maximum temperature setting Important! Always grill with the oven door closed Always pre-heat the empty oven with the grill functions for 5 minutes.
- Page 21 1-1.5 1-1.5 0.5-1 1.5-2 3.5-5 2.5-3.5 • Put the oven shelf in the first shelf level from the bottom. electrolux 21 Grill Time (min) 12 - 15 3 - 4 Temperature Time (min) [°C] 180 - 230 150 - 180...
-
Page 22: Oven - Care And Cleaning
22 electrolux Type of food Shelf Chicken, 1000 g Meat, 1000g Meat, 500g Trout, 150g Strawberries, 300g Butter, 250g Cream, 2 x 2dl Cake, 1400g Information on acrylamides Important! According to the newest scientific knowledge, if you brown food (specially the one which contains starch), OVEN - CARE AND CLEANING Warning! Refer to "Safety information"... -
Page 23: Shelf Support Rails
The number of glasses can be different. Removing the glass: 1. Push the door trim at one side to re- move it. Refer to the picture. 2. Pull up the trim. 3. Remove the glass panels. electrolux 23... -
Page 24: What To Do If
24 electrolux To replace the glass panels obey the procedure in opposite sequence. Be- fore you lower the trim attach the A trim part to the door. Refer to picture. OVEN LAMP Warning! There is a danger of electrical shock! WHAT TO DO IF…... -
Page 25: Installation
596 mm 600 mm 40 l 74 l electrolux 25 Remedy Replace the oven lamp • Deactivate the appliance with the house fuse or the safety switch in the fuse box and activate it again •... -
Page 26: Electrical Installation
26 electrolux Minimum distances Dimension LEVELLING Use small feet on the bottom of appliance to set same level of cooker top surface with other surfaces THE ANTI-TILT PROTECTION Caution! You must install the anti-tilt protection (A+B). If you do not install it the appliance can tilt. -
Page 27: Terminal Board
Standard guarantee conditions: We, Electrolux, undertake that if within 12 months of the date of the purchase this Electrolux appliance or any part thereof is proved to be defective by reason only of faulty workmanship or materials, we will, at... -
Page 28: Www.electrolux.com
Electrolux For Customer Service in The Republic of Ireland please contact us at the address below: Electrolux Group (Irl) Ltd, Long Mile Road, Dublin 12, Republic of Ireland Tel: +353 (0)1 4090751, Email: serv- ice.eid@electrolux.ie • The appliance guarantee is personal to... - Page 29 +41 62 88 99 111 Industriestrasse 10, CH-5506 Mägenwil +38 61 24 25 731 Gerbičeva ulica 110, 1000 Ljubljana +421 2 32 14 13 34-5 Electrolux Slovakia s.r.o., Electrolux Do- máce spotrebiče SK, Galvaniho 17/B, 821 04 Bratislava www.electrolux.fi +46 (0)771 76 76 76 Electrolux Service, S:t Göransgatan 143,...
- Page 30 30 electrolux...
- Page 31 31...
- Page 32 892937841-Q-072012...
Need help?
Do you have a question about the EKC607601 and is the answer not in the manual?
Questions and answers