Table of Contents
Advertisement
Advertisement
Table of Contents

Related Manuals for HYOSUNG TE 100


Summary of Contents for HYOSUNG TE 100
- Page 1 This manual should be considered a permanent part of the vehicle and should remain with the vehicle when resold or otherwise transferred to a new owner or operator. The manual contains important safety information and instructions which should be read carefully before operating the vehicle.
- Page 2 N O T E This provides special information to make maintenance easier or important instructions clearer. HYOSUNG MOTORS & MACHINERY INC. � COPYRIGHT HYOSUNG MOTORS & MACHINERY INC.
- Page 3 WARNING Noise Control System(muffler assembly) TAMPERING WITH NOISE CONTROL SYSTEM PROHIBITED Owners are warned that the law may prohibit : (a) The removal or rendering inoperative by any person other than for the purpose of maintenance, repair or replacement, of any device or element of design incorporated into any new vehicle for the purpose of noise control prior to its any sale or delivery to the ultimate purchaser or while it is in use ;...
- Page 4 I M P O RTA N T N OTICE ’ Read this owner s manual carefully and review its contents fully with your child. It is TO PA R E N T S YOUR RESPONSIBILITY to make sure that your 『 『 TE100 / 90 』 』 is properly and WARNING safely ridden and maintained.
- Page 5 ● ● Observe periodic maintenance section on page 24 of this owner’ s manual. requirements your authorized HYOSUNG dealer is trained and ● ● Make sure the rider wears a helmet, equipped to perform this service. eye protection, and protective clothing (gloves, leather or heavy ●...
-
Page 6: Table Of Contents
TABLE OF CONTENTS 1. SERIAL NUMBER LOCATION ∙∙∙∙∙∙∙∙∙∙∙∙∙∙∙∙∙ 2. FUEL AND OIL RECOMMENDATION ∙∙∙∙∙∙∙∙∙∙∙∙∙ FUEL ENGINE OIL TRANSMISSION OIL 3. LOCATION OF PARTS TE100 ∙∙∙∙∙∙∙∙∙∙∙∙∙∙∙∙ 4. LOCATION OF PARTS TE90 ∙∙∙∙∙∙∙∙∙∙∙∙∙∙∙∙ 5. CONTROLS ∙∙∙∙∙∙∙∙∙∙∙∙∙∙∙∙∙∙∙∙∙∙∙∙∙ IGNITION SWITCH LEFT HANDLEBAR RIGHT HANDLEBAR FUEL COCK 6. - Page 7 AIR CLEANER SPARK PLUG IDLE SPEED ADJUSTMENT THROTTLE CABLE ADJUSTMENT FUEL HOSE TRANSMISSION OIL ENGINE OIL LEVEL B R A K E TIRES DRIVE CHAIN FRONT AND REAR WHEEL REMOVAL REPLACEMENT OF THE LAMP (FOR TE100 GENERAL LUBRICATION ( TE100 GENERAL LUBRICATION ( TE90 12.
-
Page 8: Serial Number Location
The frame number ① is stamped on the front frame member as shown in the illustration. ENGINE OIL Use HYOSUNG HYPOL OIL HS. � If they are not available, use a good quality TWO-STROKE engine oil. TRANSMISSION OIL Use a good quality SAE 10W/30 or 10W/40 multi-grade motor oil. -
Page 9: Location Of Parts Te100
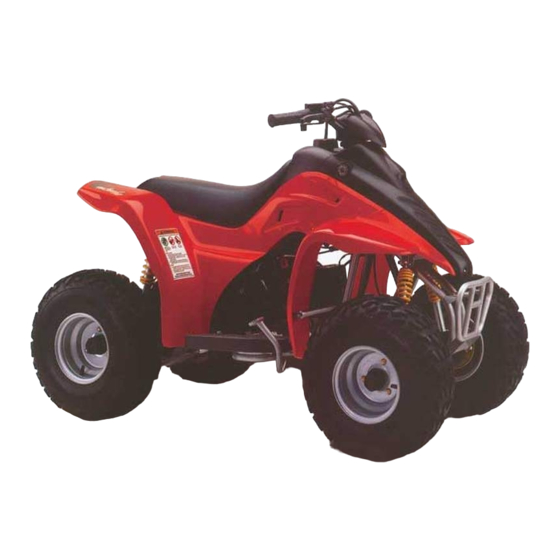
LO C ATION OF PA RT S『TE100』 ① Rear brake lever (Parking brake lever) ② Parking brake knob ③ Front brake lever ④ Throttle lever ⑤ Fuel tank cap ⑥ Starter switch ⑦ Engine stop switch... - Page 10 ⑧ ⑧ Remote engine stop switch...
- Page 11 ⑨ Fuel cock ⑩ Head lamp ⑪ Battery & fuse ⑫ Muffler ⑬ Drive chain N O T E “ “ ” ” : : means the invisable parts.
- Page 12 ⑭ Tail lamp ⑮ Tools � Engine oil tank � Air cleaner N O T E “ “ ” ” : : means the invisable parts.
-
Page 13: Location Of Parts Te90
LO C ATION OF PA RT S『TE90』 ① Rear brake lever (Parking brake Iever) ② Parking brake knob ③ Front brake lever ④ Throttle lever ⑤ Fuel tank cap ⑥ Starter switch ⑦ Engine stop switch... - Page 14 ⑧ ⑧ Remote engine stop switch...
- Page 15 ⑩ ⑪ ⑨ ⑫ ⑨ Fuel cock ⑩ Battery & fuse ⑪ Muffler ⑫ Drive chain N O T E “ “ ” ” : : means the invisable parts.
- Page 16 ⑭ ⑮ ⑬ ⑬ Tools ⑭ Engine oil tank ⑮ Air cleaner N O T E “ “ ” ” : : means the invisable parts.
-
Page 17: Controls
LEFT HANDLEBAR C O N T RO L S IGNITION SWITCH ① ① Rear Brake Lever Apply the rear brake by squeezing the rear brake lever towards the grip. The ignition switch has two position : ② ② Parking Brake Knob This knob is used to set the parking brake, ◉... -
Page 18: Right Handlebar
③ ③ Throttle Limiter CAUTION When the starter motor doesn’ t rotate within 5 seconds after pushing the switch, try again after 10 seconds to prevent damage to the battery. ④ ④ Engine Stop Switch ◉ “ “ ” ” Position : The ignition circuit is off. -
Page 19: Fuel Cock
◉ ◉ “ “ RES” ” (RESERVE) Position FUEL COCK If the fuel level in the tank is too low, turn the lever to the “RES” position to use the 1 『TE100 / 90』is equipped with a manually ℓ of reserve fuel supply. operated fuel cock. -
Page 20: Equipment And Adjustments
WARNING E QUIPMENT AND A D J U S T M E N T S Do not overfill the fuel tank. Stop adding fuel when the fuel level reaches the bottom of the filler neck as shown in the FUEL TANK CAP illustration. - Page 21 3. With the lanyard fastened to the vehicle ① and to your hand, follow after the moving vehicle. If you notice any driving hazard or unsafe situation, pull the lanyard ③ ② forcefully so that the rubber cap comes off. This will activated the remote engine ’...
- Page 22 1. Place the lanyard in the vinyl bag WARNING provided with the vehicle, with the rubber cap visible at the bag opening. The throttle limiter should always be set to the low power position(as described on page 18) when the remote engine stop lanyard is used.
-
Page 23: Break-In (Running-In)
as part of the initial servie includes BREAK-IN (RUNNING-IN) correction of all adjustments, tightening of all fasteners and replacement of dirty oil. Timely performance of this service will The first month is the most important in the ensure optimum service life and perfor- life of your vehicle. -
Page 24: Inspection Before Riding
WARNING INSPECTION BEFORE RIDING Failure to perform an inspection before riding may result in an accident or WHAT TO serious damage to the vehicle. Check CHECK FOR : CHECK these items riding. Be sure your Steering No rattle or looseness 『... - Page 25 ★ ★ STARTING THE ENGINE WARNING Before attempting to start the engine, make sure: While operating the 『 『 TE100 /90』 』 , the 1. The parking brake is engaged. rider should keep both feet on the 2. The engine stop switch is in the “ footrests at all times, or injuries resulting ”...
- Page 26 To turn the 『TE100 / 90』 , the rider should WARNING use the following technique : Turn the handlebars in the direction of Avoid braking during turns. Use of the turn. the brake when turning could cause Shift body weight slightly forward and the 『...
- Page 27 ■ ■ Front wheel: ■ ■ Climbing a Hill If front wheel skidding occurs, try to gain To climb a small hill with the 『TE100 / 90』 , front wheel traction by reducing the throttle the rider should: opening and leaning your body weight Speed up and maintain a steady speed slightly forward.
- Page 28 If your child is climbing a hill and loses WARNING forward momentum, he/she should : Lean farther forward, uphill. The rider should never allow the Apply the front and rear brake and stop 『 『 TE100 /9 0』 』 to roll backwards on a the vehicle before it starts to roll hill.
-
Page 29: Instructing The Young Rider
After extended operation of the maintain a straight course. 『 『 TE100 /90』 』 in water, bring it to your authorized HYOSUNG dealer to have the ★ ★ RIDING THROUGH WATER brakes inspected and cleaned, if The 『TE100 / 90』may be ridden through necessary. - Page 30 WITH THE VEHICLE techniques described in earlier parts of this owner’ s manual, HYOSUNG strongly Your child should become completely urges that you use this guide to teach each familiar with the names and functions of all child that you let ride the 『TE100 / 90』...
- Page 31 Go over the INSPECTION BEFORE 4. As you approach the end of the practice RIDING with your child until he/she knows area, tell the rider to stop the vehicle, all of the items that should be checked and apply the parking brake, and get off. You how they should be checked.
- Page 32 As you approach the end of the practice ■ ■ STEP 5 - PUTTING IT ALL area, you should again tell the rider to stop TOGETHER the vehicle, apply the parking brake, and get off so you can turn it around for him/her. When your child has mastered the basic Practice this exercise until your child can riding maneuvers in the previous steps,...
-
Page 33: Instection And Maintenance
All items should be serviced more your authorized HYOSUNG dealer to do frequently if the vehicle is operated the maintenance for you. under extreme conditions. If you have... -
Page 34: Periodic Maintenance Chart
Tighten General lubrication * ─ ─ Lucbricate CAUTION More frequent servicing may be performed on motercycles that are used under sever conditions. N O T E = Ask your Hyosung dealer or qualified mechanic to do the maintenance items marked. - Page 35 SEAT REMOVAL AIR CLEANER If the air cleaner element is clogged with dust, there will be greater intake resistance, resulting in decreased power output and increased fuel consumption. CAUTION DO NOT operate the engine without the air cleaner element in place or severe engine damage may result.
- Page 36 ◉ ◉ Removing The Element ◉ ◉ Washing the Element Wash the element as follows : 1. Fill a washing pan large enough to hold the element with a non-flammable cleaning solvent � . Immerse the element in the solvent and wash it. 2.
- Page 37 Use one of the spark plugs listed below or equivalents. Consult your HYOSUNG dealer if you are not sure which spark plug is correct for your type of vehicle usage. PLUG REPLACEMENT GUIDE...
- Page 38 If you do not have tighten it with a wrench. Do not one, ask your HYOSUNG dealer to perform overtighten or cross thread the spark this adjustment. plug, or the aluminum threads of the cylinder head will be damaged.
- Page 39 THROTTLE CABLE ADUSTMENT FUEL HOSE 2.5~6mm (0.098~0.236 in) Replace the fuel hose every 4 years, even Measure the throttle cable play by pressing if it appears to be in good condition. the throttle lever. The throttle lever should Damage from aging may not always be have 2.5~6mm (0.098~0.236 in) play.
- Page 40 � CAUTION Frequent use in wet conditions will require more frequent oil changes. If the vehicle becomes submerged in water, immediately change the oil. Failure to follow these instruction may result in severe transmission damage. ENGINE OIL LEVEL � To change the oil : 1.
- Page 41 ◉ Front Brake BRAKE ● Brake adjustment The 『TE100 / 90』has front drum brake and rear disk brake. WARNING WARNING Too much play in the front brake lever can cause poor braking performance Failure to properly inspect and maintain and may lead to an accident. your ATV’...
- Page 42 ③ If the extension line is beyond the range, rear brake lever and pressing the lock have the brake shoe assembly replaced knob ①. by your Hyosung dealer to ensure safe 2. Try to move the vehicle backward and operation. forward to see if the rear wheels are securely locked.
- Page 43 : replaced with a new one by your authorized Hyosung dealer or qualified service Front Rear machanic. 18×7.00 - 7 18×7.00 - 7...
- Page 44 ◉ ◉ Tire Tread Condition ◉ ◉ Tire Pressure A low pressure gauge is provided in tool kit under the seat, so you can measure the air pressure in your 『TE100 / 90』tires. Check the air pressure in all tires before each use of the vehicle.
- Page 45 If it becomes necessary to replace the drive chain, we recommend that you take your vehicle to an authorized HYOSUNG dealer to have the work done. Clean and oil the chain as follows : You should periodically inspect the drive 1.
- Page 46 If they are not, the wheel can come off unexpec- tedly. We strongly recommend that you have these nuts checked and retorqued, if necessary, by your authorized HYOSUNG dealer. Tighten Torque Front and Rear 25 N∙m wheel nut...
- Page 47 ◉ ◉ TAIL LAMP REPLACEMENT OF THE LAMP (FOR TE100 Requirement electric power of the lamp shown in the following chart. When replace the damaged lamp, always use the equal capacity. The use of a lamp other than rules may cause to excesive at the electric system or damage the lamp.
- Page 48 GENERAL LUBRICATION ( TE100 ) ① King pin ⑥ Rear axle housing ② Front wheel bearing ⑦ Front brake cable ③ Steering shaft holder ⑧ Throttle cable ④ Rear brake cable ⑨ Throttle lever ⑤ Drive chain ⑩ Front brake camshaft Motor oil ※...
- Page 49 GENERAL LUBRICATION ( TE90 ) ① King pin ⑥ Rear axle housing ② Front wheel bearing ⑦ Front brake cable ③ Steering shaft holder ⑧ Throttle cable ④ Rear brake cable ⑨ Throttle lever ⑤ Drive chain ⑩ Front brake camshaft Motor oil ※...
- Page 50 “ ” position. vehicle. Be sure to have your authorized 3. Check that the remote engine stop HYOSUNG dealer perform a general switch cap is installed on the remote lubrication as shown in the maintenance engine stop switch. chart on page 34.
- Page 51 If the ignition system is operating properly, a blue spark should jump across the spark plug gap. If there is no spark, take your machine to you authorized HYOSUNG dealer. [NORMAL POSITION] WARNING CAUTION Do not check for a spark unless you are certain that you know how to do it ;...
- Page 52 CAUTION WARNING When draining the carburetor, always The 『 『 TE100 /9 0』 』 should be transpo- shut the engine off. Do not smoke, and rted or deposited in the normal position. never drain or refuel in an area where If the 『...
- Page 53 ★ ★ WASHING YOUR ATV CLEANING PRO C E D U R E With some care, your ATV can be washed in a similar manner to washing an auto- A thorough cleaning of your ATV is a mobile. necessary part of maintenance and will help keep your ATV looking and performing N O T E its best.
- Page 54 Wet brakes may not provide as much equipment and skill. For this reason, stopping power as dry brakes. This HYOSUNG recommends that you trust this could lead to an accident. maintenance work to your HYOSUNG dealer. If you wish to service the machine...
- Page 55 ★ ★ TIRES Inflate tires to the normal specifications. ★ ★ EXTERNAL ● Spray all vinyl and rubber parts with rubber preservative. ● Spray unpainted surfaces with rust preventative. ● Coat painted surfaces with car wax. ★ ★ PROCEDURE FOR RETURNING TO SERVICE ●...
- Page 56 LO C ATION OF LABELS ⑥ ⑤ ④ ② ⑦ ③ ①...
- Page 58 SPECIFICAT I O N S DIMENSIONS AND MASS TE 90 TE 100 Overall length 1,376mm (54.2 in) Overall width 840mm (33.1 in) Overall height 885mm (34.8 in) Wheelbase 950mm (37.4 in) Ground clearane 120mm (4.7 in) Front track 658mm (25.9 in) Rear track 658mm (25.9 in)
- Page 59 TRANSMISSION TE 90 TE 100 Transmission 2.842~1.042 2.257~0.782 Drive chain 428H 56 links CHASSIS TE 90 TE 100 Front brake Drum brake Rear brake Disk brake Front tire size 18 7.00 - 7 Rear tire size 18 7.00 - 7...
- Page 60 Prepared by H YO S U N G M OTORS & MACHINE RY INC. 2nd Ed. MAR. 2003. Printed in KOREA...
Need help?
Do you have a question about the TE 100 and is the answer not in the manual?
Questions and answers