Juniper NETWORK AND SECURITY MANAGER NSM3000 - QUICK START REV 1 Quick Start Manual
Hide thumbs
Also See for NETWORK AND SECURITY MANAGER NSM3000 - QUICK START REV 1:
- Manual (100 pages)
Table of Contents
Advertisement
Quick Links
Download this manual
See also:
Manual
Network and Security Manager NSM3000
Quick Start
November 17, 2010
Revision 1
Copyright © 2010, Juniper Networks, Inc.
NSM3000 is an appliance version of Network and Security Manager (NSM). NSM3000
simplifies the complexity of network administration by providing a single, integrated
management interface that controls device parameters.
This robust hardware management system installs in minutes with full high availability
(HA) support, making it easy to scale and deploy. Enterprise customers with limited
resources can benefit significantly from NSM3000 because it eliminates the need to
have dedicated resources for maintaining a network and security management solution.
NSM3000 makes it easy for administrators to control device configuration, network
settings, and security policy settings for multiple families of Juniper devices including:
IDP Series Intrusion Detection and Prevention Appliances and Firewall and VPN devices
running ScreenOS.
Devices running Junos OS, such as J Series Services Routers, SRX Series Services
Gateways, EX Series Ethernet Switches, M Series Multiservice Edge Routers, and MX
Series Ethernet Services routers.
SA Series SSL VPN Appliances
IC Series Unified Access Control Appliances
For a complete list of supported device families and platforms, see the Network and
Security Manager Administration Guide.
Up to 10 administrators can log into NSM3000 concurrently.
This quick start explains the following steps for installing and configuring NSM3000 and
for configuring NSM.
Install the NSM3000 appliance hardware.
1.
Set up the NSM3000 appliance, using the serial port.
2.
1
Advertisement
Table of Contents

Related Manuals for Juniper NETWORK AND SECURITY MANAGER NSM3000 - QUICK START REV 1

Summary of Contents for Juniper NETWORK AND SECURITY MANAGER NSM3000 - QUICK START REV 1
-
Page 1: Quick Start
Up to 10 administrators can log into NSM3000 concurrently. This quick start explains the following steps for installing and configuring NSM3000 and for configuring NSM. Install the NSM3000 appliance hardware. Set up the NSM3000 appliance, using the serial port. Copyright © 2010, Juniper Networks, Inc. -
Page 2: Table Of Contents
SNMP Trap Configuration ........30 Copyright © 2010, Juniper Networks, Inc. - Page 3 Revision History ........... . . 51 Copyright © 2010, Juniper Networks, Inc.
-
Page 4: Contents Hardware Installation
Connections from the NSM GUI Client to NSM 7802 Heartbeat between peers in an HA cluster 7803 Connections from managed IDP devices to NSM 7804 Connections from devices running Junos, Secure Access devices, or Infranet Controller devices Copyright © 2010, Juniper Networks, Inc. -
Page 5: Installing The Nsm3000 Hardware
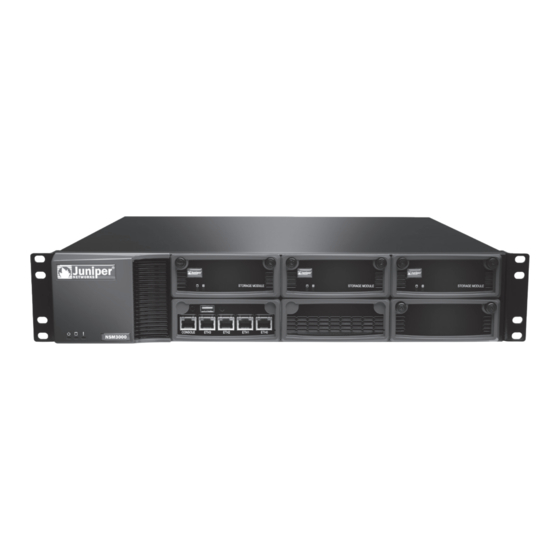
Plug the power cord into the AC receptacle on the rear panel. Figure 1: Rear Panel of NSM3000 Fan 0 Fan 1 AC Power Blank power switch supply tray Power AC Power supply supply receptacle Copyright © 2010, Juniper Networks, Inc. - Page 6 Table 2 on page 6 provides LED information for the Ethernet ports. Table 2: Ethernet Port LEDs LAN Status LED 1 LED2 10 Mbps connection 100 Mbps connection Green 1000 Mbps connection Orange Data is being transferred Orange, Green, or Off Blinking No connection Copyright © 2010, Juniper Networks, Inc.
-
Page 7: Initial Setup Configuration
Set Up Your Appliance This section provides the minimum information necessary to make your appliance active on the network. To set up your appliance either as a regional server or a central manager, follow these steps: Copyright © 2010, Juniper Networks, Inc. -
Page 8: Web Interface Configuration
Configuring the NSM Software After you log in as an “admin” user, an initial setup script walks you through additional configuration system settings before finalizing the NSM installation. This chapter describes that setup process. Copyright © 2010, Juniper Networks, Inc. -
Page 9: Configuring Basic Settings
NSM Central Manager window (see Figure 4 on page 10), as the case may be. NOTE: The “admin” user default username is admin and the password is the one you created in Step 6 of “Boot NSM3000” on page 7. Copyright © 2010, Juniper Networks, Inc. - Page 10 NSM3000 Quick Start Figure 3: Regional Server Configuration Main Menu Figure 4: Central Manager Configuration Main Menu Copyright © 2010, Juniper Networks, Inc.
-
Page 11: Configuring High Availability
See the Network and Security Manager installation Guide for more information about NSM licensing. Click Submit to save any changes, and then click Install to install the software. Configuring High Availability To configure high availability (HA) settings: Copyright © 2010, Juniper Networks, Inc. - Page 12 Click Menu next to Shared Disk (see Figure 5 on page 12) to configure a shared disk for regional servers (see Figure 6 on page 13) or for central managers (see Figure 7 on page 13.) This step is optional. Copyright © 2010, Juniper Networks, Inc.
- Page 13 If you configure HA with just one heartbeat link, then device management traffic and data replication traffic both use that link. If you configure two links, device management traffic uses the first link and data replication uses the second. Copyright © 2010, Juniper Networks, Inc.
-
Page 14: Advanced Options
To display the Advanced Options menu, on the NSM Configuration Main Menu, select Menu next to Advanced Options. The Advanced Options menu appears as shown in Figure 11 on page 14. Figure 11: Advanced Options Menu Advanced installation options include: Copyright © 2010, Juniper Networks, Inc. -
Page 15: Enabling And Configuring Remote Replication Of The Database
Backup information is copied to the directory on the remote /var/netscreen/dbbackup server. The “nsm” user must exist on both servers and you must establish an SSH trust relationship. See the Network and Security Manager Installation Guide, for details. Copyright © 2010, Juniper Networks, Inc. -
Page 16: Server Only)
SRS database. SRS DB Owner Name The default value is netscreen. To enter another name, click the radio button next to the blank text box and enter the name in the text box. Copyright © 2010, Juniper Networks, Inc. -
Page 17: Installing Nsm Software
Scheduling Security Updates on page 21 Changing the Superuser Password To change the superuser password, select NSM Administration > NSM Super User Password. See Figure 14 on page 17. Figure 14: Change Superuser Password Copyright © 2010, Juniper Networks, Inc. -
Page 18: Downloading Nsm Mibs (Regional Server Only)
Exporting Device Logs (Regional Server Only) To export device logs, select NSM Administration > Export Device Logs. See Figure 17 on page 18). This option is not available on the central manager. Figure 17: Export Device Logs Copyright © 2010, Juniper Networks, Inc. -
Page 19: Generating Reports (Regional Server Only)
Modifying NSM Configuration Files To manually edit the files, select NSM Administration GuiSrv.cfg DevSvr.dfg HaSvr.cfg > Modify NSM Configuration Files. The example in Figure 19 on page 20 shows the option to modify the file. GuiSvr.cfg Copyright © 2010, Juniper Networks, Inc. -
Page 20: Backing Up The Nsm Database
Backing Up the NSM Database To configure backups of the NSM database, select NSM Administration > NSM Database Backup link under NSM Administration. See Figure 20 on page 21. Copyright © 2010, Juniper Networks, Inc. -
Page 21: Changing The Nsm Management Ip
> NSM Management IP link under NSM Administration. See Figure 21 on page 21. Figure 21: Change Management IP Scheduling Security Updates To schedule security updates, select NSM Administration > Schedule Security Updates. See Figure 22 on page 22. Copyright © 2010, Juniper Networks, Inc. -
Page 22: Managing System Administration
To reboot or shut down NSM3000, select System Administration > Bootup and Shutdown, and then click either Reboot System or Shutdown System. See Figure 23 on page 22. Figure 23: Reboot or Shut Down Copyright © 2010, Juniper Networks, Inc. -
Page 23: Changing The User Password
Routing and Gateways on page 24 Hostname and DNS Clients on page 24 Host Addresses on page 25 Network Interfaces Use this option to manage the network interfaces. See Figure 26 on page 24. Copyright © 2010, Juniper Networks, Inc. -
Page 24: Routing And Gateways
Use this option to configure and manage routes and gateways. See Figure 27 on page 24. Figure 27: Routes and Gateways Hostname and DNS Clients Use this option to configure and manage hostnames and DNS clients. See Figure 28 on page 25. Copyright © 2010, Juniper Networks, Inc. -
Page 25: Host Addresses
You will also need to add NSM3000 users with their associated user profiles (SysAdmin, NSMAdmin, Operator, Guest), to the RADIUS database. For more details see Steel-Belted Radius Documentation. NOTE: You need System Administration or NSM Administration permission to manage RADIUS servers in the NSM3000 WebUI. Copyright © 2010, Juniper Networks, Inc. -
Page 26: Adding A Radius Server
: The IP address or the hostname of the RADIUS Server. : The shared secret NSM3000 and the RADIUS server use for secure Shared secret authentication. Auth Port : The RADIUS authentication software port. (We recommend UDP port 1812) Copyright © 2010, Juniper Networks, Inc. -
Page 27: Changing The Priority Of Radius Servers
RADIUS Servers that have been added. Select the name of the server whose properties you want to edit. The Edit RADIUS Server dialog box appears. See Figure 32 on page 28. Copyright © 2010, Juniper Networks, Inc. -
Page 28: Monitoring With Snmp
SNMP System Information on page 29 SNMP Trap Configuration on page 30 SNMP Configuration To configure SNMP: Select System Administration > SNMP Monitoring. Select the SNMP Config tab, which is shown in Figure 33 on page 29. Copyright © 2010, Juniper Networks, Inc. -
Page 29: Snmp System Information
Select the System Info tab, which is shown in Figure 34 on page 29. Figure 34: Configuring SNMP System Information Enter the following information, with is required for any SNMP-managed device: Contact—Contact information for the appliance. Location—Location of the appliance. Copyright © 2010, Juniper Networks, Inc. -
Page 30: Snmp Trap Configuration
Enter the percentage of free memory below which SNMP issues a trap. CPU high Enter the percentage of CPU use over which SNMP issues a trap. NSM start/stop Admin Logon/Logoff External IP unreachable Enter the IP address of the required device. Click Save. Copyright © 2010, Juniper Networks, Inc. -
Page 31: Forwarding Syslog Messages
Viewing Syslog Receivers To view the syslog receivers configured on your NSM3000 appliance, follow these steps: Select System Administration > Syslog Forwarding. The Syslog Forwarding window appears.Figure 36 on page 33 shows an example. Copyright © 2010, Juniper Networks, Inc. -
Page 32: Adding And Configuring Syslog Receivers
Server log, and HA Server log. The syslog facility is a field included in the syslog message to help identify the data source. Click Save. Click Add new Receiver. The syslog receiver configuration window appears as shown in Figure 36 on page 33. Copyright © 2010, Juniper Networks, Inc. - Page 33 In the IP field, Enter the IP address of the syslog receiver. In the Transport field, select the type of syslog receiver: Select UDP for basic syslog implementations. Select TCP for rsyslog or syslog-NG implementations. Copyright © 2010, Juniper Networks, Inc.
-
Page 34: Editing Syslog Receiver Configurations
Configure an NTP server to synchronize the system time with an external clock. Installing Updates Select System Administration > System Update to perform the following tasks: Check for updates and install them. Enable or disable automatic updates. Copyright © 2010, Juniper Networks, Inc. -
Page 35: Managing Users
NSM3000 users. See Figure 37 on page 35. Figure 37: NSMXpress Users Dialog Box Click The Create NSMXpress user dialog box appears. Create a new NSMXpress User. See Figure 38 on page 36. Copyright © 2010, Juniper Networks, Inc. - Page 36 Enter a user name in the text box. Username Select from the password drop-down list and enter the password you want to Set to set in the password text box. Reenter the password in the text box. Confirm Password Copyright © 2010, Juniper Networks, Inc.
-
Page 37: Deleting A User
When a user logs in, NSM3000 modules are displayed or hidden based on the user profile and the permissions associated with the profile. For more details about user profiles and permissions, see Table 4 on page 38. Copyright © 2010, Juniper Networks, Inc. - Page 38 Change NSM Super User Password Download NSM MIBs Export Audit Logs Export Device Logs Generate Reports NSM Configuration Files NSM Database Backup NSM Management IP Schedule Security Updates Maintenance System Statistics Troubleshooting Action Audit Logs Copyright © 2010, Juniper Networks, Inc.
-
Page 39: Configuring The Web Interface
Upgrading the Recovery Partition on page 41 Viewing System Statistics To view system statistics, select System Administration > Maintenance > System Statistics. The system Statistics window appears as shown in Figure 41 on page 40. Copyright © 2010, Juniper Networks, Inc. -
Page 40: Cpu
Select Disk to view graphs that monitor the file system disk space usage hourly, daily, weekly, and monthly. Tile All Graphs Select Tile all graphs to display all the statistical graphs for the system in one window. Copyright © 2010, Juniper Networks, Inc. -
Page 41: Upgrading The Recovery Partition
Both sets are usually retained in the local file system. The NSM3000 OS set can also be downloaded from the Juniper Networks software repository. NSM3000 splits the recovery upgrade process into a preparation phase and an upgrade phase. -
Page 42: Troubleshooting
. The NSMXpress Actions Log dialog box Troubleshooting > Action Audit Logs appears. See Figure 42 on page 42. Figure 42: NSMXpress Actions Dialog Box Select the Action Audit Logs that you want to view: Copyright © 2010, Juniper Networks, Inc. -
Page 43: Error Logs
. The Search Results dialog box appears with the result of your query. See Search Figure 43 on page 43. Figure 43: Search Results Dialog Box Error Logs To review error logs, select Troubleshooting > Error Logs. Figure 44 on page 44 shows an example, Copyright © 2010, Juniper Networks, Inc. -
Page 44: Network Utilities
SeeFigure 46 on page 44. Figure 46: Network Utilities Options Ping Ping is a tool for checking network connectivity. NSM3000 prompts with questions so you can focus your search. Figure 47 on page 45 shows an example. Copyright © 2010, Juniper Networks, Inc. -
Page 45: Traceroute
Traceroute Traceroute is a tool to print the route a packet takes to a network host. See Figure 48 on page 46. Copyright © 2010, Juniper Networks, Inc. -
Page 46: Lookup
(see Figure 50 on page 47). When you calculate a netmask by the number of hosts, NSM3000 returns the smallest network available. Copyright © 2010, Juniper Networks, Inc. -
Page 47: Tech Support
> Tech Support under Troubleshooting. To help analyze problems, select a detail type in the drop-down list box, and then click Run Tech-Support Script. NSM3000 creates a file you can download and send to Juniper Networks technical support. See Figure 51 on page 47. -
Page 48: List Of Technical Publications
Network and Security Provides procedures for basic tasks in the NSM user interface. It Manager Online Help also includes a brief overview of the NSM system and a description of the GUI elements. Copyright © 2010, Juniper Networks, Inc. -
Page 49: Requesting Technical Support
7 days a week, 365 days a year. Self-Help Online Tools and Resources For quick and easy problem resolution, Juniper Networks has designed an online self-service portal called the Customer Support Center (CSC) that provides you with the following features: Find CSC offerings: http://www.juniper.net/customers/support/... -
Page 50: Opening A Case With Jtac
NSM3000 Quick Start Join and participate in the Juniper Networks Community Forum: http://www.juniper.net/company/communities/ Open a case online in the CSC Case Management tool: http://www.juniper.net/cm/ To verify service entitlement by product serial number, use our Serial Number Entitlement (SNE) Tool: https://tools.juniper.net/SerialNumberEntitlementSearch/ Opening a Case with JTAC You can open a case with JTAC on the Web or by telephone. -
Page 51: Revision History
Products made or sold by Juniper Networks or components thereof might be covered by one or more of the following patents that are owned by or licensed to Juniper Networks: U.S. Patent Nos. 5,473,599, 5,905,725, 5,909,440, 6,192,051, 6,333,650, 6,359,479, 6,406,312, 6,429,706, 6,459,579, 6,493,347, 6,538,518, 6,538,899, 6,552,918, 6,567,902, 6,578,186, and 6,590,785.
Need help?
Do you have a question about the NETWORK AND SECURITY MANAGER NSM3000 - QUICK START REV 1 and is the answer not in the manual?
Questions and answers