
Related Manuals for Krone Big Pack 1270XC


Summary of Contents for Krone Big Pack 1270XC
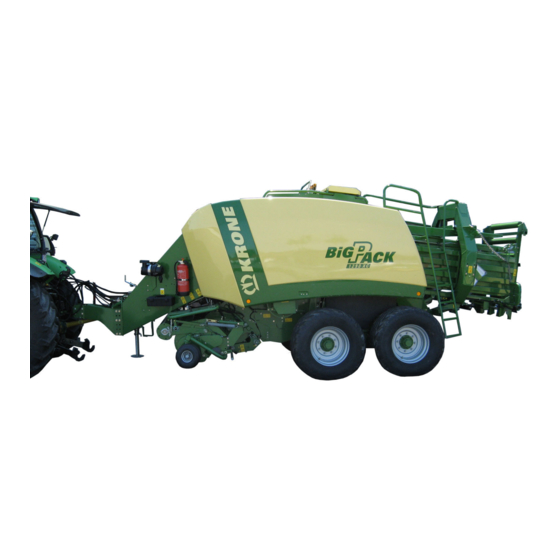
- Page 1 Operating Instructions 150 000 050 01 EN Big Pack Baler Big Pack 890/XC Big Pack 1270/XC/MultiBale Big Pack 1290/XC Big Pack 1290 HDP / XC (Machine No. 721 564 or higher)
- Page 2 Krone Big Pack Baler Types: Big Pack 890; Big Pack 1270; Big Pack 1290 Big Pack 890 XC; Big Pack 1270XC; Big Pack 1290XC Big Pack 1290 HDP; Big Pack 1290 HDP XC to which this declaration refers corresponds to the relevant basic safety and health requirements of the EC Directive 98/37/EC.
-
Page 3: Table Of Contents
Intended Use ......................I -1 Information Required in Case of Questions and Orders ........I -1 Technical Data ......................I -2 1.4.1 Big Pack 890/XC ....................I -2 1.4.2 Big Pack 1270/XC/MultiBale ................... I -3 1.4.3 Big Pack 1290/XC ....................I -4 1.4.4... - Page 4 Contents Main PTO Shaft ..................... III -4 3.4.1 Adapting the Main PTO Shaft................III -4 3.4.2 Mounting on the tractor side ................. III -5 Hydraulic, Compressed Air and Electrical Connections ......... III -6 3.5.1 Hydraulic Brake (country-specific) ................. III -6 3.5.2 Hydraulic Connection for Locking the Coaster Axle (Optional)......
- Page 5 Working Principle ....................IV -49 4.12.2 Mounting ......................IV -49 4.12.3 Functions that Differ from the KRONE In-cab Comfort Kit ........IV -50 Medium Control Unit ................V -1 General Description ....................V -1 Mounting ......................... V -2 Control Unit ......................V -4 Operational Readiness ...................
- Page 6 8.6.5 Setting of the Spring of the Zeroizing Device ............ VIII -27 Adjusting the Flywheel Cleaning (Only for Big Pack 890) ........VIII -28 Basic Setting of the Flywheel Belt Brake ............VIII -28 Adjusting the Baling Chute ................VIII -29 8.10...
- Page 7 Contents 8.10.3 Adjusting the height of the needle yoke brake ..........VIII -30 8.10.4 Setting the lock (frame) ..................VIII -31 8.10.5 Setting the locks of the needle yoke ..............VIII -31 8.10.6 Setting the rubber buffer between the needle yokes ......... VIII -31 8.10.7 Possible setting errors and how to eliminate them ..........
- Page 8 Contents A1.1 Work Hydraulics Part I for Medium and Comfort Version Electronics ....A -1 A1.2 Work Hydraulics Part II for Comfort Version Electronics........A -2 A1.3 Work Hydraulics Part II for Medium Version Electronics ........A -3 A1.4 On-board Hydraulics for Medium Version Electronics ..........A -4 A1.5 On-board Hydraulics for Comfort Version Electronics ..........
-
Page 9: General Information
ID No. and the year of construction of the machine (see below). The Big Pack 890/XC; Big Pack 1270/XC/MultiBale; Big Pack 1290/XC and BigPack 1290 HDP / XC Balers work with the “Variable Feeding System”. They produce highly compacted and dimensionally stable big bales with a length of 1.0 to 2.7 m under all conditions. -
Page 10: Technical Data
General Information 1.4 Technical Data 1.4.1 Big Pack 890/XC Big Pack 890 Big Pack 890 XC Single-axle Tandem Single-axle Tandem 40 km/h 50km/h* 40 km/h 50km/h* Permissible maximum speed (mm) 9180 Length of working position (mm) 7930 Length of transport position... -
Page 11: Big Pack 1270/Xc/Multibale
General Information 1.4.2 Big Pack 1270/XC/MultiBale Big Pack 1270 Big Pack 1270 XC Single-axle Tandem Single-axle Tandem 40 km/h 50km/h* 40 km/h 50km/h* Permissible maximum speed (mm) 9180 Length of working position (mm) 7930 Length of transport position (mm) 2875 Height (kg) 7240... -
Page 12: Big Pack 1290/Xc
General Information 1.4.3 Big Pack 1290/XC Big Pack 1290 Big Pack 1290 XC Tandem Tandem Single-axle Single-axle 40 km/h 50km/h* 40 km/h 50km/h* Permissible maximum speed (mm) 9180 Length of working position (mm) 7930 Length of transport position (mm) 3075 Height (kg) 7860... -
Page 13: Big Pack 1290 Hdp / Xc
General Information 1.4.4 Big Pack 1290 HDP / XC Big Pack 1290 HDP Big Pack 1290 HDP XC Tandem Tandem 50 km/h Permissible maximum speed (mm) 9940 Length of working position (mm) 8850 Length of transport position (mm) 3075 Height (kg) 10200 11500... -
Page 14: Lubricants
General Information 1.4.5 Lubricants Lubricant quantities and designations for the gearboxes Quantity ltr. Designation/brand Bio-degradable lubricants Main gearbox 890 15,5 Main gearbox 1270 / 1290 16,7 Main gearbox 1290 HDP SAE 90 GL 4 Packer gearbox Esso-Spartan EP 150 Knotter/packer transfer gearbox On request Shell Omala Oil 150 Pick-up gearbox, upper... -
Page 15: Connection Requirements, Tractor
General Information 1.5 Connection Requirements, Tractor Brake connections: For Big Pack Baler with: brake activated by compressed air Dual-line brake system required hydraulically activated brake (6) Connection for hydraulic brake system required (max. operating pressure 120 bar) Electrical connections: Lighting for the Big Pack Baler 7-pin socket DIN ISO 1124 Power supply for the electronic 2-pin socket... -
Page 16: General Technical Description
With the XC design, there is also a cutting system up front. Baling ram Length of stroke 750 mm -50 strokes per minute (Big Pack 890) - 38.5 strokes per minute (Big Pack 1270 and 1290) The baling ram moves on 4 rollers... -
Page 17: Overviews
General Information 1.7 Overviews 1.7.1 Left Side of the Big Pack Baler with Tandem Axle 1. Flywheel parking brake 9. Drawbar with adjustable height 2. On-board computer 10. Wide-angle PTO shaft with overload protection 3. Bale length adjustment and free-wheeling 4. -
Page 18: Right Side Of The Big Pack Baler With Tandem Axle
General Information 1.7.2 Right Side of the Big Pack Baler with Tandem Axle Knotting area XC cutting system drive Hydraulic oil storage tank Pick-up hydraulics shut-off valve Jack Twine brake in the twine box Holder for fast-action couplings and plugs Bale chute Variable filling system VFS I - 10... -
Page 19: How The Vfs Conveyor System Works
General Information 1.7.3 How the VFS Conveyor System Works BPXC0200 I - 11... -
Page 20: Functional Description Of The Big Pack Baler
The drawbar is provided with channel. The Big Pack 890 is equipped with 4, the height adjustment so that the Big Pack Baler can work Big Pack 1270 and 1290 with 6 knotters (7). The big horizontally. -
Page 21: Safety
Safety Safety 2.2 Safety Instructions and Accident Prevention Regulations 2.1 Identifying Symbols in the 2.2.1 Personnel Qualification and Training Operating Instructions The Big Pack Baler may only be used, maintained and The safety instructions in these operating instructions repaired by persons who are familiar with it and have that in the case of non-compliance can give rise to been instructed about the dangers connected with it. -
Page 22: Safety Instructions And Accident Prevention Regulations
Safety Always observe the applicable traffic laws when using 15. Operating devices (ropes, chains, rods, etc.) of public roads (for example, in Germany, the Road remotely operated devices must be run so that Traffic Type Approval Law and Road Traffic Law). they do not trigger unintended movements in all transport and working positions. -
Page 23: Hitched Implements
Safety 2.2.5 Hitched Implements 13. Caution! After switching off the PTO, there is danger due to the inertia of the flywheel mass! 1. Secure implements against rolling away. Keep away from the implement during this time. The machine may be worked on only if it is 2. -
Page 24: Tyres
1. When working on the tyres make sure that the manufacturer of the implements! implement is safely shut down and has been This is guaranteed by original KRONE spare secured against rolling away (wheel chocks). parts! 2. You must have adequate knowledge and the 10. -
Page 25: Introduction
2.3 Introduction The KRONE Big Pack Baler is equipped with all safety devices (protective devices). However, it is not possible to eliminate all potential hazards on this machine since to do so would impair its full functional capability. You will find corresponding danger warnings on the machine that indicate the remaining residual risks. - Page 26 Safety 939 101-4 1000/ MAX. MAX. Before placing the machine The speed of the PTO must not exceed 1000 rpm! in operation, read the operating instructions and the safety The operating pressure of the hydraulic instructions and observe them. system must not exceed 200 bar! Order No.
-
Page 27: Special Safety Instructions
Safety 2.4 Special Safety Instructions 2.4.1 Ladder • Climb on the ladder only with PTO shaft switched off, engine turned off and ignition key withdrawn! • Riding on the Big Pack Baler or on the ladder is not permitted. There is a ladder (1) on the left side of the machine at the rear next to the baling channel that can be used, among other things, for maintenance work on the knotting mechanism. - Page 28 Safety II - 8...
-
Page 29: Start-Up And Transport
Start-up and Transport Start-up and Transport 3.1 Safety Instructions • Special caution is required when mounting and detaching the Big Pack Baler on and from the tractor. No one may stay between the tractor and Big Pack Baler. After successful coupling turn off the engine and pull out the ignition key. -
Page 30: Hydraulic Support Base (Optional)
Start-up and Transport Crank gear on the parking support: The crank (2) can be attached to the head of the parking support in both positions, (a) and (b). Position a) Direct transmission ratio 1:1 for quickly cranking the parking support up and down. Position b) Gear reduction for cranking the Big Pack Baler up and down if the Big Pack Baler is... -
Page 31: Holding Brake For Flywheel
Start-up and Transport 3.2.4 Holding Brake for Flywheel The flywheel holding brake (belt brake) is located on the left side on the machine on the drawbar. • To brake the flywheel move the brake lever (1) on the flywheel from position (a) into position (b). The flywheel is now braked. -
Page 32: Connecting To The Tractor
Start-up and Transport 3.3 Connecting to the Tractor • The Big Pack Baler must only be connected to tractors that are equipped with a matching hitch. • When the tractor is put back in front of the Big Pack Baler, there must be no one between the tractor and the baler. -
Page 33: Mounting On The Tractor Side
Start-up and Transport 3.4.2 Mounting on the tractor side Before pushing the PTO shaft onto the tractor PTO, do not fail to set the flywheel with its holding brake. Tractor side • Take the PTO shaft out from the retaining chain (1). •... -
Page 34: Hydraulic, Compressed Air And Electrical Connections
Start-up and Transport 3.5 Hydraulic, Compressed Air and Electrical Connections Depending on the version, a different number of hydraulic control valves is required on the tractor for the Big Pack Baler. The protective caps of the hydraulic hoses (1) placed in the stowage (2) are colour-coded. This ensures problem-free identification of the necessary control valves (see also Chapter 1 “Connection Requirements, Tractor”). -
Page 35: Load-Sensing Connection (Optional)
Start-up and Transport 3.5.3Load-Sensing Connection (optional) A Big Pack Baler with Comfort electronics or Comfort hydraulics is capable of load sensing. The advantage of using a tractor equipped for this is the lower output that is required because of less oil heating. The oil supply comes through the Power-Beyond of the tractor hydraulics for use of the load-sensing system. -
Page 36: Compressed Air Brake
Start-up and Transport 3.5.4 Compressed Air Brake Snap the coloured coupling heads of the compressed air hoses (1) into the correspondingly coloured couplings on the tractor. First let the yellow coupling head snap in and then the red coupling head. Uncoupling is in reverse order. -
Page 37: Electrical Connection Cables
Start-up and Transport 3.5.6 Electrical Connection Cables The Big Pack Baler requires a voltage source for the power supply of the on-board computer and lighting. A socket for installation on the tractor is part of the scope of supply. • The socket included with delivery can be connected directly to the 12-V battery of the tractor •... -
Page 38: Placing In Operation Again After An Extended Standstill Time
Start-up and Transport 3.6 Placing in Operation again after an Extended Standstill Time 3.6.1Safety Instructions • The following is a basic rule for all maintenance, mounting, repair and adjustment tasks: Bring the machine to a stop. Switch off the engine. Remove the ignition key. Tighten the flywheel brake. -
Page 39: Storage For Winter
Perform the necessary repair tasks immediately after the harvest season. Draw up a list of all replacement parts you will need. This will make it easier for your KRONE dealer to process your orders and you will be certain that your machine will be ready for use at the beginning of the next season. -
Page 40: Transport
Start-up and Transport 3.7 Transport 3.7.1 Preparations for Road Travel • Travelling on public roads is only allowed with empty baling channel, bale chute folded in and the pick-up is raised. • To prevent functions from being triggered accidentally, it is essential to turn off the control unit when the machine is being transported. -
Page 41: Moving
Start-up and Transport Hydraulically activated roller chute (optional): • Fold up the hydraulically activated roller chute hydraulically. After it is folded together, make certain that the mechanical lock has snapped into place. BPXC0122 Check the lighting system: • Check the rear lights (2) and reflectors (1) for proper functionality and clean them. -
Page 42: Coaster/Steering Axle (Optional)
Start-up and Transport 3.7.3 Coaster/Steering Axle (Optional) Make certain the shut-off valve (1) is in position (I) (opened) when the machine is in use. Before moving backward first move the rear axle wheels to a straight position if they are turned. Then charge the locking cylinder with air. -
Page 43: Parking The Big Pack Baler
Start-up and Transport 3.8 Parking the Big Pack Baler • Park the Big Pack Baler only on level and firm ground. If the Big Pack Baler is parked on soft ground, enlarge the base area of the parking support. • Secure the Big Pack Baler against rolling away with wheel chocks and by applying the parking brake. - Page 44 Start-up and Transport III - 16...
-
Page 45: Comfort Control Unit
Comfort Control Unit Comfort Control Unit 4.1 General Description The electronic equipment of the Big Pack Baler consists essentially of the job computer, the control unit and the control and function elements. The job computer (1) is located on the front left of the machine under the side hood. -
Page 46: Mounting
Comfort Control Unit 4.2 Mounting Mount the control unit with its support (1) where it can be seen by the driver. The support (1) can optionally be fastened directly in the cab or, using the suction base, on the front or side pane. Direct fastening •... - Page 47 Comfort Control Unit Electrical power supply When installing, take care that the connecting cables are not stretched and cannot come in contact with the tractor wheels. • Connect the power supply cable (12 V) on the tractor side to the 3-prong power outlet (DIN 9680) and on the machine side with the Delphi plug (5).
-
Page 48: Control Unit
Comfort Control Unit 4.3 Control Unit Overview BPK41010 1 On/Off key 2 Display 3 Keys (1 - 8) 4 Rotary potentiometer 5 Esc key (F) 6 Menu key (E) 7 A - D keys IV - 4... -
Page 49: Operational Readiness
Comfort Control Unit Description of the keys Keys 1-8 The keys 1-8 are used to activate the softkeys located in the right column. For the assignment of the keys, see the illustration. If there is no softkey next to the key, it has no function. -
Page 50: Manual Mode
Comfort Control Unit 4.5 Manual Mode 4.5.1 Basic Screen for Manual Mode 1/2 BPK41017_4 IV - 6... - Page 51 Comfort Control Unit Status line • Machine duty Current states of the machine (depending on how it is Max. duty if continuously inverted. equipped) are shown in the top line: Flashing at lower loads. • Alarm message is pending If not inverted when baling => check the packer feed sensor.
-
Page 52: Basic Screen For Manual Mode 2/2
Comfort Control Unit 4.5.2 Basic Screen for Manual Mode 2/2 BPK41012_3 Softkeys: The following softkeys are located in the right column The following softkeys are located in the right column of page 2/2: of page 1/2: • To trigger the knotter •... - Page 53 Comfort Control Unit Displays in the main window (depending on how the machine is equipped) • Current baling force as a % (100% = max.) • Total number of bales, current customer counter • Current layer thickness (only for electrical bale length setting •...
- Page 54 Comfort Control Unit • Bale channel flap pressure (in bar) The value under the bar display and the height of the bar (1) indicate the current actual value of the bale channel flap pressure. The value above the bar display and the arrows in the bar display (2) indicate the set target bale channel flap pressure in bar.
- Page 55 Comfort Control Unit Setting the target bale channel flap pressure The pressure is specified by the user in manual mode. The pressure is built up immediately if the PTO is running and the machine is stopped. The pressure display barely fluctuates in the display. If the pressure is set too high, the machine may be exposed to mechanical overload during baling,...
- Page 56 Comfort Control Unit Setting the number of multi-bales (Multi-bale only) First set the bale length. Minimum length of the multi-bale: 45 cm (17,7 inch). The multi-bale number should only be changed at the start of a bale. Doing so could result in a mixture of total bale and multi-bale.
-
Page 57: Automatic Mode
Comfort Control Unit 4.6 Automatic Mode BPK41015_3 For a general description, see Chapter 4.5, Manual Setting the target baling force mode In Automatic mode, the pressure is automatically set Differences compared to manual mode based on the measured plunger force. Softkeys: The pressure display may deviate significantly in the display. -
Page 58: Buttons On The Machine
Comfort Control Unit 4.7 Buttons on the Machine The Comfort version has a few buttons located externally on the machine that can be used to per- form functions on the machine. 1. There are two buttons on the left front part of the machine on the front part of the twine box with the following functions: (1) Raise blade bar... -
Page 59: Description Of The Baling Process
Comfort Control Unit 4.8 Description of the Baling Process 4.8.1 Bale Channel is Empty 4.8.2 Bale Channel is Full When the control unit is turned on, the display is Same as Chapter 4.8.1 with the following difference: always in Manual mode. 1. -
Page 60: Menu Level
Comfort Control Unit 4.9 Menu Level Overview Correction value for bale length Knotter signal Settings Sensitivity of Customer direction display counters Counters Contrast Total counters Service Central lubrication Sensor test, manual Info Knotter blowing Actuator test, 1-6-1 manual Strokes / blow Technician Measuring unit 1-6-2... -
Page 61: Main Menu 1 "Settings
Comfort Control Unit The menu level is divided into five main menus: • = main menu 1 “Settings” • = main menu 2 “Counters” • = main menu 4 “Service” • = main menu 5 “Info” BPK40020 • = main menu 6 “Technician” •... -
Page 62: Menu 1-1 "Correction Value For Bale Length
Comfort Control Unit 4.9.3 Menu 1-1 “Correction value for bale length” (for machines with electr. bale length adjustment) Because of different properties of materials (for example straw, silage) the actual bale length may differ from the pre-set target value. The correction value can be used to correct this deviation. -
Page 63: Menu 1-2 "Knotter Signal
Comfort Control Unit 4.9.4 Menu 1-2 “Knotter signal” Activation/deactivation of the audio signal when a knot has been completed. Calling the menu Main menu 1 “Settings” is displayed • You can select menu 1-2 with the rotary potentiometer. The icon is shown in reverse colours. -
Page 64: Menu 1-3 "Sensitivity Of Direction Display
Comfort Control Unit 4.9.5 Menu 1-3 “Sensitivity of direction display” Setting the sensitivity of the direction display. Calling the menu Main menu 1 “Settings” is displayed • You can select menu 1-3 with the rotary potentiometer. The icon is shown in reverse colours. -
Page 65: Menu 1-4 "Contrast
Comfort Control Unit 4.9.6 Menu 1-4 "Contrast" Setting the display contrast. Calling the menu Main menu 1 "Settings" is displayed • You can select menu 1-4 with the rotary potentiometer. The icon is shown in reverse colours. • Press the rotary potentiometer. BPK40091 The display shows menu 1-4 "Contrast". -
Page 66: Menu 1-5 "Central Lubrication
Comfort Control Unit 4.9.7 Menu 1-5 “Central lubrication” (for machines with central lubrication) Setting lubrication intervals and lubrication duration. Calling the menu Main menu 1 “Settings” is displayed • You can select menu 1-5 with the rotary potentiometer. The icon is shown in reverse colours. -
Page 67: Menu 1-6 "Knotter Blowing
Comfort Control Unit 4.9.8 Menu 1-6 "Knotter blowing" Displaying the menu Main menu 1 "Settings" appears • You can select menu 1-6 with the rotary potentiometer. The icon is shown in reverse video. • Press the rotary potentiometer. The display shows menu 1-6 "Knotter blowing". Menu level 1-6 "Knotter blowing"... -
Page 68: Menu 1-6-1 "Strokes / Blow
Comfort Control Unit 4.9.8.1 Menu 1-6-1 "Strokes / blow" (for machines without electronic knotter triggering) Dust and accumulated crop material is removed from the knotters by compressed air at regular intervals (depending on the number of piston strokes completed). Adjusting the number of piston strokes Displaying the menu Menu 1-6 "Knotter blowing"... -
Page 69: Menu 1-6-2 "Bales / Blow
Comfort Control Unit 4.9.8.2 Menu 1-6-2 "Bales / blow" (for machines with electronic knotter triggering) Dust and accumulated crop material is removed from the knotters by compressed air at regular intervals (depending on the number of bales produced). Settings from 0.5 to 3 bales are possible. If you select a setting of 0.5, half of the bale is blown out at the end of the bale. -
Page 70: Menu 1-6-3 "Blow Time
Comfort Control Unit 4.9.8.3 Menu 1-6-3 "Blow time" You can adjust the blowing time on the knotter in this menu. Displaying the menu Menu 1-6 "Knotter blowing" appears • You can select menu 1-6-3 with the rotary potentiometer. The icon is shown in reverse video. •... -
Page 71: Menu 1-7 "Unit Of Measure
Comfort Control Unit 4.9.9 Menu 1-7 "Unit of measure" (for machines with electronic knotter triggering) Switch the unit of measure from Metric to US or vice versa. Meaning of the icons: Unit of measure Metric Unit of measure US Displaying the menu Main menu 1 "Settings"... -
Page 72: Main Menu 2 "Counters
Comfort Control Unit 4.9.10 Main Menu 2 “Counters” Calling the main menu • Call the main menu with the key. • You can select main menu 2 with the rotary potentiometer. The icon is shown in reverse colours. • Press the rotary potentiometer. BPK40130 The display shows menu level 2 “Counters”. - Page 73 Comfort Control Unit Activating customer counters • Turn the rotary potentiometer to select the desired customer counter (A). Then press the rotary potentiometer to activate. The desired customer counter (in this case customer counter 2) is shown in reverse colours ( 100.0 Activating the bale counter (cut / uncut bales The activated counter is shown in reverse „...
-
Page 74: Menu 2-2 "Total Counters
Comfort Control Unit 4.9.12 Menu 2-2 “Total counters” Calling the menu Main menu 2 “Counters” is displayed • You can select menu 2-2 with the rotary potentiometer. The icon is shown in reverse colours. • Press the rotary potentiometer. The display shows menu 2-2 “Total bale counters”. The total number of bales is the sum of all bales BPK40160 pressed. -
Page 75: Main Menu 4 "Service
Comfort Control Unit 4.9.13 Main Menu 4 “Service” Calling the main menu • Call the main menu with the key. • You can select main menu 4 with the rotary potentiometer. The icon is shown in reverse colours. • Press the rotary potentiometer. The display shows menu level 4 “Service”. - Page 76 Comfort Control Unit Diagnostics – Namur sensors State: state: • Alive (iron) 8,3V 7,3V • Not alive (no iron) • Broken cable 5,2V 2,4V • Short circuit 7,8V Setting values: BPK40200 The minimum and maximum setting value with the sensor alive (metal in front of the sensor) are shown in the upper part of the bar display.
- Page 77 Comfort Control Unit Diagnostics button State: • Broken cable • Short circuit • Pressed • Not pressed Setting values: BPK40210 When the button is held down, the bar must be in the lower marked area of the bar display. When the button is released, it should be in the upper area.
- Page 78 Comfort Control Unit Diagnostics – Force sensors Status messages are only valid if force sensors have already been adjusted correctly once. State: • Broken cable or short circuit • Defect in the sensor/force measurement amplifier or job computer BPK40531 Setting values: Inner marking: If a sensor has been changed or the bar is outside The bar must be between 1.8 V and 2.0 V...
-
Page 79: Menu 4-4 "Actuator Test, Manual
Comfort Control Unit 4.9.15 Menu 4-4 “Actuator test, manual” The actuator test is used to test the actuators installed on the machine. An actuator can only be tested if power is flowing through it. In the manual actuator test, on the other hand, the actuator must be controlled manually for a short time to be able to determine if there are any errors in the actuator system. - Page 80 Comfort Control Unit Diagnostics – digital actuators Errors are only displayed if the actuator is turned on and a test is possible for the actuator (see the table called “Possible digital actuators”). If necessary, the LED on the plug right on the actuator can be used for monitoring.
- Page 81 Comfort Control Unit Diagnostics – analog actuators (for example pressure limiting valve) A current (in mA) can be created with the PWM value (in parts per thousand). With a value of PWM = 500, the current should be between 1000 mA and 3000 mA (depending on the valve that is used and the operating temperature) •...
-
Page 82: Menu 4-5 "Current Alarms
Comfort Control Unit 4.9.16 Menu 4-5 “Current alarms” Currently pending errors are displayed in “Current alarms”. Calling the menu Main menu 4 “Service” is called. • You can select menu 4-5 with the rotary potentiometer. The icon is shown in reverse colours. -
Page 83: Main Menu 5 "Info
Comfort Control Unit 4.9.17 Main Menu 5 “Info” Calling the main menu • Call the main menu with the key. • You can select main menu 5 with the rotary potentiometer. The icon is shown in reverse colours. • Press the rotary potentiometer. The display shows menu 5 “Info”. -
Page 84: Main Menu 6 "Technician
Comfort Control Unit 4.9.19 Main Menu 6 “Technician” Calling the main menu • Call the main menu with the key. • You can select main menu 6 with the rotary potentiometer. The icon is shown in reverse colours. • Press the rotary potentiometer. Main menu 6 “Technician”... -
Page 85: Alarm Message
Comfort Control Unit 4.10 Alarm Message If a malfunction occurs in the machine an alarm message appears in the display and an audio signal is heard at the same time (rapid-interval horn sound). Description, possible cause and remedy are shown in Chapter 4.11. -
Page 86: Alarm Messages
Job computer defective Replace the job computer CAN connection broken CAN wiring defective Check the CAN wiring between job computer Krone I/O computer inactive Check the cables and Krone I/O computer Replace Krone I/O computer Undervoltage • Tractor battery defective Connect the Krone connection •... - Page 87 Comfort Control Unit Description Possible cause Remedy Twine monitoring - Twine torn - Checking the twine and - Twine end twine tensioner Packer monitoring - Blockage in the intake area of the - Stop the travel drive packer immediately - Reduce PTO speed until the blockage is cleared Baling force exceeded, Baling force exceeded...
- Page 88 Comfort Control Unit Description Possible cause Remedy Pick-up Pick-up or cutting system is not - Check mechanics turning Blockage - Cleaning Knotter motor has not triggered any - Check the knotter motor Knotter motor knots or the knotter sensor is not electrical system set correctly - Check the mechanics in the...
- Page 89 Comfort Control Unit Description Possible cause Remedy Knotter monitoring1 Knot missing Check knotter (knotter on far left (in No more twine the direction of travel)) Knotter monitoring2 Knot missing Check knotter (second knotter from No more twine the left (in the direction of travel)) Knotter monitoring3 Knot missing...
- Page 90 Comfort Control Unit Description Possible cause Remedy Knotter monitoring Sensor or line defective - Perform a sensor test sensor - Check the sensor and line for damage Measuring force Sensor or line defective - Perform a sensor test sensor - Check the sensor and line for damage Sensor or line defective - Perform a sensor test...
- Page 91 Comfort Control Unit Description Possible cause Remedy Bale ejector out button Button or line defective - Perform a sensor test - Check the button and line for damage Bale ejector in button Button or line defective - Perform a sensor test - Check the button and line for damage Blade bar up button...
- Page 92 Comfort Control Unit IV - 48...
-
Page 93: Iso Control
ISO Control 4.12 ISO Control 4.12.1 Working Principle ISO control is used exclusively for machines and systems that are compliant with Application Level 1 of International Standards Organisation (ISO) 11783. The purpose of ISO 11783 is to provide a complete uniform system for electronic systems in the vehicle. -
Page 94: Functions That Differ From The Krone In-Cab Comfort Kit
ISO terminal display via the attached device. The ISO terminal operates in a manner similar to the KRONE in-cab Comfort kit. Before starting the system up for the first time, please read the section on KRONE in-cab Comfort kit in the operating instructions. - Page 95 ISO terminal manufacturer. Menu item 1-7 “Unit of measure“ of the KRONE In-cab Comfort kit cannot be displayed on the ISO terminal. A setting is made directly via the ISO terminal. (if available) (refer to the...
- Page 96 ISO Control IV - 52...
-
Page 97: Medium Control Unit
Medium Control Unit Medium Control Unit 5.1 General Description The electronic equipment of the Big Pack Baler consists essentially of the job computer, the control unit and the control and function elements. The job computer (1) is located on the front left of the machine under the side hood. -
Page 98: Mounting
Medium Control Unit 5.2 Mounting Mount the control unit with its support (1) where it can be seen by the driver. . Direct fastening • Fasten the support (1) using the drill holes (2) already present. • The control unit (3) is held in place on the magnetic plate (4) on the support (1). -
Page 99: Control Unit
Medium Control Unit Electrical power supply When installing, take care that the connecting cables are not stretched and cannot come in contact with the tractor wheels. • Connect the power supply cable (12 V) on the tractor side to the 3-prong power outlet (DIN 9680) and on the machine side with the Delphi plug (5). - Page 100 Medium Control Unit 5.3 Control Unit Overview 1 On/Off button 2 Display 3 Keys (1 - 3) 4 Menu key (4) 5 “+” key (5) 6 Esc key (6) 7 “-” key (7) 8 OK key (8) BPM50010 V - 4...
-
Page 101: Operational Readiness
Medium Control Unit Description of the keys Keys 1-3 The keys 1-3 are used to activate the softkeys located in the line just above them. For the assignment of the keys, see the illustration. If there is no softkey above the key, it has no function. Key 4 key can be used to bring up the menu. -
Page 102: Manual Mode
Medium Control Unit 5.5 Manual Mode 5.5.1 Basic Screen for Manual Mode Softkeys: The following softkeys are found in the bottom line: • Switching between Manual/Automatic mode Activated operation is shown. Switching to Automatic mode Press key for softkey BPM50040 •... - Page 103 Medium Control Unit • Bale channel flap pressure (in bar) The first value (1) under the bar display and the height of the bar (1) indicate the current actual bale channel flap pressure. The second value (2) under the bar display and the arrows in the bar display (2) show the target bale channel flap pressure that was set in bar.
-
Page 104: Automatic Mode
Medium Control Unit 5.6 Automatic Mode For a general description, see Chapter 5.5 Manual Mode Differences compared to manual mode Softkeys: • Switching between Manual/Automatic mode Activated operation is shown. Switching to manual mode BPM50031 Press the key for softkey Displays in the main window: •... -
Page 105: Description Of The Baling Process
Medium Control Unit 5.7 Description of the Baling Process 5.7.2 Bale Channel is Full 5.7.1 Bale Channel is Empty Same as Chapter 5.7.1 with the following difference: When the control unit is turned on, the display is 1. If you will be baling in Automatic mode, you can always in Manual mode. -
Page 106: Menu Level
Medium Control Unit 5.8 Menu Level Overview Bale length setting, To trigger the knotter, Bale length correction value Knotter signal Settings Sensitivity of Customer direction display counters Counters Contrast Total counters Service Central lubrication Sensor test, manual Info Knotter blowing Actuator test, 1-6-1 manual... -
Page 107: Main Menu 1 "Settings
Medium Control Unit The menu level is divided into five main menus: • = main menu 1 “Settings” • = main menu 2 “Counters” • = main menu 4 “Service” • = main menu 5 “Info” • = main menu 6 “Technician” •... -
Page 108: Menu 1-1 "Bale Length Setting, To Trigger The Knotter, Bale Length Correction Value"
Medium Control Unit 5.8.3 Menu 1-1 “Bale length setting, To trigger the knotter, Bale length correction value” (for machines with electr. bale length adjustment) Because of different properties of materials (for example straw, silage) the actual bale length may differ from the pre-set target value. - Page 109 Medium Control Unit Setting and saving the bale length correction value Because of different properties of materials (for example straw, silage) the actual bale length may differ from the pre-set target value. The correction value can be used to correct this deviation. Factory setting: 100% If the bale is too long, reduce the correction value.
-
Page 110: Menu 1-2 "Knotter Signal
Medium Control Unit 5.8.4 Menu 1-2 “Knotter signal” Activation/deactivation of the audio signal when a knot has been completed. Calling the menu Main menu 1 “Settings” is displayed • You can select menu 1-2 with the keys. The icon is shown in reverse colours. •... -
Page 111: Menu 1-3 "Sensitivity Of Direction Display
Medium Control Unit 5.8.5 Menu 1-3 “Sensitivity of direction display” Setting the sensitivity of the direction display. Calling the menu Main menu 1 “Settings” is displayed • You can select menu 1-3 with the keys. The icon is shown in reverse colours. •... -
Page 112: Menu 1-4 "Contrast
Medium Control Unit 5.8.6 Menu 1-4 “Contrast” Setting the display contrast. Calling the menu Main menu 1 “Settings” is displayed • You can select menu 1-4 with the keys. The icon is shown in reverse colours. • Press the key. BPM50250 The display shows menu 1-4 “Contrast”. -
Page 113: Menu 1-5 "Central Lubrication
Medium Control Unit 5.8.7 Menu 1-5 “Central lubrication” (for machines with central lubrication) Setting lubrication intervals and lubrication duration. Calling the menu Main menu 1 “Settings” is displayed • You can select menu 1-5 with the keys. The icon is shown in reverse colours. •... -
Page 114: Menu 1-6 "Knotter Blowing
Medium Control Unit 5.8.8 Menu 1-6 "Knotter blowing" Displaying the menu Main menu 1 "Settings“ is displayed • You can select menu 1-6 with the keys. The icon is shown in reverse video. • Press the key. The display shows menu level 1-6 "Knotter blowing“. Menu level 1 "Knotter blowing“... -
Page 115: Menu 1-6-1 "Strokes / Blow
Medium Control Unit 5.8.8.1 Menu 1-6-1 "Strokes / blow" (for machines without electronic knotter triggering) Dust and accumulated crop material is removed from the knotters by compressed air at regular intervals (depending on the number of piston strokes completed). Adjusting the number of piston strokes Displaying the menu Menu 1-6 "Knotter blowing“... -
Page 116: Menu 1-6-2 "Bales / Blow
Medium Control Unit 5.8.8.2 Menu 1-6-2 "Bales / blow" (for machines with electronic knotter triggering) Dust and accumulated crop material is removed from the knotters by compressed air at regular intervals (depending on the number of bales produced). Settings from 0.5 to 3 bales are possible. If you select a setting of 0.5, half of the bale is blown out at the end of the bale. -
Page 117: Menu 1-6-3 "Blow Time
Medium Control Unit 5.8.8.3 Menu 1-6-3 "Blow time" You can adjust the blowing time on the knotter in this menu. Displaying the menu Menu 1-6 "Knotter blowing“ appears • You can select menu 1-6-3 with the keys. The icon is shown in reverse video. •... -
Page 118: Menu 1-7 "Unit Of Measure
Medium Control Unit 5.8.9 Menu 1-7 "Unit of measure" (for machines with electronic knotter triggering) Switch the unit of measure from Metric to US or vice versa. Meaning of the icons: Unit of measure Metric Unit of measure US Displaying the menu BPM50607 Main menu 1 "Settings“... -
Page 119: Main Menu 2 "Counters
Medium Control Unit 5.8.10 Main Menu 2 “Counters” Calling the main menu • Call the main menu with the key. • You can select main menu 2 with the keys. The icon is shown in reverse colours. • Press the key. - Page 120 Medium Control Unit Activating customer counters • You can use the key to bring up the desired customer counter. It appears in the top line. • Press the key. The desired customer counter (in this case customer counter 4) is shown in reverse colours ( Changing the number of bales BPM50120 •...
-
Page 121: Menu 2-2 "Total Counters
Medium Control Unit 5.8.12 Menu 2-2 “Total counters” Calling the menu Main menu 2 “Counters” is displayed • You can select menu 2-2 with the keys. The icon is shown in reverse colours. • Press the key. The display shows menu 2- 2 “Total counters”. The total number of bales is the sum of all bales pressed. -
Page 122: Main Menu 4 "Service
Medium Control Unit 5.8.13 Main Menu 4 “Service” Calling the main menu • Call the main menu with the key. • You can select main menu 4 with the keys. The icon is shown in reverse colours. • Press the key. - Page 123 Medium Control Unit Diagnostics – Namur sensors 8,3V State: 7,3V • Alive (iron) • Not alive (no iron) 5,2V • Broken cable state 2,4V • Short circuit 7,8V Setting values: BPM50520 The minimum and maximum setting value with the sensor alive (metal in front of the sensor) are shown in the upper part of the bar display.
- Page 124 Medium Control Unit Diagnostics – analog sensors State: • Broken cable or short circuit • Defect in the sensor or job computer Setting values: The bar must be inside the marked area of the bar display. Possible analog sensors BPM50530 (depending on the design of the machine) Icon Description...
- Page 125 Medium Control Unit Diagnostics – power supply voltages Nominal voltages: • 12 V tot.: 12 - 14.5 V • 12 V Ter: 12 - 14.5 V • SS_5V: 4.5 -5.5 V • 8 V ana: 8.5 -9.1 V • 8 V dig: 8.5 -9.1 V •...
-
Page 126: Menu 4-4 "Actuator Test, Manual
Medium Control Unit 5.8.15 Menu 4-4 “Actuator test, manual” The actuator test is used to test the actuators installed on the machine. An actuator can only be tested if power is flowing through it. In the actuator test, on the other hand, the actuator must be controlled manually for a short time to be able to determine if there are any errors in the actuator system. - Page 127 Medium Control Unit Diagnostics – digital actuators Errors are only displayed if the actuator is turned on and a test is possible for the actuator (see the table called “Possible digital actuators”). If necessary, the LED on the plug right on the actuator can be used for monitoring.
- Page 128 Medium Control Unit Diagnostics – analog actuators (for example pressure limiting valve) A current (in mA) can be created with the PWM value (in parts per thousand). If the PWM value = 1000, the current should be between 500 mA and 3000 mA (depending on the valve that is used) •...
-
Page 129: Menu 4-5 "Current Alarms
Medium Control Unit 5.8.16 Menu 4-5 "Current alarms" Currently pending errors are displayed in „Current alarms“. Calling the menu Main menu 4 "Service" is called. • You can select menu 4-5 with the keys. The icon is shown in reverse colours. •... -
Page 130: Main Menu 5 "Info
Medium Control Unit 5.8.17 Main Menu 5 “Info” Calling the main menu • Call the main menu with the key. • You can select main menu 5 with the keys. The icon is shown in reverse colours. • Press the key. -
Page 131: Info Window
Medium Control Unit 5.8.18 Info window The display shows menu 5-9 Number of layers per “ bale“ • Pressing the key brings up the basic screen. BPM50355 5.8.19 Main Menu 6 “Technician” Calling the main menu • Call the main menu with the key. -
Page 132: Alarm Message
Medium Control Unit 5.9 Alarm Message If a malfunction occurs in the machine an alarm message appears in the display and an audio signal is heard at the same time (rapid-interval horn sound). Description, possible cause and remedy are shown in Chapter 5.10. -
Page 133: Alarm Messages
Job computer defective Replace the job computer CAN connection broken CAN wiring defective Check the CAN wiring between job computer Krone I/O computer inactive Check the cables and Krone I/O computer Replace Krone I/O computer Undervoltage • Tractor battery defective Connect the Krone connection •... - Page 134 Medium Control Unit Description Possible cause Remedy Twine monitoring - Twine torn - Checking the twine and twine - Twine end tensioner - Stop the travel drive Packer monitoring - Blockage in the intake area of the immediately packer - Reduce PTO speed until the blockage is cleared The following measures must Baling force exceeded...
- Page 135 Medium Control Unit Description Possible cause Remedy Pick-up Pick-up or cutting system is not turning - Check mechanics Blockage - Cleaner Knotter motor Knotter motor has not triggered any - Check the knotter motor knots or the knotter sensor is not set electrical system correctly - Check the mechanics in the...
- Page 136 Medium Control Unit Description Possible cause Remedy Twine monitoring sensor Sensor or line defective - Perform a sensor test - Check the sensor and line for damage Packer monitoring Sensor or line defective - Perform a sensor test sensors - Check the sensor and line for damage Packer feed sensor Sensor or line defective...
- Page 137 Medium Control Unit Description Possible cause Remedy Bale chute sensor Sensor or line defective - Perform a sensor test - Check the sensor and line for damage Force sensor, right Sensor, measurement amplifier or - Check the sensor and line for line defective damage Force sensor, left...
- Page 138 Medium Control Unit V - 42...
- Page 139 Dieses Kapitel ist bewußt freigelassen worden 6 This section has been left blank intentionally!! VI - 1...
- Page 140 Dieses Kapitel ist bewußt freigelassen worden VI - 2...
-
Page 141: Working With The Big Pack Baler
Working with the Big Pack Baler Working with the Big Pack Baler 7.1 Safety Instructions • The following is a basic rule for all maintenance, mounting, repair and adjustment tasks: Turn off the PTO. Turn off the engine and remove the ignition key. Apply the flywheel brake. •... - Page 142 Working with the Big Pack Baler Determining the working height of the pick-up The working height of the pick-up can be adjusted by manually moving the stoppers (1) on either side of the machine. This makes it possible to drive the machine without feeler wheels with the pick-up in fixed position.
-
Page 143: Safety Instructions
Cutting length The cutting system of the Big Pack 890 XC can be fitted with a maximum of 16 blades, that of the Big Pack 1270 XC/1290 XC with a maximum of 26 blades. The theoretical cutting length is then 44 mm. - Page 144 Working with the Big Pack Baler Changing blades Blades are changed on the right and left side of the machine. Jobs on the left side of the machine are described below. The same applies for the right side of the machine. Lower the cutting system: Before lowering, the knife selection system must be in position (1) for the...
- Page 145 Working with the Big Pack Baler Unlocking the blade shaft • Unlock the locking lever (1) (Pos. II). • The blades (2) can now be removed vertically upward • Set the new blades in place. • Set the blind blades in the positions where no blades are required.
-
Page 146: Baling Force Regulation
Working with the Big Pack Baler 7.4 Baling Force Regulation The baling force in the baling channel is regulated by an electronic/hydraulic system. The force of pressure can be adjusted from the tractor controls. The pressure can be read directly on the control unit (see Chapter 4 and 5). -
Page 147: Emptying The Baling Channel
Working with the Big Pack Baler 7.5 Emptying the Baling Channel Before the baling channel is emptied, any baling material that is in the baling channel should be tied up. To do this, trigger the tying process manually (see Chapter “Triggering the tying process manually”). -
Page 148: Length Adjustment Of Big Bales
Working with the Big Pack Baler • To extend the bale chute (2), raise the safety sleeve (3) and move the lower control lever (4) into position (b). • To retract the bale chute (2), raise the safety sleeve (3), activate the control lever (4) and move it to position (a). -
Page 149: Twine
Working with the Big Pack Baler 7.8 Twine 7.8.1 Electrical Twine Empty Display When the end of the twine is reached or the twine has been torn, the stretching twine tensioners (1) come to rest on the rotation bracket (2). An audio warning signal is sounded on the control unit. -
Page 150: Initiate The Tying Process Manually
Working with the Big Pack Baler 7.8.3 Initiate the Tying Process Manually For the tying twine to reach the baling channel and be grasped by the knotter, the tying process must be triggered manually. To do this: • Swivel the safety lever (2) down. With mechanical triggering: •... -
Page 151: Gears
Working with the Big Pack Baler 7.9 Gears Main drive A bevel spur gear serves as main drive. The necessary torque is transmitted through the PTO shaft and a generously dimensioned flywheel. The maximum drive speed must not exceed 1000 rpm. The PTO shaft is protected on the machine side by a friction clutch (1). - Page 152 Working with the Big Pack Baler Feed packer drum drive The drive of the feed packer drum is located on the left side of the machine. The gearbox is protected by a spring-loaded ratchet clutch or by a shear screw. As soon as the ratchet clutch responds, stop the tractor and reduce the speed until the machine has cleared itself again.
- Page 153 Working with the Big Pack Baler Pick-up drive for XC cutting system The torque is transmitted through a star ratchet to the drive chain of the pick-up from the output of the lower angular gear of the cutting system. As soon as the overload coupling responds, stop the tractor and reduce the speed until the machine has cleared itself again.
-
Page 154: Multi-Bale Device(Optional)
Working with the Big Pack Baler 7.10 Multi-Bale Device(optional) In the Multi-Bale design, the entire big bale can be divided up into as may as 6 small bales. The complete bale are held together by 4 twines, while small bales are held together by 2 twines each. If the Multi-Bale function is turned off, the conventional big bale is still bound up by 6 twines. -
Page 155: Settings
Settings Settings 8.1 Safety Instructions • The following is a basic rule for all maintenance, mounting, repair and adjustment tasks: Turn off the PTO. Turn off the engine and remove the ignition key. Apply the flywheel brake. • Put the Big Pack Baler into operation only if all protective devices are attached and in proper working order! •... - Page 156 Settings Setting the tying twine in place Each time before you set new tying twine in place, the knotter shaft must be secured so that the needle yoke cannot be put in motion. To do this, move the safety lever (1) from position (a) to position (b) and set it down on the journal (2).
- Page 157 Number of rollers Number of rollers Reserve of knotters Tying twine/knotter Tying twine/knotter (twine below) (twine above) Big Pack 890 Big Pack 1270 Big Pack 1290 When placing the tying twine in the BP 890 Doppelknoter twine box, make certain that the labelling on the rolls can be read.
- Page 158 Settings Threading the tying twine Single knotter Thread the tying twine coming through the lower twine openings of the twine box through the outer twine guide and into the eyes. From here, thread them through the twine tension springs into the tying needles and knot them on the corresponding eyes on the frame.
- Page 159 Big Pack 1270/1290 right side BPXC0016 Big Pack 1270/1290 left side BPXC0018 Big Pack 890 right side BPXC0017 Big Pack 890 left side BPXC0019 VIII - 5...
-
Page 160: Needle Adjustment
Settings Double knotter for the upper twine strand: The twine (1) is fed in through the eyes (2) of the twine box through the twine guide (3) and through the eyes (9) into the brake (4). From there it goes through the eyes of the tension arm (5) and through the upper needle rollers (6) onto the upper side of the bale. - Page 161 Settings Only make adjustments with the twine threaded in! Height of the needles on the knotter To adjust the height of the needles (4) when they enter into the knotter, after initiating the tying process by turning the flywheel manually, turn the needle yoke upwards in the working direction until the lower roller is Standard knotter on the needle point above the cleaners (6) of the driver...
- Page 162 Settings Adjustment of the needle yoke brake The needle yoke brake should not be set until the height of the needle on the knotter and the upper dead point of the needle have previously been set! When the needle yoke is in the idle position, i.e. the crank arm (1) and the needle connecting rod (2) are extended, the distance between the cross tube of the needle yoke (4) and the brake (3) must be...
- Page 163 Settings Needles to the baling ram To adjust the needles to the baling ram, first dismount the drive PTO shaft of the knotter shaft. After that, turn the baling ram on the flywheel manually in its running direction until the crank arms (3) and the connecting rod (4) are perfectly aligned (i.e.
- Page 164 Settings Setting of the Upper Needle The upper needle should be set so that the individual arms of the upper needles (1) are centred in the channel slot (2). This can be done by lining up on the ends of the upper needle shaft with shim rings.
-
Page 165: Twine Bar
Settings 8.2.3 Twine Bar The twine bar (1) moves the tying twine away from the needle and pushes it against the knotter hook. If the tying twine is not grasped by the twine bars, the knotter hook cannot receive the tying twine. 8.2.3.1 Setting of the Twine Bar (Single Knotter) Initiating the tying process. -
Page 166: Setting Of The Twine Bar (Double Knotter)
Settings 8.2.3.2 Setting of the Twine Bar (Double Knotter) For the double knotter, the setting of the twine bar should be made with the second knot. To do this, continue tying by turning the flywheel. After the first knot (closing knot) is complete, the needle moves back down again and the upper needle enters into the channel slot to its deepest point. - Page 167 Settings Pretension on the Twine Bar Shaft Pre-tension the twine bar shaft spring (1) until dimension a= 220 mm between the eyes of the spring (1). BPXC0228 Setting the Knotter Shaft Brake Pre-tension the springs (1) on the knotter shaft brake until dimension a= approx.
-
Page 168: Twine Brake
Settings 8.2.4 Twine Brake Single knotter The twine brakes (2) are located in the twine box. The tying twine (1) is held under tension by the setting screws (3). Different types of tying twine may have different friction properties. The drawing tension of the tying strand must be checked when you start using a different type of tying twine. - Page 169 Settings Twine tension on the upper twine strand The upper strands of twine (1) should be held by the brakes (2) up to a drawing force of 100 - 120 N. Before the twine brakes will allow the twine to slip through, the twine tension arm (3) should move down- ward against the spring force until the twine (1) is guided through the eye of the tension arm (4) almost without...
- Page 170 Settings 8.3 Knotter Safety instructions • All maintenance, adjustment and repair tasks on knotters must only be performed when the machine is at a standstill. Turn off the engine and remove the ignition key. • Apply the flywheel brake. • Secure the knotter against being triggered unintentionally by moving the lock bar.
- Page 171 Settings Knotter hook The closer is held under tension by the compression spring (3) and presses on the knotter tongue roller. The spring is set in zero position (refer to Chapter „Setting the zero position“). The setting dimension of the compression spring is 28.5 -0.5 Not enough contact pressure results in ties not being...
- Page 172 Settings Blade lever Ensure that the extractor comb on the blade lever glides lightly along the back of the knotter hook in the middle. Adjusting the blade lever too closely will cause wear on the control cams of the knotter disc and on the blade lever.
-
Page 173: The Knotter Hook
Settings 8.3.2 Double knotter 8.3.2.1 The knotter hook The knotter tongue (5) of the knotter hook (2) is tensioned by the leaf spring (3) on the closer (1). • If the clamping effect on the knotter tongue (5) is too big, the knot will be l eft hanging in the knotter tongue. - Page 174 Settings Setting the holding force of the twine retainer (6) The holding force has been preset in the works of the manufacturer. The type and moisture content of baling material and its baling density as well as the tying twine that is selected all require different settings, which have to be determined by trial and error under actual working conditions.
-
Page 175: Baling Ram Setting
The baling ram (3) of the Big Pack 1270/1290 is equipped with seven blades. • The baling ram (3) of the Big Pack 890 is only equipped with 5 blades (5) because of the small width of the baling channel. -
Page 176: Adjusting The Packer Relative To The Baling Ram
Settings Cleaning the running rails The cleaning rails (2) are positioned on the four rollers (3). They remove dirt deposits from the running rails of the baling ram. To adjust, loosen the screws (1) and adjust the cleaning rails to the dimension a = 1 - 2 mm. Tighten the screws again. - Page 177 Settings Ensure that the VFS system is located in zero position (refer to Chapter „Set- ting the zero position“). 8.5.2 Setting the packer BigPack 890/1290/1290 HDP: Turn the packer manually in the working direction by turning the flywheel until the large packer strip roller (9) running in front of the feeder strip is located directly behind the viewing window (10).
- Page 178 Settings • Secure the packer in this position with a mounting lever. • Remove the roller chain (5) from the packer gearbox drive shaft (7). • Move the plunger rod to the extended position (rear dead point) until the marks (8) on the main gearbox match.
-
Page 179: Variable Filling System Vfs
Settings 8.6 Variable filling system VFS 8.6.1 Installing the Feeler Rocker The feeler rocker (1) and threaded rod (2) must be mounted in different positions according to machine type. Position Position of feeler rocker of threaded rod BP 1270 BP 890/1290 BPXC0164 8.6.2 Adjusting the Clutch... -
Page 180: Adjusting The Triggering Sensitivity
Settings 8.6.3 Adjusting the Triggering Sensitivity The purpose of the spring (8) is to pretension the feeler rocker through the anvil (4) and the threaded rod (2) and to move it into the position it swings back into after the fodder has been pushed in. -
Page 181: Absorbing Mechanism
Settings 8.6.4 Absorbing Mechanism The purpose of the absorbing mechanism is to prevent the feeler rocker from triggering the VFS clutch unintentionally by recoiling back against The length of the braking path in the two stop positions can be adjusted with the slotted brake jaw (2). -
Page 182: Adjusting The Flywheel Cleaning (Only For Big Pack 890)
Settings 8.7 Adjusting the Flywheel Cleaning (Only for Big Pack 890) Even minor accumulations of dirt inside the flywheel (1) can result in imbalances. For this reason, you should regularly check the setting of the plastic rail (2). If the... -
Page 183: Adjusting The Baling Chute
Settings 8.9 Adjusting the Baling Chute When it is unfolded, the bale chute represents an extension of the baling channel. For big bales to be set down on the ground correctly, the back edge of the baling chute must not be too high above the ground. Otherwise the bales will be damaged when they are placed on the ground. -
Page 184: Multi-Bale Setting
Settings 8.10 Multi-Bale Setting 8.10.1 Setting the position of the second needle yoke The tube (2) of the needle yoke (3) has to be located in the trough (4). If this is not the case, please proceed as follows: • Check the knotter needle setting relative to the knotter, and adjust, if and when necessary (refer to Chapter „Needle Setting“). -
Page 185: Setting The Lock (Frame)
Settings 8.10.4 Setting the lock (frame) • Adjust the support tube (10) so that the distance between the interlocking (11) and the support tube (10) is Z = 15-35 mm. BPXC0247 8.10.5 Setting the locks of the needle yoke In order to ensure a safe lock of the second needle yoke (13), the lock (11) (as shown in the adjacent illustration) has to have a space of U = 3 –... -
Page 186: Possible Setting Errors And How To Eliminate Them
Settings 8.10.7 Possible setting errors and how to eliminate them Malfunction Possible cause Remedy Needle yoke (2) recoils Needle yoke brake (1) is mounted too Mount the needle yoke brake further to the rear. back out forward from far forward in the direction of travel. the needle yoke brake (1). - Page 187 Settings VIII - 33...
- Page 188 Settings VIII - 34...
-
Page 189: Care, Maintenance And Lubrication
Care and Maintenance Care, Maintenance and Lubrication Safety Instructions • Commissioning, upkeep, maintenance and cleaning tasks must only be performed when the machine is at a standstill. Turn off the engine and remove the ignition key. Apply the flywheel brake. •... -
Page 190: Cleaning
Care and Maintenance 9.2.2 Cleaning The Big Pack Baler, especially the knotter, must be cleaned of chaff and dust after every use. Under very dry working conditions, the cleaning must be repeated several times a day. The packer control system and the flywheel must also be cleaned daily of chaff and dust. -
Page 191: Hydraulics
Check the hydraulic hoses and lines regularly and replace them if they are damaged. • Spare parts must correspond to the technical requirements of the machine manufacturer. For this reason, use KRONE original spare parts only. • Repair jobs on the hydraulic system should only be performed by trained and authorised professionals. -
Page 192: Work Hydraulics (Comfort
Care and Maintenance 9.3.3 Work Hydraulics (Comfort) Changing the filter: The hydraulic filter (1) is located in the front part of the drawbar and must also be replaced once a year. On the process for changing the filter, see Chapter “On-board hydraulics“. - Page 193 Care and Maintenance 9.3.4 Emergency Manual Activation 9.3.4.1 Controlling the Baling Force • The pressure adjustment of the bale channel flaps can be made in Emergency mode while the machine is running. Special caution must be exercised when making the adjustment.
-
Page 194: Checking And Changing The Oil On The Gearboxes
Care and Maintenance Checking and Changing the Oil on the Gearboxes 9.4.1 General Information • When checking the oil level on the gearboxes, care must be taken that the Big Pack Baler is in a horizontal position. Use the lower edges of the twine boxes as a reference surface. •... -
Page 195: Distributor Gearbox
Care and Maintenance 9.4.4 Distributor Gearbox The distributor gearbox (2) is located on the left side of the machine. Checking the oil level Check the oil level in the distributor gearbox (2) each time before using the machine. To do this, screw out the control screw (1). -
Page 196: Cutting System Drive Gearbox For The Big Pack Xc, Upper And Lower
Care and Maintenance 9.4.6 Cutting System Drive Gearbox for the Big Pack XC, Upper and Lower On the right side of the machine there is an angular gearbox (upper) and a pick-up/cutting system distributor gearbox (lower). Checking the oil level Check the oil level in the upper angular gearbox (3) each time before using the machine. -
Page 197: Brake System
Work on the brake system should only be performed by trained professionals or by suitable workshops. • KRONE is not responsible for natural wear, defects caused by overload or changes made to the brake system. • No changes may be made to the brake system without the approval of KRONE. -
Page 198: Adjusting The Transfer Mechanism
Care and Maintenance 9.5.3 Adjusting the Transfer Mechanism Brake setting Depending on how the machine is used, the wear on and proper functionality of the brakes must be checked regularly and reset if necessary. After the first few kilometres of driving, the transfer mechanisms and the brake linings of the brake drum will have adjusted. -
Page 199: Compressor
Care and Maintenance Compressor If the Big Pack Baler is equipped with hydraulic brakes the supply of compressed air for knotter cleaning is provided through a compressor (1) mounted between the drawbar beams. It is driven via a V-belt pulley (3) mounted on the flywheel and a V-belt (2). -
Page 200: Lubrication
Care and Maintenance Lubrication 9.8.1 Special Safety Instructions • Commissioning, upkeep, maintenance and cleaning tasks must only be performed when the machine is at a standstill. Turn off the engine and remove the ignition key. Apply the flywheel brake. • Secure the Big Pack Baler and tractor against rolling. -
Page 201: Rollers And Cam Follower Rollers On The Packer Strips
Care and Maintenance 9.8.3.2 Rollers and Cam Follower Rollers on the Packer Strips Packer strips can be lubricated through the openings (5) on the left side of the machine. To do this: • Go to the platform (2) on the drawbar and turn the flywheel (1) far enough in the work direction so that the mark (3) (on the packer lever) matches the mark (4) (on the cam disc). -
Page 202: Lubricating Points
Main drive BP 1290 HDP 250 h Pick-up drive ** 200 h Knotter drive 200 h * : Big Pack 890/Big Pack 1270 or 1290 optional Knotter cen. lub.: Knotter central lubrication possible Autom.: Automatic central lubrication possible No central lubrication possible... - Page 203 50 h Multi-bale coupling of needle yokes ** 10 h Knot. lub. Autom. * : Big Pack 890/Big Pack 1270 or 1290 ** : optional Knotter cen. lub.: Knotter central lubrication possible Autom.: Automatic central lubrication possible No central lubrication possible...
- Page 204 Care and Maintenance Lubrication points on the Big Pack Baler (left side of the machine) IX - 16...
- Page 205 Care and Maintenance Lubrication points on the Big Pack Baler (right side of the machine) IX- 17...
- Page 206 Care and Maintenance Lubrication points on the Big Pack Baler with XC cutting system (left side of the machine) IX - 18...
- Page 207 Care and Maintenance Lubrication points on the Big Pack Baler with XC cutting system (right side of the machine) IX- 19...
-
Page 208: Automatic Central Lubrication (Optional
Care and Maintenance 9.8.5 Automatic Central Lubrication (Optional) Functional description of the BEKA-MAX grease central lubrication system The BEKA-MAX grease central lubrication system is a progressive system. Progressive means that all lubricating points included in the central lubricating system are lubricated one after the other. Lubricating the lubrication points one after the other makes it very easy to monitor a progressive central lubrication system with an over-pressure valve. -
Page 209: Position Of The Sensors
Care and Maintenance Position of the Sensors Depending on how the Big Pack Baler is equipped, the sensors that are shown below may not be present in all cases! Right side of the machine BPXC0280 Knotter monitoring Bale ejector Force sensors right Packer feed Force sensor left Packer monitoring... - Page 210 Care and Maintenance Left side of the machine BPXC0279 Blade bar up button Blade active Blade bar down button Upper blade bar 10 Multibale Bale channel flap pressure 11 Bale ejector in button Twine monitoring Bale ejector out button Needle connecting rod Bale chute up button Setting down bales Bale chute down button...
-
Page 211: Adjusting The Sensors
Care and Maintenance 9.10 Adjusting the Sensors Namur sensor d = 8 mm The dimension between the encoder (2) and the sensor (1) must be “a” = 0.5 mm. Setting • Loosen the nuts on either side of the sensor. •... - Page 212 Care and Maintenance IX - 24...
-
Page 213: Malfunctions, Causes And Remedies
Malfunctions – Causes and Remedies Malfunctions, Causes and Remedies 10.1 Safety Instructions • The following is a basic rule for all maintenance, mounting, repair and adjustment tasks: Bring the machine to a stop. Switch off the engine. Remove the ignition key. Tighten the flywheel brake. -
Page 214: General Malfunctions
Malfunctions – Causes and Remedies 10.2 General Malfunctions Cause and/or remedy Fault 1. Twine torn, twine tensioner is lying against the angle Horn for twine empty display engages. rail. 2. Tying twine used up - insert new tying twine. Baling ram/tying unit does not move. 1. -
Page 215: Malfunctions On The Knotter
Malfunctions – Causes and Remedies 10.3 Malfunctions on the Knotter 10.3.1 Single Knotter The most frequent knotter malfunctions are caused by minor problems that you can eliminate yourself in most cases. The errors may often be found in twine quality, twine guiding, twine tension, position of the tying needles or twine bar. - Page 216 Malfunctions – Causes and Remedies Cause and/or remedy Malfunction Ends of knots frayed. 1. Dull twine blade — sharpen the cutting edge of the twine blade or replace the blade. Knots only in the twine strand guided up by the needle. 2.
- Page 217 Malfunctions – Causes and Remedies Cause and/or remedy Malfunction Knots are left hanging on the knotter hook. 5. If the scraper path of the blade lever is not long enough (the blade lever can be deformed by a dull twine blade) — remove the blade lever and align it, or replace it if necessary.
-
Page 218: Double Knotter
Malfunctions – Causes and Remedies 10.3.2 Double Knotter Experience has shown that a majority of tying problems are the result of insufficient twine tension. Check the twine path and twine tension before starting work. The following list shows the most frequent malfunctions, their cause and a note on how to eliminate them. Otherwise reference is made to the chapter in which the topic in question is explained in greater detail. - Page 219 Malfunctions – Causes and Remedies X - 7...
- Page 220 Malfunctions – Causes and Remedies X - 8...
- Page 221 Malfunctions – Causes and Remedies X - 9...
- Page 222 Malfunctions – Causes and Remedies X - 10...
- Page 223 Malfunctions – Causes and Remedies X - 11...
- Page 224 Malfunctions – Causes and Remedies X - 12...
- Page 225 Malfunctions – Causes and Remedies X - 13...
- Page 226 Malfunctions – Causes and Remedies X - 14...
- Page 227 Malfunctions – Causes and Remedies X - 15...
-
Page 228: Troubleshooting In The Central Lubrication System
Malfunctions – Causes and Remedies 10.4 Troubleshooting in the Central Lubrication System Eliminating Malfunctions Fault Find out what is causing the blockage and eliminate the Blockage in the system or in any bearing con- cause. nected to it. PROCEDURE First check whether the conveyor pump is working and is sup- Manually activated systems. -
Page 229: A1 Circuit Diagrams Of The Hydraulic System
Appendix A1 Circuit Diagrams of the Hydraulic System A1.1 Work Hydraulics Part I for Medium and Comfort Version Electronics Connection to tractor hydraulics: 1x EW Pick-up (gelb) 2x DW support foot (green) 1x EW steering axle (green) Pickup tractor connection 331 742 1x EW 919-603... -
Page 230: A1.2 Work Hydraulics Part Ii For Comfort Version Electronics
Appendix A1.2 Work Hydraulics Part II for Comfort Version Electronics Connection to tractor hydraulics: 1 x EX / (DW) forward / pressure (red) 1 x T / (DW) reverse / tank (blue) 1 x LS load-sensing line (blue) For Comfort control block: Blade bar, bale ejector and roller chute 286-203 2x 334-997... -
Page 231: A1.3 Work Hydraulics Part Ii For Medium Version Electronics
Appendix A1.3 Work Hydraulics Part II for Medium Version Electronics Connection to tractor hydraulics: 2x DW blade bars (red) 2x DW bale ejector/roller chute (blue) Roller chute and bale ejector (Version 1) (Medium only) 334-997 282-203 919-603 919-714 Sticker for direction Tractor connection 2x DW... -
Page 232: A1.4 On-Board Hydraulics For Medium Version Electronics
Appendix A1.4 On-board Hydraulics for Medium Version Electronics 921-122 302-647 (in front of yoke) 2x 918-435 Plu.-Zyl. 80-250 (1270/90/130) 919-163 1x 918-435 Plu.-Zyl. 80-250 (890) 2x 918-492 Plu.-Zyl. 120-220 (1290HDP) 920-914 (neben DBV) 921-148 920-933 2x 918-436 Plu.-Zyl. 90-150 (890) 2x 918-481 Plu.-Zyl. -
Page 233: A2 Electrical Circuit Diagrams
Appendix A2 Electrical Circuit Diagrams A2.1 Medium Control Unit A- 5... - Page 234 Appendix A - 6...
- Page 235 Appendix A- 7...
- Page 236 Appendix A - 8...
- Page 237 Appendix A- 9...
- Page 238 Appendix A - 10...
-
Page 239: A2.2 Comfort Control Unit
Appendix A2.2 Comfort Control Unit A- 11... - Page 240 Appendix A - 12...
- Page 241 Appendix A- 13...
- Page 242 Appendix A - 14...
- Page 243 Appendix A- 15...
- Page 244 Appendix A - 16...
- Page 245 Appendix A- 17...
- Page 246 Appendix A - 18...
- Page 247 Appendix A- 19...
- Page 248 Appendix A - 20...
- Page 249 Appendix A- 21...
- Page 250 . . konsequent, kompetent Maschinenfabrik Bernard Krone GmbH Heinrich-Krone-Straße 10, D-48480 Spelle Postfach 11 63, D-48478 Spelle Phone +049 (0) 59 77/935-0 +049 (0) 59 77/935-339 Internet: http://www.krone.de eMail: info.ldm@krone.de...
Need help?
Do you have a question about the Big Pack 1270XC and is the answer not in the manual?
Questions and answers