
Related Manuals for Krone VariPack V 165 XC


Summary of Contents for Krone VariPack V 165 XC
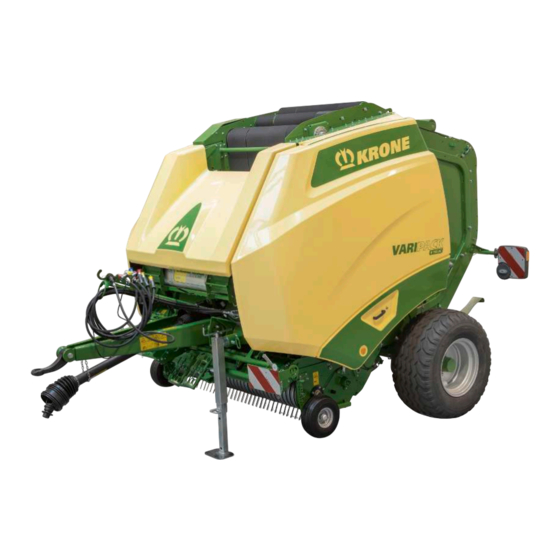
- Page 1 Original operating instructions Document number: 150001185_05_en Version: 22/09/2023 RP201-11 Round baler VariPack V 165 XC From machine number: 1136331...
- Page 2 Contact Maschinenfabrik Bernard Krone GmbH & Co. KG Heinrich-Krone-Straße 10 48480 Spelle Germany Telephone main office + 49 (0) 59 77/935-0 Telefax main office + 49 (0) 59 77/935-339 Telefax spare parts warehouse na- + 49 (0) 59 77/935-239 tional territory...
- Page 3 For information on your KRONE machines, also refer to mykrone.green. After you have registered, you can generate and manage your machines via the machine number so that you can view the machine data. Via your personal account, you can also access all KRONE Services.
-
Page 4: Table Of Contents
Identification plate ........................ 45 Scope of delivery ........................ 46 Function description net wrapping ..................... 47 Function description of twine tying ..................... 48 Function description cutting unit .................... 49 Technical data .......................... 50 VariPack V 165 XC Original operating instructions 150001185_05_en... - Page 5 Connecting foreign ISOBUS terminal .................. 71 7.13 Connecting joystick ........................ 72 7.14 Connecting the camera to the KRONE ISOBUS terminal CCI 800 or CCI 1200 ....... 75 Operation .......................... 76 Preparation before baling...................... 76 Filling the bale chamber ...................... 77 Completing the baling process, starting tying cycle and ejecting round bales ......
- Page 6 10.1 Touchable display ........................ 129 10.2 Switching terminal on/off ...................... 129 10.3 Design DS 500 ......................... 130 KRONE ISOBUS terminal (CCI 800, CCI 1200) .............. 132 11.1 Touchable display ........................ 132 11.2 Switching terminal on/off ...................... 133 11.3 Design of display........................ 134 11.4...
- Page 7 Menu 13-1 “Customer counter” .................... 175 14.20.2 Menu 13-2 "Total counter" ....................... 177 14.21 Menu 14 "ISOBUS" ........................ 178 14.21.1 Menu 14-5 "KRONE SmartConnect".................. 179 14.21.2 Menu 14-6 "Configuring TIM software" (for "TIM 1.0" version) .......... 180 14.21.3 Menu 14-9 "Switching between terminals"................ 181 14.22 Menu 15 "Settings"........................
- Page 8 Drain condensation water from the compressed air tank............ 240 17.26.3 Retighten tensioning straps at the compressed air tank ............ 241 17.27 Servicing the hydraulic system .................... 241 17.27.1 Before working on the hydraulic system .................. 242 VariPack V 165 XC Original operating instructions 150001185_05_en...
- Page 9 Checking the pressure limiting valve .................. 255 18.10 Filling the accumulator ...................... 255 18.11 Cleaning deflection rolls and baling belts................. 256 18.12 Car jack contact points...................... 256 Waste disposal ........................ 258 Index............................ 259 Declaration of conformity ..................... 269 VariPack V 165 XC Original operating instructions 150001185_05_en...
-
Page 10: Information On This Document
Information on This Document Validity This document is valid for machines of type: RP201-11 (VariPack V 165 XC) All information, illustrations and technical data in this document correspond to the latest state at the time of publication. We reserve the right to make design changes at any time and without notification of reasons. -
Page 11: Figures
Your machine may deviate from this document. 1.6.6 Means of representation Icons in the text The following means of representation (icons) are used to present the text more clearly: VariPack V 165 XC Original operating instructions 150001185_05_en... - Page 12 Explanation of danger sign This is the danger sign that warns of a risk of injury. Please observe all notes marked with the danger sign in order to avoid injuries or death. VariPack V 165 XC Original operating instructions 150001185_05_en...
- Page 13 “Information”. Example: INFO Each safety sign is provided with an order number and can be ordered directly from the manufacturer or from an authorised specialist dealer. VariPack V 165 XC Original operating instructions 150001185_05_en...
-
Page 14: Conversion Table
Kilometres per km/h 0.6215 Miles per hour hour Volumes Litres 0.2642 US gallon US gal. Millilitre 0.0338 US ounce US oz. Cubic centi- cm³ 0.0610 Cubic inch in³ metre Weight Kilogram 2.2046 Pound VariPack V 165 XC Original operating instructions 150001185_05_en... -
Page 15: Safety
• Attachment of unauthorised or unapproved additional equipment • Use of spare parts which are not KRONE original spare parts • Stationary operation of the machine Unauthorised modifications to the machine may affect the properties of the machine or disrupt proper operation. -
Page 16: Service Life Of The Machine
He has read the operating instructions and can implement the information in the operating instructions accordingly. • He is familiar with driving vehicles safely. • For road travel he has adequate knowledge of the highway code and has the stipulated driving licence. VariPack V 165 XC Original operating instructions 150001185_05_en... -
Page 17: Personnel Qualification Of The Technicians
2.4.6 Structural modifications on the machine Structural modifications and extensions that were not approved by KRONE can impair the functionality, operational safety and also the road traffic certification of the machine. As a result, persons can be seriously injured or killed. -
Page 18: Jobs On The Machine
„ Determine the cause of damage according to these operating instructions and repair the damage, if possible, Page 243. „ In case of damage which may affect operational safety and cannot be repaired according to these operating instructions: Have damage repaired by a qualified service centre. VariPack V 165 XC Original operating instructions 150001185_05_en... -
Page 19: Danger Zones
Page 28. This also applies to brief inspection work. „ Consider the information in all relevant operating instructions: • the operating instructions for the tractor • the operating instructions of the machine • the operating instructions of universal shaft VariPack V 165 XC Original operating instructions 150001185_05_en... - Page 20 „ In case of dangerous situations, immediately switch off drives and instruct people to leave the danger zone. Danger zone due to trailing machine parts If machine parts are trailing, people may be seriously injured or killed. VariPack V 165 XC Original operating instructions 150001185_05_en...
-
Page 21: Ensuring Functionality Of Safety Devices
„ Use only personal protective equipment which is in proper condition and offers effective protection. „ Adjust personal protective equipment to the person, for example the size. „ Remove unsuitable clothing and jewellery (e.g. rings, necklaces) and cover long hair with a hairnet. VariPack V 165 XC Original operating instructions 150001185_05_en... -
Page 22: Safety Sign On The Machine
„ Consider the overall width of the combined tractor and machine. „ Consider the larger swivel range when cornering. „ Adjust the driving speed when cornering. „ When turning, watch out for people, oncoming traffic and obstacles. VariPack V 165 XC Original operating instructions 150001185_05_en... -
Page 23: Parking The Machine Safely
Foreign objects and/or liquids in the hydraulic system and/or fuel system may impair the operational safety of the machine and cause accidents. „ Clean all connections and components. „ Close open connections by means of protective caps. VariPack V 165 XC Original operating instructions 150001185_05_en... -
Page 24: Dangers Arising From Environment
„ Warn people: Do not approach the machine. Electrical voltage differences on the ground may lead to severe electric shocks. „ Wait for help from professional rescue teams. The overhead line must be switched off. VariPack V 165 XC Original operating instructions 150001185_05_en... -
Page 25: Sources Of Danger On The Machine
Persons can suffer burns and/or scalding when hot liquids are drained. „ Wear personal protective equipment when hot consumables are drained. „ If necessary, allow liquids and machine parts to cool down before you start repair, maintenance and cleaning work. VariPack V 165 XC Original operating instructions 150001185_05_en... -
Page 26: Dangers In Connection With Certain Activities: Working On The Machine
„ Only perform work which is described in this operating instructions. Prior to any work, stop and safeguard the machine, Page 28. „ All other maintenance and repair work must only be performed by qualified specialist workshop. VariPack V 165 XC Original operating instructions 150001185_05_en... -
Page 27: Dangers In Connection With Certain Activities: Working On Wheels And Tyres
Frame or supporting components • Running gear „ Before carrying out welding work on the machine, obtain consent by KRONE customer service and, if required, identify alternatives. „ Before performing welding work on the machine, park the machine safely and disconnect it from the tractor. -
Page 28: Behaviour In Dangerous Situations And In Case Of Accidents
Safety routines The fitting of wheels and tyres requires adequate knowledge and approved mounting tools. „ If there is a lack of knowledge, have the wheels and tyres fitted by the KRONE dealer or by a qualified tyre service. „ When fitting tyres on the rims, never exceed the maximum permitted pressure specified by KRONE, otherwise the tyre or even the rim may explode, Page 50. -
Page 29: Securing Raised Machine And Machine Parts Against Lowering
„ Check installed seal rings for damage. Replace them if necessary. „ Collect leaking oil and/or waste oil in a container provided for this purpose, and dispose of it properly, Page 24. VariPack V 165 XC Original operating instructions 150001185_05_en... -
Page 30: Running Actuator Test
Safety sign on the machine Each safety sign is provided with an order number and can be ordered directly from the KRONE dealer. Immediately replace missing, damaged and unrecognisable safety signs. When attaching safety signs, the contact surface on the machine must be clean and free of dirt, oil and grease to ensure optimum adhesion of the safety signs. - Page 31 Safety Safety sign on the machine Location and meaning of the safety signs RPG000-165 VariPack V 165 XC Original operating instructions 150001185_05_en...
- Page 32 There is a danger of being drawn in if you approach the danger zone and if you use your hands or feet to remove crop blockages. „ Before working on the pick-up, switch off the PTO shaft and the engine. VariPack V 165 XC Original operating instructions 150001185_05_en...
- Page 33 Danger due to rotating machine parts When the machine is running, there is a risk of injury due to rotating machine parts. „ Before starting up, move the guards into their protective position. VariPack V 165 XC Original operating instructions 150001185_05_en...
- Page 34 27 028 023 0 13. Ord. no. 27 013 422 0 (2x) Danger due to impact Risk of injury from the rolling bale. „ Ensure that no one remains in the danger zone. VariPack V 165 XC Original operating instructions 150001185_05_en...
-
Page 35: Information Signs On The Machine
Each information sign is provided with an order number and can be ordered directly from the KRONE dealer. Immediately replace missing, damaged and unrecognisable information signs. When attaching information signs, the contact surface on the machine must be clean and free of dirt, oil and grease to ensure optimum adhesion of the information signs. - Page 36 Location and meaning of the information signs RPG000-231 1. Ord. no. 27 025 114 0 (1x) This shows how to load the net in the machine, Page 94. ca. 2 m ca. 10 cm 27 025 114 0 VariPack V 165 XC Original operating instructions 150001185_05_en...
- Page 37 835 mm for hay and 855 mm for straw when the machine is connected to the tractor, Page 55. 835 mm 855 mm 27 029 222 00 VariPack V 165 XC Original operating instructions 150001185_05_en...
- Page 38 Page 256. • Order no. 942 012 2 There are suspension points on the machine which are marked by this information sign, Page 197. 942 012 2 • Ord. no. 27 023 958 0 VariPack V 165 XC Original operating instructions 150001185_05_en...
- Page 39 Safety Information signs on the machine There are lashing points on the machine which are marked by this information sign, Page 198. 27 023 958 0 VariPack V 165 XC Original operating instructions 150001185_05_en...
-
Page 40: Safety Equipment
Safety Safety equipment Safety equipment RPG000-158 VariPack V 165 XC Original operating instructions 150001185_05_en... - Page 41 (every 2 years) are observed. „ Observe country specifications. The inspection intervals may differ from one country to another. If this is the case, follow the instructions on the fire extinguisher. Further information, Page 228. VariPack V 165 XC Original operating instructions 150001185_05_en...
-
Page 42: Smv Emblem
The SMV emblem (1) is at the rear in the centre or on left. If the machine is transported on transport vehicles (for example lorry or train), the SMV emblem must be covered or dismounted. VariPack V 165 XC Original operating instructions 150001185_05_en... -
Page 43: Data Memory
- can be related to persons. Additional functions, which are contractually agreed with the customer (e.g. teleservice), allow the transmission of certain machine data from the machine. VariPack V 165 XC Original operating instructions 150001185_05_en... -
Page 44: Machine Description
14 Support jack 6 Road travel lighting 15 Drawbar 7 Bale ejector 16 Safety chain (depending on country version) 8 Blade cassette 17 Lanyard (depending on country ver- sion) 9 Integral cutting rotor VariPack V 165 XC Original operating instructions 150001185_05_en... -
Page 45: Overload Protections On The Machine
If the cam clutch is actuated due to a machine overload, Page 229. Pick-up drive To prevent an overload, there is a claw coupling on the pick-up drive. This claw coupling has been set at the factory and must not be adjusted without consulting your KRONE service partner. Identification plate INFO... -
Page 46: Scope Of Delivery
The machine number results from the last 7 digits of the vehicle identification number (5). To ensure that the data is always available, KRONE recommends that you enter it in the boxes on the front cover of these operating instructions. -
Page 47: Function Description Net Wrapping
5 7-pole connection cable for road travel lighting 2 Ring spanner 6 Hose and cable support 3 Terminal (depending on version) 7 Test roll KRONE excellent, net for net wrapping 4 Small parts 8 Universal shaft bracket Function description net wrapping RP001-024 The net roll (2) lies in the net holder (1) and is inserted into the double wrapping unit. -
Page 48: Function Description Of Twine Tying
Function description of twine tying RP001-281 (I) Zero position The double wrapping unit is in the zero position (I) when no round bale is wrapped. The twine arms (1) and the blade (2) are completely retracted. VariPack V 165 XC Original operating instructions 150001185_05_en... -
Page 49: Function Description Cutting Unit
From the tractor, the blade cassette can be swivelled hydraulically out of the feed channel if there are any crop blockages, Page 88. VariPack V 165 XC Original operating instructions 150001185_05_en... -
Page 50: Technical Data
Technically permitted maximum speed (road travel) 40 km/h Airborne noise emission Airborne noise emission Emissions value (sound pressure level) 73.2 dB Measurement device Bruel & Kjaer, Type 2236 Accuracy class Measurement uncertainty (according to DIN EN ISO 11201) 4 dB VariPack V 165 XC Original operating instructions 150001185_05_en... -
Page 51: Ambient Temperature
Net wrapping and tying material Net wrapping and tying material External diameter of the net roll ø max. 300 mm Length of the sleeve max. 1,320 mm Recommended net width 1,230–1,250 mm VariPack V 165 XC Original operating instructions 150001185_05_en... -
Page 52: Requirements For Tractor - Power
Complying with change intervals for biooils To ensure high life expectancy of the machine, it is absolutely necessary to comply with change intervals for biooils due to the ageing of the oils. VariPack V 165 XC Original operating instructions 150001185_05_en... -
Page 53: Oils
If oils, which have different specifications, are mixed with each other, the machine may be damaged. „ Never mix oils, which have different specifications, with each other. „ Contact your KRONE service partner before using an oil with a different specification after changing the oil. Biodegradable consumables can be used on request. -
Page 54: Initial Operation
ü The cable ties, which were mounted to secure the storage box flap and the side hood, were removed. Scope of delivery The machine is delivered together with the following additional parts. VariPack V 165 XC Original operating instructions 150001185_05_en... -
Page 55: Adjusting The Drawbar Height
The distance can be different for straw (large swaths): X=855 mm. INFO For high driving speeds on uneven terrain, KRONE recommends a distance of X=855 mm. If the machine is too low, there is no support pressure relief for the pick-up. VariPack V 165 XC... - Page 56 „ Align the drawbar eye (6) parallel to the ground. „ Ensure that the toothed disc connections (4) mesh. „ Tighten the screw connections (1) and (5). Torque, Page 215. „ After 10 operating hours tighten the screw connections (1) and (5). VariPack V 165 XC Original operating instructions 150001185_05_en...
-
Page 57: Universal Shaft
„ Mount the cover (6). „ To prevent the supporting chain (5) from rotating, hook it into the eye (4) on the protective cap (3). INFO More details can be found in the operating instructions for the universal shaft. VariPack V 165 XC Original operating instructions 150001185_05_en... -
Page 58: Adjusting The Length Of The Universal Shaft
„ To prevent damage to the machine, check the length of the universal shaft whenever you change tractors. Have it corrected by a KRONE service partner if necessary. The universal shaft must be shortened as far as the narrowest position of both universal shaft halves permits. -
Page 59: Commissioning
(e.g. ball-head hitch) must be in a horizontal position (+/- 3°) with respect to the ground so as not to obstruct the operational swivel angle between the mechanical connection devices. RP000-098 Example image VariPack V 165 XC Original operating instructions 150001185_05_en... -
Page 60: Mounting The Universal Shaft On The Tractor
„ To prevent damage to the machine, check the length of the universal shaft whenever you change tractors. Have it corrected by a KRONE service partner if necessary. ü The machine has been shut down and secured, Page 28. -
Page 61: Connecting Hydraulic Hoses
If foreign objects or liquids get into the hydraulic system, the hydraulic system may be severely damaged. „ When connecting the quick couplings, ensure that they are clean and dry. „ Check the hydraulic hoses for abrasion and pinch point and replace if required. RPG000-117 VariPack V 165 XC Original operating instructions 150001185_05_en... -
Page 62: Connecting Hydraulic Brake (Export)
The machine features a dual-line compressed air braking system. The coupling heads are connected to the machine for attachment of the supply line (2) (red coupling head) and brake line (1) (yellow coupling head) of the tractor. VariPack V 165 XC Original operating instructions 150001185_05_en... -
Page 63: Connecting The Road Lighting
Short circuit caused by impurities and moisture in the plug connection The machine may be damaged by a short circuit. „ Make sure that the plugs and sockets are clean and dry. BPG000-067 VariPack V 165 XC Original operating instructions 150001185_05_en... -
Page 64: Mounting Safety Chain
The safety chain should have enough play when driving around curves. ü The machine has been shut down and secured, Page 28. VariPack V 165 XC Original operating instructions 150001185_05_en... -
Page 65: Mounting The Catch Loop
The catch loop (1) is pre-mounted at the drawbar in position (I). ü The machine has been shut down and secured, Page 28. „ Fasten the catch loop (1) at a suitable position at the rear of the tractor, e.g. position (II). VariPack V 165 XC Original operating instructions 150001185_05_en... -
Page 66: Connecting The Krone Ds 100 Operation Unit
Commissioning Connecting the KRONE DS 100 operation unit Connecting the KRONE DS 100 operation unit NOTICE Short circuit caused by impurities and moisture in the plug connection The machine may be damaged by a short circuit. „ Make sure that the plugs and sockets are clean and dry. -
Page 67: Connecting Krone Terminal Ds 500
EQG003-124 ü The machine has been shut down and secured, Page 28. ü The accessories kit B290 “KRONE tractor retrofitting” is mounted. Connection terminal to tractor „ Connect the 9-pin plug (1) of the terminal to the 9-pin socket (2) (In-cab). - Page 68 Commissioning 7.10 Connecting KRONE terminal DS 500 Tractors with integrated ISOBUS system EQ003-251 ü The machine has been shut down and secured, Page 28. Connection terminal to tractor „ Connect the 9-pin plug (2) of the cable (1) to the 9-pin socket (3) (In-cab).
-
Page 69: Connecting The Krone Isobus Terminal (Cci 800, Cci 1200)
EQ003-252 ü The machine has been shut down and secured, Page 28. ü The accessories kit B290 “KRONE tractor retrofitting” is mounted. Connection terminal to tractor „ Connect the 9-pin plug (2) of the cable (1) to the 9-pin socket (3) (In-cab). Connection tractor to machine INFO The cable (6) can be ordered by quoting the order number 20 086 886 *. - Page 70 Commissioning 7.11 Connecting the KRONE ISOBUS terminal (CCI 800, CCI 1200) Tractors with integrated ISOBUS system CCI 1200 CCI 800 EQ001-173 ü The machine has been shut down and secured, Page 28. Connection terminal to tractor „ Connect the 12-pin plug (2) of the cable (3) to the 12-pin socket (1) of the terminal.
-
Page 71: Connecting Foreign Isobus Terminal
EQ001-181 ü The machine has been shut down and secured, Page 28. ü The accessories kit B290 “KRONE tractor retrofitting” is mounted. Connection terminal to tractor „ Connect the 12-pin plug (2) of the cable (3) to the 12-pin socket (1) of the terminal. -
Page 72: Connecting Joystick
„ Connect the 11-pole socket (4) of the cable (2) to the 11-pole socket (3) of the machine. 7.13 Connecting joystick INFO Follow the supplied joystick operating instructions for attachment of the joystick in the tractor cabin. VariPack V 165 XC Original operating instructions 150001185_05_en... - Page 73 Commissioning Connecting joystick 7.13 KRONE ISOBUS terminal on tractors with integrated ISOBUS system EQ001-150 ü The machine has been shut down and secured, Page 28. „ Connect the 9-pin plug (2) of the cable (1) to the 9-pin socket (3) of the joystick.
- Page 74 ü The machine has been shut down and secured, Page 28. ü The accessories kit B290 “KRONE tractor retrofitting” is mounted. „ Connect the 9-pin plug (2) of the cable (1) to the 9-pin socket (3) of the joystick. „ Connect the 9-pin plug (4) of the joystick to the 9-pin socket (5) (In-cab).
-
Page 75: Connecting The Camera To The Krone Isobus Terminal Cci 800 Or Cci 1200
CCI 800 CCI 1200 EQ000-212 „ Insert the plug (4) on the camera (2) cable (3) into the connection C (1) of the KRONE ISOBUS terminal CCI 800 or CCI 1200 . „ To connect the plug (4) correctly, ensure that it is aligned with the marked points (5). VariPack V 165 XC... -
Page 76: Operation
ü The required cutting length has been set, Page 205. ü The customer counter has been set to 0, Page 175. ü The tailgate is closed. ü The working screen has been selected, Page 146. VariPack V 165 XC Original operating instructions 150001185_05_en... -
Page 77: Filling The Bale Chamber
At the beginning, change the side every 3 m until the bale diameter is approx. 80 cm. Next, crops must be picked up on each side approx. every 10 ... 20 m. The crops will then be distributed evenly on the right and left sides of the bale chamber. VariPack V 165 XC Original operating instructions 150001185_05_en... - Page 78 „ To largely prevent short, brittle straw from falling out of the bale chamber when driving from one swath to the next swath, switch off the PTO shaft in the meantime. Driving speed KRONE recommends a driving speed of 5 ... 12 km/h. VariPack V 165 XC Original operating instructions 150001185_05_en...
-
Page 79: Completing The Baling Process, Starting Tying Cycle And Ejecting Round Bales
„ Take the outer blades out of the cutting unit or completely switch off the cutting unit. „ Reduce the baling pressure, Page 200. Operating the support jack INFO In order to increase the base of the support jack when the ground is soft, use a suitable support. VariPack V 165 XC Original operating instructions 150001185_05_en... - Page 80 „ Turn the support jack (2) clockwise all the way up using the crank handle (1). „ Fold the side support jack (2)upwards and engage it. „ Turn the crank handle (1) towards the machine so that it cannot touch the tractor wheel. VariPack V 165 XC Original operating instructions 150001185_05_en...
-
Page 81: Releasing/Applying The Parking Brake
„ Attach the other end of the safety cable (3) to a suitable point at the rear of the tractor. „ Ensure that the safety cable (3) cannot come loose and does not come into contact with moving parts, for example the tractor tyres. VariPack V 165 XC Original operating instructions 150001185_05_en... -
Page 82: Using Ladders For The Tying System
„ Folding down: Pull the knob (4) and fold the side ladder (3) downwards against the direction of the arrow until it engages. Fitting wheel chocks RPG000-012 The wheel chocks (1) secure the machine against rolling away. 2 wheel chocks are affixed to the machine. VariPack V 165 XC Original operating instructions 150001185_05_en... -
Page 83: Removing/Mounting The Safety Device Which Prevents Unauthorised Use
„ Remove the padlock (1), the latch (2) and the bracket (3) and take them with you. Mounting „ Mount the bracket (3) with the latch (2) and secure with the padlock (1) and keep the key in a safe place. VariPack V 165 XC Original operating instructions 150001185_05_en... -
Page 84: Pick-Up
„ For the other terminals: To preselect the pick-up, press the key on the terminal, Page 138. ð The key switches to „ To lift the pick-up into the transport position, actuate the control unit on the tractor (yellow, 3+). VariPack V 165 XC Original operating instructions 150001185_05_en... -
Page 85: Setting The Pick-Up Working Height
This bearing pressure relief function can be activated or deactivated. KRONE recommends activating the bearing pressure relief for the pick-up to protect the sward and to protect the machine from damage. - Page 86 If the bearing pressure relief for the pick-up has been deactivated, the working height of the pick-up can be set independently of the guide wheels. This is suitable for uneven ground and light crops. RP000-801 VariPack V 165 XC Original operating instructions 150001185_05_en...
-
Page 87: Crop Press Roller Unit
2 more times. „ Mount the linch pin (5). If the linch pin (5) is not required, the linch pin (5) can be inserted into the borehole (4). VariPack V 165 XC Original operating instructions 150001185_05_en... -
Page 88: Removing/Mounting The Baffle Sheet On The Crop Press Roller Unit
„ Before lifting or lowering the blade cassette, ensure that there is nobody inside the danger zone of the blade cassette. „ Before doing any work on the blade cassette, shut down and safeguard the machine, Page 28. VariPack V 165 XC Original operating instructions 150001185_05_en... - Page 89 „ For "Operation unit DS 100" version: To preselect the blade cassette, press the key, Page 108. ð The indicator lamp below the key lights up. „ For the other terminals To preselect the blade cassette, press the key on the terminal, Page 138. VariPack V 165 XC Original operating instructions 150001185_05_en...
-
Page 90: Swivelling In/Out Blades
All blade groups were swivelled out in the mechanical blade group control system if the indicator lamp above the field of the key does not shine, Page 91. VariPack V 165 XC Original operating instructions 150001185_05_en... -
Page 91: Swivelling Blade Groups In/Out
Page 205. ü The pick-up is fully raised in transport position, Page 84. ü The blades have been swivelled out (inactive), Page 90. ü The machine has been shut down and secured, Page 28. VariPack V 165 XC Original operating instructions 150001185_05_en... - Page 92 Move the blades and the blade cassette into the maintenance position as follows: „ For "Operation unit DS 100" version: To preselect the blade cassette, press the key, Page 108. VariPack V 165 XC Original operating instructions 150001185_05_en...
-
Page 93: Storing Blades On The Blade Support
The blade support on the left and/or right side of the machine is used to suspend a set of blades for storage. Here, you can store either the new or the used set of blades. For "Blade support left" version, for "Blade support right" version RPG001-242 VariPack V 165 XC Original operating instructions 150001185_05_en... -
Page 94: Net Wrapping
„ At the same time fold the net support / holder (2) downwards in the direction of the arrow. „ Dismount one of the two alignment sheets (4) to make it easier to insert the net roll in the next step. VariPack V 165 XC Original operating instructions 150001185_05_en... - Page 95 / holder (2). Ensure that a gap of approx. 2 mm is maintained on both sides between the net roll (3) and alignment sheet (1). INFO Ensure that the net holder (2) is folded up again after the net has been loaded. This is described in the next chapter, Page 97. VariPack V 165 XC Original operating instructions 150001185_05_en...
-
Page 96: Inserting The Net
A length of approx. 2 metres is reached when the net is pulled upwards off the net roll as far as the opened front hood and back. To make it easier to thread the net, you can tie a knot in the end of the net. VariPack V 165 XC Original operating instructions 150001185_05_en... -
Page 97: Cutting The Net
For version with "Pivoted wrapping and tying material supply" If the start of the net roll is damaged, this damaged part must be cut off. The installed blades on the machine can be used for this purpose. VariPack V 165 XC Original operating instructions 150001185_05_en... -
Page 98: Using Pivoted Wrapping And Tying Material Supply
ü The machine has been shut down and secured, Page 28. ü The left side hood is open. „ Pull the handle (2) and manually guide pivoting storage container for wrapping material (1) and swivel out to the side. VariPack V 165 XC Original operating instructions 150001185_05_en... - Page 99 „ At the same time fold the net support / holder (2) downwards in the direction of the arrow. „ Dismount one of the two alignment sheets (4) to make it easier to insert the net roll in the next step. VariPack V 165 XC Original operating instructions 150001185_05_en...
-
Page 100: Twine Tying
If the twine or components of the twine tying are soiled by oil or lubricating grease, the machine may suffer damager. „ Cut off any soiled section of twine or use a new twine spool. „ Clean the components of the twine tying before inserting the twine. VariPack V 165 XC Original operating instructions 150001185_05_en... -
Page 101: Inserting Tying Twine
„ Shorten the twine ends of all reef knots to X=15 ... 20 mm. 8.14.2 Inserting tying twine ü The machine has been shut down and secured, Page 28. ü The spools of twine are connected with each other in the twine box, Page 100. VariPack V 165 XC Original operating instructions 150001185_05_en... - Page 102 „ Route the tying twines (1) and (2) through the eyelets (4) out of the twine box (3) to the outside. RP001-028 „ Route the tying twines (1) and (2) through the eyelets (6), (7), (8) and (9). For assistance, the eyelets on the machine are marked with 1 and 2. VariPack V 165 XC Original operating instructions 150001185_05_en...
- Page 103 15 cm overhang at the end. „ Put the brake sheet of the twine brake (20) back onto the eyelet (21), so that the twine (2) is pinched. To adjust the twine tension on the twine brake Page 202. VariPack V 165 XC Original operating instructions 150001185_05_en...
-
Page 104: Swivelling The Twine Box To And Fro
„ To open the tailgate, actuate the control unit on the tractor (red, 1+) until the tailgate is open. „ To close the tailgate, move the control unit on the tractor (red, 1+) into the float position. VariPack V 165 XC Original operating instructions 150001185_05_en... -
Page 105: Using The Stop Cock Of The Tailgate
„ Ensure that the crop press roller unit does not collide with the chassis when raised. If this does not remove the crop blockage: „ Shut down and safeguard the machine, Page 28. VariPack V 165 XC Original operating instructions 150001185_05_en... -
Page 106: Crop Blockage Under The Cutting Rotor
If this does not remove the crop blockage: „ Shut down and safeguard the machine, Page 28. CAUTION! Risk of injury due to sharp parts! Always wear appropriate protective gloves when removing crop blockages. „ Manually remove the accumulated crops. VariPack V 165 XC Original operating instructions 150001185_05_en... -
Page 107: Crop Blockage In The Baling Element
„ Manually remove the accumulated crops from the baling element. „ Open the stop cock, Page 105. „ Switch on the tractor engine and the PTO shaft. „ Close the tailgate. „ Resume baling. VariPack V 165 XC Original operating instructions 150001185_05_en... - Page 108 KRONE operation unit DS 100 Overview KRONE operation unit DS 100 For version with "Net wrapping" NOTICE Penetration of water in the operation unit could lead to malfunction. As a result, the machine can no longer be operated safely. „ Protect the operation unit from water.
-
Page 109: Krone Operation Unit Ds 100
KRONE operation unit DS 100 Overview Pos. Icon/designation Explanation Direction display arrows, see Page 111 LEDs A-H The LEDs indicate the direction or the progress of the tying cycle on the working screen. Additionally, the LEDs can indicate different set- tings. -
Page 110: Switching The Operation Unit On/Off
KRONE operation unit DS 100 Switching the operation unit on/off Pos. Icon/designation Explanation • Start tying process in manual mode • Switch the automatic mode of tying on/off, Page 112 Switching working lights on/off, see Page 113 Switching warning beacon on/off, see Page 113 Switching the operation unit on/off, see Page 110... -
Page 111: Accessing The Working Screen
KRONE operation unit DS 100 Accessing the working screen Accessing the working screen The working screen can show the following data: • The display shows the actual bale diameter in cm. • During filling of the bale chamber, the LEDs A-H serve as direction display, Page 111. -
Page 112: Start Tying
KRONE operation unit DS 100 Start tying Icon Explanation Step 2: The bale chamber is filled too much on the right side. Steer the tractor to the right to pick up the swath on the left of the bale chamber. -
Page 113: Switching The Working Lights On/Off
KRONE operation unit DS 100 Switching the working lights on/off Switching the working lights on/off For "Working lights" version „ To switch on the working lights, press the key. Æ The indicator lamp above the key emits light. „ To switch off the working lights, press the key. -
Page 114: Setting Advance Signaling
KRONE operation unit DS 100 9.10 Setting advance signaling In the working screen, the bale diameter for the entire round bale in cm can be set at the operation unit. „ Press the key (3) to call the "Bale diameter" menu. -
Page 115: Setting The Sensitivity Of The Direction Display
KRONE operation unit DS 100 Setting the sensitivity of the direction display 9.11 9.11 Setting the sensitivity of the direction display EQG003-118 This menu is used to set the sensitivity of the direction display on the working screen. The direction display indicates whether the swath is picked up in the centre by the pick-up and provides information about the required direction of travel. -
Page 116: Setting The Core, Centre And Edge Of The Round Bale
KRONE operation unit DS 100 9.13 Setting the core, centre and edge of the round bale At the operation unit, the baling pressure in % can be set for the round bale in the working screen. ü The setting for the various baling pressures is deactivated, Page 116. - Page 117 KRONE operation unit DS 100 Setting the core, centre and edge of the round bale 9.13 Baling pressure Diameter Core 0-100 % Up to 80 cm Middle 0-100 % Is calculated automatically from core and edge Edge 0-100 % Set bale diameter, Page 113 As an alternative, the same baling pressure, see Page 115...
- Page 118 KRONE operation unit DS 100 9.13 Setting the core, centre and edge of the round bale Setting the diameter of the core „ Press the key to go to the diameter setting. ð The indicator lamp above the key (9) and the LED C (4) emit light and the current diameter of the core is indicated in the display (5).
-
Page 119: Setting The Number Of Net Layers
KRONE operation unit DS 100 Setting the number of net layers 9.14 ð Press the key (6) to return to the working screen. 9.14 Setting the number of net layers EQ003-248 On the operation unit, between 1.5 and 5.0 net layers can be set in the working screen. The display shows the net layers in tenths, for example 35 at 3.5 network layers. -
Page 120: Displaying The Customer Counter
KRONE operation unit DS 100 9.16 Displaying the customer counter On the operation unit, the tying start delay can be set in milliseconds (ms) in the working screen. „ To call the "Tying start delay" menu, first press the key (3) and then the once. -
Page 121: Sensor Test For Digital And Analogue Sensors
KRONE operation unit DS 100 Sensor test for digital and analogue sensors 9.17 „ To activate the customer counter which is currently displayed, press the key. ð The LED of the activated customer counter flashes. „ To change the number of round bales, press the ... - Page 122 KRONE operation unit DS 100 9.17 Sensor test for digital and analogue sensors Status Display Sensor status Is lit and a warning sounds Sensor is attenuated (metal in front of the sensor) Is lit Sensor is not attenuated Flashes Short circuit...
-
Page 123: Calibrating Sensors
KRONE operation unit DS 100 Calibrating sensors 9.18 9.18 Calibrating sensors EQ003-529 ü The "Sensor test" menu has been selected, Page 121. „ To access the "Calibrate sensors" menu, press the key. ð The indicator lamp above the key flashes and the indicator lamp above the ... -
Page 124: Actuator Test For Digital And Analogue Actuators
KRONE operation unit DS 100 9.19 Actuator test for digital and analogue actuators Calibrating sensor B61 "Tying 1 (passive)" „ Call sensor B61. „ To change the value, press the keys. ð As soon as the sensor value is within a valid range, the indicator lamp under the ... - Page 125 KRONE operation unit DS 100 Actuator test for digital and analogue actuators 9.19 The actuator test is used to test the actuators installed on the machine. An actuator can only be tested when current is flowing through it. Therefore, in the "Actuator test" menu, the actuator must be controlled manually for a short time in order to determine possible errors in the actuator system.
-
Page 126: Error Messages
KRONE operation unit DS 100 9.20 Error messages An overview of the position of the sensors, actuators and control units is provided in the circuit diagram. „ To switch between the actuators, press the key to scroll up and the ... -
Page 127: Manual Operation Of The Tying System
KRONE operation unit DS 100 Manual operation of the tying system 9.21 9.21 Manual operation of the tying system EQ003-528 When the tying system is manually operated, the feed rocker arm can be manually moved. For an overview of the positions of the feed rocker arm, Page 252. -
Page 128: Setting User Preferences
KRONE operation unit DS 100 9.22 Setting user preferences 9.22 Setting user preferences EQG003-123 The following is set in the user settings: • volume, • background lighting for day or night design, • display lighting for day or night design . -
Page 129: Touchable Display
ð If the machine is connected, the display shows the road travel screen after switching on. Æ The terminal is ready to operate. Switching off „ Press and hold down the key (1). VariPack V 165 XC Original operating instructions 150001185_05_en... -
Page 130: Design Ds 500
10.3 Design DS 500 10.3 Design DS 500 EQ003-254 The KRONE machine application is divided into the following areas: Status line (1) The status line (1) indicates current states of the machine (depending on how it is equipped), Page 137. Keys (2) The machine is operated by pressing the keys (2) via touch function,... - Page 131 Reduce the value. • Navigate to the previous value in the menu. • Navigate to the previous menu. Press the scroll wheel: • Select the value. • Save the value. • Open the menu. VariPack V 165 XC Original operating instructions 150001185_05_en...
-
Page 132: Krone Isobus Terminal (Cci 800, Cci 1200)
KRONE machines, which have ISOBUS equipment, are coordinated with this system. EQG000-057 The electronic equipment of the machine consists essentially of the job computer (1), the terminal (2) and the control and function elements. -
Page 133: Switching Terminal On/Off
KRONE ISOBUS terminal (CCI 800, CCI 1200) Switching terminal on/off 11.2 11.2 Switching terminal on/off EQ001-174 KRONE ISOBUS terminal CCI 1200 KRONE ISOBUS terminal CCI 800 „ Before switching on the terminal for the first time, check that the connections are correct and tight. -
Page 134: Design Of Display
„ For more details on how the terminal functions, follow the terminal operating instructions. 11.4 Design of the KRONE machine application EQG000-059 The KRONE machine application is divided into the following areas: Status line (1) The status line (1) indicates current states of the machine (depending on how it is equipped), Page 137. -
Page 135: Setting Units On The Terminal
KRONE ISOBUS terminal (CCI 800, CCI 1200) Setting units on the terminal 11.5 Keys (2) The machine is operated by pressing the keys (2) via touch function, Page 138. Main window (3) Values (figures) shown in blue in the main window can be selected using the touch function. -
Page 136: Foreign Isobus Terminal
KRONE ISOBUS terminal. Before commissioning, refer to the mode of operation of the KRONE ISOBUS terminal in the operating instructions. A major difference to the KRONE ISOBUS terminal is the arrangement and number of keys with functions determined by the selected external ISOBUS terminal. -
Page 137: Terminal Machine Functions
If error messages are ignored and the malfunction is not remedied, people may be injured and/or the machine may be damaged seriously. „ Remedy the malfunction when the error message is displayed, Page 249. „ If the malfunction cannot be remedied, consult a KRONE service partner. 13.1 Status line INFO Using a terminal with a resolution of less than 480x480 pixels. -
Page 138: Keys
Switching tying to manual operation. Preselect blades. When the key has been pressed, the con- trol unit must be actuated to swivel the blades in or out. VariPack V 165 XC Original operating instructions 150001185_05_en... - Page 139 Icon Explanation Start TIM functions (can be selected only when tailgate closed). Pause TIM functions. In doing so, registration and authen- tication are not disconnected between tractor and ma- chine. VariPack V 165 XC Original operating instructions 150001185_05_en...
-
Page 140: Displays On The Working Screen
The TIM function can be switched off individually via the checkbox, e.g. if the machine is in an unfa- vourable position for ejecting the round bale. To configure the TIM soft- ware, see Page 180 VariPack V 165 XC Original operating instructions 150001185_05_en... - Page 141 The blade cassette is in the lower position. This maintenance position is used, for example, to change the blades, Page 229, or to remove crop blockages, Page 105. The blade cassette is in the lower position. VariPack V 165 XC Original operating instructions 150001185_05_en...
-
Page 142: Displays On The Information Bar
In addition, the progress of the net wrapping or twine tying is displayed as a percentage under the icon. 13.4 Displays on the information bar EQG003-111 The available icons comply with the equipment of the machine. The following represented icons are not always available. VariPack V 165 XC Original operating instructions 150001185_05_en... -
Page 143: Direction Display
The direction display (1) shows the driver to which side and to what extent he must correct his direction when driving over the swath in order to ensure the bale chamber is filled evenly. The following displays are possible: VariPack V 165 XC Original operating instructions 150001185_05_en... - Page 144 „ If the swath is the same width as the bale chamber, pick up the swath as centrally as possible „ If the swath is too narrow, pick it up alternately (on left/right). Ensure that you do not move too far to the left or right VariPack V 165 XC Original operating instructions 150001185_05_en...
-
Page 145: Isobus Shortcut Button (Isb)
ISOBUS Shortcut Button, at least one ISOBUS Shortcut Button must be available. The ISOBUS Shortcut Button can be integrated both in/on the terminal or can be available as an external momentary switch in the ISOBUS system. The KRONE Machine Controller (KMC) reads out the information whether an ISOBUS Shortcut Button is available in the ISOBUS system. -
Page 146: Accessing The Working Screen
Æ The message above goes out on the display and all machine functions are available again. 13.7 Accessing the working screen Road travel screen Example menu EQG003-045 From the road travel screen „ Press Æ The working screen is shown, Page 140. VariPack V 165 XC Original operating instructions 150001185_05_en... -
Page 147: Automatic Call Of The Road Travel Screen
ð An input field opens. „ To increase or reduce the value, turn the scroll wheel. „ To save the value, press the scroll wheel. ð The setting is accepted, the input field closes. VariPack V 165 XC Original operating instructions 150001185_05_en... -
Page 148: Operating Tim 1.0 (Tractor Implement Management)
To bale the next round bale, the driver only has to approach the tractor. Then the tractor driver must independently drive at a speed adjusted to visibility, weather or ground conditions. VariPack V 165 XC Original operating instructions 150001185_05_en... -
Page 149: Tim Displays And Keys On The Working Screen
For version with "TIM 1.0" TIM status: The machine is being registered and authenticated with the tractor. TIM status: The machine has been registered and authenticated. By pressing the key , the TIM status switches to VariPack V 165 XC Original operating instructions 150001185_05_en... -
Page 150: Activating Tim Functions
In the case of the TIM function "Stop tractor when the tying cycle starts", the tractor must be driven at a speed of at least 0.5 km/h before the TIM function can be confirmed on the tractor. VariPack V 165 XC Original operating instructions 150001185_05_en... -
Page 151: Pausing Tim Functions
A programmable key can be assigned with several different functions. If key assignments are saved, the display shows corresponding menus when switching on the terminal. The following functions are available in the “Auxiliary” (AUX) menu: VariPack V 165 XC Original operating instructions 150001185_05_en... -
Page 152: Auxiliary Assignment Of A Joystick
For further information, see the operating instructions for the terminal and tractor used. INFO The examples below represent a recommendation. The assignment of the joystick can be adapted to own desires. For further information, please refer to the operating instructions of the used terminal. VariPack V 165 XC Original operating instructions 150001185_05_en... - Page 153 The keys on the AUX joystick can be assigned on 2 levels. „ Change between the levels using the switch (2). Æ The LED (1) is lit green or red. Recommended configuration of an AUX joystick CCI A3 EQG003-143 VariPack V 165 XC Original operating instructions 150001185_05_en...
- Page 154 Terminal machine functions 13.11 Operating machine via joystick The indicator lamp (2) shines, showing that operating level 1 is active. „ Actuate the switch (1) on the rear of the joystick to display the next operating level. VariPack V 165 XC Original operating instructions 150001185_05_en...
-
Page 155: Terminal Menus
Page 167 Correction of start/end position of twine tying (for "net wrapping and twine tying" version), Page 170 Moisture measurement (for version with "moisture measurement"), Page 172 12-1 Error message for moisture measurement, Page 172 VariPack V 165 XC Original operating instructions 150001185_05_en... -
Page 156: Recurrent Icons
Page 183 15-2 Actuator test, see Page 187 15-3 Software information, see Page 189 15-4 Error list, see Page 189 14.2 Recurrent icons To navigate in the menu level/menus, the following icons appear again and again. VariPack V 165 XC Original operating instructions 150001185_05_en... -
Page 157: Selecting A Menu Level
For an overview of the menus: Page 155. 14.4 Selecting a menu Calling up menu The menus are selected depending on used terminal (touch sensitive or not touch sensitive). VariPack V 165 XC Original operating instructions 150001185_05_en... -
Page 158: Changing Value
Values must be entered or changed for the settings in the menus. The values are selected depending on used terminal (touch-sensitive or not touch-sensitive). For version with "Touch-sensitive" and "Not touch-sensitive terminal" • Via scroll wheel. VariPack V 165 XC Original operating instructions 150001185_05_en... -
Page 159: Changing Mode
„ To select the previous mode, press „ To save, press Æ An acoustic signal sounds, the set mode is saved and the icon is briefly displayed in the upper line. „ To leave the menu, press VariPack V 165 XC Original operating instructions 150001185_05_en... -
Page 160: Tying In The Menu Level
Number of twine layers (if twine tying type was selected under (3)) Tying start delay net wrapping (if net tying type was selected under (3)) Tying start delay twine tying (if twine tying type was selected under (3)) Selecting type of tying (net or twine) VariPack V 165 XC Original operating instructions 150001185_05_en... -
Page 161: Menu 1 "Number Of Net Layers" (Net Wrapping)
ü Twine tying is selected in menu 8 "Type of tying",see Page 165. „ To open the menu, press Æ The display shows the menu "Number of twine layers". The following values can be set: VariPack V 165 XC Original operating instructions 150001185_05_en... -
Page 162: Menu 3 "Advance Signalling
Tying start delay is used to set the period of time which is required between completion of round bale in the bale chamber and triggering the tying cycle. The tying start delay is set in seconds. Setting range: 0.0–10 s VariPack V 165 XC Original operating instructions 150001185_05_en... -
Page 163: Menu 6 "Electronic Baling Pressure Adjustment
Setting the baling pressure A different baling pressure can be set for the core, the centre and the edge of the round bale, and a diameter for the core. The following values are possible: VariPack V 165 XC Original operating instructions 150001185_05_en... -
Page 164: Menu 7 "Sensitivity Of Direction Display
The higher the sensitivity of the direction display is set, the stronger the motion indication appears in the form of arrows on the working screen. VariPack V 165 XC Original operating instructions 150001185_05_en... -
Page 165: Menu 8 "Select Type Of Tying" (For The "Net Wrapping And Twine Tying" Version)
„ To open the menu, press Æ The display shows the "twine tying type selection" menu. Changing the mode „ Select and save the mode, Page 159. The following modes can be selected: VariPack V 165 XC Original operating instructions 150001185_05_en... -
Page 166: Menu 9 "Filling Correction
The set nominal bale diameter is 108 cm. If the actual bale diameter is only 100 cm, which is 8 cm too small, a correction value of +8 cm must be set. This means: Correction value = nominal bale diameter - bale diameter VariPack V 165 XC Original operating instructions 150001185_05_en... -
Page 167: Menu 10 "Manual Operation" (For The "Net Wrapping" Version)
Use the keys on the sides to operate the following functions: Icon Explanation Move actuator for wrapping process to feed position Move actuator for wrapping process into tying position Moving the tying actuator to the end position VariPack V 165 XC Original operating instructions 150001185_05_en... -
Page 168: Menu 10 "Manual Operation" (For Version With "Net Wrapping And Twine Tying")
(1) Twine tying The following status displays may appear on the display: Icon Explanation Twine arms in feed position. Twine arms in start position. Twine arms in tying position. Twine arms in end position. VariPack V 165 XC Original operating instructions 150001185_05_en... - Page 169 „ To move the twine arms into the start position, press „ Press to move the twine arms to the end position. (2) Net tying The following status displays may appear on the display: VariPack V 165 XC Original operating instructions 150001185_05_en...
-
Page 170: Menu 11 "Correction Of Start/End Position Of The Twine Tying System (For "Net Wrapping And Twine Tying" Version)
(start position), • the position at which twine tying shall stop in the centre of the round bale (end position). VariPack V 165 XC Original operating instructions 150001185_05_en... - Page 171 „ Increase or reduce the value, Page 158. „ In order to save the value, press VariPack V 165 XC Original operating instructions 150001185_05_en...
-
Page 172: Menu 12 "Moisture Measurement
The error message for the display can also be deactivated or re-activated. The lower limit value has been permanently set ex works and cannot be changed. VariPack V 165 XC Original operating instructions 150001185_05_en... -
Page 173: Menu 12-2 "Correction Value For Moisture Measurement
Menu 12-2 "Correction value for moisture measurement" In this menu a correction value can be set for the moisture measurement if the displayed value deviates from the value of an external measuring system. VariPack V 165 XC Original operating instructions 150001185_05_en... - Page 174 Value (2) – measured value of the external moisture measuring system=correction value (1) Values between +10 and -10 can be set. „ Increase or reduce the value, Page 158. „ In order to save the value, press VariPack V 165 XC Original operating instructions 150001185_05_en...
-
Page 175: Menu 13 "Counters
NAME 01 NAME 02 NAME 03 NAME 04 EQ003-054 / EQ003-228 ü Menu 13 “Counter” is called.“ Page 175. „ To open the menu, press Æ The display shows menu 13-1 "Customer counter". VariPack V 165 XC Original operating instructions 150001185_05_en... - Page 176 Operating hours counter for the corresponding customer Use the keys on the sides of the terminal to operate the following functions: Icon Explanation Increase number of bales Reduce number of bales Setting displayed customer counter to zero VariPack V 165 XC Original operating instructions 150001185_05_en...
-
Page 177: Menu 13-2 "Total Counter
ü Menu 13 “Counter” is called.“ Page 175. „ To open the menu, press Æ The display shows menu 13-2 "Total counter". The icons that appear in the working screen have the following meaning: VariPack V 165 XC Original operating instructions 150001185_05_en... -
Page 178: Menu 14 "Isobus
ü The menu level is open, Page 157. „ To open the menu, press Æ The display shows the "ISOBUS" menu. Depending on the machine equipment, the "ISOBUS" menu is divided into the following submenus: VariPack V 165 XC Original operating instructions 150001185_05_en... -
Page 179: Menu 14-5 "Krone Smartconnect
14-6 Configuring TIM software (for "TIM 1.0" version), Page 180 14-9 Switching between terminals, see Page 181 14.21.1 Menu 14-5 "KRONE SmartConnect" The access data for the KRONE SmartConnect (KSC) can be seen in this menu. 14-5 WLAN-NAME: 00011501 WLAN-KEY: afbb2bfac5 PRODUCT-CODE: C0060000600011501 EQG000-064 ü... -
Page 180: Menu 14-6 "Configuring Tim Software" (For "Tim 1.0" Version)
Stop TIM functions. In doing so, registration and authentic- ation are also disconnected between tractor and machine. Pause TIM functions. In doing so, registration and authen- tication are not disconnected between tractor and ma- chine. VariPack V 165 XC Original operating instructions 150001185_05_en... -
Page 181: Menu 14-9 "Switching Between Terminals
. The machine automatically takes over control of the TIM functions on the tractor, Page 148. 14.21.3 Menu 14-9 "Switching between terminals" INFO This menu is only available if several ISOBUS terminals are connected. VariPack V 165 XC Original operating instructions 150001185_05_en... -
Page 182: Menu 15 "Settings
Menu 15 "Settings" EQG003-036 ü For The menu level is active, Page 157. „ To open the menu, select Æ The display shows the "Settings" menu. The "Settings" menu is divided into the following submenus: VariPack V 165 XC Original operating instructions 150001185_05_en... -
Page 183: Menu 15-1 "Sensor Test
EQG003-030 ü Menu 15 “Settings” is called, Page 182. „ To open the menu, press Æ The display shows the "Sensor test" menu . The following keys can be available in the menu: VariPack V 165 XC Original operating instructions 150001185_05_en... - Page 184 Blade cassette up Filling indicator Tailgate lock hook left Tailgate lock hook right Bale ejection Tying 1 (passive) Position tying mechanism twine (for version "Net and twine tying") VariPack V 165 XC Original operating instructions 150001185_05_en...
-
Page 185: 14.22.1.1 Adjusting Sensor B08 "Top Blade Cassette
Sensor attenuated (metal in front of the sensor) Sensor unattenuated (no metal in front of the sensor) Cable break or short circuit Defective sensor or job computer Cable break Short circuit 14.22.1.1 Adjusting sensor B08 “Top blade cassette” RPG001-241 VariPack V 165 XC Original operating instructions 150001185_05_en... -
Page 186: Adjusting Sensor B61 "Tying 1 (Passive)
„ When the bar is in the red rectangle, save the position by clicking on „ Approach the tying position of the feed rocker arm by clicking on „ Check the tying position on the machine, Page 252. VariPack V 165 XC Original operating instructions 150001185_05_en... -
Page 187: Menu 15-2 "Actuator Test
Æ The display shows the "Actuator test" menu. The following keys can be available in the menu: Icon Designation Choose previous sensor Choose next sensor Switching on the actuator Switch off the actuator Exit menu VariPack V 165 XC Original operating instructions 150001185_05_en... - Page 188 Lowering the feed rocker arm Lifting the feed rocker arm Baling pressure Possible status displays of the actuators Icon Designation Actuator ON Actuator OFF General actuator error No supply voltage Possible cause: Fuse defective. VariPack V 165 XC Original operating instructions 150001185_05_en...
-
Page 189: Menu 15-3 "Software Info
All active and non-active errors are shown in this menu. The errors are shown with a number indicating how often the error occurred and the time on the operating hours counter when the error last occurred. VariPack V 165 XC Original operating instructions 150001185_05_en... - Page 190 Delete individual errors • The selected error is deleted. • Only non-active errors can be deleted. Delete all errors • All inactive errors are deleted. Recurring icons Page 156. VariPack V 165 XC Original operating instructions 150001185_05_en...
- Page 191 „ To select the error to be deleted, press „ To delete the error, press Delete all errors Only non-active errors (highlighted grey) can be deleted. „ To delete all errors, press VariPack V 165 XC Original operating instructions 150001185_05_en...
-
Page 192: Driving And Transport
In addition, using an automatic anti-jack-knife brake system can lead to a significantly higher wear on the machine brakes. VariPack V 165 XC Original operating instructions 150001185_05_en... -
Page 193: Preparing The Machine For Road Travel
„ When using a safety chain as an additional safety precaution for trailed implements: Remove the safety chain. „ Disconnect the road lighting plug, Page 63. „ Remove the power supply cable for the terminal. VariPack V 165 XC Original operating instructions 150001185_05_en... -
Page 194: Securing The Universal Shaft
„ Attach the universal shaft chain (1) to the support (3). With bottom suspension of the drawbar RPG000-137 „ Fold out the universal shaft bracket (1) and place the universal shaft on the universal shaft bracket (1). VariPack V 165 XC Original operating instructions 150001185_05_en... -
Page 195: Checking Road Travel Lighting
For road travel, you can remove the guide wheel of the pick-up on the right-hand side of the machine to reduce the overall width of the machine to less than 2.55 m (depending on the currently installed tyres). Next, mount it on the drawbar for storage. VariPack V 165 XC Original operating instructions 150001185_05_en... -
Page 196: Preparing The Machine For Shipment
Checklist for the transport of the machine ü All guards are properly closed and locked. ü Ladders for the tying system have been folded up, Page 82. ü The universal shaft is secured, Page 194. VariPack V 165 XC Original operating instructions 150001185_05_en... -
Page 197: Securing The Front Hood
„ Make sure the lifting means are properly secured. „ Never stay under the suspended machine. „ If work has to be performed under the machine, securely support the machine, Page 29. The machine is equipped with 3 suspension points. VariPack V 165 XC Original operating instructions 150001185_05_en... -
Page 198: Lashing The Machine
If the machine is not properly lashed for transportation by vehicle, the machine may move in an uncontrolled manner and endanger people. „ Before transporting the machine, secure it properly to the designated lashing points using suitable lashing material. VariPack V 165 XC Original operating instructions 150001185_05_en... - Page 199 The lashing points on the machine are marked by an information sign, Page 35. RPG000-219 1 2 lashing points at the front RPG000-220 1 2 lashing points at the rear (one on the left and one on the right machine side) VariPack V 165 XC Original operating instructions 150001185_05_en...
-
Page 200: Settings
The bale diameter is set via the operation unit, Page 113. For the remaining terminals The bale diameter is set via the working screen on the terminal, Page 147. 16.3 Setting net overhang on the wrapping material brake RPG000-163 VariPack V 165 XC Original operating instructions 150001185_05_en... -
Page 201: Setting Rubber Cloth On The Net Wrapping
The brake force is set using the 3 screws (4). The net must protrude approx. 10 cm between the rubber pads, Page 96. Default dimension of the 3 springs (3) set by KRONE: X=24 mm ü The machine has been shut down and secured, Page 28. -
Page 202: Adjusting The Twine Tension At The Twine Brake
„ Wear protective gloves when you adjust the blade on the twine tying system. „ Be particularly careful when you work on the twine tying system in the vicinity of the blade. VariPack V 165 XC Original operating instructions 150001185_05_en... - Page 203 „ Check also to ensure that the blade support (2) is pushed up to the borehole (3). „ If this is not the case, loosen the screw connections (4) and move the blade support (2). VariPack V 165 XC Original operating instructions 150001185_05_en...
-
Page 204: Setting Oil Quantities For The Central Chain Lubrication Unit
Pos. Oil lubrication for setting screw Drive no. 1 – baling unit (8) white Drive no. 2 – rotor (9) red Drive no. 3 – feed roller and starter (10) orange roller VariPack V 165 XC Original operating instructions 150001185_05_en... -
Page 205: Setting The Cutting Length
The bale ejector (1) can be set in 3 positions (Position I, II and III). Position Explanation Round bales up to 165 cm Round bales up to 190 cm For soft ground ü The machine has been shut down and secured, Page 28. VariPack V 165 XC Original operating instructions 150001185_05_en... - Page 206 „ Pull out the extension (3) in the direction of the arrow until the required position (I), (II) or (III) has been reached. „ Mount the bolt and the linch pin (2). Ensure that the linch pin is mounted from the outside. VariPack V 165 XC Original operating instructions 150001185_05_en...
-
Page 207: Service & Maintenance
„ Have the completed maintenance work confirmed by the KRONE service partner in the supplied service record booklet. -
Page 208: Maintenance - After The Season
17.2.3 Maintenance – once after 10 hours The manual for service technicians contains other maintenance items which must also be carried out. These may be carried out only by authorised qualified personnel. VariPack V 165 XC Original operating instructions 150001185_05_en... -
Page 209: Maintenance - Once After 50 Hours
Tighten the screw connections on the drawbar see Page 224 Check tyre pressure see Page 218 Check the hydraulic hoses for leaks and, if ne- see Page 242 cessary, have them replaced by a KRONE service partner. Cleaning bushing and drawbar eye see Page 223 Change/replace blades see Page 229 17.2.4... -
Page 210: Maintenance - Every 250 Hours
The types of lubrication are marked by means of icons in the lubrication chart, refer to table. Type of lubrication Lubricant Comment „ Apply two strokes of Grease Multi-purpose grease lubricating grease from the grease gun per grease nipple. „ Remove excess lubricating grease at the grease nipple. VariPack V 165 XC Original operating instructions 150001185_05_en... - Page 211 Service & maintenance Lubrication chart 17.3 Left side of machine RPG000-169 Every 20 operating hours VariPack V 165 XC Original operating instructions 150001185_05_en...
- Page 212 Service & maintenance 17.3 Lubrication chart Every 50 operating hours Every 500 operating hours Use a different lubricating grease for this lubrication point, Page 53. VariPack V 165 XC Original operating instructions 150001185_05_en...
- Page 213 Service & maintenance Lubrication chart 17.3 Right side of machine RPG000-170 Every 20 operating hours Every 50 operating hours VariPack V 165 XC Original operating instructions 150001185_05_en...
-
Page 214: Lubricating The Universal Shaft
„ Lubricate the universal shaft with multi-purpose grease at the intervals indicated in the table below. For a list of the lubricating greases to be used, Page 52. The following table provides information about the lubricant quantity and the lubrication interval per lubrication point. VariPack V 165 XC Original operating instructions 150001185_05_en... -
Page 215: Tightening Torques
The table does not apply to countersunk screws with hexagon socket in case the countersunk screw is tightened via hexagon socket. DV000-001 Thread size Strength class on screw head Strength class 10.9 12.9 Tightening torque (Nm) VariPack V 165 XC Original operating instructions 150001185_05_en... - Page 216 M30 x 1.5 2,100 2,650 Metric thread screws with countersunk head and hexagon socket INFO The table applies only to countersunk screws with hexagon socket and metric thread tightened via hexagon socket. VariPack V 165 XC Original operating instructions 150001185_05_en...
- Page 217 Bleed valve made of brass copper ring Ventilation/breather filter made of Ventilation/breather filter made of brass steel Steel and cast Aluminium Steel and cast Aluminium Maximum tightening torque (Nm) (±10%) M10x1 M12x1.5 G1/4“ M14x1.5 VariPack V 165 XC Original operating instructions 150001185_05_en...
-
Page 218: Checking/Maintaining Tyres
Inspect the tyres visually „ Visually inspect tyres for cuts or breaks. Æ If there are cuts or breaks in the tyres, have the tyres repaired or replaced by a KRONE service partner. Maintenance intervals for visual inspection of the tyres, Page 207. - Page 219 — 350 ... 380 Nm M22x1.5 30 mm 8/10 units — 450 ... 510 Nm Hub centring M18x1.5 27 mm 6 units — 270 ... 290 Nm M22x1.5 32 mm 8/10 units — 450 ... 510 Nm M24x1.5 36 mm 10 units — 550 ... 610 Nm VariPack V 165 XC Original operating instructions 150001185_05_en...
-
Page 220: Servicing The Main Gearbox
„ Top up with fresh oil via the inspection and filling hole (3) up to the inspection and filling hole (3). „ Screw the locking screw into the inspection and filling hole (3), tightening torque Page 217. VariPack V 165 XC Original operating instructions 150001185_05_en... -
Page 221: Cleaning The Machine
As a result, people may be seriously injured or killed. „ Always close the stop cock when carrying out work with the tailgate open. VariPack V 165 XC Original operating instructions 150001185_05_en... - Page 222 „ Remove crop build-up from the drive chains using compressed air. „ Ensure that the drive chains are sufficiently wetted with engine oil after cleaning. „ If required, repeat the cleaning several times a day. VariPack V 165 XC Original operating instructions 150001185_05_en...
-
Page 223: Clean The Bushing And The Drawbar Eye
(1) in the drawbar eye (2) is X=43 mm. If the dimension X is exceeded, the drawbar eye (1) must be replaced by a KRONE service partner. „ To minimize wear, clean the bushing (1) and the drawbar eye (2) several times a day and coat with grease. -
Page 224: Relieving Baling Belts
„ Check that the screw connections (1) and (2) have been tightened to the correct tightening torque. „ Tighten the screw connections (1) on the drawbar to the tightening torque 210 Nm. „ Tighten the screw connections (2) on the drawbar eye to the tightening torque 730 Nm. Maintenance interval, Page 207. VariPack V 165 XC Original operating instructions 150001185_05_en... -
Page 225: Checking And Adjusting The Cleaning Rollers
„ Open the tailgate completely and secure it with the stop cock, Page 105. „ Shut down and safeguard the machine, Page 28. „ Check the distance between the cleaning roller (1) and the drive shaft (2). VariPack V 165 XC Original operating instructions 150001185_05_en... - Page 226 „ Loosen the screw connections (4) of the setting sheet (2) and move the sheet in the oblong holes (3). This moves the cleaning roller too. ð The distance between the cleaning roller and the drive shaft increases as the setting sheet (2) is moved upwards. VariPack V 165 XC Original operating instructions 150001185_05_en...
-
Page 227: Checking And Adjusting Scraper On The Feed Roller
„ Using the screw connection (5), set the scraper (2) to contact the feed roller (1). Ensure that the feed roller (1) can still be turned by hand. „ Tighten the 5 screw connections (4) on the scraper (2). VariPack V 165 XC Original operating instructions 150001185_05_en... -
Page 228: Checking The Fire Extinguisher
Removing corrosion from net support / holder RPG000-157 ü The machine has been shut down and secured, Page 28. „ Before starting the new season, remove corrosion from the net support / holder (1). VariPack V 165 XC Original operating instructions 150001185_05_en... -
Page 229: Releasing The Cam Clutch On The Universal Shaft
17.19 Changing the blades Moving blades to maintenance position „ For "Operation unit DS 100" version: To preselect the blade cassette, press the key, Page 108. VariPack V 165 XC Original operating instructions 150001185_05_en... - Page 230 „ Insert a new or a ground blade (1). „ Ensure that the blade (1) is correctly positioned on the blade control shaft and is centred in the slot (2). „ After inserting all blades (1), check that all blades (1) are in alignment. VariPack V 165 XC Original operating instructions 150001185_05_en...
-
Page 231: Unlocking/Locking Blade Retaining Shaft
„ Move the handle (1) downwards according to the sheet stamping (2) and engage. Locking „ Move the handle (1) upwards according to the sheet stamping (2) and engage. Æ After locking the blade retaining shaft (3), the blades selected beforehand swivel independently upwards into the working position. VariPack V 165 XC Original operating instructions 150001185_05_en... -
Page 232: Checking And Moving The Blade Retaining Shaft
If this groove on the blade retaining shaft is worn as well: „ Move the blade retaining shaft (2) in position (II). „ Mount a new retaining ring (1) on both machine sides. VariPack V 165 XC Original operating instructions 150001185_05_en... -
Page 233: Grinding The Blades
INFO KRONE recommend the KRONE blade grinding machine for grinding the blades. Contact your KRONE dealer. For further information, please refer to the operating instructions of the blade grinding machine. Correctly ground, sharp blades reduce fuel consumption and the wear on the cutting components. -
Page 234: Checking/Lubricating The Safety Rolls Of The Single Blade Locking Device
Number Drive chain Location on the machine Baling unit drive Right side of machine Rotor drive Right side of machine Feed roller and starter roller drive Left side of machine VariPack V 165 XC Original operating instructions 150001185_05_en... -
Page 235: Drive Chain Of The Baling Unit (No. 1)
„ Using the nut (3) and counter nut (4), set the spring (2) so that the lower edge of the spring (2) is inside the notch (6). INFO The drive chain is supplied with oil via the central chain lubrication system, Page 204. VariPack V 165 XC Original operating instructions 150001185_05_en... -
Page 236: Drive Chain Of The Rotor (No. 2)
„ To tension the drive chain (1), use the nut (3) to set the spring (2) to the dimension of the sheet (4). INFO The drive chain is supplied with oil via the central chain lubrication system, Page 204. VariPack V 165 XC Original operating instructions 150001185_05_en... -
Page 237: Servicing Chain Lubrication Unit
„ Remove the cover (2). „ Remove the filter (3) from the reservoir (1). „ Clean the filter (3). „ Mount a clean filter (3). „ Fill the reservoir (1) with oil. „ Mount the cover (2). VariPack V 165 XC Original operating instructions 150001185_05_en... -
Page 238: Position Of The Oil Brushes
The oil brushes are located on the 3 drive chains which are identified on the machine by numbers. Right side of machine RPG000-175 1 Drive chain no. 1 – baling unit 2 Drive chain no. 2 – rotor VariPack V 165 XC Original operating instructions 150001185_05_en... -
Page 239: Servicing Compressed Air Brake (For Version With "Compressed Air Brake")
The air filters clean the compressed air and protect the compressed air brake against malfunctions. The compressed-air brake remains functional in both flow directions even when a filter element is obstructed. ü The machine has been shut down and secured, Page 28. VariPack V 165 XC Original operating instructions 150001185_05_en... -
Page 240: Drain Condensation Water From The Compressed Air Tank
The drain valve (2) is on the underside of the compressed air reservoir (1). „ Shut down and safeguard the machine, Page 28. WARNING! Risk of eye injury due to spurting condensation water! Wear suitable protective goggles. VariPack V 165 XC Original operating instructions 150001185_05_en... -
Page 241: Retighten Tensioning Straps At The Compressed Air Tank
„ Visually inspect the drain valve (2) to ensure that it is not defective or soiled. Æ If the drain valve (2) is defective and is no longer sealed, immediately have the drain valve (2) replaced by a KRONE service partner. Æ If the drain valve (2) is soiled, clean the drain valve (2). -
Page 242: Before Working On The Hydraulic System
When checking hydraulic hoses, the state-specific conditions (e.g., BGVU) must be observed. Performing a visual inspection „ Visually inspect all hydraulic hoses for damage and leaks and have them replaced by an authorised specialist if necessary. VariPack V 165 XC Original operating instructions 150001185_05_en... -
Page 243: Malfunction, Cause And Remedy
The machine height has not been set correctly with respect KRONE service partner, Page 55. to the tractor. The crop press roller unit has „ Set the crop press roller unit higher, Page 87. been set too low. VariPack V 165 XC Original operating instructions 150001185_05_en... -
Page 244: Disturbances During Or After The Baling Process
„ Fill the bale chamber quickly with crops by increasing driving speed or swath size. „ Reduce the rotational speed. „ Drive with few or no blades. To swivel out blade groups, Page 91. VariPack V 165 XC Original operating instructions 150001185_05_en... - Page 245 „ Reduce the baling pressure, Page 200. high. The tensioning hydraulics are „ Have the tensioning hydraulics checked by a KRONE faulty. service partner. Disturbance: The round bale does not roll far enough out of the bale chamber. The tailgate damages the wrapping and tying material when it closes.
-
Page 246: Disturbances At The Tying Unit Or During The Tying Cycle
„ Drive over the swath on alternate sides, The bale chamber is filled un- Page 77. evenly. „ Increase the number of layers. KRONE recommends 4 net The number of layers of wrap- ping material is too low. layers for net wrapping. - Page 247 Remedy „ Remove deposits from the cutting unit. The cutting unit is blunt. „ If required, have the cutting unit replaced by a KRONE service partner. The cutting unit is not actu- „ Remove debris from the cutting unit inside the bale chamber ated.
-
Page 248: Malfunctions On The Chain Lubrication Unit
„ Clean the entire central chain lubrication system. The system is blocked by de- posits. Malfunction: The oil pump is not pressed for the complete stroke. Possible cause Remedy The oil is too thick. „ Use recommended oil, Page 52. VariPack V 165 XC Original operating instructions 150001185_05_en... -
Page 249: Faults Of The Electrics/Electronics
„ When an error message is displayed, eliminate the disturbance; see chapter "Error list" in the supplement to operating instructions "Error messages". „ If the fault cannot be rectified, contact KRONE service partner. KMC - 521202- 5 EQG000-034 If the machine malfunctions, the display shows an error message. -
Page 250: Possible Error Types (Fmi)
The lower limit value has been reached. The lower limit value has not been reached. There is a CAN communication failure. The data deviates upwards. The data deviates downwards. The condition has been fulfilled. VariPack V 165 XC Original operating instructions 150001185_05_en... -
Page 251: Remedying Sensor/Actuator Error
Depending on the position of the feed rocker arm, the ratchet (1) is either engaged (Position (I)) or not engaged (Position (II)). For an overview of the positions of the feed rocker arm, Page 252. VariPack V 165 XC Original operating instructions 150001185_05_en... -
Page 252: Checking Positions Of The Feed Rocker Arm
When manually operating the terminal, the feed rocker arm can be moved to the end position, feed position and tying position, Page 167. The positions of the feed rocker arm can be checked on the left side of the machine. Final position RP000-994 VariPack V 165 XC Original operating instructions 150001185_05_en... - Page 253 „ In Menu 10 "Manual operation" move the feed rocker arm into the feed position by pressing the key. „ Check whether the cylinder (1) has been completely extended and the area (2) looks as the same as the one illustrated. VariPack V 165 XC Original operating instructions 150001185_05_en...
-
Page 254: Setting The Tailgate Lock
Make the following setting on the right and left sides of the machine in the same way: ü The machine has been shut down and secured, Page 28. „ Check dimension X on the eyelet bolt (3). ð If the dimension is X=105 mm, the setting is correct. VariPack V 165 XC Original operating instructions 150001185_05_en... -
Page 255: Checking The Pressure Limiting Valve
„ Check whether the terminal is switched on. If the terminal is switched on and the light-emitting diode is not lit, there is an electrical fault. „ Check the machine electronics and, if required, have them repaired by the KRONE service partner. -
Page 256: Cleaning Deflection Rolls And Baling Belts
„ If work has to be performed under the machine, securely support the machine, Page 29. The car jack contact points are located on the left and right on the single axle or tandem axle and a marked with a sticker. VariPack V 165 XC Original operating instructions 150001185_05_en... - Page 257 Malfunction, cause and remedy Car jack contact points 18.12 Example image of a single axle: RPG000-177 1 Car jack contact point at rear left 2 Car jack contact point at rear right VariPack V 165 XC Original operating instructions 150001185_05_en...
-
Page 258: Waste Disposal
Rubber • All rubber parts (e.g. hoses, tyres) must be taken to a rubber recycling centre. Electronic components • All electronic components must be taken to a disposal point for electronic scrap. VariPack V 165 XC Original operating instructions 150001185_05_en... -
Page 259: Index
Behavior in the case of voltage flashover of overhead lines ............ 24 Behaviour in dangerous situations and in case of accidents ............28 Briefly deactivating cutting unit and pick-up ..229 Bringing the pick-up to transport/working position ................84 VariPack V 165 XC Original operating instructions 150001185_05_en... - Page 260 Connecting the camera to the KRONE ISOBUS terminal CCI 800 or CCI 1200 ......75 Checking hydraulic hoses ........ 242 Connecting the KRONE DS 100 operation unit .. 66 Checking hydraulic oil pressure in the clamping system .............. 255 Connecting the KRONE ISOBUS terminal (CCI 800, CCI 1200) ...........
- Page 261 Delete all errors ..........191 Delete individual errors ........191 Design DS 500..........130 Design of display ..........134 Design of the KRONE machine application ..134 Diagnostics for digital actuators......189 Dimensions ............50 Direction display ........111, 143 Direction display sensitivity (terminal)....
- Page 262 Grinding the blades........... 233 Switching the operation unit on/off ..110 Switching the working lights on/off ..113 Hot liquids ............25 Hot surfaces............26 How to use this document ........11 VariPack V 165 XC Original operating instructions 150001185_05_en...
- Page 263 Jobs on the machine .......... 18 Keys ..............138 KRONE ISOBUS terminal (CCI 800, CCI 1200) ................. 132 KRONE operation unit DS 100 ......108 KRONE SmartConnect (Terminal) ....179 KRONE Terminal DS 500......... 129 VariPack V 165 XC Original operating instructions 150001185_05_en...
- Page 264 Menu 13-2 "Total counter" ........ 177 consumption too high ......248 Menu 14 "ISOBUS"........... 178 Central chain lubrication system: Oil Menu 14-5 "KRONE SmartConnect" ....179 consumption too low ......248 Menu 14-6 "Configuring TIM software" (for "TIM Central chain lubrication system: Oil pump 1.0"...
- Page 265 Position of the oil brushes......... 238 Possible error types (FMI) ........ 250 Preparation before baling ........76 Preparing the machine for road travel ....193 Preparing the machine for shipment....196 Pre-signalling (terminal)........162 VariPack V 165 XC Original operating instructions 150001185_05_en...
- Page 266 Setting the bale ejector ........205 Setting the baling pressure ....... 115, 200 Setting the core, centre and edge of the round bale ................116 Setting the crop press roller unit ......87 VariPack V 165 XC Original operating instructions 150001185_05_en...
- Page 267 ..........165 Sensor test ..........183 Setting units..........135 Settings........... 182 SmartConnect......... 179 Software info........... 189 Switching between terminals ....182 Twine tying start/end position ....170 Tying in the menu level......160 VariPack V 165 XC Original operating instructions 150001185_05_en...
- Page 268 Tying start delay ........163 Terminal machine functions ......137 Validity ..............10 Terminal menus..........155 Varying functions to KRONE ISOBUS terminal 136 The cam clutch is released....... 244 Vehicle identification number......46 Tightening torques..........215 Tightening torques for "ADR/Colaert axle" version .................
-
Page 269: Declaration Of Conformity
EU Directive 2014/30/EU (EMC) The harmonised standard EN ISO 14982:2009 has been applied in accordance with the directive. The signing Managing Director is authorised to compile the technical documents. Jan Horstmann Spelle, 04/08/2021 (Managing Director, Design & Development) Year of manufacture: Machine no.: VariPack V 165 XC Original operating instructions 150001185_05_en... - Page 270 Maschinenfabrik Bernard Krone GmbH & Co. KG * Heinrich-Krone-Straße 10 D-48480 Spelle * Postfach 11 63 D-48478 Spelle ' +49 (0) 59 77 / 935-0 6 +49 (0) 59 77 / 935-339 ü www.landmaschinen.krone.de...
Need help?
Do you have a question about the VariPack V 165 XC and is the answer not in the manual?
Questions and answers