
Related Manuals for Nordson ARAG MULTIFLOW IBX100


Summary of Contents for Nordson ARAG MULTIFLOW IBX100
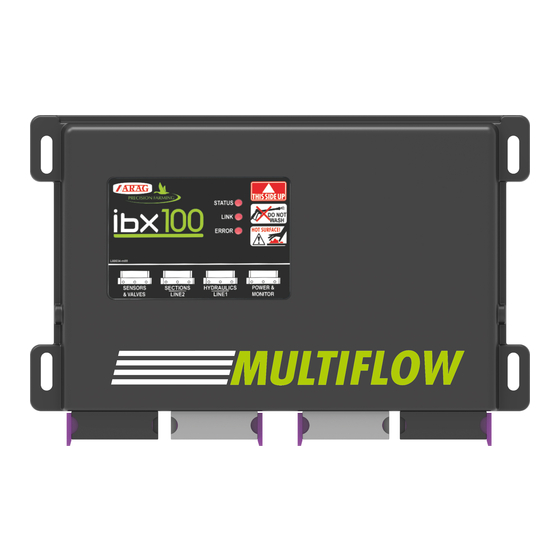
- Page 1 IBX100 ELECTRONIC CONTROL UNIT 4679407 46794072 Object Pool rel. 3.2.X INSTALLATION, USE AND MAINTENANCE...
-
Page 2: Legend Of Symbols
LEGEND OF SYMBOLS LEGEND OF SYMBOLS AND TERMINOLOGY • = Generic danger = Warning = IBX100 remote control unit = Virtual Terminal = Object Pool = Task Controller Flowmeter = Outputs, channels or lines (up to 4) present in each Orion Multiflow Flussometri Flowmeters (uscite, canali, file) -
Page 3: Table Of Contents
CONTENTS Risks and protections before assembly.........4 33 Data and Settings ..............46 Intended use ................4 34 Implement settings ..............47 34.10.1 Home > Data and settings > Implement settings > Tank > Precautions ................4 Press. sensor zero value ............ 54 Package content ...............4 34.11 Home >... -
Page 4: Risks And Protections Before Assembly
INTRODUCTION • MANUAL USE MODES The section of this manual dedicated to the installation contains information for installers. For this reason we have used technical terms without providing explanations which would be necessary for end users only. THE INSTALLATION MUST BE CARRIED OUT BY AUTHORIZED AND SKILLED PERSONNEL ONLY. ARAG IS NOT RESPONSIBLE FOR ANY OPERATION SPECIFIED IN THIS MANUAL CARRIED OUT BY UNAUTHORIZED OR UNSKILLED PERSONNEL. -
Page 5: Position On Farming Machine - Multiflow Monitor Mode
INSTALLATION POSITION ON FARMING MACHINE - MULTIFLOW MONITOR MODE System recommended composition To connect all parts of the system correctly, make sure to use the proper connection cables. Consider all possible variants: • type of system, • number of Multiflows connected (maximum 12) INSTALLATION DIAGRAM MULTIFLOW MONITOR MODE VIRTUAL TERMINAL... -
Page 6: Position On Farming Machine - Multiflow Sprayer Mode
INSTALLATION POSITION ON FARMING MACHINE - MULTIFLOW SPRAYER MODE System recommended composition To connect all parts of the system correctly, make sure to use the proper connection cables. Consider all possible variants: • type of system, • number of Multiflows connected (maximum 12) INSTALLATION DIAGRAM MULTIFLOW SPRAYER MODE VIRTUAL TERMINAL... -
Page 7: System Recommended Composition Version With Hydraulic Controls
INSTALLATION System recommended composition VERSION WITH HYDRAULIC CONTROLS To connect all parts of the system correctly, make sure to use the proper connection cables. Consider all possible variants: • type of system, • number of Multiflows connected (maximum 12) INSTALLATION DIAGRAM MULTIFLOW SPRAYER MODE (VERSION WITH HYDRAULIC CONTROLS) VIRTUAL TERMINAL... -
Page 8: Control Unit Fixing
INSTALLATION Control unit fixing Secure the control units on the back of the machine, close to the control unit and the hydraulic unit. Consider all necessary connections of the device (par. 6.4), the cable length, and make sure there is enough space for connectors and cables. -
Page 9: Wiring Harness Connection
INSTALLATION Wiring harness connection IBX100 MULTIFLOW CONNECTION POINTS Control unit (G + P) + Sensors Orion Multiflow - Line 2 + Section Valves or Section Valves only Orion Multiflow - Line 1 Standard ISOBUS connector (ISOBUS PLUG) Fig. 7 IBX100 HYDRAULIC CONNECTION POINTS Hydraulic unit IBX100 Multiflow... -
Page 10: Wiring Connections
INSTALLATION WIRING CONNECTIONS • Use original ARAG harnesses only. • Take care not to break, pull, tear or cut the cables. • Use of unsuitable cables not provided by ARAG automatically voids the warranty. • ARAG is not liable for any damage to the equipment, persons or animals caused by failure to observe the above instructions. General precautions for a correct harness position •... -
Page 11: Control Unit Valve Connection
INSTALLATION Control unit valve connection (available for only) MULTIFLOW SPRAYER MODE • The system only works if assembled with 3-wire type valves. • Use ARAG valves: use of unsuitable valves not provided by ARAG automatically voids the warranty. ARAG is not liable for damage to the equipment, persons or animals caused by failure to observe the above instructions. •... -
Page 12: Sensor Connection
INSTALLATION Sensor connection Fix the connectors to the relevant functions according to the initials indicated in your assembly general diagram (par. 6.1). Harness cables are marked with a symbol denoting their functions: please see the table for correct harness connection. Use ARAG sensors: use of unsuitable sensors not provided by ARAG automatically voids the warranty. -
Page 13: Isobus System Cable Connection
INSTALLATION ISOBUS SYSTEM CABLE CONNECTION Connect the ISOBUS and IN-CAB cables. Turn the VT on. Wait for the OP complete loading (Chap. IN-CAB IN-CAB CONNECTION CONNECTION ISOBUS ISOBUS CONNECTION CONNECTION Fig. 20 Connection of in-cab cable Use the cable supplied in the auxiliary input package Connection: Fit the connectors (in-cab connection in Fig. -
Page 14: Object Pool" Loading
“OBJECT POOL” LOADING “OBJECT POOL” LOADING Images and the relevant description texts contained in this manual are given as a reference as they can vary depending on the VT used. If the descriptions do not correspond to the text displayed in your VT, refer to the manual attached to the latter. "OBJECT POOL"... -
Page 15: Control Layout
CONTROL LAYOUT CONTROL LAYOUT Goes back to main screen Goes back to previous menu, or scrolls the pages of a menu (previous page) Scrolls the pages of a menu (next page) Saves the changes to current page Fig. 21 Quits without confirming the changes Saves the changes Fig. -
Page 16: Entering And Editing Numerical Values And Texts
ENTERING AND EDITING NUMERICAL VALUES AND TEXTS ENTERING AND EDITING NUMERICAL VALUES AND TEXTS 11.1 Entering a text Confirm Quits without confirming Deletes one character at a time (from right to left) Allows entering capital letters Fig. 23 Allows entering numbers and symbols (Fig. 24) Allows entering letters (Fig. -
Page 17: Multiflow Monitor Mode
FOREWORD - MULTIFLOW MONITOR MODE FOREWORD IBX100 ISOBUS Multiflow can control two different modes of operation: Multiflow Monitor Multiflow Sprayer. The Multiflow monitor function DISPLAYS the output of liquid fertilizer. The Multiflow Sprayer function allows CONFIGURING AND MANAGING the output of liquid fertilizer. Select the use mode in the menu D ata and settings >... -
Page 18: Data And Settings
DATA AND SETTINGS - MULTIFLOW MONITOR MODE MULTIFLOW MONITOR MODE DATA AND SETTINGS Data and Settings Data and Settings Allows setting all the items. Upon first switching on, enter the device basic settings. For a correct use of the keys during setting, refer to chap. 10. IMPLEMENT SETTINGS Configure implement settings. - Page 19 IMPLEMENT SETTINGS - MULTIFLOW MONITOR MODE MULTIFLOW MONITOR MODE Home > Data and settings > Implement settings > Orion Multiflow Opt. 15.3 Flow rate limits : enter the flowrate limits outside which the device will trigger an alarm. Info and alarms Enable the proper function in the menu (chap.
- Page 20 IMPLEMENT SETTINGS - MULTIFLOW MONITOR MODE MULTIFLOW MONITOR MODE Home > Data and settings > Implement settings > Speed 15.6 Speed settings : allows setting the speed data. : allows selecting the source for speed calculation. Source : when this option is enabled, speed is calculated through the pulses coming from the speed sensor, installed on the wheel •...
-
Page 21: Manage Presets
MANAGE PRESETS - MULTIFLOW MONITOR MODE MULTIFLOW MONITOR MODE MANAGE PRESETS This menu allows: - Set 8 different treatment configurations: Preset - Activating one configuration among the preset ones. - Consult job data of the treatment selected: Preset Fig. 34 Home >... - Page 22 MANAGE PRESETS - MULTIFLOW MONITOR MODE MULTIFLOW MONITOR MODE CONSULTATION OF JOB DATA OF THE SELECTED PRESET Preset Allows displaying and deleting the job data of the selected. Preset - Select the - Use the keys to scroll the pages - Use the key to delete job data;...
-
Page 23: Working Parameters
WORkING PARAMETERS - MULTIFLOW MONITOR MODE MULTIFLOW MONITOR MODE WORKING PARAMETERS This menu allows activating and setting the minimum work speed. Fig. 39 Require speed This item is only available if the item is enabled in the Home > Data and settings > Implement ... -
Page 24: Info And Alarms
INFO AND ALARMS - MULTIFLOW MONITOR MODE MULTIFLOW MONITOR MODE INFO AND ALARMS This menu allows setting visual and acoustic alarm warnings. Alarm enabled / Alarm disabled. For the procedure to be followed when an alarm occurs, please refer to par. -
Page 25: Data And Settings
DATA AND SETTINGS - MULTIFLOW MONITOR MODE MULTIFLOW MONITOR MODE DATA AND SETTINGS Consult chapter “33 Data and Settings" on page 46. Fig. 44... -
Page 26: Job's Data
JOB'S DATA - MULTIFLOW MONITOR MODE MULTIFLOW MONITOR MODE JOB'S DATA Allows consulting the spraying total data relating to applied area and job time Fig. 45 Pressing button 1allows the deletion of all job totals. Fig. 46... -
Page 27: Sprayer Capability
SPRAYER CAPABILITY - MULTIFLOW MONITOR MODE MULTIFLOW MONITOR MODE SPRAYER CAPABILITY Allows checking treatment performance based on speed, configurations and nozzles installed on the machine. WARNING: guidance information and all accessory functions are disabled. Displayed items are READ-ONLY. Fig. 47 ... -
Page 28: System
SYSTEM - MULTIFLOW MONITOR MODE MULTIFLOW MONITOR MODE SYSTEM Allows checking the parameters related to the IBX100 system. WARNING: guidance information and all accessory functions are disabled. Displayed items are READ-ONLY. Fig. 50 Restart ECU Press button to restart IBX100 and confirm. Fig. - Page 29 SYSTEM - MULTIFLOW MONITOR MODE MULTIFLOW MONITOR MODE Home > Data and settings > System > Device status 22.1 Correct operation Malfunction Missing connection Fig. 52 Fig. 53 Fig. 54...
- Page 30 SYSTEM - MULTIFLOW MONITOR MODE MULTIFLOW MONITOR MODE Home > Data and settings > System > ISOBUS 22.2 Displays information on ISOBUS protocol. 1 Allows changing the VT on which the OP is displayed in case more terminals are connected. 2 Allows deleting and reloading the ECU OP.
- Page 31 SYSTEM - MULTIFLOW MONITOR MODE MULTIFLOW MONITOR MODE Home > Data and settings > System > Auxiliary input status 22.3 Displays the connection of the Auxiliary Input. Hardware working correctly Hardware malfunction Missing connection Fig. 57 Home > Data and settings > System > System settings 22.4 1 Enables/disables simulation mode (mainly used for demonstrative purposes, training, etc.)
- Page 32 SYSTEM - MULTIFLOW MONITOR MODE MULTIFLOW MONITOR MODE Home > Data and settings > System > System settings > Settings manager > Restore saved configuration [ECU] 22.4.2 Allows restoring the settings contained in the last saved backup file. Restore saved configuration [ECU] Press to restore all settings in the Save active config [ECU]...
- Page 33 SYSTEM - MULTIFLOW MONITOR MODE MULTIFLOW MONITOR MODE Home > Data and settings > System > System settings > Settings manager > Export saved configuration [ECU] 22.4.3 (this button is present only if the VT supports File server feature) Save active config [ECU] Allows exporting the backup file present in the internal memory of IBX100, previously saved via the button.
- Page 34 SYSTEM - MULTIFLOW MONITOR MODE MULTIFLOW MONITOR MODE Home > Data and settings > System > System settings > Settings manager > Import configuration 22.4.4 Allows importing a backup file from an external memory connected to the Virtual Terminal. Import configuration Press to enter the File server management menu from which you can select the folder from which to import the backup...
- Page 35 SYSTEM - MULTIFLOW MONITOR MODE MULTIFLOW MONITOR MODE Home > Data and settings > System > System settings > Settings manager > Reset to Arag factory defaults 22.4.6 Allows resetting the factory settings in the IBX100 menu. Reset to Arag factory defaults Press to reset the IBX100 configuration to factory settings.
-
Page 36: Installation
SYSTEM - MULTIFLOW MONITOR MODE MULTIFLOW MONITOR MODE Home > Data and settings > System > Registration 22.5 This menu allows entering the IBX100 registration code. 1 Press and enter the code, then confirm. Fig. 65 Home > Data and settings > System > Orion Multiflow status 22.6 This menu has two main functions: - DIAGNOSTICS... -
Page 37: Connection Of Orion Multiflows
SYSTEM - MULTIFLOW MONITOR MODE MULTIFLOW MONITOR MODE CONNECTION OF ORION MULTIFLOWS PLEASE CAREFULLY FOLLOW THE INSTRUCTIONS PROVIDED IN THIS CHAPTER. ANY MISTAKES DURING ORION MULTIFLOW PAIRING/REPLACEMENT MAY LEAD TO SYSTEM OPERATION FAILURE. • Access the menu 22.6 on page 36 (par. -
Page 38: Orion Multiflow Replacement
ORION MULTIFLOW REPLACEMENT - MULTIFLOW MONITOR MODE MULTIFLOW MONITOR MODE ORION MULTIFLOW REPLACEMENT 24.1 Preliminary Operations TO AVOID ACCIDENTS, EMPTY THE TANK AND MAKE SURE THAT THE ENTIRE SYSTEM IS COMPLETELY FREE FROM CHEMICALS. IMPORTANT Operate main valve and section controls (ON position) and carry out the indicated settings: Main control ON Open sections MANUAL section management... -
Page 39: Orion Multiflow Id Reset
ORION MULTIFLOW ID RESET - MULTIFLOW MONITOR MODE MULTIFLOW MONITOR MODE ORION MULTIFLOW ID RESET Home > Data and settings > System > Orion Multiflow status Access the menu 1 Allows resetting the identification numbers of all stored Orion Multiflows, in case you want to repeat the pairing procedure 23 on page 37 (Chap. -
Page 40: User Preferences
USER PREFERENCES - MULTIFLOW MONITOR MODE MULTIFLOW MONITOR MODE USER PREFERENCES Allows customizing the user settings. Fig. 72 Displays the OP use language source. Set OP units of measurement: Allows enabling or disabling alarm groups depending on their relevance. Set OP access level: •... -
Page 41: Use
USE - MULTIFLOW MONITOR MODE MULTIFLOW MONITOR MODE 27.1 Display items Colored icon: Spraying in progress Gray icon: No spraying Width of spraying Active alarm (Chap. 29) Current application rate Speed preset Detailed data for each individual row User customizable data* Graphic indication of the output of each row: General error on the row. -
Page 42: Selective Activation / Deactivation Of The Lines
SELECTIVE ACTIVATION / DEACTIVATION OF THE LINES - MULTIFLOW MONITOR MODE MULTIFLOW MONITOR MODE SELECTIVE ACTIVATION / DEACTIVATION OF THE LINES 1 Press on the row you wish to activate/deactivate. 2 Press on the row number or on the "lens" symbol: the device allows viewing the status of the row and to activate or deactivate it. -
Page 43: Alarms
ALARMS - MULTIFLOW MONITOR MODE MULTIFLOW MONITOR MODE ALARMS Alarms Allows displaying alarm notifications. Fig. 78 No Multiflow communications Increase rotation speed! For the procedure to be followed when an alarm occurs, please refer to par. 62.3. 1 Enabled alarm. 2 Alarm just corrected. -
Page 44: Multigraph Settings
MULTIGRAPH SETTINGS - MULTIFLOW MONITOR MODE MULTIFLOW MONITOR MODE MULTIGRAPH SETTINGS Multigraph settings Fig. 80 Allows setting the tolerance limits of all spraying lines graphically represented on the user screen. 1 Set the maximum graphical tolerance limit of the lines: in order for the application rate to be considered valid, the flow of each single line must be within the defined range. -
Page 45: Row Status > Next Page
ROW STATUS > NEXT PAGE - MULTIFLOW MONITOR MODE MULTIFLOW MONITOR MODE ROW STATUS > NEXT PAGE This button is active only if there are more than 24 lines (6 Orion Multiflows). Next Line Status Page Fig. 82 1 Press the button to scroll through the line status pages. Example: - page 1 from row 1 to 24 - page 2 from row 25 to 48... -
Page 46: Multiflow Sprayer Mode
HOME - MULTIFLOW SPRAYER MODE MULTIFLOW SPRAYER MODE HOME 32.1 Menu selection buttons Line status Data and settings chap. 33 on page 46 Displays job information / Alarms chap. 54 on page 90 Automatic functions chap 55 on page 91 Tank filling management chap. -
Page 47: Implement Settings
IMPLEMENT SETTINGS - MULTIFLOW SPRAYER MULTIFLOW SPRAYER IMPLEMENT SETTINGS Configure implement settings. Fig. 86 Fig. 87 Home > Data and settings > Implement settings > Basic settings 34.1 Allows configuring: 1 / 5 Application type : select the type of function you wish to use. Multiflow monitor : the device is used only as display (Chap. - Page 48 IMPLEMENT SETTINGS - MULTIFLOW SPRAYER MULTIFLOW SPRAYER Home > data and settings > implement settings > Boom 34.2 Allows configuring: Boom settings Sprayer technology : system with electric valves with gear motor. Valves : indicate the number of sections making up the boom. Number of sections : indicate the distance between spraying points.
- Page 49 IMPLEMENT SETTINGS - MULTIFLOW SPRAYER MULTIFLOW SPRAYER Home > data and settings > implement settings > Flowmeters 34.3 This menu allows setting both flowrate measuring flowmeter and filling flowmeter (if set). Set installed flowmeter by selecting it from the list in Fig. 93(use keys to scroll items, and key to confirm).
- Page 50 IMPLEMENT SETTINGS - MULTIFLOW SPRAYER MULTIFLOW SPRAYER Home > data and settings > implement settings > Pressure sensor 34.4 Set installed pressure sensor by selecting it from the list in Fig. 95(use keys to scroll items, and key to confirm). The relevant configuration data will be automatically loaded (Fig.
- Page 51 IMPLEMENT SETTINGS - MULTIFLOW SPRAYER MULTIFLOW SPRAYER Home > data and settings > implement settings > Valves 34.5 It allows configuring the main valve, the pressure control valve and the section valves: Fig. 96 Fig. 97 1 / 2 Main valve Type ...
- Page 52 IMPLEMENT SETTINGS - MULTIFLOW SPRAYER MULTIFLOW SPRAYER Home > Data and settings > Implement settings > Nozzle data 34.6 Nozzle data : It allows setting the characteristic data of 12 ISO and 6 “User” (A ÷ F) nozzle types. : select the type of nozzle you will use for spraying. Nozzles data : set the reference flowrate for the selected nozzle.
- Page 53 IMPLEMENT SETTINGS - MULTIFLOW SPRAYER MULTIFLOW SPRAYER Home > Data and settings > Implement settings > Tank 34.9 Allows setting the tank values: Reserve level : Indicate the reserve value under which the alarm is triggered. : Indicate tank capacity. Tank capacity WHEN THE VALUE IS ON GRAY BACKGROUND, IT CANNOT BE CHANGED.
-
Page 54: Home > Data And Settings > Implement Settings > Tank > Press. Sensor Zero Value
IMPLEMENT SETTINGS - MULTIFLOW SPRAYER MULTIFLOW SPRAYER Home > Data and settings > Implement settings > Tank > Press. sensor zero value 34.10.1 In case a pressure value other than zero is displayed despite the absence of pressure inside the circuit, it is necessary to perform zero calibration of the sensor. - Page 55 IMPLEMENT SETTINGS - MULTIFLOW SPRAYER MULTIFLOW SPRAYER Home > data and settings > implement settings > Tank > Tank profile calibration 34.10.3 The calibration of the tank profile is ONLY possible if a flowmeter is installed on the system. Before starting the procedure carry out the following operations: Make sure the main control is in OFF position Fill the tank with clean water WITHOUT ADDING CHEMICAL SUBSTANCES.
- Page 56 IMPLEMENT SETTINGS - MULTIFLOW SPRAYER MULTIFLOW SPRAYER Home > Data and settings > Implement settings > Tank > Save tank profile 34.10.4 Saves the tank profile calibration file in the IBX100 internal memory. Save tank profile Press to enter the File server management menu from which you can select the folder to which to export the tank profile file (e.g.
- Page 57 IMPLEMENT SETTINGS - MULTIFLOW SPRAYER MULTIFLOW SPRAYER Home > Data and settings > Implement settings > Tank > Load tank profile 34.10.5 Allows importing a tank profile calibration file present in an external memory connected to the Virtual Terminal. Load tank profile Press to enter the File server management menu from which you can select the folder from which to import the Tank...
-
Page 58: Home > Data And Settings > Implement Settings > Implement Geometry
IMPLEMENT SETTINGS - MULTIFLOW SPRAYER MULTIFLOW SPRAYER Home > data and settings > implement settings > Implement geometry 34.11 Select the type of implement connection. Enter the selected implement dimensions. 2 - 3 - 4 Enable / disable the option, for booms with center section offset from the rest of the boom; enter the measurement. Fig. -
Page 59: Home > Data And Settings > Implement Settings > System Configurations
IMPLEMENT SETTINGS - MULTIFLOW SPRAYER MULTIFLOW SPRAYER Home > data and settings > implement settings > System configurations 34.12 Set the device system options. SYSTEM STATUS Application rate regulation 1 Setting this item makes visible / not visible Automatic functions function of the menu (Chap. -
Page 60: Home > Data And Settings > Implement Settings > Rate Controller
IMPLEMENT SETTINGS - MULTIFLOW SPRAYER MULTIFLOW SPRAYER Home > data and settings > implement settings > Rate controller 34.13 Allows configuring the activation of the alarms relating to application rate display and regulation: 1 / 2 Rate regulation cutoff Regulation cutoff : Indicate the percentage of tolerance relative to the application rate target beyond which the control valve no longer regulates because it considers it to have been reached. -
Page 61: Home > Data And Settings > Implement Settings > Flowmeter Presets
IMPLEMENT SETTINGS - MULTIFLOW SPRAYER MULTIFLOW SPRAYER Home > Data and settings > Implement settings > Flowmeter presets 34.15 Allows setting flowmeter data. 1-2 Select the flowmeter to be set with keys. Constant Set the The items Minimum flowrate and Maximum flowrate can be modified only when the option Other is enabled. -
Page 62: Manage Presets
MANAGE PRESETS - MULTIFLOW SPRAYER MULTIFLOW SPRAYER MANAGE PRESETS This menu allows: - Activate one configuration among the preset ones: PRESET ACTIVATION (Fig. 124). - Set 8 different treatment configurations: PRESET SETTING (Fig. 125). - Consult job data of the treatment selected: CONSULTATION OF JOB DATA OF THE SELECTED PRESET (Fig. - Page 63 MANAGE PRESETS - MULTIFLOW SPRAYER MULTIFLOW SPRAYER CONSULTATION OF JOB DATA OF THE SELECTED PRESET Preset Allows displaying and deleting the job data of the selected. Preset - Select the - Use the keys to scroll the pages - Use the key to delete job data;...
-
Page 64: Working Parameters
WORkING PARAMETERS - MULTIFLOW SPRAYER MULTIFLOW SPRAYER WORKING PARAMETERS This menu allows setting the working parameters of the farming machine. Fig. 128 MINIMUM SPRAYING SPEED 1 To configure the items on this menu, you must enable the speed limit. Set the minimum spraying speed: IBX100 Multiflow closes the main valve when the tractor speed is lower than the set value. -
Page 65: Info And Alarms
INFO AND ALARMS - MULTIFLOW SPRAYER MULTIFLOW SPRAYER INFO AND ALARMS This menu allows setting visual and acoustic alarm warnings. Alarm enabled / Alarm disabled. For the procedure to be followed when an alarm occurs, please refer to par. “62.3 Error messages"... - Page 66 INFO AND ALARMS - MULTIFLOW SPRAYER MULTIFLOW SPRAYER REGULATION ALARMS 1 Alarm is enabled with main control ON but flowrate at zero. 2 Alarm is enabled with main control ON with machine stopped. 3-4 Alarms are activated if the system does not reach the set pressure limits (Fig.
-
Page 67: Data And Settings
DATA AND SETTINGS - MULTIFLOW SPRAYER MULTIFLOW SPRAYER DATA AND SETTINGS Consult chapter “33 Data and Settings" on page 46. Fig. 137... -
Page 68: Job's Data
JOB'S DATA - MULTIFLOW SPRAYER MULTIFLOW SPRAYER JOB'S DATA Allows consulting the spraying total data relating to applied area and job time, managed by the TC Server. Fig. 138 Fig. 139... -
Page 69: Sprayer Capability
SPRAYER CAPABILITY - MULTIFLOW SPRAYER MULTIFLOW SPRAYER SPRAYER CAPABILITY Allows checking treatment performance based on speed, configurations and nozzles installed on the machine. WARNING: guidance information and all accessory functions are disabled. Displayed items are READ-ONLY. Fig. 140 The datum meets the specified criteria. -
Page 70: System
SYSTEM - MULTIFLOW SPRAYER MULTIFLOW SPRAYER SYSTEM Allows checking the IBX100 system parameters. WARNING: guidance information and all accessory functions are disabled. Displayed items are READ-ONLY. Fig. 143 par. 41.1 on page 71 par. 41.2 on page 72 par. 41.3 on page 73 par. - Page 71 SYSTEM - MULTIFLOW SPRAYER MULTIFLOW SPRAYER Home > Data and settings > System > Device status 41.1 Correct operation Malfunction Missing connection Fig. 145 Fig. 146 Fig. 147 Fig. 148 CONTINUES...
- Page 72 SYSTEM - MULTIFLOW SPRAYER MULTIFLOW SPRAYER Home > Data and settings > System > ISOBUS 41.2 Displays information on ISOBUS protocol. 1 Allows changing the VT on which the OP is displayed in case more terminals are connected. 2 Allows deleting and reloading the ECU OP. 3 Allows changing the VT with which data can be exchanged through the TC in case more terminals are connected.
- Page 73 SYSTEM - MULTIFLOW SPRAYER MULTIFLOW SPRAYER Home > Data and settings > System > Auxiliary input status 41.3 Displays the connection of the Auxiliary Input. Hardware working correctly Hardware malfunction Missing connection Fig. 151 Home > Data and settings > System > System settings 41.4 1 Enables/disables simulation mode (mainly used for demonstrative purposes, training, etc.)
- Page 74 SYSTEM - MULTIFLOW SPRAYER MULTIFLOW SPRAYER Home > Data and settings > System > System settings > Settings manager > Restore saved configuration [ECU] 41.4.2 Allows restoring the settings contained in the last saved backup file. Restore saved configuration [ECU] Press to restore all settings in the Save active config [ECU]...
- Page 75 SYSTEM - MULTIFLOW SPRAYER MULTIFLOW SPRAYER Home > Data and settings > System > System settings > Settings manager > Export saved configuration [ECU] 41.4.3 (this button is present only if the VT supports File server feature) Save active config [ECU] Allows exporting the backup file present in the internal memory of IBX100, previously saved via the button.
- Page 76 SYSTEM - MULTIFLOW SPRAYER MULTIFLOW SPRAYER Home > Data and settings > System > System settings > Settings manager > Import configuration 41.4.4 Allows importing a backup file from an external memory connected to the Virtual Terminal. Import configuration Press to enter the File server management menu from which you can select the folder from which to import the backup file.
- Page 77 SYSTEM - MULTIFLOW SPRAYER MULTIFLOW SPRAYER Home > Data and settings > System > System settings > Settings manager > Reset to Arag factory defaults 41.4.6 Allows resetting the factory settings in the IBX100 menu. Reset to Arag factory defaults Press to reset the IBX100 configuration to factory settings.
- Page 78 SYSTEM - MULTIFLOW SPRAYER MULTIFLOW SPRAYER Home > Data and settings > System > Registration 41.5 This menu allows entering the IBX100 registration code provided upon purchase. REGISTRATION Press to enter registration code. Enter the code and confirm. Fig. 159 Home >...
-
Page 79: Connection Of Orion Multiflows
SYSTEM - MULTIFLOW SPRAYER MULTIFLOW SPRAYER CONNECTION OF ORION MULTIFLOWS PLEASE CAREFULLY FOLLOW THE INSTRUCTIONS PROVIDED IN THIS CHAPTER. ANY MISTAKES DURING ORION MULTIFLOW PAIRING/REPLACEMENT MAY LEAD TO SYSTEM OPERATION FAILURE. • Access the menu 22.6 on page 36 (par. Home >... -
Page 80: Orion Multiflow Replacement
ORION MULTIFLOW REPLACEMENT - MULTIFLOW SPRAYER MULTIFLOW SPRAYER ORION MULTIFLOW REPLACEMENT 43.1 Preliminary Operations TO AVOID ACCIDENTS, EMPTY THE TANK AND MAKE SURE THAT THE ENTIRE SYSTEM IS COMPLETELY FREE FROM CHEMICALS. IMPORTANT Operate main valve and section controls (ON position) and carry out the indicated settings: Main control ON Open sections MANUAL section management... -
Page 81: Orion Multiflow Id Reset
ORION MULTIFLOW ID RESET - MULTIFLOW SPRAYER MULTIFLOW SPRAYER CONNECTION SEQUENCE OF THE MULTIFLOWS TO BE REPLACED: 2, 3 and 6 2 seconds Orion Multiflow 3 and 6... Orion Multiflow 3 and 6... Orion Multiflow 2 Orion Multiflow 2 Fig. -
Page 82: User Preferences
USER PREFERENCES - MULTIFLOW SPRAYER MULTIFLOW SPRAYER USER PREFERENCES Allows customizing the user settings. Fig. 168 Displays the OP use language source. To change language, edit the VT settings. Set OP units of measurement. You can select the measurement system or infer it from the VT settings. -
Page 83: Use
USE - MULTIFLOW SPRAYER MULTIFLOW SPRAYER 46.1 “HOME” main screen Line status Data and settings chap. 33 on page 46 Displays job information / Alarms chap. 54 on page 90 Automatic functions chap 55 on page 91 Tank filling management chap. 56 on page 93 Main control ON/OFF *Management of Syncro ISOBUS functions chap. -
Page 84: Home > Line Status
HOME > LINE STATUS - MULTIFLOW SPRAYER MULTIFLOW SPRAYER HOME > LINE STATUS Line status Press this button to display the line status screen. Fig. 173 47.1 Display items Auxiliary Input ON/OFF (par. 34.12) Task Controller function status (par. 34.12): Colored icon: Spraying in progress Check of ON / OFF job counters Gray icon: No spraying... -
Page 85: Displaying Customizable Data
SELECTIVE ACTIVATION / DEACTIVATION OF THE LINES - MULTIFLOW SPRAYER MULTIFLOW SPRAYER 47.2 Displaying customizable data The lower part of the job screen is customizable. Press to select the data you wish to display from those proposed: - Sprayed surface (hA) - Productivity (hA/hr) - Distance travelled (m) - Flowrate... -
Page 86: Line Status > Data And Settings
LINE STATUS > DATA AND SETTINGS - MULTIFLOW SPRAYER MULTIFLOW SPRAYER LINE STATUS > DATA AND SETTINGS Data and Settings Consult chapter “33 Data and Settings" on page 46. Fig. 178 MULTIFLOW SPRAYER LINE STATUS > ALARMS Alarms Allows displaying alarm notifications. Fig. -
Page 87: Line Status > Multigraph Settings
LINE STATUS > MULTIGRAPH SETTINGS - MULTIFLOW SPRAYER MULTIFLOW SPRAYER LINE STATUS > MULTIGRAPH SETTINGS Multigraph settings Fig. 181 Allows setting the tolerance limits of all spraying lines graphically represented on the user screen. 1 Set the maximum graphical tolerance limit of the lines: in order for the application rate to be considered valid, the flow of each single line must be within the defined range. -
Page 88: Line Status > On/Off Main Control
LINE STATUS > ON/OFF MAIN CONTROL - MULTIFLOW SPRAYER MULTIFLOW SPRAYER LINE STATUS > ON/OFF MAIN CONTROL Main control ON/OFF Fig. 183 1 Press this button to switch between main ON and main OFF control modes. Fig. 184 2 Colored icon: Main control ON. Gray icon: Main control OFF. -
Page 89: Row Status > Next Page
ROW STATUS > NEXT PAGE - MULTIFLOW SPRAYER MULTIFLOW SPRAYER ROW STATUS > NEXT PAGE This button is active only if there are more than 24 lines (6 Orion Multiflows). Next Line Status Page Fig. 186 1 Press the button to scroll through the line status pages. Example: - page 1 from row 1 to 24 - page 2 from row 25 to 48... -
Page 90: Data And Settings
DATA AND SETTINGS - MULTIFLOW SPRAYER MODE MULTIFLOW SPRAYER MODE DATA AND SETTINGS Alarms Allows displaying alarm notifications. Fig. 188 No Multiflow communications Increase rotation speed! For the procedure to be followed when an alarm occurs, please refer to par. 62.3. 1 Enabled alarm. -
Page 91: Home > Functions
HOME > FUNCTIONS - MULTIFLOW SPRAYER MULTIFLOW SPRAYER HOME > FUNCTIONS Press this button to display the automatic functions screen. Automatic functions Fig. 190 55.1 Home > Functions > Automatic functions “HOME” SCREEN “HOME” SCREEN Automatic Automatic adjustment ON adjustment OFF ... - Page 92 HOME > FUNCTIONS - MULTIFLOW SPRAYER MULTIFLOW SPRAYER Home > Functions > Light switches 55.3 Allows turning the installed light switches (DEFAULT: OFF). / Off 1 Boom lighting 2 Flasher Cable chap. 6 on page 6 of harness pin 1 flashing light pin 2 boom light.
-
Page 93: Home > Tank
HOME > TANk - MULTIFLOW SPRAYER MULTIFLOW SPRAYER HOME > TANK Manages tank filling. The management mode will change according to the device set for the tank level reading (chap. 34.1) Tank Fig. 194 1 Range 2 Tank level 3 Press to reset the tank level. 4 Press to set the quantity of liquid filled in the tank. -
Page 94: Home > On/Off Main Control
HOME > ON/OFF MAIN CONTROL - MULTIFLOW SPRAYER MULTIFLOW SPRAYER HOME > ON/OFF MAIN CONTROL Main control ON/OFF Fig. 196 1 Press this button to switch between main ON and main OFF control Fig. 197 modes. 2 Colored icon: Main control ON. Gray icon: Main control OFF. -
Page 95: Main Control And Section Management
MAIN CONTROL AND SECTION MANAGEMENT - MULTIFLOW SPRAYER MULTIFLOW SPRAYER MAIN CONTROL AND SECTION MANAGEMENT 58.1 Setting controls WITH Auxiliary Input efer to the user's manual supplied with the device. Auxiliary Input ON ARAG Auxiliary Input control system is not compulsory on all systems, and must thus be ordered separately. -
Page 96: Section Sequential Control From Touch-Screen Panel
MAIN CONTROL AND SECTION MANAGEMENT - MULTIFLOW SPRAYER MULTIFLOW SPRAYER 58.4 Section sequential control from touch-screen panel Press button to open sections to the left, starting from the first available Press button to open sections to the right, starting from the first available on the right. -
Page 97: Joystick: Arag Default Functions
JOYSTICk: ARAG DEFAULT FUNCTIONS - MULTIFLOW SPRAYER MULTIFLOW SPRAYER JOYSTICK: ARAG DEFAULT FUNCTIONS The functions described below are illustrative. Press keys O = opens the hydraulic valve The following contents may NOT be updated and may differ from to scroll C = closes the hydraulic valve the product in your possession. -
Page 98: Home > Syncro Isobus Function Management
HOME > SYNCRO ISOBUS FUNCTION MANAGEMENT - MULTIFLOW SPRAYER MULTIFLOW SPRAYER HOME > SYNCRO ISOBUS FUNCTION MANAGEMENT The user can access the functions of the connected Syncro ISOBUS: execute available commands, view info and alarms. The user CANNOT program the Syncro Isobus. Management of Syncro ISOBUS functions. -
Page 99: Home > Application Rate Change
HOME > APPLICATION RATE CHANGE - MULTIFLOW SPRAYER MULTIFLOW SPRAYER HOME > APPLICATION RATE CHANGE Allows temporarily increasing and decreasing output. Fig. 201 “HOME” SCREEN “HOME” SCREEN Working 1 Increases the value, at each press, of the percentage set in the parameters (Fig. -
Page 100: Maintenance / Diagnostics / Repairs
MAINTENANCE / DIAGNOSTICS / REPAIRS MAINTENANCE / DIAGNOSTICS / REPAIRS 62.1 Cleaning rules - Clean only with a soft wet cloth. - DO NOT use aggressive detergents or products. - DO NOT aim water jets directly at control unit. Fig. 203 62.2 LED status key COLOR... -
Page 101: Error Messages
MAINTENANCE / DIAGNOSTICS / REPAIRS 62.3 Error messages OPERATING MESSAGE ON DISPLAY CAUSE SOLUTION MODE Disable main valve switch Main switch ON upon switching on • Disable main control (OFF) Master ON Regulation • Start the machine. Move forward! The machine is stopped Main control ON with machine stopped AUTO ON •... -
Page 102: Troubleshooting
MAINTENANCE / DIAGNOSTICS / REPAIRS 62.4 Troubleshooting PROBLEM CAUSE SOLUTION NOTES • Connect the IN-CAB cable and the connection cable to Section valve controls take no effect Valves not connected the valves. One valve does not open No power supply to valve •... -
Page 103: Technical Data
TECHNICAL DATA TECHNICAL DATA DESCRIPTION IBX100 Power supply voltage 9 ÷ 16 Vdc -40 °C ÷ +60 °C Operating temperature -40 °F ÷ +140 °F -40 °C ÷ +85 °C Storage temperature -40 °F ÷ +185 °F Weight (without cables) 1213 g For Open Collector sensors: Digital inputs... - Page 104 TECHNICAL DATA 63.1 Pin-out of IBX100 Fig. 204 H2O VALVES + Tractor / Self-propelling SENSOR CABLE MULTIFLOW MULTIFLOW machine ISOBUS CABLE IBX100 signal IBX100 signal IBX100 signal IBX100 signal 12V sensor power supply GND power supply Pressure sensor (M) Valve 1 Level sensor (L) Valve 2 Valve 3...
-
Page 105: End-Of-Life Disposal
TECHNICAL DATA END - OF - LIFE DISPOSAL Dispose of the system in compliance with the established legislation in the country of use. GUARANTEE TERMS 1. ARAG s.r.l. guarantees this apparatus for a period of 360 days (1 year) from the date of sale to the client user (date of the goods delivery note). - Page 106 Only use genuine ARAG accessories or spare parts to make sure manufacturer guaranteed safety conditions are maintained in time. Always refer to the Internet address www.aragnet.com 42048 RUBIERA (Reggio Emilia) - ITALY Via Palladio, 5/A Tel. +39 0522 622011 Fax +39 0522 628944 http://www.aragnet.com info@aragnet.com...
Need help?
Do you have a question about the ARAG MULTIFLOW IBX100 and is the answer not in the manual?
Questions and answers