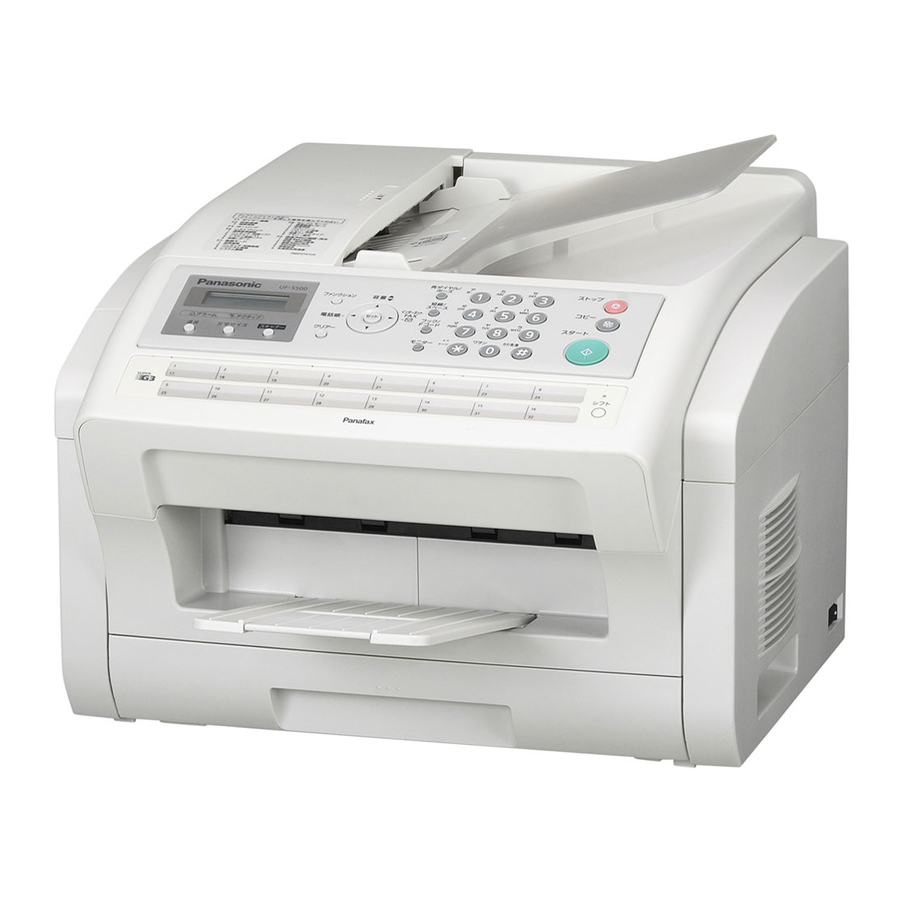
Panasonic UF-4500 Operating Instructions Manual
Facsimile transceiver
Hide thumbs
Also See for UF-4500:
- Brochure (4 pages) ,
- Quick manual (4 pages) ,
- Service manual (365 pages)
Table of Contents
Advertisement
Before operating this machine, please carefully read this manual, and keep this documentation in a safe place for future reference.
Panasonic assumes no responsibility for injuries or property damage resulting from failures
arising out of improper installation or operation inconsistent with this Operating Instructions
manual.
Operating Instructions
Facsimile Transceiver
UF-5500
Model No.
UF-4500
English
Advertisement
Table of Contents

Related Manuals for Panasonic UF-4500


Summary of Contents for Panasonic UF-4500
-
Page 1: Operating Instructions
Before operating this machine, please carefully read this manual, and keep this documentation in a safe place for future reference. Panasonic assumes no responsibility for injuries or property damage resulting from failures arising out of improper installation or operation inconsistent with this Operating Instructions English manual. -
Page 2: Main Unit And Accessories
Main Unit and Accessories Unpack the carton and check that you have all the accessories illustrated. Toner Cartridge (starter) * Machine Drum Cartridge Telephone Line Cable Power Cord Important Information Guide Quick Installation Guide CD-ROM Recording Paper Tray Final Installed View Document Tray *1 Prints about 500 pages. -
Page 3: Table Of Contents
Table of Contents Getting to Know Your Machine Main Unit and Accessories.................... Safety Information ..................Precautions........................13 Security Suggestions for Key Operators ..............14 External View ........................15 Control Panel ........................16 Function Key........................18 Connections........................19 Installing Your Machine Installing the Toner and Drum Cartridge .............. - Page 4 Basic Operations Sending Documents....................... 48 General Description ..................Memory Transmission..................Wrong Transmission Prevention Function ............. Direct Transmission ..................Voice Mode Transmission................Transmission Reservation ................Redialing ......................Receiving Documents....................66 Reception Modes ................... Telephone Mode .................... Fax / Tel Auto Switching Mode ..............Fax Mode .......................
- Page 5 Table of Contents Access Code ........................93 General Description..................93 Setting the Access Code ................93 Operating Your Machine with the Access Code..........94 Receive To Memory......................95 General Description..................95 Setting the RCV To Memory Password............95 Setting RCV To Memory ................96 Printing Out Documents .................
- Page 6 What is Sub-Addressing? ................135 To set the Sub-address into a One-Touch/ABBR. Dialing Numbers....136 To send a Document with Sub-address ............137 Panasonic Document Management System (UF-5500 Only) Setting the Network Parameters ................... 138 Setting the User (Network) Parameters ............138 Setting the User Parameters for the LAN Interface ........
- Page 7 Table of Contents Printout Journals and Lists Journals and Lists......................154 General Description..................154 Transaction Journal..................154 Individual Transmission Journal (IND. XMT JOURNAL) ........ 155 Communication Journal (COMM. JOURNAL) ..........158 One-Touch/Abbreviated and Directory Search List........160 Program List ....................163 FAX Parameter List ..................
-
Page 8: Safety Information
The plug is not excessively heated, rusted, If the power cord is broken, or insulated wires or bent. are exposed, contact the authorized Panasonic ● The plug and receptacle are free of dust. dealer for a replacement. Using a damaged cord ●... - Page 9 If debris (Metal or liquid) gets into the machine, unplug the machine immediately. Contact the authorized Panasonic dealer. Operating a debris-contaminated machine can cause fire or electric shock. CAUTION Installation and Relocation Never touch heated areas near the heat roller.
-
Page 10: Important Safety Instructions
■ This product contains a CR Coin Cell Lithium Distributed by Panasonic System Networks Company Battery which contains Perchlorate Material - of America, Unit of Panasonic Corporation of North special handling may apply. See America One Panasonic Way Secaucus, NJ 07094 www.dtsc.ca.gov/hazardouswaste/perchlorate... - Page 11 Safety Information CAUTION Denotes hazards that could result in minor injury or damage to the machine. Do not place the machine near heaters or volatile, flammable, or combustible materials such as curtains that may catch fire. Avoid exposure to direct sunlight. Install the machine on a flat surface, leave at least 10 cm (4") of space between the machine and other objects.
- Page 12 ■ Store the toner and paper in a cool area with low humidity. Others ■ Use of other than genuine Panasonic supplies can damage the machine. This may void the warranty of Panasonic is not responsible for data loss and any the machine and supplies.
-
Page 13: Precautions
Precautions Precautions ■ Laser Safety LASER SAFETY This unit employs a laser. Only qualified service personnel should attempt to CLASS 1 LASER PRODUCT APPAREIL A LASER DE CLASSE 1 service this device due to possible eye injury. CAUTION: USE OF CONTROLS, ADJUSTMENTS OR PERFORMANCE PROCEDURES OTHER THAN THOSE SPECIFIED HEREIN MAY RESULT IN HAZARDOUS RADIATION EXPOSURE. -
Page 14: Security Suggestions For Key Operators
Security Suggestions for Key Operators To keep your machine’s highly-sensitive document data 5. Delete the data completely before transferring or secure, the designated Key Operators are instructed to destroying the device. perform the recommended security measures described below for the initial machine installation, network 6. -
Page 15: External View
External View ADF (Automatic Document Feeder) Cover Document Guides Document Tray Control Panel Power Switch Recording Paper Tray Recording Paper Cassette Document Tray Recording Paper Tray... -
Page 16: Control Panel
Control Panel * The pictured model is UF-5500. * The picture shows the position of the UF-4500 Resolution button. Icon Contents Icon Contents - Used to set to Normal, Lighter Status LED lamp (RED) or Darker. (See page 46) - Lights/Flashes when trouble occurs. - Page 17 Control Panel Icon Contents Icon Contents Active LED lamp (GREEN) - Used to set to Standard, Fine, Flashes: When machine is Super-Fine or Halftone. active. (See page 46) Lights: When the received fax message is in memory. Used for Scanner Function. - Use this button when (For UF-5500 only) resetting all the previously...
-
Page 18: Function Key
Function Key Any function can be started by first pressing and then entering the function number, or by Function pressing the scroll keys repeatedly until the desired function appears on the display. Deferred Communication 1 = XMT 2 = Polling Advanced Communication 1 = Not Used 2 = Confidential Communication... -
Page 19: Connections
Connections Power Cord Plug the supply cord into the main AC socket outlet. Connect the supply cord coupler into the main supply inlet on the rear of the machine. Warning: This apparatus must be properly grounded. Do not modify the AC outlet. Power Cord (Included) USB Cable (Optional) (USB 2.0): UF-5500 Only For connecting a USB Cable when using your... -
Page 20: Installing Your Machine
Installing Your Machine Installing the Toner and Drum Cartridge Shake vertically more than 5 times. Remove the protective seal. Note: Pull on the seal slowly and straight out. Set the Toner Cartridge into the Drum Cartridge. Firmly press down on the toner cartridge ( Keep pressing down while turning both levers located on each side of the toner cartridge towards you (... - Page 21 Installing the Toner and Drum Cartridge Make sure that the arrows match, to install the toner cartridge correctly. Open the Printer Cover. Printer Cover Watch fingers Set the Toner and Drum Cartridge into the machine.
- Page 22 Installing the Toner and Drum Cartridge Verify that the arrow marks match. Close the Printer Cover. Printer Cover Watch fingers 1. Used toner cartridge should be disposed of properly according to local regulations. NOTE...
-
Page 23: Loading The Recording Paper
Loading the Recording Paper How to Load the Recording Paper Paper Specifications In general, most bond papers will produce excellent results. Most photocopy papers will also work very well. There are many "name" and "generic" brands of paper available. We recommend that you test various papers until you obtain the desired results. -
Page 24: Setting The Dialing Method (Tone Or Pulse)
Setting the Dialing Method (Tone or Pulse) Your machine can operate with either of two dialing methods (Tone or Pulse), depending on the type of telephone line you are connected to. If you need to change the dialing method to Tone or Pulse, follow the procedure below. -
Page 25: Adjusting The Volume
Adjusting the Volume You can adjust the monitor and ringer volume on your machine. The built-in speaker enables you to hear the dial tone, dialing signals, and busy tone. The ringer sounds when your machine receives a call. Setting the Monitor Volume * MONITOR * You will hear the dial tone through the speaker. -
Page 26: User Parameters
User Parameters General Description Your facsimile machine has several basic settings (User Parameters) to help you keep records of the documents you send or receive. For example, the built-in clock keeps the current date and time, and your LOGO and ID number help to identify you when you send or receive documents. Setting the Date and Time At standby the display will show the date and time. -
Page 27: Setting Your Logo (Name/Company)
User Parameters Setting Your LOGO (NAME/COMPANY) When you send a document, your LOGO appears on the top of the copy printed out at the other station. The LOGO helps to identify you to someone who receives your document. SET MODE (1-8) ∨∧... -
Page 28: Setting Your Character Id
User Parameters Setting Your Character ID If the remote machine has Character ID capabilities, when you are sending or receiving, your Character ID will appear on the remote machine's display and the remote machine's Character ID will appear on your display. -
Page 29: Setting Your Id Number (Fax Telephone Number)
User Parameters Setting Your ID Number (Fax Telephone Number) If the remote machine does not have a Character ID but has an ID Number, when sending or receiving, your ID Number will appear on the remote machine's display and their ID Number will appear on your display. We suggest you use your facsimile telephone number as your ID number. -
Page 30: Setting The Key Operator Password
User Parameters Setting the Key Operator Password The Key Operator Password is user-definable. (The factory default password is 00000000.) Using the keypad on the control panel, you can enter numbers, letters (case-sensitive), and symbols (@, ., _, SPACE) for the password. (The keys cannot be used.) SET MODE (1-8) -
Page 31: Entering Characters
Entering Characters The Keypad also serves as character and symbol input key when recording LOGO, Character ID, Department Name, Key Operator Password, program name and station name. Select the desired characters according to the following table. Keys Character Table Number of times key is pressed Ö... -
Page 32: Programming Your Machine
Programming Your Machine One-Touch/Abbreviated Dialing Numbers Entering One-Touch/Abbreviated Dialing Numbers One-Touch and Abbreviated Dialing are two fast ways of dialing full telephone numbers. To use these dialing methods, you must first store the telephone number using the following procedure. To enter a One-Touch key, follow the steps below SET MODE (1-8) ∨∧... - Page 33 One-Touch/Abbreviated Dialing Numbers To set an Abbreviated Dialing Number, follow the steps below SET MODE (1-8) ∨∧ ENTER NO. OR 1:ONE-TOUCH 2:ABBR NO. ABBR [ ENTER ABBR NO. [022] (001 to 168) 0 2 2 NTER TEL.# Enter the telephone number [022] (Up to 36 digits including pauses and spaces).
-
Page 34: Editing One-Touch/Abbreviated Dialing Numbers
One-Touch/Abbreviated Dialing Numbers Editing One-Touch/Abbreviated Dialing Numbers If you have to change or delete any of the One-Touch/Abbreviated dialing numbers, follow the steps below. To change the settings of a One-Touch/ABBR dialing number 1:ONE-TOUCH 2:ABBR NO. ONE-TOUCH< > Select for One-Touch Dialing number PRESS ONE-TOUCH Select for ABBR. - Page 35 One-Touch/Abbreviated Dialing Numbers To delete the settings of One-Touch/ABBR Dialing number 1:ONE-TOUCH 2:ABBR NO. ONE-TOUCH< > Select for One-Touch Dialing number PRESS ONE-TOUCH Select for ABBR. Dialing Number Enter the station you wish to delete. <01> SALES DEPT -555 1234 <01>...
-
Page 36: Printing Out A Directory Sheet
Refer to the Help pages of the software for the procedures to print the directory sheet. For UF-4500 ® To print a Directory Sheet for the UF-4500, open the Microsoft Word file Template included in the CD-ROM. Using MS Word, type the Station's Name for each Key <01> to <32>, then print the completed Template. -
Page 37: Customizing Your Machine
Customizing Your Machine General Description Your facsimile machine has a variety of adjustable Fax Parameters. These parameters, listed in the Parameter Table, are preset for you and do not need to be changed. If you do want to make a change, read the table carefully. -
Page 38: Fax Parameter Table
Customizing Your Machine Fax Parameter Table Setting Parameter Setting Comments Number CONTRAST NORMAL Setting the home position of the CONTRAST key. LIGHTER DARKER RESOLUTION STANDARD Setting the home position for the RESOLUTION. FINE S-FINE HALFTONE MEMORY (HOME) Setting the home position for memory transmission mode. (This setting can be temporarily changed by using F8-9 (MEMORY XMT)) DIALING METHOD... - Page 39 Customizing Your Machine Setting Parameter Setting Comments Number OP CALL TIMER 20 SEC Selecting the length of time that your machine signals (rings) for an incoming voice call in Fax/Tel Auto Switching 30 SEC mode. (See page 68) 40 SEC 50 SEC SUBSTITUTE RCV INVALID...
- Page 40 REMOTE DIAG. INVALID Selecting whether or not the machine accepts to update the firmware or Remote Diagnostics from the remote VALID station. Please ask your Panasonic Authorized Dealer for details. DIAG. PASSWORD (----) Setting the password for Remote Diagnostic Mode.
- Page 41 Customizing Your Machine Setting Parameter Setting Comments Number LOGO/DEPT. CODE INVALID Selecting whether the machine performs the Multiple Logo or Department Code operation. (See page 110 and 118) MULTI- LOGO DEPT. CODE QUICK MEM. XMT INVALID Selecting whether the machine performs Quick Memory Transmission.
- Page 42 Customizing Your Machine Fax Parameter Table Setting Parameter Setting Comments Number JOB BUILD Selecting whether the machine performs Job Build when the total number of documents exceeds the maximum capacity of the ADF, or when scanning the documents manually one at a time. If you place the documents on the ADF within 5 seconds after the ADF scan, the ADF scan will continue for the current scan.
- Page 43 Customizing Your Machine Setting Parameter Setting Comments Number PRT FORWARD DOC INC.ONLY Selecting whether a fax received in memory to be forwarded is always printed or only when forwarding is ALWAYS incomplete. DHCP CLIENT INVALID Select whether the machine would automatically acquire the Network Parameters from the DHCP Server.
-
Page 44: Basic Operations
Basic Operations Loading Documents Documents You Can Send In general, your machine will send any A4, Letter or Legal size document printed on high quality paper. The illustrations below are provided as a quick reference only. There are many "name" and "generic" brands of paper available, we recommend that you test various media thoroughly to find one that meets your needs. -
Page 45: How To Load Documents
Loading Documents How to Load Documents 1. Be sure the document(s) is free of staples, paper clips and is not torn, greasy or covered by foreign objects. 2. Place the document(s) FACE UP on the Automatic Document Feeder (ADF) until the leading edge inserted in the machine stops. -
Page 46: Basic Transmission Settings
Basic Transmission Settings General Description You can temporarily change the transmission settings either before or after you place the document on the ADF. These settings are as follows: • Contrast • Resolution • Communication Journal After your document(s) have been sent, your machine will automatically return to the preset settings. Contrast Your machine is preset to Normal contrast. -
Page 47: Communication Journal (Comm. Journal)
Basic Transmission Settings Communication Journal (COMM. JOURNAL) A Communication Journal lets you verify if the transmission was successful. You can select the condition to print out the Communication Journal as follows. When you set COMM. JOURNAL = OFF A Communication Journal will not be printed out. When you set COMM. -
Page 48: Sending Documents
Sending Documents General Description You can choose Memory, Direct or Voice Mode Transmission. Use Memory Transmission if: • You want to send the document to multiple stations. • You have to retrieve the document immediately. • You want to take advantage of Dual Operation design. Use Direct Transmission if: •... - Page 49 PRINT COMM.JRNL? 1:YES 2:NO 8. If the file memory reaches the capacity (UF-4500: 10 files, UF-5500: 20 files) and you try to store another file, the following display appears and the machine will not accept additional files until a file is completed and becomes available.
-
Page 50: Memory Transmission
Sending Documents Memory Transmission Manual Number Dialing To dial the telephone number manually, follow the steps below. ENTER STATION(S) THEN PRESS START Set document(s) face up. Enter a telephone number from the keypad. TEL. NO. (Up to 36 digits) 5551234 You can also designate more than one destination. -
Page 51: One-Touch Dialing
Sending Documents One-Touch Dialing One-Touch Dialing allows you to dial a full telephone number by pressing a One-Touch key. To set up the One-Touch keys, see page 32. ENTER STATION(S) THEN PRESS START Set document(s) face up. To switch the One-touch key to lower row, press Lower Press a One-Touch key. -
Page 52: Directory Search Dialing
Set document(s) face up. ENTER LETTER(S) Enter the full station name or part of the station name by ENTER LETTER(S) using the Keypad. for searching PANASONIC P A N A [010] ANASONIC 5553456 repeatedly until the display shows the station name you want to send to. -
Page 53: Multi-Station Transmission (Broadcasting)
Sending Documents Multi-Station Transmission (Broadcasting) If you have to send the same document(s) to multiple stations, you can save time when feeding the document(s) by using memory transmission. That is, you can store the document(s) into the memory and then send it to the station(s) automatically. ENTER STATION(S) THEN PRESS START Set document(s) face up. -
Page 54: Wrong Transmission Prevention Function
Sending Documents Wrong Transmission Prevention Function The following functions have been provided to prevent transmission to a wrong address. These include the dial re-enter function to prohibit direct dialing or multiple addresses, and a function to confirm the address. Direct Dial Restriction Function This function prohibits all designations of addresses by direct dialing (Including manual transmission). -
Page 55: Dialing Re-Enter Function
Sending Documents Dialing Re-enter Function If the address is designated with direct dialing, the re-enter screen of the address is displayed. With this function, transmission is only started if the addresses for the first and second time agree with each other. This function operates if setting “137 RE-ENTER D. - Page 56 Sending Documents Wrong Transmission Prevention Function Address Confirmation Function Settings can be made so that transmission will always start after confirming the address. When is pushed and address confirmation has been set, a message prompting operations to Start confirm the address will be displayed if the address has not been confirmed first. This function operates if setting “125 CONFIRM STATIONS”...
-
Page 57: Direct Transmission
Sending Documents Direct Transmission If your machine's memory is full or you wish to send the document immediately, use Direct Transmission. Manual Number Dialing (Direct Transmission) Without storing image into memory, follow the steps below. ENTER STATION(S) THEN PRESS START Set document(s) face up. - Page 58 Sending Documents Direct Transmission One-Touch Dialing (Direct Transmission) One-Touch Dialing allows you to dial a full telephone number by pressing a single key. To set up the One- Touch keys, see page 32. ENTER STATION(S) THEN PRESS START Set document(s) face up. MEMORY XMT? ON<>...
- Page 59 Sending Documents Abbreviated Dialing (Direct Transmission) Abbreviated dialing is a speedy way to dial a frequently dialed telephone number by preprogramming the telephone number into the built-in auto-dialer with a 3-digit abbreviated code. To program an abbreviated dialing number, see page 33. ENTER STATION(S) THEN PRESS START Set document(s) face up.
- Page 60 ENTER LETTER(S) Enter the full station name or part of a station name by ENTER LETTER(S) using the Keypad. (See page 16 and 31) for searching PANASONIC P A N A [010] ANASONIC 5553456 repeatedly until the display shows the station name you want to send to.
-
Page 61: Voice Mode Transmission
Sending Documents Voice Mode Transmission If you wish to send documents after listening to a voice prompt, use Voice Mode Transmission. On-Hook Dialing For On-Hook Dialing, follow the steps below. ENTER STATION(S) THEN PRESS START Set document(s) face up. * MONITOR * You will hear dial tone through the monitor speaker. -
Page 62: Transmission Reservation
Transmission Reservation You can do the following jobs while sending a document from memory or receiving a document. • Reserve the next transmission in the memory. (UF-4500: up to 10 files, UF-5500: up to 20 files) • Reserve a priority transmission. - Page 63 Sending Documents Direct Transmission Reservation (Priority Transmission Reservation) If you are in a rush to send an urgent document, but there are many files in the memory, use Direct Transmission Reservation to send the urgent document. The urgent document will be sent immediately after the current communication is finished.
- Page 64 Sending Documents Transmission Reservation To cancel the direct transmission reservation Make sure the document is on the ADF. XMT RESERVED <01>(Stn name) CANCEL RSV. JOB? 1:YES 2:NO and then remove the document from ADF.
-
Page 65: Redialing
Sending Documents Redialing Automatic Redialing If a busy line is detected, the machine will redial the number up to 3 times at 3 minute WAITING TO DIAL intervals. During that time, a message will appear as shown at right. <01>(Stn name) A file number is shown in the upper right hand corner of the display if it is a memory transmission file. -
Page 66: Receiving Documents
Receiving Documents Reception Modes You can select one of the four modes shown below. Conditions Suggested Reception Mode Settings You normally receive Telephone Mode Fax Parameter No. 17 set to 1: only voice calls. You can answer the incoming call via an External Telephone (Optional). -
Page 67: Telephone Mode
Receiving Documents Telephone Mode When your machine is set to this mode, it will not receive documents automatically. If you receive a fax call, follow the procedure below to receive documents manually. Setting the Telephone Mode Change Fax Parameter No. 17 (RECEIVE MODE) to 1: Tel. (See page 38) Operation of Telephone Mode When your telephone rings, lift the handset of the External... -
Page 68: Fax / Tel Auto Switching Mode
Receiving Documents Fax / Tel Auto Switching Mode When your machine is set to this mode, your machine will switch to document reception or voice communication automatically. Setting the Fax / Tel Auto Switching Mode Change Fax Parameter No. 17 (RECEIVE MODE) to 3: FAX/TEL SW. (See page 38) Operation of Fax / Tel Auto Switching Mode If it is a Fax call,... -
Page 69: Fax Mode
Receiving Documents Fax Mode When your machine is set to this mode, it will immediately begin to receive documents automatically when a call is received. Setting the Fax Mode Change Fax Parameter No. 17 (RECEIVE MODE) to 2: FAX. (See page 38) Operation of Fax Mode Your machine will begin receiving automatically when a fax call is received. -
Page 70: Tam (Telephone Answering Machine) Interface Mode
Receiving Documents TAM (Telephone Answering Machine) Interface Mode Your machine is equipped with a unique feature called TAM Interface which enables it to automatically switch a single telephone line either to Fax or TAM. You can connect most TAMs in the market to your machine and use your existing telephone line very efficiently. - Page 71 Receiving Documents Setting the TAM Interface Mode Change Fax Parameter No. 17 (RECEIVE MODE) to 4: TAM/FAX. (See page 38) Operation of TAM Interface Mode If it is a Fax call, When your TAM and Fax receives an incoming call, the TAM always answers the call first and then the TAM plays the OGM (Outgoing Message) recorded in your TAM to the calling station.
-
Page 72: Print Reduction
Receiving Documents Print Reduction This machine can use Letter, Legal or A4 size plain paper for recording. Sometimes, oversized documents sent to you by other parties cannot be printed on a single page. When this occurs, the document will be divided into separate pages. -
Page 73: Receiving Oversize Documents
Receiving Documents Receiving Oversize Documents If the received document is extremely long (over 39% longer than the recording paper), the document will be divided into separate pages. When printing on separate pages, the bottom 10 mm (0.4”) of the first page will be overlapped on the top of the next page. -
Page 74: Substitute Memory Reception
Receiving Documents Substitute Memory Reception If the recording paper runs out or jams or if the toner runs out during reception, the machine automatically starts receiving documents in its image data memory. Stored documents are printed automatically after replacing the recording paper or the toner cartridge. (See Note 1 and 2) When the machine finishes the memory reception and OUT OF TONER INFO. -
Page 75: Making Copies
Making Copies Copies Your machine has a copy function for single or multiple copies. ENTER STATION(S) THEN PRESS START Set document(s) face up. COPY NO. OF COPY= Enter the number of copies. COPY NO. OF COPY=10 * STORE * NO.001 PAGES=001 * COPY * 01/10... -
Page 76: Advanced Features
Advanced Features Timer Controlled Communications General Description You can send a document to one or multiple stations at any preset time within the next 24 hours. Up to 10 built-in timers can be set for deferred transmission and deferred polling. Deferred Transmission ENTER STATION(S) THEN PRESS START... -
Page 77: Deferred Polling
Timer Controlled Communications Deferred Polling DEFERRED COMM. ? ∨∧ ENTER NO. OR DEFERRED POLL START TIME Enter the start time from the keypad. DEFERRED POLL (Use a 4-digit, 24-hour clock) PASSWORD= (3:30 a.m.) and 0 3 3 0 Enter a 4-digit polling password. ENTER STATION(S) THEN PRESS START 9 8 7 6... -
Page 78: Polling
Polling General Description Polling means calling other station(s) to retrieve a document. The other station must know in advance that you will call and must have a document set on the ADF or stored in the memory. You may need to set a polling password shared by the other station to ensure security. -
Page 79: Preparing To Be Polled
Polling Preparing to be Polled In order to let other stations poll your machine, you must prepare your machine with a document stored in memory. Be sure to set the polling password before storing the document into memory. After being polled, the documents stored in the memory will be delete automatically. -
Page 80: To Poll Documents From Another Station
Polling To Poll Documents from Another Station The following procedure lets you poll a document from one or multiple stations. Be sure to set the polling password before polling. (See page 78) POLLING NO.= 1:POLL 2:POLLED POLLING PASSWORD= 234 Enter a 4-digit polling password. (See Note 2) POLLING PASSWORD=1111 1 1 1 1... -
Page 81: Program Keys
Program Keys General Description Your fax machine has special Program Keys. These keys are useful if you frequently need to send or poll the same group of stations. You can use these keys to store a One-Touch group key, a sequence of stations to be polled, a deferred transmission or polling sequence, or an additional One-Touch key. -
Page 82: Setting For Deferred Transmission
Program Keys Setting for Deferred Transmission To set a Program Key for deferred transmission PROGRAM (1-3) ∨∧ ENTER NO. OR PROGRAM[P PRESS ONE-TOUCH [P01] NAME NTER NAME Enter the station name (Up to 15 characters) by using the PROGRAM[P01] PRESS FUNCTION Keypad. -
Page 83: Setting For Deferred Polling
Program Keys Setting for Deferred Polling To set a Program Key for deferred polling PROGRAM (1-3) ∨∧ ENTER NO. OR PROGRAM[P PRESS ONE-TOUCH [P01] NAME ROG.A Enter the station name (up to 15 characters) by using the PROGRAM[P01] Keypad. (See page 16 and 31) PRESS FUNCTION Ex: PROG.A and DEFERRED POLL... -
Page 84: Setting For Normal Polling
Program Keys Setting for Normal Polling To set a Program Key for normal polling PROGRAM (1-3) ∨∧ ENTER NO. OR PROGRAM[P PRESS ONE-TOUCH [P01] NAME ROG.A Enter the station name (Up to 15 characters) by using the PROGRAM[P01] PRESS FUNCTION Keypad. -
Page 85: Changing Or Erasing The Program Key Settings
Program Keys Changing or Erasing the Program Key Settings To change the settings in a Program Key, follow the procedures on setting a Program Key on pages 81 to • Start time or station(s) for deferred transmission • Station(s) for normal polling •... -
Page 86: Edit File Mode
20:30 [001] MEM. DEF. XMT MMM-dd 13:20 22:30 [011] [012] [013] [016] [017] -PANASONIC ************************************ -HEAD OFFICE - ***** - 201 555 1212- ********* Explanation of Contents (1) File number If the file is now being executed, an "*" is indicated on the left of the file number. -
Page 87: Viewing The Contents Of A File List
Edit File Mode Viewing the Contents of a File List To view the contents of a file list on the display without printing it, follow the steps below. EDIT FILE (1-6) ∨∧ ENTER NO. OR FILE LIST ? PRESS SET FILE LIST 1:PRINT 2:VIEW ∨... -
Page 88: Changing The Start Time Or The Station Of A File
Edit File Mode Changing the Start Time or the Station of a File To change the start time and/or stations in a communication file, follow the steps below. EDIT FILE (1-6) ∨∧ ENTER NO. OR ∨∧ ENTER NO. OR FILE NO.= ∨∧... -
Page 89: Deleting A File
Edit File Mode Deleting a File To delete the file in memory, follow the steps below. EDIT FILE (1-6) ∨∧ ENTER NO. OR ∨∧ ENTER NO. OR FILE NO.= ∨∧ ENTER NO. OR Enter the file number or use to select the file FILE NO.=001 that you want to delete. -
Page 90: Printing Out A File
Edit File Mode Printing Out a File To print the contents of the communication file, follow the steps below. EDIT FILE (1-6) ∨∧ ENTER NO. OR ∨∧ ENTER NO. OR FILE NO.= ∨∧ ENTER NO. OR Enter the file number or use to select the file FILE NO.=001 that you want to print. -
Page 91: Adding Documents Into A File
Edit File Mode Adding Documents into a File To add documents into the file, follow the steps below. ENTER STATION(S) THEN PRESS START Set document(s) face up. EDIT FILE (1-6) ∨∧ ENTER NO. OR ∨∧ ENTER NO. OR FILE NO.= ∨∧... -
Page 92: Retry An Incomplete File
Edit File Mode Retry an Incomplete File If a memory communication has been unsuccessful due to a busy line or no answer, the document you stored is automatically delete from the memory after the last redial. If you need to retain the document even if the communication failed, change the setting of Fax Parameter No. -
Page 93: Access Code
Access Code General Description The Access Code prevents an unauthorized user from operating the machine. Once a 8-digit Access Code is registered, no one can operate the machine without entering the correct access code. Automatic Receiving, however, is always available. After you complete any operation, such as mode setting or transmission, and the display returns to standby, you have to re-enter the access code in order to use the machine again. -
Page 94: Operating Your Machine With The Access Code
Access Code Operating Your Machine with the Access Code Enter the Access Code. MMM-dd 15:00 ACCESS CODE= 1 2 3 4 5 6 7 8 ACCESS CODE ENTER ID=****** MMM-dd 15:00 Now you can operate the machine normally. -
Page 95: Receive To Memory
Receive To Memory General Description This feature is used to secure all received documents by storing them into the memory. To print out the document from memory, the authorized operator must enter the correct password. Setting the RCV To Memory Password SET MODE (1-8) ∨∧... -
Page 96: Setting Rcv To Memory
Receive To Memory Setting RCV To Memory SELECT MODE(1-9) ∨∧ ENTER NO. OR RCV TO MEMORY? OFF<> RCV TO MEMORY? ON<> MMM-dd 15:00 <RCV TO MEMORY> 1. When the memory overflows, the machine will stop receiving and release the line. The NOTE machine will not answer the next incoming call until there is space available in the memory. -
Page 97: Printing Out Documents
Receive To Memory Printing Out Documents After receiving a document with the Receive To Memory feature, the following message will appear on the display. MESSAGE IN MEM. <RCV TO MEMORY> To print the document, follow the steps below. SELECT MODE(1-9) ∨∧... -
Page 98: Junk Fax Filtering
Junk Fax Filtering General Description This machine can filter incoming faxes to prevent receipt of unnecessary documents (Junk fax, etc.). Before receiving the document, the sender’s numeric ID (Fax number) will be compared to the numbers registered as junk fax numbers in the receiving station. If the fax number is found in the registry, the machine will cancel the reception. -
Page 99: Set The Filter
Junk Fax Filtering Set the Filter Set the Junk Fax Filter to prevent receiving unnecessary documents. When set to “VALID”, the machine will not receive faxes from senders whose numeric ID has been registered as junk fax number. It is required to register the junk fax number (up to 30 fax numbers) for reception refusal to make this function effective. -
Page 100: Receive Without Id
Junk Fax Filtering Receive without ID When set to “VALID”, the machine will receive faxes from senders without numeric ID registered. When set to “INVALID”, reception is denied in cases where it is not possible to receive number IDs. This setting is available only when “135 JUNK FAX FILTER (01. JUNK FAX FILTER)” is set to ”VALID”. Same as procedure 1 to 5 of “Set the Filter”... -
Page 101: Received Id Print
Junk Fax Filtering Received ID Print When set to “VALID”, the sender's numeric ID and received time are printed at the bottom of the received faxes. If the sender's numeric ID is not registered, only the received time is printed. This setting is available only when “135 JUNK FAX FILTER (01. -
Page 102: Register Junk Fax Number
Junk Fax Filtering Register Junk Fax Number Register fax numbers as junk fax number. Up to 30 ID numbers can be registered as junk fax numbers. (Including numerals “0-9”, blank space, and + symbol.) When comparing the sender's numeric ID to the registered junk fax numbers, blank spaces between numbers and "0"... -
Page 103: Distinctive Ring Detector (Drd)
Distinctive Ring Detector (DRD) General Description This function is only effective for companies in countries which offer the DRD Service. Your machine has a special feature in conjunction with an optional service provided by many local telephone companies. It can distinguish up to 2 telephone numbers with a corresponding ring pattern identifying each number. -
Page 104: Fax Cover Sheet
Fax Cover Sheet General Description A Fax Cover Sheet can be automatically attached to your transmit document(s) that shows the recipient's name, originator's name and the number of pages attached. Transmitted as: Received as: Header P.01 Header P.02 Page 1 Page 2 Cover Page 1... -
Page 105: Fax Cover Sheet
Fax Cover Sheet Sample ***** FACSIMILE COVER SHEET ***** MMM-dd-yyyy 15:00 Message To: SALES DEPT. Message From: PANASONIC 201 555 1212 Page(s) Following This Cover Page Explanation of Contents (1) Starting time of communication. (2) Recorded name in the One-Touch, ABBR. No. or dialed telephone number. -
Page 106: Pin Code Access
PIN Code Access General Description If your PBX requires a PIN (Personal Identification Number) code to get an outside line, your machine can be set to prompt the user to enter a PIN code before any dialing. Selecting the Access Method (Prefix or Suffix) SET MODE (1-8) ∨∧... -
Page 107: Dialing With A Pin Code
PIN Code Access Dialing with a PIN Code ENTER STATION(S) THEN PRESS START Set document(s) face up. Dial by any combination of the following methods: • One-Touch Dialing • Abbreviated Dialing • Manual Number Dialing, press after each station is entered (Up to 12 stations) •... -
Page 108: Fax Forward
Fax Forward Setting Fax Forward This feature allows all incoming faxes to be forwarded to the station registered in the one-touch or abbreviated dialing number. Once the faxes are received in the memory, the machine will forward the received document(s) to the telephone number registered in the one-touch or abbreviated dialing number. This function is convenient when you would like to receive faxes in another location ( your home) at night or during a holiday. -
Page 109: Fax Forward
Fax Forward Setting Fax Forward Enter the station to which the received faxes should be <01>(STN name) forwarded to by assigning a one-touch key or an 5551234 abbreviated dialing number. 1. When the Fax Forward feature is set, the one-touch or abbreviated dialing number is restricted NOTE from editing. -
Page 110: Department Code
Department Code General Description This operation requires the user to input a preset Department Code (8-digit maximum) before transmission. The Department Name of the selected Department Code is printed on the Header of each page sent, COMM. Journal and Individual Transmission Journal. When the Department Code is set, the Transaction Journal will be sorted by the Department Code number (1 - 24) when it is printed. - Page 111 Department Code Setting the Department Code Enter the Department Code using the Keypad (up to 8 INPUT DEPT. CODE digits). 12 1234 LOGO/DEPT. NAME To record another Department Code, repeat step 7 to 11. To return to standby, press Sto p NOTE 1.
-
Page 112: Changing Or Erasing The Department Code
DEPT. CODE ENTER NO. OR ∨∧ Enter the Department Code number you wish to change LOGO/DEPT. NAME or erase. 12 PANASONIC SAL (01 to 24) LOGO/DEPT. NAME LOGO/DEPT. NAME 12 ANAFAX SALES then enter a new LOGO. (See Note 1 and 2) - Page 113 Department Code Changing or Erasing the Department Code LOGO/DEPT. NAME To change or erase another Department Code, repeat step 6 to 10. To return to standby, press Sto p NOTE 1. If you make a mistake, use to move the cursor beyond the incorrect character, press then re-enter the correct Department Name.
-
Page 114: Sending Document With Department Code
Department Code Sending Document with Department Code ENTER STATION(S) THEN PRESS START Set document(s) face up. Dial by any combination of the following methods: • One-Touch Dialing • Abbreviated Dialing • Manual Number Dialing, press after each station is entered (UP to 10 stations) •... -
Page 115: Printing A Department Code List
DEPARTMENT CODE Panafax Sales 0001 Panafax Service 0002 Panafax Accounting 0003 Panafax Engineering 0024 -PANASONIC ************************************ -HEAD OFFICE - ********* - 201 555 1212 - ******** Explanation of Contents (1) Department Code Number 01-24 (2) Department Name Up to 25 characters... -
Page 116: Printing A Department Code Journal
COMM. PAGES FILE DURATION IDENTIFICATION DATE TIME DIAGNOSTIC 001/001 00:00:13 5551234 MAR-11 10:10 C0044903C0000000 011/011 00:08:15 SERVICE DEPT. MAR-12 13:10 C0044903C0000000 TOTAL PAGES = 000012 TOTAL TIME = 00:08:28 -PANASONIC ************************************ -HEAD OFFICE - ********* - 201 555 1212 - ********... - Page 117 19:15 C0044903C0000000 00:00:13 44567345 MAR-11 10:10 C0044903C0000000 -PANASONIC ************************************ -HEAD OFFICE - ********* - 201 555 1212 - ******** Explanation of Contents (1) Date period of this journal (2) Number of total pages transmitted/received for this machine. (3) Total transmitted/received time for this machine.
-
Page 118: Multiple Logo
Multiple LOGO General Description This operation allows the user to select one of the 25 preset LOGOs before a transmission. The selected LOGO is printed on the Header of each page sent, Cover Sheet, COMM. Journal and Individual Transmission Journal. Setting the Multiple LOGO SET MODE (1-8) -
Page 119: Changing Or Erasing The Multiple Logo
Multiple LOGO Changing or Erasing the Multiple LOGO If you have to change or erase any of the Multiple LOGOs, follow the steps below. SET MODE (1-8) ENTER NO. OR ∨∧ KEY OPERATOR ID ENTER ID= Enter the Key Operator Password (The factory default FAX PARAMETERS NO.= (01-169) -
Page 120: Sending Document With Multiple Logo
ADD MORE, START entered, press SELECT LOGO ENTER NO. OR ∨∧ 12 PANASONIC SAL Enter the LOGO No. or use to select the LOGO that you want to use. (See Note 2) The document is sent with the header of the selected LOGO. -
Page 121: Printing A Multiple Logo List
*************** -FAX PARAMETER LIST- ************** DATE MAR-12-2011 ***** TIME 15:00 *** P.02 MULTI-LOGO LIST NUMBER LOGO Panafax Sales Panafax Service Panafax Accounting Panafax Engineering -PANASONIC ************************************ -HEAD OFFICE - ********* - 201 555 1212 - ******** Explanation of Contents (1) LOGO Number 01-24 (2) Multiple LOGO... -
Page 122: Network Features
Network Features Selective Reception General Description Your machine has a special feature known as Selective Reception which can prevent receipt of unnecessary documents ( junk fax, direct mail, etc.). Before receiving the document, the last 4 digits of the ID Number received from the sending machine will be compared with the last 4 digits of the telephone number programmed in each One-Touch or Abbreviated station. -
Page 123: Password Communications
"ON", it stays that way until you change the setting to "OFF". Compatibility with Other Machines This function is available when the remote station is a Panasonic Business Model (UF / DP / DX series). The compatible Panasonic machines are listed below. For details on machines not listed here, contact your local authorized Panasonic dealer. -
Page 124: Setting Password Transmission
Password Communications Setting Password Transmission To set transmission password and parameter, SET MODE (1-8) ∨∧ ENTER NO. OR KEY OPERATOR ID ENTER ID= Enter the Key Operator Password (The factory default FAX PARAMETERS NO.= (01-169) password is 00000000.) and press PASSWORD-XMT? Enter a 4-digit Transmission Password. -
Page 125: Setting Password Reception
Password Communications Setting Password Reception To set the receiving password and parameter, SET MODE (1-8) ∨∧ ENTER NO. OR KEY OPERATOR ID ENTER ID= Enter the Key Operator Password (The factory default FAX PARAMETERS NO.= (01-169) password is 00000000.) and press PASSWORD-RCV? Enter a 4-digit Transmission Password. -
Page 126: Using Password Transmission
Password Communications Using Password Transmission To use Password Transmission, you can select PASSWORD-XMT “OFF” or “ON” for each Transmission by following the procedure below. ENTER STATION(S) THEN PRESS START Set document(s) face up. SELECT MODE(1-9) ∨∧ ENTER NO. OR PASSWD-XMT? OFF<>... -
Page 127: Using Password Reception
Password Communications If your machine's Transmission Password coincides with the other station's Transmission Password, your machine starts sending the document. When transmission is completed, PASSWORD-XMT returns to standard setting (“OFF” or “ON”). Using Password Reception There is no additional operation required once you set the parameter by following the procedure on page 125. -
Page 128: Confidential Mailbox
UF-790 UF-880 UF-885 UF-890 UF-895 UF-990 UF-4500 UF-5100 UF-5500 UF-6000 UF-6100 UF-6200 UF-9000 1. If your machine receives two confidential faxes with same confidential code, both documents NOTE are stored together in the same confidential mailbox. 2. Up to 10 Mailbox files can be stored in memory. That means you can receive the confidential fax using 10 different confidential codes. -
Page 129: Sending A Confidential Document To A Remote Station's Mailbox
Confidential Mailbox Sending a Confidential Document to a Remote Station's Mailbox ENTER STATION(S) THEN PRESS START Set document(s) face up. CONF. COMM. ? ∨∧ ENTER NO. OR CONF. XMT CONF. CODE= Enter a 4-digit Confidential Code. CONF. XMT CONF. CODE=2233 2 2 3 3 ENTER STATION THEN PRESS START... -
Page 130: Polling A Confidential Document From A Remote Station's Mailbox
Confidential Mailbox Polling a Confidential Document from a Remote Station's Mailbox After you have been informed that someone has transmitted a confidential document to a remote station's mailbox, you can poll the confidential document from the remote station by following the procedure below. CONF. -
Page 131: Receiving A Confidential Document To Your Machine's Mailbox
** NOTICE OF CONFIDENTIAL DOCUMENT HELD ** FILE NO. RECEIVED FROM PAGES TIME RECEIVED PANAFAX MMM-dd 15:00 -PANASONIC ************************************ -HEAD OFFICE - ***** - 201 555 1212- ********* Explanation of Contents (1) File number 001 to 999 (2) Received remote station's ID... -
Page 132: Storing A Confidential Document In Your Machine's Mailbox
Confidential Mailbox Storing a Confidential Document in Your Machine's Mailbox Use the following procedure to store a document in a confidential mailbox in your machine. Once the confidential document is stored in your machine, it can be polled by another machine. ENTER STATION(S) THEN PRESS START Set document(s) face up. -
Page 133: Printing Out A Confidential Document From Your Machine's Mailbox
Confidential Mailbox Printing Out a Confidential Document from Your Machine's Mailbox After you have been notified that someone has transmitted a confidential document to your machine's mailbox, use the following procedure to print out the confidential document. CONF. COMM. ? ∨∧... -
Page 134: Deleting A Confidential Document Stored In Your Machine's Mailbox
Confidential Mailbox Deleting a Confidential Document Stored in Your Machine's Mailbox If the machine's memory becomes full, or you just want to clean out your confidential documents, you may delete one or more confidential faxes stored in your machine by using the following procedure. There are two types of confidential file deletions, one is to delete the file individually by its Confidential Code, and the other is to delete all confidential files in memory. -
Page 135: Sub-Addressing
• A center machine supporting the Memory feature is required on a fax network to implement sub-addressed communications. For more details, contact your local authorized Panasonic dealer. • In a sub-addressed communication, the sub-addressing information must be checked between the sender and the receiver beforehand (sub-address is limited up to 20 digits). -
Page 136: To Set The Sub-Address Into A One-Touch/Abbr. Dialing Numbers
Sub-addressing To set the Sub-address into a One-Touch/ABBR. Dialing Numbers 1:ONE-TOUCH 2:ABBR NO. ONE-TOUCH< > PRESS ONE-TOUCH to select “One-Touch”. to select “ABBR.NO.”. <01> ENTER TEL.# Enter the telephone number, press Flash/Sub-addr then enter the Sub-address. (Up to 20 digits) (Up to 36 digits including telephone number, pauses, spaces, FLASH and Sub-address) <01>... -
Page 137: To Send A Document With Sub-Address
Sub-addressing To send a Document with Sub-address Using One-Touch/ABBR. Number Dialing The operation is the same as normal dialing ENTER STATION(S) THEN PRESS START Set document(s) face up. <01>(STN name) 5551234s2762 * STORE * NO.001 PAGES=001 The document is stored into the memory and your machine starts to dial the number of the station and sends the document(s) with Sub-addressing information. -
Page 138: Panasonic Document Management System
Panasonic Document Management System (UF-5500 Only) Setting the Network Parameters Setting the User (Network) Parameters For your machine to be able to operate on the Network properly, the following three (3) Basic Parameters must be pre-programmed into the machine. (For UF-5500 only) If DHCP server is available on your network, the IP Address, Subnet Mask and Default Gateway IP Address will be acquired automatically. -
Page 139: Setting The User Parameters For The Lan Interface
Setting the Network Parameters SUBNET MASK Enter the subnet mask using the keypad. Press to enter 123.178.240.4 the period ".". DEF. GATEWAY IP DEF. GATEWAY IP Enter the default gateway using the keypad. Press 123.178.240.5 enter the period ".". To continue setting other parameters, or press Sto p to return to standby. -
Page 140: Installing The Printer Driver And Application Software
Installing the Printer Driver and Application Software General Description The Panasonic Document Management System enables the machine to carry out the following functions: Available software Interface Description Network Printer Driver Printer Driver ® ® For printing files created in a Microsoft... - Page 141 Installing the Printer Driver and Application Software General Description System requirements Item Requirements Operating System Windows 2000 (Service Pack 4 or later) Windows XP (32/64-bit) (Service Pack 2 or later) ® Windows Server 2003 (32/64-bit) (Service Pack 1 or later) ®...
-
Page 142: When Connecting Using A Usb Port
Start Windows and make sure no other applications are running. • You must be logged in as an administrator in order to install the Panasonic Document Management System. Insert the supplied CD-ROM into your CD-ROM drive. • The [Panasonic Document Management System] window appears. - Page 143 • To install to a different folder, click [Browse] and select the desired folder. The [Select Printer Driver] dialog box appears. Select [Panasonic UF-5500], and click [Next]. The [Select Panafax Desktop Setup Type] dialog box appears. Select [Standalone/Server] or [Client], and click [Next].
-
Page 144: When Connecting Using A Network Port
• You must be logged in as an administrator in order to install the Panasonic Document Management System. Insert the supplied CD-ROM into your CD-ROM drive. • The [Panasonic Document Management System] window appears. Click [Complete Install] or [Custom Install] from [Network Connection] in the [Install Software] tab. - Page 145 Installing the Printer Driver and Application Software When Connecting using a Network Port The [Communications Utility] dialog box appears. Select the checkbox if you want to register the [Communications Utility] on the startup menu of Windows, and click [Next]. • If the [Windows Firewall Setting Tool] dialog box appears after this step, select the proper selection.
-
Page 146: Using The Machine As A Printer
Using the machine as a Printer Printing from Windows Applications You can print from a Windows application. For example, to print from WordPad using Windows XP, proceed as follows: Open the document you want to print. Select [Print...] from the [File] menu. •... -
Page 147: Using The Machine As A Scanner
Using the machine as a Scanner Scanning from Your Computer (USB Connection) Document Scanner includes a TWAIN compliant scanner driver. The following is an example scanning procedures: Set the document(s) face up. Start an application that supports TWAIN scanning such ®... -
Page 148: Setting The Scanner Parameters
Using the machine as a Scanner Setting the Scanner Parameters SET MODE (1-1) ∨∧ ENTER NO. OR SCAN PARAMETERS? PRESS SET SCAN PARAM.(0-9) ∨∧ ENTER NO. OR Enter scanner Parameter number from the Parameter RESOLUTION? Table. 100dpi<> for RESOLUTION RESOLUTION? Enter the new setting value or press 200dpi<>... -
Page 149: Scanner Parameter Table
Using the machine as a Scanner Scanner Parameter Table General User Mode Parameter Setting Setting Comments Number SCANNER SETTINGS (----) (----) Printing the scan settings. COMPRESSION Setting the compression mode. RESOLUTION 100dpi Setting the resolution. 200dpi 300dpi 600dpi HALFTONE(100dpi) HALFTONE(200dpi) HALFTONE(300dpi) HALFTONE(600dpi) FILE TYPE/NAME... -
Page 150: Scanning From Your Machine (Network Connection)
Using the machine as a Scanner Scanning from Your Machine (Network Connection) Registering your PC address to Your Machine Right-click the [Panasonic Communications Utility] icon ( ) from the task tray. Select [Scanner Configuration]. • The [Scanner Configuration] window appears. - Page 151 Using the machine as a Scanner Scanning from Your Machine (Network Connection) Scan to Your computer repeatedly to change the original document size. • The default document size is set to LETTER. Set the document(s) face up. Select the desired Scanning setting. To select Scanning Resolution, press repeatedly.
-
Page 152: Using The Machine As A Pc Fax
Using the machine as a PC Fax Sending Documents from Your PC (USB Connection) Open the document(s) you want to send as a fax. Select [Print...] from the [File] menu. • The [Print] dialog box appears. Select [Panafax Desktop Driver] as the active printer, and click [OK]. -
Page 153: Sending Documents From Your Pc (Network Connection)
• A confirmation dialog box appears. Check the sending information again and click [OK]. 1. For details about the [Panasonic Fax Driver] dialog box, click [?], then click the desired item. NOTE 2. When sending documents, check to confirm if the external telephone is not in use. -
Page 154: Printout Journals And Lists
Printout Journals and Lists Journals and Lists General Description To help you maintain records of the documents you sent and received, as well as lists of the numbers you record, your facsimile machine can print the following journals and lists: Transaction Journal, Individual Transmission Journal, Communication Journal, One-Touch/Abbreviated/Directory Search No. -
Page 155: Individual Transmission Journal (Ind. Xmt Journal)
Journals and Lists Individual Transmission Journal (IND. XMT JOURNAL) An Individual Transmission Journal contains the information on the latest transmission. PRINT OUT (1-6) ∨∧ ENTER NO. OR IND. JOURNAL? PRESS SET * PRINTING * IND. JOURNAL... - Page 156 08:35 C8044B03C1000000 003/003 00:01:32 0353678980 MMM-dd 08:57 C8044B03C1000000 (13) -PANASONIC ************************************ -HEAD OFFICE - ***** - 201 555 1212- ********* (15) (14) Sample Individual Transmission Journal (IND. XMT JOURNAL) ************** -IND. XMT JOURNAL- **************** DATE MMM-dd-yyyy ***** TIME 15:00 *********...
- Page 157 Journals and Lists Explanation of Contents (1) Printout date (2) Printout time (3) Journal number (4) Communication results "OK" indicates that the communication was successful. "BUSY" indicates that the communication has failed because of busy line. "STOP" indicates that STOP was pressed during communication. "M-OK"...
-
Page 158: Communication Journal (Comm. Journal)
PAGES DURATION ABBR NO. <01> SERVICE DEPT. 001/001 00:01:30 <02> SALES DEPT. 001/001 00:01:25 <03> ACCOUNTING DEPT. 000/001 00:01:45 BUSY 021 111 1234 000/001 00:00:00 - PANASONIC ************************************* - HEAD OFFICE - ****** - 201 555 1212 - ********* MMM-dd-yyyy... - Page 159 Journals and Lists Explanation of Contents (1) Indication of communication mode (2) Start time of communication (3) End time of communication (4) File number 001 to 999 (When the communication is stored into the memory, a file number is assigned for each communication.) (5) Station number Sequential number of the Stations.
-
Page 160: One-Touch/Abbreviated And Directory Search List
Journals and Lists One-Touch/Abbreviated and Directory Search List To print a One-Touch/Abbreviated Number and Directory Search List of the telephone numbers you have stored. PRINT OUT (1-6) ∨∧ ENTER NO. OR SPEED DIAL LIST? PRESS SET 1:ONE-TOUCH/ABBR 2:DIR. SEARCH * PRINTING * ONE-TOUCH/ABBR for One-Touch/ABBR. - Page 161 222 666 2345 <03> ACCOUNTING DEPT 313 333 3456 NO. OF STATIONS = 03 (4) -PANASONIC ************************************** -HEAD OFFICE - ***** - 201 555 1212- ********* Sample ABBR. Number List *************** -ABBR NO. LIST- ****************** DATE MMM-dd-yyyy ***** TIME 15:00 ******* ABBR NO.
- Page 162 <01> 121 555 1234 SERVICE DEPT <02> 222 666 2345 NO. OF STATIONS = 006(4) -PANASONIC ************************************ -HEAD OFFICE - ***** - 201 555 1212 - ********* Explanation of Contents (1) One-Touch number or Abbreviated number : <nn>= One-Touch number, [nnn] = Abbreviated number...
-
Page 163: Program List
TIMER POLL POLL 19:00 [002] [P03] PROG. A POLL ----- [001] [002] -PANASONIC ************************************ -HEAD OFFICE - ***** - 201 555 1212- ********* Explanation of Contents (1) Program key (2) Program name Up to 15 characters (3) Type of communication "XMT"... -
Page 164: Fax Parameter List
3:Darker) * 002 RESOLUTION (HOME) (1:Standard 2:Fine 3:S-Fine 4:Halftone) MEMORY SIZE (8MB) (6) -PANASONIC ************************************ -HEAD OFFICE - ***** - 201 555 1212- ********* Explanation of Contents (1) Parameter number (2) Description : "(HOME)" means home position setting. (3) Selection (4) Current setting : "(----)"... -
Page 165: Toner/Drum Cartridge Order Forms
Journals and Lists Toner/Drum Cartridge Order Forms To print the Toner or Drum Cartridge Order Forms MAINTENANCE(2-2) ∨∧ ENTER NO. OR SUPPLY FORMS? 1:TONER 2:DRUM * PRINTING * TONER ORDER FORM for Toner Order Form * PRINTING * DRUM ORDER FORM for Drum Order Form Sample Toner Cartridge Order Form **********************************... -
Page 166: Problem Solving
Problem Solving Troubleshooting Troubleshooting If You Have Any of These Problems Mode Symptom Cause / Action page During Transmission Document doesn't 1. Check that your document is free of staples and paper feed/multiple feed clips, and that it is not greasy or torn. 2. - Page 167 Troubleshooting Mode Symptom Cause / Action page Communication No dial tone 1. Check the connection of the telephone line. 2. Check the telephone line. 1. Check the connection of the telephone line. No auto answer 2. Check the Reception mode setting. 3.
- Page 168 Troubleshooting Troubleshooting Mode Symptom Cause / Action page TAM Interface Trouble Cannot utilize the This feature is not compatible. The fax machine is designed to in Unattended TAM I/F remote turn-on feature answer after 8 rings if the TAM does not answer. Mode (OUT Mode) of the telephone answering machine...
- Page 169 Troubleshooting Mode Symptom Cause / Action page TAM Interface Trouble Fax machine will not Increase the ring count for detection on the telephone In Unattended Fax start to receive with the answering machine. Mode (OUT Mode) telephone answering machine in the auto- answer mode.
-
Page 170: Information Codes
Check with the other party. size of the paper feeding direction. The fixing temperature does not rise up even if the Contact the authorized Panasonic dealer. heating circuit is "ON". The temperature of fuser exceeds upper limit of Contact the authorized Panasonic dealer. - Page 171 Troubleshooting Info. Meaning Action page Code 404/405 During initial handshake, communication error Reload the document and send again. occurred. Transmission Password does not match. Check the password or the telephone number Receiving Password does not match. in One-Touch or Abbreviated station. Received from an unauthorized station in Selective Reception mode.
- Page 172 1. After identifying the problem and verifying the recommended action, if the information Codes NOTE keep reoccurring or if you need help on Information Codes that appear on your machine but are not listed above, please contact the Panasonic Technical Support Hotline.
-
Page 173: Clearing A Recording Paper Jam
Troubleshooting Clearing a Recording Paper Jam If the recording paper doesn't advance into the machine, or there is no recording paper, Information Code 001 will show on the display. If a recording paper jam occurs, Information Code 007 will show on the display. To Clear the Information Code 001 (1) Slide out and remove the paper cassette. -
Page 174: Clearing A Document Jam
Troubleshooting Clearing a Document Jam If a document becomes jammed in the machine, the display will show the Information Code 030 or 031. (1) Open the ADF Door. (2) Remove the jammed document. To clear the jam, Info. Code 030... - Page 175 Troubleshooting To clear the jam, Info. Code 031...
-
Page 176: Cleaning The Document Scanning Area
Troubleshooting Cleaning the Document Scanning Area If the receiving party reports that the received documents were black or contained black lines, try making a copy on your unit to verify. If the copy is black or has black lines, the document Scanning Area is probably dirty and must be cleaned. -
Page 177: Checking The Telephone Line
Troubleshooting Checking the Telephone Line If you do not hear a dial tone through the telephone connected to the machine or if the telephone does not ring (No automatic receive). Unplug the Telephone Line Cable from the telephone jack that was supplied by the telephone company. -
Page 178: Appendix
600 dpi 600 dpi Recording Method Laser printer Recording Paper Plain Paper Recording Paper Size Letter, A4 or Legal (Optional) : UF-5500 Letter or A4 : UF-4500 Printer Resolution 1) Copy Fine 203 dpi 196 dpi SuperFine 203 dpi 391 dpi... - Page 179 Each station can register up to 36 digits for each telephone number (including pauses and spaces) and up to 15 characters for each station name Image Memory Capacity 240 pages : UF-4500 480 pages : UF-5500 (Based on ITU-T Image No.1 using Standard Resolution)
-
Page 180: Recording Paper Specifications
Recording Paper Specifications In general, most photocopy papers will also work very well. There are many "name" and "generic" brands of paper available. We recommend that you test various papers until you obtain the desired results. The following table summarizes the major specifications to consider when selecting white or colored paper. Basic Weight 16 to 21 lb (60 to 80 g/m Cut Edge Conditions... -
Page 181: Options And Supplies
Options and Supplies Please contact your local Panasonic dealer for availability. A. Options: Order No. Picture Description UE-409100 Legal Cassette B. Supplies: Order No. Picture Description UG-5591 Toner Cartridge Prints about 3000 pages. (See Note 1) UG-5590 Drum Cartridge Prints about 6000 pages. -
Page 182: Fcc Notice For Users In Usa
Email: pddc_fax@us.panasonic.com Note:For Technical Support, please contact the Panasonic Technical Support Hotline. This equipment complies with Part 68 of the FCC rules and the requirements adopted by the ACTA. On the rear panel of this equipment is a label that contains, among other information, a product identifier in the format US:AAAEQ##TXXXX. - Page 183 The default functions can be adjusted depending on your office requirements. Please ask your Authorized Panasonic dealer for more details. Recycling information USA Only: Disposal may be regulated in your community due to Environmental considerations.
-
Page 184: Notice To Users In Canada
Notice to Users in Canada NOTICE Before installing this equipment, users should ensure that it is permissible to be connected to the facilities of the local telecommunications company. The equipment must also be installed using an acceptable method of connection. The customer should be aware that compliance with the above conditions may not prevent degradation of service in some situations. - Page 185 Notice to Users in Canada Avis Avant d'installer ce matériel, l'utilisateur doit s'assurer qu'il est permis de le raccorder aux installations de l'entreprise locale de télécommunication. Le matériel doit également être installé en suivant une méthode acceptée de raccordement. L'abonné ne doit pas oublier qu'il est possible que la conformité aux conditions énoncées ci-dessus n'empêche pas la dégradation du service dans certaines situations.
-
Page 186: Glossary
Glossary ABBR. No. The ability to store full phone numbers into the dialer and then utilizing a short series of (Abbreviated Number) keystrokes to speed dial that number in the future. Access code A 4-digit programmable access code that prevents unauthorized operation of your Fax. The mechanism that delivers a stack of document pages to the scanner one page at a time. - Page 187 Glossary G3 mode (Group 3) Refers to the standards and transmission capabilities of the current generation of facsimile machines. Group dialing The ability to program many telephone numbers into a single station so that many locations can be dialed in sequence utilizing a single keystroke. HALFTONE A scanning technique to distinguish levels of gray from black and white.
- Page 188 Glossary Selective reception A function that can be set so that your unit will receive from only those machines programmed into your dialer. Station name Alphanumeric ID which can be programmed for each One-Touch dialing and Abbreviated dialing number. Stored documents Documents that have been scanned and now are stored in your machine's memory.
-
Page 189: Itu-T Image No. 1
ITU-T Image No. 1 All specifications are based on the ITU-T Image No. 1 (The sample shown below is not to scale). -
Page 190: Index
Index Fax Parameter Table ........... 38 Index File List ..............86 Fixed Reduction........... 72 ABBR. Number List..........161 Function Key List ..........18 Abbreviated Dialing........51 Abbreviated Dialing Number ........33 Access Code............93 Address Confirmation ..........56 Group Dialing............81 ADF Capacity.............178 Adjusting the Volume ...........25 Automatic Document Feeder (ADF).....45 ID Number ............ - Page 191 Index Priority Transmission Reservation ...... 63 Program Keys ............. 81 Program List ............163 Receive To Memory ..........95 Receiving Password.......... 125 Reception Modes ..........66 Recording Paper Jam ........173 Redialing ............. 65 Resolution ............46 Retry an Incomplete File ........92 Ringer Volume ............
-
Page 192: Information Of Copyrights And Licenses
Information of copyrights and licenses This product uses a part of NetBSD kernel. The use of a part of NetBSD kernel is based on the typical BSD style license below. Copyright (c) The Regents of the University of California. All rights reserved. Redistribution and use in source and binary forms, with or without modification, are permitted provided that the following conditions are met: Redistributions of source code must retain the above copyright notice, this list of conditions and the... - Page 193 Copyright (c) 1985, 1986, 1993 The Regents of the University of California. All rights reserved. Copyright (c) 1986, 1989, 1991, 1993 The Regents of the University of California. All rights reserved. Copyright (c) 1986, 1993 The Regents of the University of California. All rights reserved. Copyright (c) 1987, 1991, 1993 The Regents of the University of California.
- Page 194 Information of copyrights and licenses Copyright (c) 1999, 2000 The NetBSD Foundation, Inc. All rights reserved. Copyright (c) 1999, 2000, 2001 The NetBSD Foundation, Inc. All rights reserved. Copyright (c) 1999, 2001 The NetBSD Foundation, Inc. All rights reserved. Copyright (c) 2000 The NetBSD Foundation, Inc. All rights reserved. Copyright (c) 2000, 2001 The NetBSD Foundation, Inc.
- Page 195 This product contains thttpd software that ACMELabs developed and is using it based on the following licence conditions. Copyright c 2000 by Jef Poskanzer <jef@mail.acme.com>. All rights reserved. Redistribution and use in source and binary forms, with or without modification, are permitted provided that the following conditions are met: Redistributions of source code must retain the above copyright notice, this list of conditions and the following disclaimer.
- Page 196 Information of copyrights and licenses This product contains The OpenLDAP software and is using it based on the following license conditions. Copyright 1998-2004 The OpenLDAP Foundation All rights reserved. Redistribution and use in source and binary forms, with or without modification, are permitted only as authorized by the OpenLDAP Public License.
- Page 197 Redistribution and use in source and binary forms, with or without modification, are permitted provided that this notice is preserved. The names of the copyright holders may not be used to endorse or promote products derived from this software without their specific prior written permission. This software is provided ``as is'' without express or implied warranty.
- Page 198 Information of copyrights and licenses THIS SOFTWARE IS PROVIDED BY THE OPENLDAP FOUNDATION AND ITS CONTRIBUTORS ''AS IS'' AND ANY EXPRESSED OR IMPLIED WARRANTIES, INCLUDING, BUT NOT LIMITED TO, THE IMPLIED WARRANTIES OF MERCHANTABILITY AND FITNESS FOR A PARTICULAR PURPOSE ARE DISCLAIMED. IN NO EVENT SHALL THE OPENLDAP FOUNDATION, ITS CONTRIBUTORS, OR THE AUTHOR(S) OR OWNER(S) OF THE SOFTWARE BE LIABLE FOR ANY DIRECT, INDIRECT, INCIDENTAL, SPECIAL, EXEMPLARY, OR CONSEQUENTIAL DAMAGES (INCLUDING, BUT NOT LIMITED TO, PROCUREMENT...
-
Page 199: Important Information
Important Information IMPORTANT INFORMATION When requesting information, supplies or service, always refer to the model and serial number of your machine. The model and serial number plate (Main Name Plate) is located on the machine as shown below. For your convenience, space is provided below to record information you may need in the future. Model No. - Page 200 Mississauga, Ontario L4W 2T3 http://www.panasonic.net/ http://www.panasonic.ca/ PD0311AN1091 PNQX3486ZB © Panasonic System Networks Co., Ltd. 2011 September 2011 Unauthorized copying and distribution is a violation of law. Published in Japan The contents of these Operating Instructions are subject to change without notice.
Need help?
Do you have a question about the UF-4500 and is the answer not in the manual?
Questions and answers