
Subscribe to Our Youtube Channel
Related Manuals for Ricoh FAX4430NF


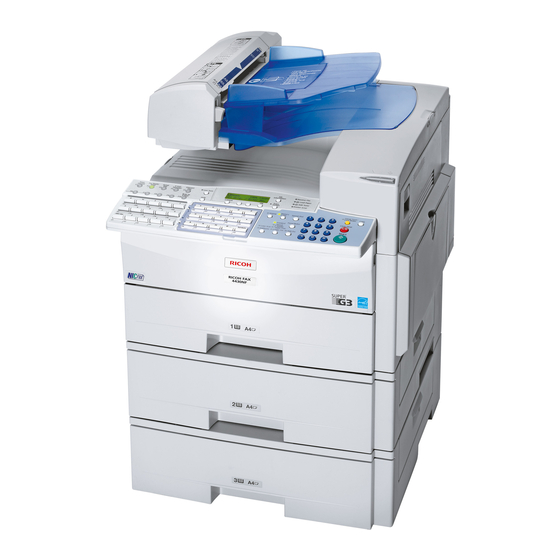
Summary of Contents for Ricoh FAX4430NF
-
Page 1: Operating Instructions
Operating Instructions Basic Features Getting Started Faxing Programming Troubleshooting For safe and correct use of this machine, please be sure to read the Safety Information before you use it. - Page 2 Chapter 10, “Connecting the Power and Switching On” in the Advanced Features manual. Declaration of Conformity Product Name: Facsimile Model Number: 3770/F640/LF412/FAX4430L, 3770nf/F650/LF417e/FAX4430NF Responsible party: Ricoh Corporation Address: 5 Dedrick Place, West Caldwell, NJ 07006 Telephone number: 973-882-2000 This device complies with part 15 of FCC Rules.
-
Page 3: Table Of Contents
TABLE OF CONTENTS What Do You Want to Do with This Machine? ............ 1 Notice ........................3 Safety Information ......................5 Safety During Operation ..................5 Safety During Operation ..................5 Important Safety Instructions ................9 Important Safety Instructions ..................9 Caution ........................9 Position of the RCAUTION Label ..............10 ENERGY STAR Program ..................11 Energy Saver Modes....................12 Remarks........................ - Page 4 Canceling a Memory Transmission..............38 Before Pressing the Start Key..................38 While Scanning the Original..................38 When an Original Is Jammed...................38 During Transmission ....................38 While Awaiting Transmission ...................39 Immediate Transmission..................41 If the Connection Could Not Be Made..............42 Canceling an Immediate Transmission ............. 43 Before Pressing the Start Key..................43 After Pressing the Start Key..................43 When an Original Is Jammed...................43...
- Page 5 Groups ........................79 Programming ......................79 Editing ........................82 Deleting ........................85 To delete a destination from a group..............85 To delete an entire group ..................86 Entering Characters.....................88 Available Characters ....................88 Keys .........................88 How to Enter Characters..................89 4. Troubleshooting Loading Paper in the Main Paper Tray...............91 Replacing the Toner Cartridge ................
-
Page 7: What Do You Want To Do With This Machine
What Do You Want to Do with This Machine? This is a summary of this machine's features including which pages to consult for detailed information. I want ... Reference to specify several destinations with a single p.51 “Using Group Dials” and p.79 “Groups” to print Quick Dial key labels that can be at- p.70 “Quick Dial Key Label (Dial Label)”... - Page 8 I want ... Reference to prevent a received message being picked up p.37 “Printing a Confidential Message”, Ad- casually by other people vanced Features and p.42 “Printing Personal Box Messages”, Advanced Features to have backups automatically made of faxes I p.134 “Backup File Transmission Settings”, send Advanced Features...
-
Page 9: Notice
Notice R CAUTION: Use of controls, adjustments, or performance of procedures other than those specified herein may result in hazardous radiation exposure. Direct (or indirect reflected) eye contact with the laser beam may cause serious eye damage. Safety precautions and interlock mechanisms have been designed to prevent any possible laser beam exposure to the operator. - Page 10 -Notice about the Telephone Consumer Protection Act (Valid in USA only) The Telephone Consumer Protection Act of 1991 makes it unlawful for any per- son to use a computer or other electronic device, including FAX machines, to send any message unless such message clearly contains in a margin at the top or bottom of each transmitted page or on the first page of the transmission, the date and time it is sent and an identification of the business or other entity, or other individual sending the message and the telephone number of the sending ma-...
-
Page 11: Safety Information
Safety Information When using this machine, the following safety precautions should always be fol- lowed. Safety During Operation In this manual, the following important symbols are used: R WARNING: Indicates a potentially hazardous situation which, if instructions are not followed, could result in death or serious injury. R CAUTION: Indicates a potentially hazardous situation which, if instructions are not followed, may result in minor or moderate injury or damage to property. - Page 12 R WARNING: • Connect the power cord directly into a wall outlet and never use an extension cord. • Disconnect the power plug (by pulling the plug, not the cable) if the power cable or plug becomes frayed or otherwise damaged. •...
- Page 13 R CAUTION: • Protect the machine from dampness or wet weather, such as rain and snow. • Unplug the power cord from the wall outlet before you move the machine. While moving the machine, you should take care that the power cord will not be damaged under the machine.
- Page 14 • If toner or used toner is inhaled, gargle with plenty of water and move into a fresh air environment. Consult a doctor if necessary. • If toner or used toner gets into your eyes, flush thoroughly with eyswash or water. Consult a doctor if necessary. •...
-
Page 15: Important Safety Instructions
Important Safety Instructions Important Safety Instructions Caution When using your telephone equipment, basic safety precautions should always be followed to reduce the risk of fire, electric shock and injury to persons, includ- ing the following: • Do not use this product near water, for example, near a bath tub, wash bowl, kitchen sink or laundry tub, in a wet basement or near a swimming pool. -
Page 16: Position Of The Rcaution Label
Position of the RCAUTION Label This machine has a RCAUTION label at the position shown below. For safety, please follow the instructions and handle the machine as indicated. The inside of the machine becomes very hot. Do not touch the inside. Doing so could result in a burn. -
Page 17: Energy Star Program
ENERGY STAR Program ® ENERGY STAR Program ® The ENERGY STAR Program encourages energy conservation by promoting energy efficient computers and other office equipment. The program backs the development and dissemination of products that feature energy saving functions. It is an open program in which manufacturers participate voluntarily. Targeted products are computers, monitors, printers, facsimiles, copiers, scanners, and multi- function devices. -
Page 18: Energy Saver Modes
Energy Saver Modes Energy Saver mode enables you to avoid using unnecessary power and econo- mize on electricity. Although we recommend you use this mode from the view- point of environmental consciousness, you can also turn it off. When you install this machine for the first time, Energy Saver mode is turned on by default. - Page 19 To exit Energy Saver mode: • In Energy Saver Standby mode, press the {Energy Saver/Clear Modes} key. • In FAX Standby mode, press any key. • Place an original. • Pick up the optional handset or the external telephone handset. Note ❒...
-
Page 20: Remarks
Remarks Be sure to read the following information before you use this machine: • Do not turn off the power during output. Make sure that output has complet- ed before you turn off the power. • Do not open the front cover, right cover, lower right cover, main paper tray, or optional paper tray unit while paper is being printed out. - Page 21 If the other party's machine does not have paper loaded of the same size and ori- entation as your original, the message may be split and printed on two or more sheets, or reduced and printed on one sheet. • For example, if the other party's machine has A5 paper loaded and it receives a A4 size document, the A4 size image will be reduced to A5 size and printed on A5 paper.
-
Page 22: How To Read This Manual
How to Read This Manual Symbols The following set of symbols is used in this manual. R WARNING: This symbol indicates a potentially hazardous situation that might result in death or serious injury when you misuse the machine without following the in- structions under this symbol. -
Page 23: Paper Mark
Paper Mark Paper directions in this book are shown as follows. GFKAMI0N Portrait direction for originals is shown as K, and landscape direction for orig- inals is shown as L. Portrait direction for paper in the paper tray is shown as K, and landscape di- rection for paper in the paper tray is shown as L. -
Page 24: Manuals For This Machine
Manuals for This Machine Instructions for the optional and the Extra G3 Interface Unit (G3 Interface Unit Type410) are in- cluded in the Basic Features and Advanced Features manuals. Basic Features (this manual) The Basic Features manual explains the most frequently used fax functions and operations. -
Page 25: Getting Started
1. Getting Started Machine Types This machine comes in two types. Type1 Type2 NIC FAX Unit Option Standard Papar Tray Unit first Option Option second Option Option Bypass Tray Unit Option Standard... -
Page 26: Guide To Components
Getting Started Guide to Components Front View The following illustration is for Type1. AZX004 ADF cover Main paper tray Cover for the ADF. Load paper here. Release button Optional paper tray unit (Option) Push this button to open the ADF. You can load more paper here. -
Page 27: Original Tray
Guide to Components Status indicators • hAlarm Blinks red when an error occurs. Check the display and read the mes- sage to identify the problem (such as a paper jam or an open the cover). • 0Communicating Lights during fax transmission or re- ception. -
Page 28: Side View
Getting Started Side View ZHMH010N Output tray guide Handset/external telephone con- nector Pull out and raise the end fence to sup- port large paper. Reference Main power switch p.194 “Connecting to a Telephone The power turns your machine on and Line”, Advanced Features off. -
Page 29: Control Panel
Control Panel Control Panel The following illustration is for Type2. ZHMS020N {User Tools} key User Function keys Each of these can be programmed for Press to access the User Tools settings rapid access to frequently used functions. and customize various functions to meet your specific requirements. - Page 30 Getting Started {Stamp} key Add Toner indicator Blinks when toner is low and lights con- Press this key to switch the Stamp func- tinuously when toner has completely run tion on. See p.53 “Stamp”, Advanced Fea- out. See p.92 “Replacing the Toner Car- tures .
-
Page 31: Number Keys
Control Panel {Speed Dial} key Press to specify a destination pro- grammed in a Speed Dial. {On Hook Dial} key Use to dial a number from the number keys without having to lift the handset. {Pause/Redial} key Pause: Inserts a pause when you are dial- ing or storing a fax number. -
Page 32: Reading The Display
Getting Started Reading the Display The machine status and instructions are shown on the display. Important ❒ Do not apply a strong shock or force of about 30N (about 6.8 lbf ) or more to the panel display. Otherwise, the display might be damaged. N = Newton lbf = weight pound Note... -
Page 33: Standby Display
Control Panel Standby Display While the machine is on standby (immediately after it is turned on or after the {Cancel} key is pressed), the following display is shown. ❖ Returning the machine to the standby display To return the machine to the standby display manually, do one of the follow- ing: •... -
Page 34: Display Prompts
Getting Started Display Prompts Depending on the situation, the machine will show various prompts on the dis- play. ❖ Instructions and Requests ❖ Questions ❖ Selections ❖ Status Energy Saver Mode Display When the machine is not used for a fixed period, the machine goes into Energy Saver Mode automatically. -
Page 35: Restricted Access Display
Control Panel Restricted Access Display When the following display appears, the Restricted Access function is on. To exit the Restricted Access display, enter your user code (the Personal Box SUB code). You can check your Personal Box SUB code on the Personal Box list. See p.169 “Printing the Box List”, Advanced Features . -
Page 36: Turning On Or Off The Power
Getting Started Turning On or Off the Power Note Turning Off the Power ❒ This machine automatically enters Energy Saver mode if you do not Important use the machine for a while. ❒ Make sure that 100% appears on the display before you turn off the Turning On the Power power. -
Page 37: Faxing
2. Faxing Transmission Modes ❖ Immediate Transmission There are two types of transmission. The machine dials immediately ❖ Memory Transmission and transmits the fax while scan- The fax is stored in memory, and ning. then transmitted automatically. This is convenient when you want This is convenient when you want to send a fax immediately and to remove originals quickly. -
Page 38: Switching Between Memory Transmission And Immediate Transmission
Faxing Switching between Memory Transmission and Immediate Transmission Press the {Memory Trans.} key to switch between Memory Transmis- sion and Immediate Transmission. When the indicator of the {Memory Trans.} key is not lit, Immediate Transmission is selected. When the indicator of the {Memory Trans.} key is lit, Memory Transmission is selected. -
Page 39: Placing Originals
Placing Originals Placing Originals You can place your originals in the Note ADF. ❒ When sending a fax, the image out- put at the other end depends on ❖ How to place A4, B5 JIS (Japanese the size and orientation of paper Industrial Standard), A5, 5 "x8 ",... -
Page 40: Placing Originals In The Adf
Faxing Adjust the original guide to match Placing Originals in the ADF the size of your originals. Align the edges of your originals and Use the ADF to scan a stack of origi- stack them in the ADF face up. nals in one operation. -
Page 41: Originals Unsuitable For The Auto Document Feeder (Adf)
Placing Originals Originals Unsuitable for the Auto Document Feeder (ADF) Do not set the following types of orig- inals in the Auto Document Feeder (ADF) because they may be damaged. • Originals of sizes other than those specified on p.200 “Acceptable original sizes”, Advanced Features •... -
Page 42: Memory Transmission
Faxing Memory Transmission ❒ The number of pages that you can Memory Transmission is convenient because: store in memory depends on the original images and the scan set- • Fax originals can be scanned much tings. You can store up to 1280 more quickly. - Page 43 Memory Transmission Press the {Start} key. Dial. If you want to send the same fax to more than one destination, press the {OK} key, and then dial anoth- er destination. Repeat this step for all destinations. Note ZHMS030N ❒ If you make a mistake, press the {Clear/Stop} key, and then enter the correct number again.
-
Page 44: Canceling A Memory Transmission
Faxing Canceling a Memory Transmission Before Pressing the Start Key When an Original Is Jammed {Energy Press Read the message in the display. Saver/Clear Modes} key. The following displays appear one after the other. Press the {OK} key. ZHMS040N Note ❒... -
Page 45: While Awaiting Transmission
Canceling a Memory Transmission Press the {Job Information} key, While Awaiting Transmission and confirm that " 1. Cancel TX / RX " is displayed. Use this procedure to cancel a trans- mission after the original has been scanned. Note ❒ If transmission finishes while you are carrying out this procedure, it will not be canceled. - Page 46 Faxing Display the file you want to de- lete. Enter the file number with the number keys, or search using 0 or If you are unable to find the file, it has already been sent. Press the {OK} key. Press 0 or 1 to select " Yes ”. Press the {OK} key.
-
Page 47: Immediate Transmission
Immediate Transmission Immediate Transmission Immediate Transmission is conve- Place your original. nient when: Reference • You want to send an original im- mediately as it is scanning. p.33 “Placing Originals” • You want to quickly check wheth- Select any scan settings you re- er you have successfully connected quire. -
Page 48: If The Connection Could Not Be Made
Faxing Press the {Start} key. If the Connection Could Not Be Made If it is not possible to make a connec- tion with the number you specified because the line was busy or there was a line problem, the machine redi- als automatically. -
Page 49: Canceling An Immediate Transmission
Canceling an Immediate Transmission Canceling an Immediate Transmission Before Pressing the Start Key When an Original Is Jammed Press the {Energy Saver/Clear Modes} Read the message on the display. key. Remove the original. Reference p.98 “Clearing Original Jams” ZHMS040N Note ❒... -
Page 50: Scan Settings
Faxing Scan Settings ❖ Detail (8 × 7.7 lines/mm, 200 × 200 dpi) You may want to send many different types of fax messages. Some of these Select for originals containing may be difficult to reproduce at the small characters or when you re- other end. - Page 51 Scan Settings ❒ To select 300 x 300 dpi, the NIC Limitation FAX unit (Option for Type1) is re- ❒ If the other party's machine does quired. 300 x 300 dpi can be used not support the resolution at with the scanner function. When which you are sending, this ma- sending fax messages with 300 x chine automatically switches to a...
-
Page 52: Original Type
Faxing Original Type -Speed Mode and Standard Mode If your original contains photographs or colored illustrations, select Half- Halftone has two modes, Speed mode tone to optimize image clarity. and Standard mode. When you select When you select Color Scan, color Speed mode, faxes can be transmitted originals can be scanned with the faster, but the resulting images could... -
Page 53: Dialing
Dialing Dialing There are four main ways to dial a Enter the fax number with the number: number keys. ❖ Entering numbers directly The digits appear on the display as you enter them. See p.47 “Entering Numbers Di- rectly”. ❖ Using Quick Dials See p.49 “Using Quick Dials”. -
Page 54: Pause
Faxing Note Pause ❒ When this machine is requested to Press the {Pause/Redial} key when di- transfer a call (i.e. becomes a aling or storing a number to insert Transfer Station), two fax numbers about a two-second pause. are automatically stored. There- fore, the number of destinations that can be dialed from the number keys decreases by two whenever... -
Page 55: Using Quick Dials
Dialing Press the User Function key ( {F1} Preparation to {F10} ) in which“Tone”is pro- To use the User Function key with grammed. the Tone function programmed in, you need to assign this function to a User Function key beforehand. See p.101 “User Function Keys”, Advanced Features . -
Page 56: Using Speed Dials
Faxing Place your original, and then se- Using Speed Dials lect any scan settings you require. You can specify a destination simply by pressing the {Speed Dial} key and a Speed Dial code (000 to 199). Preparation Press the Quick Dial key in which You must program the destina- the destination number is pro- tion's fax number in a Speed Dial... -
Page 57: Using Group Dials
Dialing ❖ When not programmed in a Quick Dial Note Use the User Function key. Group ❒ “Enter No.” and “Search A/Z” Dial is assigned to {F3} as a de- are shown one after the other in fault. If this setting is changed, the display above. -
Page 58: When Specifying A Group With A Quick Dial
Faxing Press the {Start} key. When specifying a group with a Quick Dial When specifying a group with the Group Preparation You must program Groups in Quick Dials beforehand. See p.79 Note “Groups”. ❒ Group Dial is assigned to {F3} as a default. - Page 59 Dialing Enter the Group number (1 to 9) with the number keys. Note ❒ Group Number is displayed. If t h e g r o u p n a m e i s p r o - grammed, the group name is also displayed.
-
Page 60: Reception Modes
Faxing Reception Modes The machine can treat incoming fax Press the {User Tools} key. messages and telephone calls in two ways. ❖ Manual Receive Use this mode if your line is shared by a fax machine and a telephone but you want to answer all calls yourself and decide whether they are fax transmissions or telephone calls. -
Page 61: Receiving Messages In Manual Receive
Reception Modes Press the {OK} key. Press 0 or 1 to select the recep- tion mode. Press the {OK} key. Press the {User Tools} key to re- turn to the standby display. Receiving Messages in Manual Receive In this mode you have to answer the call yourself and decide whether it is a fax or a telephone call. - Page 62 Faxing...
-
Page 63: Programming
3. Programming Own Name/Fax Header/Own Fax Number Make sure that all necessary settings Note are made before connecting your ma- ❒ In the USA, law requires that chine to the telephone line. your fax number be included in the fax Header. Register the fax ❖... -
Page 64: Own Name / Fax Header
Programming Press 0 or 1 until " 3. Setup " is Note ❒ When the optional extra G3 inter- displayed. face unit is installed, register using the “G3–2 Analog Line”. See p.151 “G3 Analog Line”, Advanced Fea- tures . ❒ Make sure that the machine is in Press the {OK} key. -
Page 65: Editing
Own Name/Fax Header/Own Fax Number Press 0 or 1 until " 2. Fax Header Editing 1" or “3. Fax Header 2”is dis- played. Press the {User Tools} key. Press the {OK} key. The programmed Own Name is displayed. ZHMS130E Press 0 or 1 to move the cursor, and then enter your fax number a f t e r t h e p r o g r a m m e d O w n Name. -
Page 66: Deleting
Programming Press the {OK} key. Press 0 or 1 until " 2. Fax Fea- tures " is displayed. Press 0 or 1 to select the item Press the {OK} key. that you want to edit. Press the {OK} key. Press 0 or 1 until " 3. Setup " is displayed. -
Page 67: Own Fax Number
Own Name/Fax Header/Own Fax Number Press the {User Tools} key. Press the {OK} key. The standby display reappears. Own Fax Number Press {2}{2}{2}{2}. The following procedure describes how to program/edit/delete the Own Fax Number. Programming Press the {OK} key. Press the {User Tools} key. Press 0 or 1 until "... -
Page 68: Editing
Programming Press the {OK} key. Press the {OK} key. Press the {User Tools} key. Press {2}{2}{2}{2}. The standby display reappears. Editing Press the {OK} key. Press the {User Tools} key. Press 0 or 1 until " 13. G3 Ana- log Line" is displayed. Note ZHMS130E ❒... -
Page 69: Deleting
Own Name/Fax Header/Own Fax Number Press the {Clear/Stop} key, and Press 0 or 1 until " 4. Key Op. then reenter the Own Fax Num- Tools" is displayed. ber. Press the {OK} key. Press the {OK} key. Press {2}{2}{2}{2}. Press the {User Tools} key. The standby display reappears. - Page 70 Programming Press the {Clear/Stop} key. Press the {OK} key. Press the {User Tools} key. The standby display reappears.
-
Page 71: Quick Dial
Quick Dial Quick Dial To save time, you can program a fax Note number that you use often into a ❒ When a programmed Quick Dial Quick Dial key. Then, whenever you key is being used for a standby are sending a message to that loca- Memory Transmission, the mes- tion, just press that Quick Dial key to sages "... -
Page 72: Programming
Programming Display the number of the Quick Programming Dial key you want to program. Press a Quick Dial key, or search Note using 0 or 1. ❒ There are 90 Quick Dials available. Press the {User Tools} key. Note ❒ If a Quick Dial has already been programmed, the contents are displayed. - Page 73 Quick Dial ❒ You can program SUB, SEP, Press 0 or 1 to select "On" or SID, and PWD in this step with "Off". the Dial Option function. See p.45 “SUB/SID (SUB Code Transmission)”, Advanced Fea- tures and p.46 “SEP/PWD (SEP Code Polling Transmission)”, Note Advanced Features .
-
Page 74: Editing
Programming Display the number of the Quick Editing Dial key you want to edit. Press a Quick Dial key, or search Press the {User Tools} key. using 0 or 1. Press the {OK} key. If you do not edit the number, pro- ZHMS130E ceed to step I. -
Page 75: Deleting
Quick Dial Note Deleting ❒ Under rare circumstances, gar- bled characters may appear Press the {User Tools} key. during name registration if you use the {Pause/Redial} key to display the fax number of par- ties located in other countries. If this happens, simply delete the garbled characters using 0 or 1 and the {Clear/Stop} keys,... -
Page 76: Quick Dial Key Label (Dial Label)
Programming Press 0 or 1 until "2. Fax Fea- Display the Quick Dial key that you want to delete. tures" is displayed. Press a Quick Dial key or search by pressing 0 or 1. Press the {OK} key. Press the {OK} key. The programmed data (fax num- ber and name) is deleted. -
Page 77: Label Paper
Quick Dial Label paper GFFORM1N Quick Dial key number Destination The number of the Quick Dial key the The other party's name or Group name destination is programmed in. programmed in the Quick Dial. - Page 78 Programming The name of an Auto Document The name for a document programmed as an Auto Document. The name of a program When a program is stored on the Quick Dial key, the name is printed. The contents of the User Function keys The contents of the User Function keys is printed.
-
Page 79: Speed Dial
Speed Dial Speed Dial If you program numbers in Speed Di- You can select to print Fax als, you can specify the fax number Header1 or Fax Header2 on fax simply by pressing the {Speed Dial} messages that the other party key and entering a three-digit Speed receives. -
Page 80: Programming
Programming Press the {OK} key. Programming Note ❒ There are 200 numbers available. ❒ You can specify codes 000 to 199. Display the number of the Speed Dial you want to program (000 to Press the {User Tools} key. 199). Enter the Speed Dial number with the number keys, or search using 0 or 1. - Page 81 Speed Dial ❒ You can redial the number. Press the {OK} key. Press the {Pause/Redial} key be- The search letter is programmed. fore entering a fax number with the number keys, and the last 10 fax numbers dialed are dis- played.
-
Page 82: Editing
Programming Display the number of the Speed Editing Dial you want to edit (000 to 199). Enter the Speed Dial number with Press the {User Tools} key. the number keys, or search using 0 or 1. Press the {OK} key. ZHMS130E If you do not edit the number, pro- ceed to step... -
Page 83: Deleting
Speed Dial Enter the search letter (A/a to Z/z) Deleting for Telephone Directory. Press the {User Tools} key. Press the {OK} key. Press 0 or 1 to select "On" or "Off". ZHMS130E Press the {OK} key. Press 0 or 1 until " 2. Fax Fea- tures "... - Page 84 Programming Display the Speed Dial number you want to delete (000 to 199). Enter the Speed Dial number with the number keys or search using 0 or 1. Press the {OK} key. The programmed data (fax num- ber and name) is deleted. If you want to delete another Speed Dial number, proceed to step F.
-
Page 85: Groups
Groups Groups If you regularly broadcast originals to Programming the same set of destinations, you can combine these numbers into a group. There are two ways of programming Then just select the group and each Groups: number will be dialed in sequence au- tomatically. - Page 86 Programming Group1 Group2 Total Num- Reference ber of items p.51 “Using Group Dials” Quick Dial Quick Dial Note [01] [01] ❒ Make sure that the machine is in Quick Dial standby mode before performing [03] the following procedures. Quick Dial Quick Dial ❒...
- Page 87 Groups Press the {OK} key. Specify the destination using one of the following three methods: Enter the fax number with the number keys. Confirm that " 1. Program / Delete " is displayed. Press the {OK} key. Press a Quick Dial key. Press 0 or 1 until "...
-
Page 88: Editing
Programming Repeat steps I to K for all the des- Press the Quick Dial key you tinations you want to program in want to program the Group in. the Group. If you finished adding a destina- tion, press the 0 or 1 to select " Exit ". - Page 89 Groups Press the {User Tools} key. Press the {OK} key. Display the number of the Group you want to edit (1 to 9). Enter the group number with the number keys, or search using 0 or ZHMS130E Press the {OK} key. Press 0 or 1 until "...
- Page 90 Programming Press the {OK} key. Specify the destination using one of the following three methods: Enter the fax number with the number keys. Programmed Group name is dis- played. If you do not edit the Group name, Press a Quick Dial key. proceed to step Press the {Clear/Stop} key, and then enter another name.
-
Page 91: Deleting
Groups B Press the {OK} key. To delete a destination from a group The following procedure describes how to delete a destination from a group. When the group was not Press the {User Tools} key. assigned to a Quick Dial key A Press the {OK} key. -
Page 92: To Delete An Entire Group
Programming Press the {OK} key. Press the {OK} key. To delete another destination, re- Display the group number for the peat steps destination you want to delete (1 to 9). Press the {User Tools} key. Enter the group number with the The standby display reappears. - Page 93 Groups Press the {OK} key. Press 0 or 1 until " 6. Delete Group Dial " is displayed. Press the {OK} key. Display the number of the group you want to delete (1 to 9). Enter the group number with the number keys, or search using 0 or Press the {OK} key.
-
Page 94: Entering Characters
Programming Entering Characters This section describes how to enter characters. Available Characters • Letters: ABCDEFGHIJKLMNOPQRSTUVWXYZabcdefghijklmnopqrstuvwxyz • Symbols: – _ (space) . , ( ) / @ & $ !” ' # p % + : ; < = > ? ^ [ ] ` { | } ∼ •... -
Page 95: How To Enter Characters
Entering Characters {ABC/abc} key (Quick Dial 21, 51, How to Enter Characters or 81) Use to switch between upper and lower The following procedure describes case. how to enter characters. Space key (Quick Dial 29, 59, or Note ❒ When you enter a character, it is Press to enter a space. -
Page 96: Wild Cards
Programming See p.121 “Multi-copy Recep- tion”, Advanced Features . -Wild Cards • Specified Tray When you program other parties' See p.123 “Specified Tray”, Ad- Own Name or Own Fax Numbers for vanced Features . multiple destinations, you can pro- • Two-sided Reception gram a sequence of characters com- See p.126 “Two-sided Recep- mon to these identifications as a wild... -
Page 97: Troubleshooting
4. Troubleshooting Loading Paper in the Main Paper Tray If there is no paper in the main paper Push the metal plate down, and tray, the B indicator on the control then square the paper and load it panel lights. into the tray. -
Page 98: Replacing The Toner Cartridge
Troubleshooting Replacing the Toner Cartridge When the Add Toner indicator (D) R CAUTION: starts to blink, the toner cartridge is • Keep toner (used or unused) and almost empty. About 50 pages can be toner cartridges out of reach of printed while the Add Toner indica- children. - Page 99 Replacing the Toner Cartridge Important Prepare the new toner cartridge. ❒ Used toner cartridges can be recy- Hold the cartridge horizontally cled. Please contact the seller of and shake it gently from side to this machine. side a few times. ❒...
- Page 100 Troubleshooting Close the front cover. ZHMH100E Important ❒ The front cover will not close properly if the toner cartridge is set into the machine incorrectly. If the cover will not close, re- move the cartridge and set it again. -When Toner Runs Out Even if toner runs out and the Add Toner indicator (D) is lit, transmis- sion operations are possible.
-
Page 101: Toner Cartridge Storage
Toner Cartridge Storage Toner Cartridge Storage R WARNING: • Do not incinerate used toner or toner cartridge. Toner dust might ignite when exposed to an open flame. Dispose of used toner cartridge in accor- dance with local regulations. R CAUTION: •... -
Page 102: Adjusting Volume
Troubleshooting Adjusting Volume You can change the volume of the fol- Press the {User Tools} key. lowing sounds the machine makes: ❖ On Hook Sounds when you press the {On Hook Dial} key. ❖ Transmission Sounds when the machine sends a message. - Page 103 Adjusting Volume Press the {OK} key. Press 0 or 1 to select the item you want to adjust, and then press the {OK} key. Press 0 or 1 to adjust the vol- ume. Press the {OK} key. If you want to adjust another item, repeat steps G to I.
-
Page 104: Clearing Original Jams
Troubleshooting Clearing Original Jams If an original is jammed, the hindica- Close the ADF unit and ADF cov- tor blinks and “ Clear Misfed Orig- er making sure they click firmly “ is displayed. inal(s) into place. Perform the following procedure to clear the jammed original. -
Page 105: Clearing A Copy, Fax, Or Print Jam
Clearing a Copy, Fax, or Print Jam Clearing a Copy, Fax, or Print Jam R CAUTION: Open the blue cover. • The fusing section of this ma- chine might be very hot. Caution should be taken when removing misfed paper. •... - Page 106 Troubleshooting When paper is caught in the right cover A Pull out the jammed paper. Close the right cover making sure it clicks firmly into place.
-
Page 107: Error Messages
Error Messages Error Messages The following messages may appear while you are operating or programming the machine. Message Causes and Solutions No Files Exist One of the following: • There are no documents in memory waiting for trans- mission. • Incorrect file number is entered. Check the file number and try again. - Page 108 Troubleshooting Message Causes and Solutions Machine is in Use. Please Wait Machine cannot print a list/file,because the plotter is not ready. Call Service Machine is out of order. Contactyour service representa- tive. This Dial is in Use.Cannot De- This Quick Dial or Speed Dial is being used(such as for a lete.This Dial is in Use.
-
Page 109: Indicators
Indicators Indicators Problem Causes Solutions B is lit red. Paper has run out Load paper. See p.91 “Loading Paper in the Main Paper Tray”. D islit red. Toner is exhausted Replace the toner cartridge. See p.92 “Replacing the Toner Car- tridge”. -
Page 110: Solving Problems
Troubleshooting Solving Problems This table lists some common problems and their solutions. Problem Solutions Reference Cannot transmit or receive. The telephone line may p.194 “Connecting to a Telephone have becomedisconnected. Line”, Advanced Features Make sure it is correctly con- nected. The data stored in the ma- Check the Power Failure Re- p.172 “Power Failure Report”, Ad-... - Page 111 Solving Problems Problem Solutions Reference Cannot print onto paper ev- Make sure the paper size de- p.178 “Changing the Paper Size”, enthough it is of an appro- tectionplate for the main pa- Advanced Features priate size. per tray or optional paper tray unit matches the paper sizeactually loaded in that tray or unit.
-
Page 112: When Things Don't Go As Expected
Troubleshooting When Things Don't Go as Expected This table lists operations which allow you to cancel Memory Transmission, Im- mediate Transmission, or copying, or to exit Energy Saver Mode. Problem Solutions Reference You want to cancel a Memo- If the original is being p.38 “Canceling a Memory Trans- ry Transmission. -
Page 113: Printing The Help List
Printing the Help List Printing the Help List Press the {Help} key and {Start} key to print a copy of the Help List which contains brief descriptions about the following features: • Immediate/Memory Transmission • Canceling Memory Transmission • Programming/Clearing Quick Di- •... -
Page 114: Index
INDEX 300 × 300 dpi , 44 Deleting Groups , 85 Quick Dial , 69 Speed Dial , 77 Add Toner indicator , 24 Detail , 44 ADF , 34 Dialing , 47 ADF cover , 20 Entering Numbers Directly , 47 Adjusting Volume Using Group Dials , 51 Alarm , 96... - Page 115 Halftone , 24 OK key , 23 Handset/external telephone connector , 22 On Hook Dial key , 25 Help key , 23 Optional Handset , 22 How to Read This Manual , 16 Optional paper tray unit (Option) , 20 Original guide , 21 Original output tray , 21 Original output tray guide , 21...
- Page 116 Reading the Display , 26 Ventilation Hole , 22 Receive File Indicator , 24 Volume , 96 Reception Receiving Messages in Manual Receive , When Things Don't Go as Expected , 106 Reception Modes Wild Cards , 90 Auto Receive , 54 Manual Receive , 54 Selecting , 54 Release button , 20...
-
Page 117: Fcc Requirements
7. If trouble is experienced with this equipment, for repair or warranty information, please contact RICOH CORP. CUSTOMER SUPPORT DEPT. at 1-800-FASTFIX. If the equipment is causing harm to the telephone network, the telephone company may request that you disconnect the equipment until the problem is resolved.
Need help?
Do you have a question about the FAX4430NF and is the answer not in the manual?
Questions and answers