Akuvox E12 Series Administrator's Manual
Hide thumbs
Also See for E12 Series:
- Quick manual (7 pages) ,
- Admin manual (114 pages) ,
- Manual (11 pages)
Advertisement
Quick Links
Advertisement

Related Manuals for Akuvox E12 Series


Summary of Contents for Akuvox E12 Series
- Page 1 About This Manual About This Manual...
- Page 2 Thank you for choosing the Akuvox E12 series door phone. This manual is intended for the administrators who need to properly configure the door phone. This manual applies to firmware version 312.30.10.18 and it provides all the configurations for the functions and features of the E12 and E12S-2 door phones.
- Page 3 The security provided by controlling access to your building, and verifying identities verbally and visually, is invaluable. Akuvox E12 series door phones, SIP-compliant, can connect with Akuvox indoor monitors for remote access control and monitoring. Users can interact with visitors through audio and video calls, granting access.
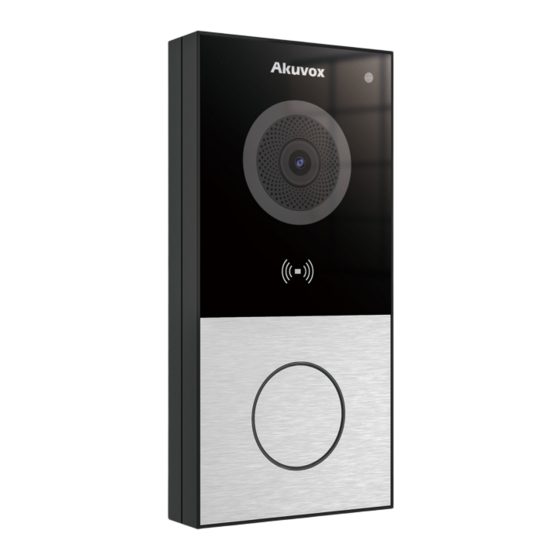
- Page 4 Model Specification and Differences Model Specification and Differences Model Model E12W E12W E12S E12S Camera 2M pixels, automatic lighting 2M pixels, automatic lighting Relay In Relay Out RS485 ✔ WiFi WiFi ✔ ✔ Card Reader Microphone Speaker ✔ ✔ Bluetooth TF Card Slot ✔...
- Page 5 Introduction to Configuration Menu Introduction to Configuration Menu Status: Status: This section gives you basic information such as product information, network information, account information, etc. Account: Account: This section concerns the SIP account, SIP server, proxy server, transport protocol type, audio & video codec, DTMF, session timer, etc. Network: Network: This section mainly deals with DHCP &...
- Page 7 Access the Device Access the Device Obtain Device IP Address Obtain Device IP Address Check the Device IP address by holding the push button. You can set up the IP announcement loop times on the Device > Audio Device > Audio interface. Expiration(After Reboot) Expiration(After Reboot) (Sec):...
- Page 8 The initial username and password are admin admin and please be case-sensitive to the usernames and passwords entered. Note Note Download IP scanner: https://knowledge.akuvox.com/docs/akuvox-ip-scanner?highlight=IP https://knowledge.akuvox.com/docs/akuvox-ip-scanner?highlight=IP See the detailed guide: https://knowledge.akuvox.com/v1/docs/en/how-to-obtain-ip-address-via- https://knowledge.akuvox.com/v1/docs/en/how-to-obtain-ip-address-via- ip-scanner?highlight=IP%20Scanner ip-scanner?highlight=IP%20Scanner Google Chrome browser is strongly recommended.
- Page 9 Language and Time Setting Language and Time Setting Language Setting Language Setting You can set up the device web language on the device web Setting > Time/Lang > Web Setting > Time/Lang > Web Language interface. Language The device supports the following web languages: English, Russian, Portuguese, Spanish, Italian, Dutch, French, German, and Turkish.
- Page 10 Preferred Server Preferred Server: Enter the primary NTP server address for updating the time. The default NTP server address is 0.pool.ntp.org. Alternate Server Alternate Server: Enter the backup NPT server address when the primary one fails. Update Interval Update Interval: Set the time update interval. For example, if you set it as 3600s, the device will send a request to the NPT server for the time update every 3600 seconds.
- Page 11 LED Setting LED Setting LED Light Setting LED Light Setting LED fill light is mainly designed to reinforce the light at night or in a dark environment. Set it up on the Device > LED Setting > LED Fill Light Device >...
- Page 12 Device Status: Device Status: There are six statuses, Normal, Offline, Calling, Talking, Receiving, and Emergency Alarm. The status cannot be changed. Color: Color: Select from Blue, Red, and Purple. You can select Red & Blue(flashing red and blue alternately) for Emergency Alarm status. Display Mode: Display Mode: Set the different flashing frequencies.
- Page 13 Volume and Tone Configuration Volume and Tone Configuration Volume and tone configuration include various volume controls. Moreover, you can upload tones to enrich the user experience. Volumes Volumes To set up volumes, go to the web Device > Audio Device > Audio interface. Tamper Alarm Volume Tamper Alarm Volume : Set the volume when the tamper alarm is triggered.
- Page 14 Open Door Failed Tone Enabled Open Door Failed Tone Enabled : The tone sounds when opening the door fails. Upload Tone Files Upload Tone Files You can customize ringback, door-opening, and emergency alarm tones. Upload files on the Device > Audio > Tone Upload Device >...
- Page 15 Network Setting Network Setting Network Status Network Status Check the network status on the web Status > Network Information Status > Network Information interface. Device Network Configuration Device Network Configuration To ensure normal functioning, make sure that the device has its IP address set correctly or obtained automatically from the DHCP server.
- Page 16 Device Deployment in Network Device Deployment in Network To facilitate device control and management, configure Akuvox intercom devices with details such as location, operation mode, address, and extension numbers. To set it up, navigate to the web Network > Advanced > Connect Setting Network >...
- Page 17 Device Address Device Address : Specify the device address by entering device location information from the left to the right: Community, Unit, Stair, Floor, and Room in sequence. Device Extension Device Extension: The device extension number. Device Location Device Location: The location in which the device is installed and used. NAT Setting NAT Setting Network Address Translation(NAT...
- Page 18 Device W eb HTTP Setting Device W eb HTTP Setting This function manages device website access. The door phone supports two remote access methods: HTTP and HTTPS (encryption). Set it up on the Network > Advanced > Web Server Network > Advanced > Web Server interface. HTTP/HTTPS Enabled HTTP/HTTPS Enabled : HTTP and HTTPS are enabled by default.
- Page 19 SIP address for each device, and configuring SIP settings on the devices. SIP Account Registration SIP Account Registration Each device needs a SIP account to make and receive SIP calls. Akuvox intercom devices support the configuration of two SIP accounts, which can be registered under two independent servers.
- Page 20 Account 1/Account 2: The door phone supports 2 SIP accounts. - Account 1 is the default account for call processing. Also, it will be utilized when the Akuvox SmartPlus cloud service is activated. - The system switches to Account 2 if Account 1 is not registered.
- Page 21 SIP servers enable devices to establish and manage call sessions with other intercom devices using the SIP protocol. They can be third-party servers or built-in PBX in Akuvox indoor monitor. To set it up, go to the web Account > Basic Account >...
- Page 22 Port: Set the proxy port for establishing a call session via the backup outbound proxy server. Data Transmission Type Data Transmission Type Akuvox intercom devices support four data transmission protocols: User Datagram User Datagram Protocol(UDP), Transmission Control Protocol(TCP Protocol(UDP) Transmission Control Protocol(TCP ), Transport Layer Security...
- Page 23 Internet phone eavesdropping is a network attack that allows unauthorized parties to intercept and access the content of the communication sessions between intercom users. This can expose sensitive and confidential information to the attackers. SIP hacking protection is a technique that secures SIP calls from being compromised on the Internet.
- Page 24 Audio & Video Codec Configuration Audio & Video Codec Configuration Audio Codec Audio Codec The door phone supports three types of codec(PCMU, PCMA, and G722) for encoding and decoding the audio data during the call session. Each codec varies in terms of sound quality. You can select the specific codec with different bandwidths and sample rates flexibly according to the actual network environment.
- Page 25 The door phone supports the H264 codec that provides better video quality at a much lower bit rate with different video quality and payload. To set it up, go to the web Account > Advanced > Account > Advanced > interface.
- Page 26 Video Bitrate Video Bitrate : The video stream bitrate ranges from 128 to 2048 kbps. The default bitrate is 2048. Video Payload Video Payload : The payload ranges from 90 to 119 for configuring audio/video configuration files. The default is 104. Configure DTMF Data Transmission Configure DTMF Data Transmission In order to achieve door access via DTMF code or some other applications, you are required to...
- Page 27 Access Allowlist Configuration Access Allowlist Configuration The door phone can store up to 500 contacts, giving access permission to indoor monitors or other devices. You can search, create, edit, and delete the contacts in the allowlist. Set it up on the Access Control > Access Allowlist Access Control >...
- Page 28 Account: Account: Select the account to make the call. Floor: Floor: Specify the accessible floor(s) to the contact via elevator.
- Page 29 Relay Setting Relay Setting Relay Switch Setting Relay Switch Setting You can configure the relay switch(es) and DTMF for the door access on the web Access Control Access Control > Relay interface. > Relay Type Type : Determine the interpretation of the Relay Status regarding the state of the door: Default Status: A “Low”...
- Page 30 Security Relay Setting Security Relay Setting The Security Relay, known as Akuvox SR01, is a product designed to bolster access security by preventing unauthorized forced entry attempts. Installed inside the door, it directly governs the door opening mechanism, ensuring that the door remains secure even in the event of damage to the device.
- Page 31 Connect Type Connect Type : Indicate the connection type between the security relay and the door phone. Trigger Delay(Sec) Trigger Delay(Sec): Set the delay time before the relay triggers. For example, if set to 5 seconds, the relay activates 5 seconds after pressing the Unlock button. Hold Delay(Sec) Hold Delay(Sec): Determine how long the relay stays activated.
- Page 32 To set it up, navigate to Access Control > Web Relay Access Control > Web Relay interface. Type Type : Determine the type of relay activated when employing door access methods for entry. Disabled : Only activate the local relay. Disabled WebRelay: Only activate the web relay.
- Page 33 Both: Activate both the local relay and web relay. Typically, the local relay is Both triggered first, followed by the web relay to execute their pre-configured actions. IP Address IP Address : The web relay IP address provided by the web relay manufacturer. User Name User Name : The user name provided by the web relay manufacturer.
- Page 34 Door Access Schedule Management Door Access Schedule Management Configure Door Access Schedule Configure Door Access Schedule A door access schedule lets you decide who can open the door and when. It applies to both individuals and groups, ensuring that users within the schedule can only open the door using the authorized method during designated time periods.
- Page 35 Name Name : Name the schedule. Import and Export Door Access Schedule Import and Export Door Access Schedule You can create door access schedules one by one or in bulk. You can export the current schedule file, edit it or add more schedules following the format, and import the new file to the desired devices.
- Page 37 Door Unlock Configuration Door Unlock Configuration Unlock by RF Cards Unlock by RF Cards The RF card should be assigned to a particular user for door opening. When adding a user, you can also customize settings such as defining the door access schedule to determine when the code is valid and specifying which relay to open.
- Page 38 Note: Note: Each user can have a maximum of 5 cards added. The device allows to add 5,000 users. RF cards operating at 125 KHz frequencies are compatible with the door phone for access. To enable the IC card function, navigate to the Access Control > Card Setting > Card Type Access Control >...
- Page 39 Relay Relay: The relay to be unlocked using the door-opening methods should be assigned to the user. Web Relay Web Relay: Specify the ID of web relay action commands that you’ve configured on the Web Relay interface. A default value of 0 indicates that the web relay will not be triggered. Floor No.
- Page 40 RF Card Code Format RF Card Code Format To integrate the RF card door access with the third-party intercom system, you need to match the RF card code format with the one used by the third-party system. To set it up, go to Access Control > Card Setting > RFID Access Control >...
- Page 41 Sector/Block Sector/Block: Specify the location where encrypted card data is stored. A Mifare card has 16 sectors (numbered 0 to 15), and each sector has 4 blocks (numbered 0 to 3). Block Key Block Key: Set a password to access the data stored in the predefined sector/block. NFC Card NFC Card NFC (Near Field Communication) is a popular way for door access.
- Page 42 DTMF Mode DTMF Mode : Set the number of digits for the DTMF code. 1 Digit DTMF 1 Digit DTMF : Define the 1-digit DTMF code within the range(0-9 and *,#) when the DTMF Mode is set to 1-digit. 2-4 Digit DTMF 2-4 Digit DTMF : Set the DTMF code based on the number of digits selected in the DTMF Mode.
- Page 43 Assigned The Authority For Assigned The Authority For: Specify the contacts authorized to open doors via DTMF: Disabled: No numbers can unlock doors using DTMF. Allowlist And Push Button: Doors can be opened by numbers added to the door phone's contact list and pressing the push button.
- Page 44 Tip: Tip: Here is an HTTP command URL example for relay triggering. Note Note The HTTP format for relay triggering varies depending on whether the door phone's high secure mode is enabled. Please refer to this how-to guide Opening the Door via HTTP Opening the Door via HTTP Command Command...
- Page 45 Action To Execute Action To Execute : Set the desired actions that occur when the specific Input interface is triggered. FTP: Send a screenshot to the preconfigured server. Email: Send a screenshot to the preconfigured Email address. SIP Call: Call the preset number upon the trigger.
- Page 46 RSSI Threshold RSSI Threshold : Set the received signal strength. Higher values indicate stronger signal strength, making it easier to receive the Bluetooth signal. Open Door Interval Open Door Interval: Set the interval(sec) between consecutive Bluetooth door access attempts.
- Page 47 MJPEG, or Motion JPEG, is a video compression format that uses JPEG images for each video frame. Akuvox devices display live streams on the web interface and capture monitoring screenshots in MJPEG format. Settings related to MJPEG determine video quality and the on/off status of the live stream function.
- Page 48 To view a dynamic stream, use the URL http://device_IP:8080/video.cgi. For capturing a screenshot, use the following URLs, with the image formats varying accordingly: http://device_IP:8080/picture.cgi http://device_IP:8080/picture.jpg http://device_IP:8080/jpeg.cgi For example, if you want to capture the jpg format image of the door phone with the IP address 192.168.1.104, you can enter http://192.168.1.104:8080/picture.jpg on the web browser.
- Page 49 RTSP Authorization Enabled RTSP Authorization Enabled : Once enabled, configure RTSP Authentication Mode, RTSP Username, and RTSP Password. These credentials are required for accessing the door phone's RTSP stream from other intercom devices like indoor monitors. Authentication Mode Authentication Mode : Select between Basic and Digest. Basic is the default authentication type.
- Page 50 Audio Enabled: Audio Enabled: Decide whether the RTSP stream has sound. Video Enabled: Video Enabled: Decide whether the RTSP stream has video. After enabling the RTSP feature, the video RTSP is enabled by default and cannot be modified. 2nd Video Enabled: 2nd Video Enabled: E12 supports two RTSP streams.
- Page 51 Video Resolution Video Resolution: Specify the image resolution, varying from the lowest CIF(352×288 pixels) to the highest 1080P(1920x1080 pixels). Video Frame rate(fps) Video Frame rate(fps): Frames per second, refers to how many frames are displayed in one second of video. The default frame rate is 30fps. Video Bitrate(Kb/Sec) Video Bitrate(Kb/Sec): The amount of video data transferred in a specific duration of time.
- Page 52 ONVIF ONVIF You can access the real-time video from the device's camera using the Akuvox indoor monitor or other third-party devices like Network Video Recorder(NVR NVR). Enabling and setting up the ONVIF function on the device will allow its video to be visible on other devices.
- Page 53 Discoverable Discoverable : When enabled, the video from the door phone camera can be searched by other devices. User Name User Name : Set the username required for accessing the door phone's video stream on other devices. It is admin by default. Password Password : Set the password required for accessing the door phone's video stream on other devices.
- Page 54 SD Card for Storing Videos SD Card for Storing Videos The device can be inserted into an SD card for storing motion and call videos. To check the videos, go to Device > SD Card Device > SD Card interface. When there is not enough space in the SD card to record the next video, the system automatically deletes the oldest video.
- Page 55 It is a certificate sent to the client for authentication when the client requests an SSL connection with the Akuvox door phone. Please upload the certificates in accepted formats. Upload Web Server Certificate on the web Security > Advanced > Web Server Certificate Security >...
- Page 56 Client Certificate Client Certificate This certificate verifies the server to the Akuvox door phone when they want to connect using SSL. The door phone verifies the server's certificate against its client certificate list. Upload and configure the Client Certificate on the Security > Advanced > Web Server Security >...
- Page 57 Index: Index: Auto: The uploaded certificate will be displayed in numeric order. 1 to 10: the uploaded certificate will be displayed according to the value selected. Choose File: Choose File: Click Choose File to upload the certificate. Only Accept Trusted Certificates: Only Accept Trusted Certificates: When enabled, as long as the authentication succeeds, the doorphone will verify the server certificate based on the client certificate list.
- Page 58 Before applying for a SIP account from a SIP or a DNS server using the TLS protocol, you'll need to upload a TLS certificate. This certificate is essential for server authentication. To set it up, go to Security > Advanced Security >...
- Page 59 Time Interval: Time Interval: If you set the default time interval as 10 sec, the motion detection period will be 10 seconds. Assuming that we set the time interval as 10, and the first movement captured can be seen as the start point of the motion detection, and if the movement continues through 7 seconds of the 10 seconds interval, the alarm will be triggered at 7 seconds (the first trigger point) and motion detection action can be triggered (sending out notification) anywhere between 7-10 seconds once the movement is detected.
- Page 60 SMTP Server Address SMTP Server Address : The SMTP server address of the sender. SMTP User Name SMTP User Name : The SMTP username is usually the same as the sender's email address. SMTP Password SMTP Password : The password of the SMTP service is the same as the sender's email address.
- Page 61 You can use the device to send specific HTTP URL commands to the HTTP server for certain actions. These actions will be triggered when the relay status, input status, or RF card access changes. Akuvox Action URL: Akuvox Action URL:...
- Page 62 Parameter Event Example format Http://server Make Call $remote ip/Callnumber=$remote Http://server Hang Up $remote ip/Callnumber=$remote Http://server Relay Triggered $relay1status ip/relaytrigger=$relay1status Http://server Relay Closed $relay1status ip/relayclose=$relay1status Http://server Input Triggered $input1status ip/inputtrigger=$input1status Http://server Input Closed $input1status ip/inputclose=$input1status Suspicious Object Movement Http://server $active_user Detection ip/active_user=$active_user Valid Card Entered $card_sn...
- Page 63 Voice Encryption Voice Encryption Secure Real-time Transport Protocol (SRTP) is a protocol derived from the Real-time Transport Protocol (RTP). It enhances the security of data transmission by providing encryption, message authentication, integrity assurance, and replay protection. Set it up on the web Account > Advanced > Encryption Account >...
- Page 64 User Agent: Akuvox is by default. Emergency Action Emergency Action This feature works with Akuvox SmartPlus Cloud. It keeps the door open when an emergency happens. To set it up, go to Security > Basic > Emergency Action Security > Basic > Emergency Action interface. Select the Input(s) to be triggered.
- Page 65 If the mode is off, the device can use both the new formats above and the old format below: l http://deviceIP/fcgi/do? action=OpenDoor&UserName=username&Password=password&DoorNum=1 4. It is not allowed to import/export configuration files in tgz. format between a device with the high security mode and another one without it. For assistance with file transfer, please contact Akuvox technical support.
- Page 66 Logs Logs Call Logs Call Logs If you want to check on the calls inclusive of the dial-out calls, received calls, and missed calls in a certain period of time, you can check and search the call log on the device web interface and export the call log from the device if needed.
- Page 67 Door Logs Door Logs If you want to search and check on the various types of door access history, you can search and check the door logs on the device's web. Go to the Access Control > Door Log Access Control > Door Log interface. Status: Status: Display All, Successful, and Failed door-opening records.
- Page 68 Upgrade > Diagnose > System Log interface. Log Level: Log Level: Select log levels from 1 to 7 levels. You will be instructed by Akuvox technical staff about the specific log level to be entered for debugging purposes. The default log level is 3.
- Page 69 Connect Status Connect Status: Display the connection status between the device and the server. IP IP : Enter the IP address of the server. Port Port: Enter the port of the server. PCAP PCAP PCAP is used to capture the data package going in and out of the devices for debugging and troubleshooting purposes.
- Page 70 Backup Backup You can import or export encrypted configuration files to your Local PC. Export the file on the Upgrade > Diagnose > Others Upgrade > Diagnose > Others interface...
- Page 71 Firmware Upgrade Firmware Upgrade Akuvox devices can be upgraded on the device web interface. Upgrade the device on the Upgrade > Basic Upgrade > Basic interface. Note Note The upgrade files should be in .rom format.
- Page 72 Provisioning Principle Auto-provisioning is a feature used to configure or upgrade devices in batch via third-party servers. DHCP, PNP, TFTP, FTP, and HTTPS are the protocols used by the Akuvox devices to access DHCP, PNP, TFTP, FTP, and HTTPS the URL of the address of the third-party server which stores configuration files and firmware, which will then be used to update the firmware and the corresponding parameters on the device.
- Page 73 AutoP Schedule AutoP Schedule Akuvox provides you with different Autop methods that enable the device to perform provisioning for itself according to the schedule. To set it up, go to Upgrade > Advanced > Automatic Autop...
- Page 74 Mode Mode : Power On: The device will perform Autop every time it boots up. Power On Repeatedly: The device will perform Autop according to the schedule you set up. Repeatedly Power On + Repeatedly: Combine Power On Power On + Repeatedly Power On mode and Repeatedly Repeatedly mode that will enable the device to perform Autop every time it boots up or according to...
- Page 75 FTP: ftp://192.168.0.19/(allows anonymous login) ftp://username:password@192.168.0.19/(requires a user name and password) HTTP: http://192.168.0.19/(use the default port 80) http://192.168.0.19:8080/(use other ports, such as 8080) HTTPS: https://192.168.0.19/(use the default port 443) Akuvox does not provide user specified server. Please prepare TFTP/FTP/HTTP/HTTPS server by yourself.
- Page 76 DHCP Provisioning Configuration DHCP Provisioning Configuration Auto-provisioning URL can also be obtained using the DHCP option which allows the device to send a request to a DHCP server for a specific DHCP option code. If you want to use Custom Option Custom Option as defined by users with option codes ranging from 128-255), you are required to configure DHCP Custom Option on the web interface.
- Page 77 To set up the DHCP Option, scroll to the DHCP Option DHCP Option section. Custom Option Custom Option: Enter the DHCP code that matches the corresponding URL so that the device will find the configuration file server for the configuration or upgrading. DHCP Option 43 DHCP Option 43 : If the device does not get a URL from DHCP Option 66, it will automatically use DHCP Option 43.
- Page 79 Integration with Third Party Device Integration with Third Party Device Integration via W iegand Integration via W iegand The device can be integrated with third-party devices via Wiegand. Set it up on the Access Control > Card Setting > Wiegand Access Control >...
- Page 80 Integration via HTTP API Integration via HTTP API HTTP API is designed to achieve a network-based integration between the third-party device and the Akuvox device. Set it up on the web Security > HTTP API Security > HTTP API interface.
- Page 81 Lift Control Lift Control The door phones can be connected to the Akuvox lift controller for the lift control. Users can summon the lift to go down to the ground floor when they are granted access through various types of access methods on the door phone.
- Page 82 Lift Control configuration example. Akuvox Lift Controller Akuvox Lift Controller After selecting Akuvox EC32 in the Lift Control List, you need to set up relevant parameters. Server IP: Server IP: Enter the IP address of the Akuvox lift controller.
- Page 83 $floor. You can define your parameter string. URL To Trigger Specific Floor: URL To Trigger Specific Floor: The Akuvox lift control URL for triggering a specific floor. The URL is /cdor.cgi?open=0&door=$ floor, but the string $floor at the end must be identical to the parameter string you defined.
- Page 84 Password Modification Password Modification You can modify the device web password for both the administrator account and the user account. To set it up, go to Security > Basic > Web Password Modify Security > Basic > Web Password Modify interface. Click Change Password Change Password to modify the password.
- Page 85 System Reboot&Reset System Reboot&Reset Reboot Reboot If you want to restart the device system, you can operate it on the device web. Moreover, you can set up a schedule for the device to be restarted. Navigate to the Upgrade > Basic Upgrade >...
- Page 86 Powered by Document360...
Need help?
Do you have a question about the E12 Series and is the answer not in the manual?
Questions and answers