Table of Contents
Advertisement
Advertisement
Table of Contents

Related Manuals for Akuvox E18C


Summary of Contents for Akuvox E18C
- Page 1 Version: 1.0 | Date: Oct.2021...
- Page 2 About This Manual Thank you for choosing Akuvox E18C door phone. This manual is intended for the administrators who need to properly configure the door phone. This manual applies to 18.30.0.54 version, and it provides all the configurations for the functions and features of E18C door phones. Please visit Akuvox forum or consult technical support for any new information or the latest firmwares.
- Page 3 Introduction of Icons and Symbols Warning: Always abide by this information in order to prevent the persons from injury. Caution: Always abide by this information in order to prevent the damages to the device. Note: Informative information and advice from the efficient use of the device.
- Page 4 Related Documentation You are advised to refer to the related documents for more technical information via the link below: https://knowledge.akuvox.com...
-
Page 5: Table Of Contents
Table of Contents 1. Product Overview....................1 2. Change Log......................2 3. Model Specification....................3 4. Introduction to Configuration Menu..............5 5. Access the Device....................7 5.1. Access the Device Setting on the device..........7 5.2. Access the Device Setting on the Web Interface........8 6. Time and Language Setting................10 6.1. - Page 6 8. Intercom Call Configuration................31 8.1. IP call & IP Call Configuration..............31 8.1.1. Make IP/SIP calls................31 8.1.2. IP Call Configuration..............32 8.2. SIP Call &SIP Call Configuration............. 32 8.2.1. SIP Account Registration..............33 8.2.1.1. Configure SIP Account on the Device......33 8.2.1.2. Configure SIP Account on the Web Interface....34 8.2.2.
- Page 7 11.1.4.2. Edit the Door Access Schedule on the Device..... 60 12. Door Unlock Configuration................62 12.1. Configure PIN Code for Door Unlock........... 62 12.1.1. Configure Public PIN code............62 12.1.2. Configure Private PIN Code on the Device......63 12.1.3. Configure Private PIN Code on the Web Interface....64 12.1.4.
- Page 8 15.2. Door Logs....................94 15.3. Temperature Log..................96 15.4. Export Logs....................96 16. Debug........................98 16.1. System Log for Debugging..............98 16.2. PCAP for Debugging................99 16.3. User Agent....................99 17. Firmware Upgrade................... 101 18. Backup.......................103 19. Auto-provisioning.................... 105 19.1. Configuration Files for Auto-provisioning........105 19.2.
-
Page 9: Product Overview
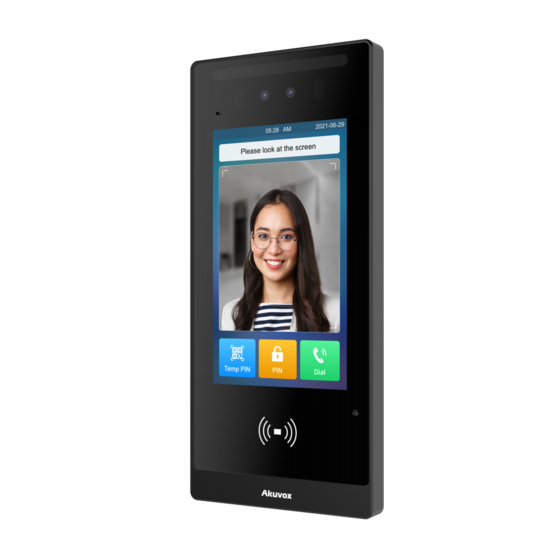
E18C Door Phone Administrator Guide 1.Product Overview Akuvox E18C is an Liunx-based with a touch screen. It incorporates audio and video communications, access control, and video surveillance. Its finely-tuned SmartPlus and AI-based communication technology allow featured customization to better suit your operation habit. E18C multiple... -
Page 10: Change Log
E18C Door Phone Administrator Guide 2.Change Log The change log will be updated here along with the changes in new software version. AKUVOX SMART INTERCOM www.akuvox.com... -
Page 11: Model Specification
E18C Door Phone Administrator Guide 3.Model Specification E18C Model & Feature Display 7” IPS Touch Screen √ Button Housing Material Plastic Relay Out Relay In RS485 √ √ Resolution 1024x600 Brightness 500cd/m Card Reader 13.56MHz Wi-Fi Bluetooth √ IP Rating... - Page 12 E18C Door Phone Administrator Guide Wall √ Mounting Flush √ Mounting Desk Mounting POE Stand by 6.0W Power POE Full Load Consumption Power Adapter 5.8W Standby Power Power Adapter Full 10.35W Load Consumption Color Option Black AKUVOX SMART INTERCOM www.akuvox.com...
-
Page 13: Introduction To Configuration Menu
E18C Door Phone Administrator Guide 4.Introduction to Configuration Menu Status: this sections gives you basic information such as product information, Network Information, and account information etc. Account: this section concerns SIP account, SIP server, proxy server, transport protocol type, outbound proximity server. - Page 14 3. Akuvox PC Manager: Distribute all configuration items in batch on a LAN. 4. IP scanner: it is used to search Akuvox device IP addresses on a LAN. 5. FacePro: Manage face data in batch for the door phone on a LAN.
-
Page 15: Access The Device
E18C Door Phone Administrator Guide 5.Access the Device E18 series door phoneinal system setting can be either accessed on the device directly or on the device web interface. 5.1. Access the Device Setting on the device If you want to access the device setting to configure and adjust the parameters, you can do it directly on the device. -
Page 16: Access The Device Setting On The Web Interface
You can also obtain the device IP address using the Akuvox IP scanner to log in the device web interface. Please refer to the URL below for the IP scanner application: https://knowledge.akuvox.com/docs/how-to-obtain-ip-address-via... - Page 17 E18C Door Phone Administrator Guide Note Google Chrome browser is strongly recommended. The Initial user name and password are “admin” and please be case-sensitive to the user names and passwords entered. AKUVOX SMART INTERCOM www.akuvox.com...
-
Page 18: Time And Language Setting
E18C Door Phone Administrator Guide 6.Time and Language Setting 6.1. Language Setting When you first set up the device, you might need to set the language to your needs, or you can do it later if needed. And the language can either be set up directly on the device or on the device web interface according to your preference. -
Page 19: Language Setting On The Device Web Interface
E18C Door Phone Administrator Guide 6.1.2. Language Setting on the Device Web Interface. To configure the language on the web interface. Path:Setting >Time/Lang > LCD Language. Parameter Set-up: Type: choose a suitable web language. Normally, English is the default web and LCD language. - Page 20 E18C Door Phone Administrator Guide Parameter Set-up: Automatic Date&Time: Automatic Date&Time is toggled on by default, which allows the date& time to be automatically set up and synchronized with the default time zone and the NTP server (Network Time Protocol).
-
Page 21: Time Setting On The Device Web Interface
E18C Door Phone Administrator Guide Note: When the Automatic Date&Time toggle switch is toggled off then parameters related to NTP server will become not editable. And when the switch is toggled on, then time and date will be denied editing. -
Page 22: Led Setting
E18C Door Phone Administrator Guide Note: When the check box is unticked , the parameters related to NTP server will become uneditable. 6.3. LED Setting 6.3.1. Configure Card Reader LED Setting You can enable or disable the LED lighting on the card reader area as needed on the web interface. -
Page 23: Configure Led White Light Setting
E18C Door Phone Administrator Guide 6.3.2. Configure LED White Light Setting LED White light is used to reinforce the lighting for facial recognition as well as for the QR code access as needed in the dark environment. You can set the white light function properly on the device web interface. -
Page 24: Lcd Screen Brightness Setting
E18C Door Phone Administrator Guide 6.4. LCD Screen Brightness Setting If you want adjust the screen brightness in order to see the screen at greater ease in an environment with higher light intensity, you need to set up the related parameters. . -
Page 25: Screen Display Configuration
E18C Door Phone Administrator Guide 6.5. Screen Display configuration E18C door phones allow you to enjoy a variety of screen displays to enrich your visual and operational experience through the customized setting to your preference. 6.5.1.Configure Screensaver Screensaver configuration is for the screen protection when the device goes into idle status. -
Page 26: Configure Screensaver On The Web Interface
E18C Door Phone Administrator Guide Parameter Set-up: Screensaver Mode: move the toggle switch to the right to enable the screen saver function. Screensaver Time:set the screensaver duration after the device goes in to sleep mode. The default setting is 30 min. -
Page 27: Customize Screensaver On The Web Interface
E18C Door Phone Administrator Guide 6.5.4.Customize Screensaver on the Web Interface You can upload and customize screensaver pictures separately or in batch to the device and to the device web interface for publicity purpose or for a greater visual experience.You are allowed to upload a maximum of 5 pictures, and each picture will be displayed in rotation according to the ID order with specific time duration (Time Interval ) you set. -
Page 28: Home Screen Configuration
E18 Door Phone Administrator Guide 6.5.5.Home Screen Configuration You can change the home screen display through the configuration of tab name and tab arrangement on the device web interface if needed. Path: Device > LCD > Key In Homepage Of The Building Theme. Parameter Set-up: ... -
Page 29: Volume & Tone Configuration
E18 Door Phone Administrator Guide 6.6. Volume & Tone Configuration Volume and tone configuration in E18 door phone refers to the Call volume(speaker), Mic volume, prompt volume (eg. open door tone) Moreover, you can upload the tone you like to enrich your personalized user experience. 6.6.1.Volume Configuration You can configure the Mic volume, speaker volume and temper alarm volume according to your need for the intercom-based audio&video communication. -
Page 30: Configure Volume On The Web Interface
E18 Door Phone Administrator Guide Mic Volume: adjust the microphone volume according to your need. Speaker volume: adjust the loudspeaker volume according to your need. Prompt Volume: adjust the prompt volume, which includes various types of prompt sound for door open success and failure, ringback, and temperature measurement sound etc. -
Page 31: Upload Open Door Tone
E18 Door Phone Administrator Guide to your need. The default volume is “8”. 6.6.2.Upload Open Door Tone You can upload the Open Door Tone on the device web interface. Path: Device >Audio > Open Door Tone Setting. 6.6.3. Configure Door Open Prompt Text You can enable or disable the door open prompt to be shown on the device’s screen for door open failure and success. -
Page 32: Configure Hang-Up Tone
E18 Door Phone Administrator Guide Open Door Failed Text Prompt : Tick the check box if you want to see the prompt words after the door open failure and vice versa. 6.6.4.Configure Hang-up Tone You can customize your call hang-up tone if needed. Path: Device > Audio > Hang Up Tone Setting. -
Page 33: Network Setting
E18 Door Phone Administrator Guide 7. Network Setting 7.1. Device Network Connection Setting You can configure the default DHCP mode (Dynamic Host Configuration Protocol) and static IP connection. More over, you can set up IP address, Subnet Mask, Default Gateway, and DNS servers. Parameter Set-up: ... -
Page 34: Lte Wireless Connection Setting
E18 Door Phone Administrator Guide environment. Default Gateway: set up the correct gateway default gateway according to the IP address of the default gateway. Preferred&Alternate DNS Server: set up preferred or alternate DNS Server (Domain Name Server) according to your actual network environment. Preferred DNS server is the primary DNS server address while the alternate DNS server is the secondary server address, and the door phone will connect to the alternate server when the primary DNS server is... -
Page 35: Device Local Rtp Configuration
E18 Door Phone Administrator Guide Cellular Network: Move the toggle switch on and off to enable or disable the LTE function. The signal strength has four levels: Weak, Fair, Good, and Excellent. Access Point Name (APNs): Check the Cellular Network provider for the Access Point. -
Page 36: Device Deployment In Network
E18 Door Phone Administrator Guide exclusive range of data transmission in the network. Path:Network > Advanced > Local RTP interface. Parameter set-up: Starting RTP Port: enter the Port value in order to establish the start point for the exclusive data transmission range. ... -
Page 37: Nat Setting
E18 Door Phone Administrator Guide Server Mode: it is automatically set up according to the actual device connection with a specific server in the network such as SDMC or Cloud and None. None is the default factory setting indicating the device is not in any server type, therefore you are allowed to choose Cloud, SMDC in discovery mode. - Page 38 E18 Door Phone Administrator Guide Parameter Set-up: UDP Keep Alive Messages: If enabled, the device will send out the massage to the SIP sever so that SIP sever will recognize that the device is in on-line status. UDP Alive Msg Interval: set the message sending time interval from 5-60 seconds, the default is 30 seconds.
-
Page 39: Intercom Call Configuration
E18 Door Phone Administrator Guide 8.Intercom Call Configuration Intercom call in the device can be configured to allow you to perform a variety of customized intercom calls such as IP call and SIP call for different application scenarios. 8.1. IP call & IP Call Configuration IP call can be made directly on the intercom device by entering the IP number on the device. -
Page 40: Ip Call Configuration
E18 Door Phone Administrator Guide 8.1.2.IP Call Configuration You are required to set up a specific port the for the data transmission for the IP calls. Path: Intercom > Basic > Direct IP. Parameter set-up: Enabled : tick the checkbox to enable or disable the direct IP call . For example if you do not allow direct IP call to be made on the device, you can disable the function. -
Page 41: Sip Account Registration
E18 Door Phone Administrator Guide Note: Akuvox currently has its own PBX called My PBX server, and it has also achieved compatibility with third-party PBX, you can refer to the below: https://www.akuvox.com/PartnersTechnology.aspx?ptype=16 8.2.1.SIP Account Registration E18 supports two SIP accounts that can all be registered according to your applications. -
Page 42: Configure Sip Account On The Web Interface
E18 Door Phone Administrator Guide User Name: enter the user name obtained from SIP account administrator. Password: enter the password obtained from the SIP account administrator. Server IP: enter the SIP server address for the SIP account selected. ... -
Page 43: Sip Server Configuration
E18 Door Phone Administrator Guide Account Enabled: tick the checkbox to enable or disable registered SIP account. Display Name: configure the name, for example the device’s name to be be shown on the device being called to. You can fill in 63 bytes of characters in length maximum ... -
Page 44: Configure Sip Ports For Sip Calls
E18 Door Phone Administrator Guide Parameter Set-up: Server Address ( preferred SIP server) : enter the primary server IP address number or its URL. Server Address ( alternate SIP server): enter the backup SIP server IP address or its URL. ... -
Page 45: Configure Data Transmission Type
E18 Door Phone Administrator Guide via port-based data transmission. Path: Account > Basic > Outbound Proxy Server. Parameter Set-up: Outbound Enabled : tick the checkbox to enable or disablethe outbound proxy server. Preferred Server IP: enter the SIP address of the outbound proxy server. ... -
Page 46: Dial Options Configuration
E18 Door Phone Administrator Guide Parameter Set-up: UDP: select “UDP” for unreliable but very efficient transport layer protocol. UDP is the default transport protocol. TCP: select “TCP” for Reliable but less-efficient transport layer protocol. TLS: select “TLS” for Secured and Reliable transport layer protocol. ... -
Page 47: Quick Dial By Number Replacement On The Device
E18 Door Phone Administrator Guide You can replace the long SIP/IP number with the short number on the device. Path: Replace Rule > Add Replace Rule. Parameter Set-up: Account: select the account to which you want to apply dial number replacement. -
Page 48: Call Auto-Answer Configuration
E18 Door Phone Administrator Guide 8.4. Call Auto-answer Configuration Auto-answer is a function that allows you to answer the incoming call without picking up the phone. When auto-answer is enabled, the incoming call will be answered automatically based on the answering timing you defined. -
Page 49: Call Settings
8.5. Call Settings 8.5.1.Maximum Call Duration Setting E18C door phone allows you to set up the call time duration in receiving the call from the calling device as the caller side might forget to hang up the phone. When the call time duration is reached, the door phone will terminate the call automatically. -
Page 50: Maximum Dial Duration Setting
E18 Door Phone Administrator Guide Note: Max call time of device is also related with max call time of SIP server. If using SIP account to make a call, please pay attention to the max call time of SIP server. If the max call time of SIP server is shorter than the max call time of device , the shorter one is available. -
Page 51: Audio& Video Codec Configuration For Sip Calls
8.5.3.Audio& Video Codec Configuration for SIP Calls 8.5.3.1. Configure Audio Codec E18C door phone support four types of Codec (PCMU, PCMA, G729, G722) for encoding and decoding the the audio data during the call session. Each type of Codec vary in terms of the sound quality. You can select the specific codec with different bandwidth and sample rate flexibly according to the actual network environment. -
Page 52: Configure Video Codec
E18 Door Phone Administrator Guide Please refers to the bandwidth consumption and sample rate for the four types of codecs below: Codec Type Bandwidth Sample Rate Consumption PCMA 64 kbit/s 8kHZ PCMU 64 kbit/s 8kHZ G729 8 kbit/s 8kHZ G722 64 kbit/s 16kHZ 8.5.3.2. -
Page 53: Configure Dtmf Data Transmission
E18 Door Phone Administrator Guide Name: Check to select the H264 video codec format for the door phone video stream. H264 is the video codec by default. Resolution: select the code resolution for the video quality among four options:”QCIF”, “CIF”, “VGA”, “4CIF”... - Page 54 E18 Door Phone Administrator Guide transmission type of the third party device to be matched with as the party for receiving signal data. How to Notify DTMF:select among four types: “Disable” “ DTMF” “DTMF-Relay” “Telephone-Event” according to the specific type adopted by the third party device.
-
Page 55: Phone Book Configuration
E18 Door Phone Administrator Guide 9.Phone Book Configuration 9.1. Phone Book Configuration on the Device You can configure the contacts list in terms of adding and modifying contact groups or contacts on the device directly. To configure the phone book on the device User >... -
Page 56: Phone Book Configuration On The Web Interface
E18 Door Phone Administrator Guide 9.2. Phone Book Configuration on the Web Interface 9.2.1.Manage Contact Groups on the Web Interface You can configure contact and contact groups by adding and editing them on the web interface Path: Access Control > User> Group . 9.2.2. - Page 57 E18 Door Phone Administrator Guide Tenants List > Tenants List Setting. Parameter Set-up: Show Tenants of Local Group Enabled: tick or untick the check box to control the display the of the group label. If you untick the check box, then only the group tab will be displayed while the contact tab will be concealed and vice versa.
-
Page 58: Relay Switch Setting
E18 Door Phone Administrator Guide 10. Relay Switch Setting 10.1.Relay Switch Setting You can unlock the door via DTMF code during the call. To do so, you are required to set up DTMF code along with relays. Path: Access Control > Relay >... -
Page 59: Dtmf Code Configuration
E18 Door Phone Administrator Guide DTMP Mode is set as 3-digits. Relay Status: relay status is low by default which means normally closed(NC) If the relay status is high, then it is in Normally Open status(NO). Relay Name: name the relay switch according to your need. For example you can name the relay switch according to where the relay switch is located for the convenience. -
Page 60: Web Relay Setting
E18 Door Phone Administrator Guide Mode: select DTMF type among five options: “ Inband”, “ RFC2833”, “ Info+Inband” and “Info+RFC2833” according to you need. DTMF Code Transport format: select among four options: “Disable” “ DTMF” “DTMF-Relay” “Telephone-Event” according to your need. ... - Page 61 E18 Door Phone Administrator Guide the door access control. Path: Access Control > Web Relay Parameter Set-up: Type: select among three options “Disabled” “WebRelay” and “Both”. Select “WebRelay” to enable the web relay. Select “Disable” to disable the web relay. Select “Both” to enable both local relay and web relay. ...
-
Page 62: Configure Web Relay On The Device
E18 Door Phone Administrator Guide http://admin:admin@192.168.1.2/state.xml?relayState=2. 10.3.2. Configure Web Relay on the Device After the web relay actions is entered on the web interface, you can now select the specific number of the web relay actions to be carried for the specific resident you added for the door unlock. - Page 63 E18 Door Phone Administrator Guide After the relay schedule is created, you can select the relay schedule and select the specific relay to which you want to apply the schedule. Path:Access control > Relay > Relay Schedule. Note: You can refer to the chapter 11.1 Create Door Access Schedule for the relay schedule setting as the configuration of relay schedule is identical to the...
-
Page 64: Door Access Schedule Management
E18 Door Phone Administrator Guide Door Access Schedule Management You are required to configure and make schedule for the user-based door access via RF card, Private PIN and Facial recognition. 11.1. Configure Door Access Schedule You can create door access schedules so that they can be later conveniently applied to the door access control intended for individual user or a group of users created. - Page 65 E18 Door Phone Administrator Guide Name: enter the daily schedule name. Mode: select daily schedule. Date Time:Set up the time schedule for the validity of the door access during a day. To create a weekly schedule, you can do as follows: Parameter Setup: ...
-
Page 66: Create Door Access Schedule On The Device
E18 Door Phone Administrator Guide Parameter Setup: Name: enter the schedule name. Mode: select Normal schedule. Date Range: Set the data range of the validity of the door access. Day of Week: Select the day (s) on which door access can be valid on a weekly basis. -
Page 67: Import And Export Door Access Schedule
E18 Door Phone Administrator Guide 11.1.3. Import and Export Door Access Schedule In addition to creating door access schedule separately, you can also conveniently import or export the schedules in order to maximize your door access schedule management efficiency. Path: Access Control > Schedule. Note: ... -
Page 68: Edit The Door Access Schedule
E18 Door Phone Administrator Guide 11.1.4. Edit the Door Access Schedule 11.1.4.1. Edit the Door Access Schedule on the Web Interface If you want to edit or delete your door access schedule you created, you can edit or delete the configured schedule separately or in batch on the web interface. - Page 69 E18 Door Phone Administrator Guide...
-
Page 70: Door Unlock Configuration
E18 Door Phone Administrator Guide 12. Door Unlock Configuration E18 offers you three types of door access via PIN code, NFC, RF card and Facial recognition. You can configure them on the device and web interface. More over, you can import or exporting the configured files to maximize your RF card configuration efficiency. -
Page 71: Configure Private Pin Code On The Device
Public PIN code will not valid until the function is turned on. Note: APT+PIN can only be applicable when the device is added to the Akuvox SmartPlus. 12.1.2. Configure Private PIN Code on the Device You can configure door access by Private PIN code for the resident on the device by entering the user’s name and the PIN code for the door access. -
Page 72: Configure Private Pin Code On The Web Interface
E18 Door Phone Administrator Guide 12.1.3. Configure Private PIN Code on the Web Interface On the web interface, you can not only set up PIN code, but also set and select the door access schedule that you created for the validity of the PIN Code access during a certain time span you scheduled. - Page 73 E18 Door Phone Administrator Guide Parameter Set-up: User ID: enter user’s ID. Name:enter the user name ( resident’s name). Code: enter the user’s private PIN . After user information and PIN code is entered, you can start configuring the private PIN code for the door access.
-
Page 74: Configure Private Pin Access Mode
E18 Door Phone Administrator Guide Note: This step is applicable to door access by RF card and facial recognition credentials as they are identical in configuration. 12.1.4. Configure Private PIN Access Mode E18 offers you two types of access modes for private PIN code access, namely “... -
Page 75: Configure Rf Card Code Format
E18 Door Phone Administrator Guide You can tap the RF card on the reader and click obtain to add RF card for the user. Path: Access Control > User > RF Card Note: Please refer to PIN code access schedule selection for the RF card user(s)-specific door access. -
Page 76: Configure Facial Recognition For Door Unlock
E18 Door Phone Administrator Guide Parameter Set-up: IC/ID Card Display Mode: select the card format for the ID Card for the door access among five format options: 8H10D; 6H3D5D(W26); 6H8D; 8HN; 8HR. The card code format is 8HN by default in the door phone. 12.2.2. -
Page 77: Configure Facial Recognition On Web Interface
E18 Door Phone Administrator Guide 12.2.2.2. Configure Facial Recognition on Web Interface You can import the face data to the device on the web interface. Path: Access Control > User > Face. Parameter Set-up: Status: It will show “Registered” when the picture uploaded conforms to the format and standard otherwise it would show “... -
Page 78: Edit The User(S)-Specific Door Access Data
E18 Door Phone Administrator Guide in number. Path: Access Control > User > User. Note: Configured file for facial recognition and the other types of configured door access file are separated with different file forms. 12.4.Edit the User(s)-specific door access data You can search user(s)-specific door access and edit the door access data on the web interface. -
Page 79: Unlock By Qr Code
QR code. Path:Access Control > Relay > Open Relay via QR Code. Note: The function should work with Akuvox cloud. For more information, please contact Akuvox technical team. 12.4.2. Unlock by Bluetooth You can also gain the door access by mobile phone with Bluetooth which is used together with Akuvox SmartPlus. -
Page 80: Unlock By Nfc
You can also gain the door access by mobile phone with NFC which is used together with Akuvox SmartPlus. You can keep the mobile phone closer to the door phone for the door access. Path: Access Control > Card Setting>... -
Page 81: Unlock By Exit Button By The Door
E18 Door Phone Administrator Guide Parameter Set-up: Enable: enable the HTTP command unlock function by clicking on Enable field. User Name: enter the user name of the device web interface, for example “Admin”. Password: enter the password for the HTTP command. For example : “12345”. -
Page 82: Unlock By Reception Tab
E18 Door Phone Administrator Guide Parameter Set-up: Trigger Electrical Level: select the trigger electrical level options between “High” and “Low” according to the actual operation on the exit button. Action to Execute: select the method to carry out the action among four options: FTP, Email, HTTP, TFTP. -
Page 83: Body Temperature Measurement For Door Access
E18 Door Phone Administrator Guide Parameter Set-up: Reception Enabled: Tick the check box to enable the function. Name: enter the name for the Reception icon on the home screen. Number: enter the SIP/IP number to be called to after pressing the Reception icon for the door access. - Page 84 E18 Door Phone Administrator Guide of the function etc. Path:Access Control > Body Temperature > Measuring Body Temperature. Parameter set-up: Mode: select either “Disabled” Mode “Wrist” or “Forehead” Mode for temperature measurement according to your need. The device can be installed with digital forehead and wrist temperature detector therefore you are required to set the mode properly according to your application.
- Page 85 E18 Door Phone Administrator Guide temperature, then any body temperature measured higher than 37.3 degree Celsius will be deemed as abnormal temperature, while the temperature lower than 34 degree Celsius will be deemed as low body temperature. Low Temperature: set the low temperature. ...
-
Page 86: Security
E18 Door Phone Administrator Guide 13. Security 13.1.Tamper Alarm Setting Tamper alarm function serves as a protection against any unauthorized removal of the devices by triggering off the temper alarm on the device. Path: Security > Basic > Temper Alarm. Parameter Set-up: ... -
Page 87: Voice Encryption
E18 Door Phone Administrator Guide 13.2.Voice Encryption SRTP(Secure Real-time Transport Protocol) is a protocol defined on the basis of Real-time Transport Protocol. The data of the transmission protocol provides encryption, message authentication, integrity assurance and replay protection. Path: Account > Advanced > Encryption interface Parameter Set-up: Voice Encryption(SRTP): choose Disabled, Optional or Compulsory for SRTP. - Page 88 E18 Door Phone Administrator Guide Parameter Set-up: Motion Detection Options: tick the check box to enable the motion detection function. Action to Execute: select the action to be executed ( FTP、 TFTP 、 Email 、 HTTP、SIP Call) after motion detection is triggered. ...
-
Page 89: Configure Motion Detection On The Device
E18 Door Phone Administrator Guide 13.3.2. Configure Motion Detection on the Device You can turn on the motion detection and set up the motion detection interval on the device. Path: Advanced > Surveillance >Motion. 13.4.Security Notification Setting Security notification can be initiated as an action when the motion detection is triggered. - Page 90 E18 Door Phone Administrator Guide Parameter set-up: Sender’s Email Name: enter the name of the email sender. Sender's email address: enter the sender’s email address from which the email notification will be sent out. Receiver's email address: enter the receiver’s email address. ...
-
Page 91: Ftp Notification Setting
E18 Door Phone Administrator Guide Email content: compile the emails contents according to your need. Email Test: click to test if the email can be sent and received. 13.4.2. FTP Notification setting If you want to receive the security notification via FTP, you can configure the FTP notification on the web interface properly. -
Page 92: Sip Call Notification
E18 Door Phone Administrator Guide If you want to receive the security notification via TFTP, you can configure the FTP notification on the web interface properly. Path:Setting > Action > TFTP Notification. Parameter set-up: TFTP Server: enter the address (URL) of the TFTP server for the TFTP notification 13.4.4. - Page 93 E18 Door Phone Administrator Guide To configure the web interface time-out, you can do as follows: Parameter Setup: Session Time Out Value: set the automatic web interface logout timing ranging from 60 seconds to 14400 seconds. The default value is 300.
-
Page 94: Monitor And Image
14. Monitor and Image 14.1.Mjpeg Image Capturing E18C allow you to capture the Mjpeg format monitoring image if needed. You can enable the Mjpeg function and set the image quality on the web interface. Path: Surveillance > MJPEG > Mjpeg Server Parameter Set-up: ... -
Page 95: Live Stream
E18 Door Phone Administrator Guide You can also enable the the MJPEG server on the device directly. Path: Advanced > Surveillance > MJPEG server. 14.2.Live Stream If you want to check the real-time video from the E18, you can go to the the device web interface to obtain the real-time video or you can also enter the correct URL on the we browser to obtain it directly. - Page 96 E18 Door Phone Administrator Guide Note: You can also enter the correct URL (http://IP_address:8080/video.cgi) on the web browser if you want to obtain the real-time video directly without going to the web interface.
-
Page 97: Rtsp Stream Monitoring
E18 Door Phone Administrator Guide 14.3.RTSP Stream Monitoring E18 supports RTSP stream that allows intercom devices such as indoor monitor or the monitoring unit from the third party to monitor or obtain the the real time audio/ video (RTSP stream) from the door phone using the correct URL. -
Page 98: Rtsp Stream Setting
E18 Door Phone Administrator Guide User Name: enter the name used for RTSP authorization. Password: enter the password for RTSP authorization. You can also enable the RTSP function on the device directly. Path: Advanced > Surveillance > RTSP Server. 14.3.2. - Page 99 E18 Door Phone Administrator Guide Parameter Set-up: Video Resolution: select video resolutions among seven options: “QCIF”, “QVGA”,”CIF”,”VGA”,”4CIF”,”720P,””1080P”. The default video resolution is “720P. and the video from the door phone might not be able to be shown in the indoor monitor if the resolution is set higher than “720P”. ...
-
Page 100: Onvif
14.4. ONVIF Real-time video from the E18 camera can be searched and obtained by the Akuvox indoor monitor or by the third party devices such as NVR (Network Video Recorder) you can configure the ONVIF function in the door phone so that other device will be able to see the video from the door phone. - Page 101 E18 Door Phone Administrator Guide Note: Fill in the specific IP address of the door phone in the URL.
-
Page 102: Logs
E18 Door Phone Administrator Guide 15. Logs 15.1. Call Logs If you want to check on the calls inclusive of the dial-out calls , received calls and missed calls in a certain period of time, you can check and search the call log on the device web interface and export the call log from the device if needed. - Page 103 E18 Door Phone Administrator Guide check the door logs on the device web interface. Path: Access Control > Door Log. Parameter Set-up: Save Door Log Enabled: Tick the check box to turn on or turn off the door log function. ...
-
Page 104: Temperature Log
E18 Door Phone Administrator Guide 15.3.Temperature Log If you want to search and check on temperature log, you can search and check the logs on the device web interface. Path: Access Control > Temperature Log Parameter Set-up: Save Door Log Enabled: Tick the check box to turn on or turn off the temperature Log ... - Page 105 E18 Door Phone Administrator Guide...
-
Page 106: Debug
PC. Remote System Log Enabled: tick the checkbox to enable the function. Remote System Server: enter the remote server address to receive the the device log. And the remote server address will be provide by Akuvox technical support. -
Page 107: Pcap For Debugging
E18 Door Phone Administrator Guide 16.2.PCAP for Debugging PCAP in E18 is used to capture the data package going in and out of the devices for debugging and troubleshooting purpose. You can set up the PCAP on the device web interface properly before using it. Path: Upgrade >Diagnosis >... - Page 108 PCAP. If user agent is blank, by default, users can see the company name “Akuvox”, model number and firmware version from PCAP. Path: Account > Advanced > User Agent interface. Parameter Set-up: User Agent: support to enter another specific value, Akuvox is by default.
-
Page 109: Firmware Upgrade
E18 Door Phone Administrator Guide 17. Firmware Upgrade E18 can be upgraded on the device and on the device web interface. Upgrade the device on the web interface Path: Upgrade > Basic. Upgrade the device on the device Path:Advanced >... - Page 110 E18 Door Phone Administrator Guide Note: When you insert the SD card, you are required to add a .rom file at the root directory and change the file name to update.com.
-
Page 111: Backup
E18 Door Phone Administrator Guide 18. Backup Configuration files and device data can be imported to or exported out of the device to your local PC on the device web interface if needed. Back up data on the web interface Path: Upgrade >... - Page 112 E18 Door Phone Administrator Guide Note: SDHC and SDXC SD card with FAT32 format are supported.
-
Page 113: Auto-Provisioning
E18 Door Phone Administrator Guide 19. Auto-provisioning Configurations and upgrading on E18 can be done on the web interface via one-time auto-provisioning scheduled auto- provisioning configuration files, thus saving you from setting up configuration needed one by one manually on the door phone. 19.1. -
Page 114: Autop Schedule
E18 Door Phone Administrator Guide 19.2.AutoP Schedule Akuvox provides you with different Autop methods that enable the door phone to perform provisioning for itself in a specific time according to your schedule. Path: Upgrade > Advanced > Automatic Autop. Parameter Set-up: ... -
Page 115: Dhcp Provisioning Configuration
E18 Door Phone Administrator Guide 19.4.DHCP Provisioning Configuration Auto-provisioning URL can also be obtained using DHCP option which allows device to send a request to a DHCP server for a specific DHCP option code. If you wan to use Custom Option as defined by users with option code range from 128-255), you are required to configure DHCP Custom Option on the web interface. -
Page 116: Static Provisioning Configuration
E18 Door Phone Administrator Guide Parameter set-up: Custom Option: enter the DHCP code that matched with corresponding URL so that device will find the configuration file server for the configuration or upgrading. DHCP Option 66: If none of the above is set, the device will automatically use DHCP Option 66 for getting the upgrade server URL. - Page 117 E18 Door Phone Administrator Guide protocols that can be used for upgrading the device firmware and configuration. Path:Upgrade > Advanced > Automatic Autop. Parameter set-up: URL: set up tftp,http,https,ftp server address for the provisioning. User Name: set up a user name if the server needs an user name to be accessed to otherwise leave it blank.
- Page 118 HTTP: http://192.168.0.19/ (use the default port 80) http://192.168.0.19:8080/ (use other ports, such as 8080) HTTPS: https://192.168.0.19/ (use the default port 443) Tip: Akuvox do not provide user specified server. Please prepare TFTP/FTP/HTTP/HTTPS server by yourself.
-
Page 119: Integration With Third Party Device
The door phone Wiegand interface is used to connect the door phone to the third party devices for the data transmission via weigand protocol. If you want to integrate the E18C door phone with the third party devices via Wiegand, you can configure the Wiegand on the web interface. Path: Device >... -
Page 120: Integration Via Rs485
E18 Door Phone Administrator Guide between “ Normal” and “Reversed” if you select “ Reversed” then the input card number will be reversed an vice versa. Wiegand Output CRC: Tick to enable the parity check function to ensure that signal-based data can be transmitted correctly according to the established data transmission format. -
Page 121: Osdp Setting
Dummy card numbers can not be sent if “OSDP” is not selected in the RS485 list field. 20.4.Integration via HTTP API HTTP API is designed to achieve an network-based integration between the third party device with the Akuvox intercom device. You can configure the... - Page 122 E18 Door Phone Administrator Guide HTTP API function on the web interface. Path: Security > HTTP API. Parameter Set-up: HTTP API Enable enable or disable the HTTP API function for the third party integration. For example, if the function is disabled any request to initiate the integration will be denied and be returned HTTP 403 forbidden status.
- Page 123 Mode No authentication is required for HTTP API as None it is only used for demo testing. This mode is used by Akuvox developer only. Normal If this mode is selected, you are only required WhiteList to fill in the IP address of the third party device for the authentication.
-
Page 124: Power Output Control
E18 Door Phone Administrator Guide 20.5.Power Output Control E18 can serve as a power supply for the external relays. Path: Access Control > Relay >12V Power Output. Parameter Set-up: Relay ID: Select the relay to be powered by E18. ... -
Page 125: Password Modification
E18 Door Phone Administrator Guide 21. Password Modification On the device web interface, you can set and change both the System PIN Code for accessing the device setting and login password for accessing the web interface. In addition, you can also select the user role when setting passwords. -
Page 126: System Reboot&Reset
E18 Door Phone Administrator Guide 22. System Reboot&Reset 22.1.Reboot If you want to restart the device, you can operate it on the device web interface as well. More over, you can set up schedule for the device to be restarted. Path: Upgrade > Basic To set up the device restart schedule, you can go to : Upgrade >... -
Page 127: Reset
E18 Door Phone Administrator Guide 22.2.Reset You can reset the device to the factor setting and reset the device configuration to the default configuration setting on the device and on the device web interface. To Reset the device on the device web interface Path: Upgrade >... - Page 128 E18 Door Phone Administrator Guide...
-
Page 129: Abbreviations
E18 Door Phone Administrator Guide 23. Abbreviations ACS: Auto Configuration Server Auto: Automatically AEC: Configurable Acoustic and Line Echo Cancelers ACD: Automatic Call Distribution Autop: Automatical Provisioning AES: Advanced Encryption Standard BLF: Busy Lamp Field COM: Common CPE: Customer Premise Equipment CWMP: CPE WAN Management Protocol DTMF: Dual Tone Multi-Frequency DHCP: Dynamic Host Configuration Protocol... - Page 130 E18 Door Phone Administrator Guide PCMA: Pulse Code Modulation A-Law PCMU: Pulse Code Modulation µ-Law PCAP: Packet Capture PNP: Plug and Play RFID: Radio Frequency Identification RTP: Real-time Transport Protocol RTSP: Real Time Streaming Protocol MPEG: Moving Picture Experts Group MWI: Message Waiting Indicator NO: Normal Opened NC: Normal Connected...
-
Page 131: Faq
“3888” and “OK” to enter the system setting screen. Go to info screen to check the IP address. ✔Common method: Using Akuvox IP Scanner to search Akuvox devices in the same LAN network. Q2: Do Akuvox devices support opus codec? A2: For now, only Akuvox Android video IP phone R48G can support Opus audio codec. - Page 132 E18 Door Phone Administrator Guide Q4: Do Akuvox devices support Modbus protocol? A4: No. Q5:Failure in importing the R29 face data to another R29 using the exported face data . A5:Please confirm the following steps: The import format is zip;...
- Page 133 E18 Door Phone Administrator Guide Firmware Version The firmware is different between hardware version1 and hardware version 2. Go to Web-Status -Firmware Version. 20.X.X.X is hardware version 1. 220.X.X.X is hardware version 2. Hardware version The firmware is different between hardware version1 and hardware version 2. Go to Web-Status -Firmware Version.
-
Page 134: Contact Us
E18 Door Phone Administrator Guide 25. Contact Us For more information about the product, please visit us at www.akuvox.com or feel free to contact us by Sales email: sales@akuvox.com Technical support email: support@akuvox.com Telephone: +86-592-2133061 ext.7694/8162 We highly appreciate your feedback about our products.
Need help?
Do you have a question about the E18C and is the answer not in the manual?
Questions and answers