Akuvox E16 Series Administrator's Manual
Hide thumbs
Also See for E16 Series:
- Administrator's manual (198 pages) ,
- Manual (105 pages) ,
- Quick manual (9 pages)
Table of Contents
Advertisement
Advertisement
Table of Contents

Related Manuals for Akuvox E16 Series


Summary of Contents for Akuvox E16 Series
- Page 2 About This Manual Thank you for choosing Akuvox E16 series door phones. This manual is intended for the administrators who need to properly configure the door phone. This manual applies to the 116.30.4.21 version, and it provides all the configurations for the functions of E16 series door phones.
- Page 3 Introduction of Icons and Symbols Note • Informative information and advice for the efficient use of the device.
- Page 4 Related Documentation You are advised to refer to the related documents for more technical information via the link below: https://knowledge.akuvox.com...
-
Page 5: Table Of Contents
7.6 Call Settings........................32 7.6.1 Maximum Call Duration Setting ..................32 7.6.2 Maximum Dial Duration Setting ..................33 7.6.3 Audio& Video Codec Configuration for SIP Calls ............33 7.7 Configure DTMF Data Transmission .................. 35 8 Contact List Configuration ....................37 www.akuvox.com... - Page 6 12 Security..........................68 12.1 Tamper Alarm Setting.......................68 12.2 Security Notification Setting ..................... 69 12.2.1 Email Notification Setting .....................69 12.2.2 SIP Call Notification ...................... 71 12.3 Web Interface Automatic Log-out..................71 12.4 Action URL ........................72 13 Monitor and Image ......................75 www.akuvox.com...
- Page 7 19.3 Lift Control ........................99 19.4 Integrate with third-party Access Control Server ............100 20 Password Modification ....................102 21 System Reboot&Reset ....................103 21.1 Reboot ..........................103 21.2 Reset..........................104 22 Abbreviations ....................... 106 23 FAQ..........................109 24 Contact Us........................113 www.akuvox.com...
-
Page 8: Product Overview
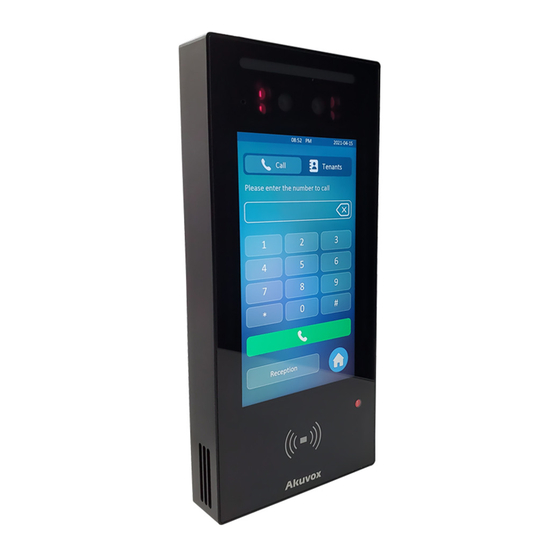
E16 Door Phone Administrator Guide 1 Product Overview Akuvox E16 series products are Android-based IP video door phones with touch screens. It incorporates audio and video communications, access control, and video surveillance. Its finely-tuned Android OS, SmartPlus, and AI-based communication technology allow featured customization to better suit your operation habits. -
Page 9: Change Log
E16 Door Phone Administrator Guide 2 Change Log The change log will be updated here along with the changes in the new software version. www.akuvox.com... -
Page 10: Model Specification
E16 Door Phone Administrator Guide 3 Model Specification E16C Model & Feature Display 5” IPS Touch Screen √ Button Housing Material Plastic Relay Out Alarm In RS485 √ √ Resolution 1280x720 www.akuvox.com... - Page 11 E16 Door Phone Administrator Guide Brightness 500cd/m Card Reader 13.56MHz Wi-Fi Bluetooth √ IP Rating IP65 Temperature Detection Optional Face recognition √ External SD Card Wall Mounting √ Flush Mounting √ Desk Mounting POE Stand by Power 5.5W www.akuvox.com...
- Page 12 Power Adapter Full Load Consumption Color Option Black Wall Mounting √ Flush Mounting √ Desk Mounting POE Stand by Power 5.5W POE Full Load Consumption 9.8W Power Adapter Standby Power 5.5W Power Adapter Full Load Consumption Color Option Black www.akuvox.com...
-
Page 13: Access The Device
4.2 Access the Device Setting on the Web Interface You can also use the Akuvox IP scanner tool to search the device's IP address on the same LAN. Then enter the device IP address on the web browser in order to login to the device web interface where you can configure and adjust parameters etc. - Page 14 E16 Door Phone Administrator Guide Note • You can also obtain the device IP address using the Akuvox IP scanner to log into the device web interface. Please refer to the URL below for the IP scanner application: https://knowledge.akuvox.com/docs/how-to-obtain-ip-address-via-ip-scanner-1 Note •...
-
Page 15: Time And Language Setting
And when your time zone is selected, the device will automatically notify the NTP server of its time zone so that the NTP server can synchronize the time zone setting in your device. www.akuvox.com... - Page 16 • Primary Server: enter the primary NTP server you obtained in the NTPServer. • Date/Time: set the date and time for the device manually when you disable the automatic date and time service. Note • When the check box is not ticked, parameters related to the NTP server cannot be edited. www.akuvox.com...
-
Page 17: Led Setting
5.3.2 Configure LED White Light Setting LED White light is used to reinforce the lighting for facial recognition as well as for QR code access in the dark environment. To configure the function, go to Device > Light > White Light interface. Parameter Set-up: www.akuvox.com... -
Page 18: Screen Display Configuration
QR code scan. 5.4 Screen Display configuration E16 series door phones allow you to enjoy a variety of screen displays to enrich your visual and operational experience through the customized setting to your preference. 5.4.1 Configure Screensaver Await screen is mainly a function for screen protection. -
Page 19: Upload Screensaver
ID order with a specific time duration (Time Interval) you set. Note • The pictures uploaded should be in JPG format with 2M pixels maximum. • The previous pictures with a specific ID order will be overwritten when the repetitive designation of pictures to the same ID order occurred. www.akuvox.com... -
Page 20: Home Screen Configuration
5.5 Volume & Tone Configuration Volume and tone configuration in E16 door phone refers to the call volume (speaker), Mic volume, and prompt volume (eg. open door tone). Moreover, you can upload the tone you like to enrich your personalized user experience. www.akuvox.com... -
Page 21: Volume Configuration
5.5.1.2 Configure Volume on the Web Interface On the web interface, you can set the temper alarm volume, Mic volume, speaker volume, and prompt volume. Path: Device > Audio > Volume Control. www.akuvox.com... -
Page 22: Upload Open Door Tone
You can upload the Open-Door Tone on the device web interface. To configure the configuration on web Device >Audio > Open Door Tone Setting. Note • The open door tone file should be in .wav format and the file size should be smaller than 200KB. www.akuvox.com... -
Page 23: Configure Door Access Prompt Text
• Open Door Success: tick the check box if you want to see the text prompt after the door opening success. • Open Door Failed: tick the check box if you want to see the prompt words after the door open failure. www.akuvox.com... -
Page 24: Network Setting
• IP Address: set up the IP Address if the static IP mode is selected. • Subnet Mask: set up the subnet Mask according to your actual network environment. www.akuvox.com... -
Page 25: Device Deployment In Network
To configure the configuration on web Network > Advanced > Connect Setting interface www.akuvox.com... -
Page 26: Nat Setting
• UDP Keep Alive Messages: if enabled, the device will send out the message to the SIP server so that the SIP server will recognize if the device is in online status. • UDP Alive Msg Interval: set the message sending time interval from 5-60 seconds, the default is 30 seconds. www.akuvox.com... - Page 27 E16 Door Phone Administrator Guide • RPort: enable the Rport when the SIP server is in WAN (Wide AreaNetwork). www.akuvox.com...
-
Page 28: Intercom Call Configuration
To make a direct IP call on the device, you can press the Dial icon, then enter the IP or SIP number and press the Call icon to call out. 7.1.2 IP Call Configuration To configure the IP call on the device web Intercom > Basic > Direct IP interface. www.akuvox.com... -
Page 29: Sip Call &Sip Call Configuration
You can, for example, switch between them if any one of the accounts failed and become invalid. The SIP account can be configured on the device and on the device interface. 7.2.1.1 Configure SIP Account on the Device On the device Setting screen, select Account. www.akuvox.com... -
Page 30: Sip Server Configuration
7.2.2 SIP Server Configuration SIP servers can be set up for devices in order to achieve call sessions through SIP servers between intercom devices. To set up a SIP server, you can go to Account > Basic > Preferred SIP Server. www.akuvox.com... -
Page 31: Configure Outbound Proxy Server
An outbound proxy server is used to receive all initiating request messages and route them to the designated SIP server in order to establish a call session via port-based data transmission. To configure the proxy server, you can go to Account > Basic > Outbound Proxy Server. www.akuvox.com... -
Page 32: Configure Data Transmission Type
DNS-SRV. In the meantime, you can also identify the server from which the data come. To do the configuration, you can go to Account > Basic > Transport Type. Parameter Set-up: • UDP: select UDP for unreliable but very efficient transport layer protocol. UDP is the default transport protocol. www.akuvox.com... -
Page 33: Dial Options Configuration
The account is Auto by default ( to dial out from the account in which the dialed number has been registered). You can select either account 1 or account 2 from which the number can be dialed out. If you have registered the dialed number in both www.akuvox.com... -
Page 34: Quick Dial By Number Replacement On The Webinterface
Smarplus App, and the guard phone. Also, you can select audio or video auto-answer mode based on your need. To configure Auto-answer function: Go to Intercom > Call Feature > Auto Answer. www.akuvox.com... -
Page 35: Enabling Prevent Sip Hacking
7.5 Enabling Prevent SIP Hacking You can enable the Prevent SIP Hacking so that the door phone will only receive calls from the SIP numbers registered in the same SIP server, and contacts added locally or synchronized from Smartplus, SMDC, and ACMS. www.akuvox.com... -
Page 36: Call Settings
7.6.1 Maximum Call Duration Setting E16 series door phone allows you to set up the call time duration in receiving the call from the calling party as the calling party might forget to hang up the phone. When the call time duration is reached, the door phone will terminate the call automatically. -
Page 37: Maximum Dial Duration Setting
7.6.3 Audio& Video Codec Configuration for SIP Calls 7.6.3.1 Configure Audio Codec E16 series door phones support four types of Codec (PCMU, PCMA, G729, G722) for encoding and decoding the audio data during the call session. Each type of Codec varies in terms of sound quality. - Page 38 7.6.3.2 Configure Video Codec These series support the H.264 codec that provides a better video quality at a much lower bit rate with different video quality and payload. To do the configuration, you can go to Account > Advanced > Video Codec. www.akuvox.com...
-
Page 39: Configure Dtmf Data Transmission
DTMF in order to establish a DTMF-based data transmission between the door phone and other intercom devices for the third-party integration. To configure the DTMF data transmission, you can go to Account > Advanced > DTMF. www.akuvox.com... - Page 40 You are required to set it up only when the third-party device to be matched with adopts Info mode. • Payload: set the payload according to the specific data transmission payload agreed on between the sender and receiver during the datatransmission. www.akuvox.com...
-
Page 41: Contact List Configuration
8 Contact List Configuration 8.1 Contact List Configuration on the Device You can configure the contact list in terms of adding and modifying contact groups or contacts on the device directly. To configure the phone book on the device User > Group. www.akuvox.com... -
Page 42: Contact List Configuration On The Web Interface
• Tenants Sort By: select ASCII Code or Room No. or Import. When you select ASCII Code, the tenants will be listed by their names in the sequence of the ASCII code. When you select Room No., the tenants will be sorted according to their room www.akuvox.com... - Page 43 • Hide Group Label for Contact List: tick or untick the check box to control the display of the group label. If you untick the check box, then only the contact tab will be displayed while the group tab will be concealed and vice versa. www.akuvox.com...
-
Page 44: Relay Switch Setting
• 1-Digt DTMF: set the 1-digt DTMF code within range from (0-9 and *, #). • 2~4 Digits DTMF: set the DTMF code according to the DMTP Option. For example, you are required to set the 3-digits DTMF code if DTMP Mode is set as 3-digits. www.akuvox.com... -
Page 45: Web Relay Setting
IP address, and password. And you can fill in a maximum of 50 web relay action commands for different web relay actions, which can later be selected on the device screen for the specific relay action for the door access control. Path: Access Control > Web Relay. www.akuvox.com... - Page 46 DTMF code, the action command will be sent to the web relay automatically. After the web relay is set up, you can select the specific web relay action to be carried out. You can go to Directory > User, then click , then scroll down to AccessSetting. www.akuvox.com...
-
Page 47: Configure Web Relay On The Device
After the web relay actions are entered on the web interface, you can now select the specific number of the web relay actions to be carried for the specific resident you added for the door unlock. To configure it, go to User > User List. www.akuvox.com... -
Page 48: Relay Schedule
• Schedule Enabled: it is disabled by default. Only choose to enable it, and you can select the schedule. For creating the schedule, please refer to the door access schedule configuration. Note • You can refer to Create Door Access Schedule for the relay schedule setting. www.akuvox.com... -
Page 49: Door Access Schedule Management
To configure the schedule, go to Setting > Schedule, then click To create a daily schedule, select Daily mode. www.akuvox.com... - Page 50 • Date Time: set up the time schedule for the validity of the door access during the day. To create a daily schedule, select Weekly mode. Parameter Set-up: • Day of Week: select the day (s) on which door access can be valid on a weekly. To create a longer period schedule: www.akuvox.com...
-
Page 51: Create Door Access Schedule On The Device
• Start Date- End Date: set the date range of the validity of the door access. 10.1.2 Create Door Access Schedule on the Device You can also create a door access schedule on the device. You can go to Schedule > Add Schedule. www.akuvox.com... -
Page 52: Import And Export Door Access Schedule
If you want to edit or delete the door access schedule you created, you can edit or delete the configured schedule separately or in batch. To edit the schedule on the web interface, go to Setting > Schedule. To edit the schedule on the device, tap Schedule, then tap the schedule you want to edit. www.akuvox.com... - Page 53 E16 Door Phone Administrator Guide Note • It only supports .xml format files for importing and exporting the schedule. www.akuvox.com...
-
Page 54: Door Unlock Configuration
E16 Door Phone Administrator Guide 11 Door Unlock Configuration E16 series door phones offer you three types of door access via PIN code, RF card, and Facial recognition. You can configure them on the device and web interface. Moreover, you can import or export the configured files to maximize your RF card configuration efficiency. -
Page 55: Configure Private Pin Code On The Device
Note • The public PIN code will not be valid until the function is turned on. Note • APT+PIN is applicable only when the device is added to the Akuvox SmartPlus. 11.2.2 Configure Private PIN Code on the Device You can configure door access by Private PIN code for the resident on the device by entering the user’s name and the PIN code for the door access. -
Page 56: Configure Private Pin Code On The Web Interface
PIN Code access during a certain time span you scheduled. In addition, you can set the limit for the total number of valid PIN code door access. To configure the PIN code, go to Directory > Userinterface. www.akuvox.com... - Page 57 PIN code door access to the box on the right side. Note • This step is applicable to door access by RF card and facial recognition as they are identical in configuration. www.akuvox.com...
-
Page 58: Configure Private Pin Access Mode
APT#+PIN, then you are required to enter the Apartment Number first before entering your PIN code for the door access. 11.3 Configure RF Card for Door Unlock 11.3.1 Add RF Card on the Web Interface To add RF cards, go to Directory > User, thenclick www.akuvox.com... -
Page 59: Add Rf Card To The Device
You can configure the RF card directly on the device for the door access while setting up the time schedule for the validity of the RF card access along with the web relay that can be triggered with the RF card etc. To add an RF card, tap User, then User List, then Add. www.akuvox.com... -
Page 60: Configure Rf Card Code Format
11.4.1 Enroll Face Data on the Device You can configure door access by facial recognition on the device by entering the user’s name and registering your facial ID on the device for door access. Tap User > User List, then tap Add, and tap Face. www.akuvox.com... -
Page 61: Upload Face Data On The Web Interface
Directory > User, then click +Add. After that, upload the face photo. Parameter Set-up: • Status: it will show Registered when the picture uploaded conforms to the format and standard otherwise it would show Unregistered as the default. However, the www.akuvox.com... -
Page 62: Configure Facial Recognition
• Pictures to be uploaded should be in jpg or png format. 11.4.3 Configure Facial Recognition E16 series door phones allow you to adjust facial recognition accuracy, and recognition intervals according to your actual need. And you can also improve the recognition quality and user experience through the basic facial recognition setting. -
Page 63: Configure Door Access Using Configured Files
5 min. before you are allowed to perform the facial recognitionagain. 11.5 Configure Door Access Using Configured Files E16 series door phones allow you to speedily configure user(s)-specific door access in batch by importing the configured all-in-one door access control files incorporating user information, door access type, door access schedule, etc., thus all the door access... -
Page 64: Unlock By Qr Code
You can also gain the door access by mobile phone with Bluetooth which is used together with Akuvox SmartPlus. You can shake the mobile phone closer to the access control terminal for the door access. To configure the configuration on web Access Control > BLE >... -
Page 65: Unlock By Nfc
11.7 Unlock by NFC You can also gain door access by mobile phone with NFC which is used together with Akuvox SmartPlus. You can keep the mobile phone closer to the door phone for door access. Path: Access Control > Card Setting> NFC. -
Page 66: Unlock By Exit Button By Thedoor
When you need to open the door from inside using the exit button installed by the door, you can configure the access control terminal Input to trigger the relay for the door access. To configure the configuration on web Access Control > Input > Input interface. Parameter Set-up: www.akuvox.com... -
Page 67: Unlock By Reception Tab
• Door Status: display the status of the input signal. 11.10 Unlock by Reception Tab On the device's home screen, the E16 series door phone provides residents and visitors quick door access by pressing the Reception tab at the bottom of the home screen. To do the configuration, you can go to Intercom >... -
Page 68: Unlock By Dtmf Code
• DTMF Payload: select the payload 96-127 for data transmission identification. Note • Please refer to the chapter Configure DTMF Data Transmission for the specific DTMF code setting. • Intercom devices involved must be consistent in the DTMF type otherwise DTMF code cannot be applied. www.akuvox.com... -
Page 69: 1Configure Dtmf White List
11.12 Body Temperature Measurement for Door Access (Optional) E16 series provides you with an optional body temperature measurement function designed to be applied in the situation where the measurement becomes necessary for the safety of the residents and visitors etc. Residents and visitors are required to go through temperature measurements along with an optional mask detection check before they are allowed for door access. - Page 70 • Low Temperature: set the low temperature. • Action For Abnormal Body Temperature: if you select Access Denied then anyone who is detected with abnormal body temperature will be denied the door access. If www.akuvox.com...
- Page 71 SIP/IP call when abnormal temperature and low temperature are detected. • SIP/IP Call Number: enter the SIP or IP call for the notification. The field will appear for you to fill in SIP/IP numbers when you check the box in the Action to Execute. www.akuvox.com...
-
Page 72: Security
• Disarm tab will turn gray when the temper alarm iscleared. • The round rubber button at the back of the device must be in press-down status otherwise the alarm will not be fired. To turn on the tamper-proof function on the device, tap Security > Temper Proof. www.akuvox.com... -
Page 73: Security Notification Setting
If you want to receive the security notification via email, you can configure the Email notification on the web interface properly. To configure the configuration on web Setting > Action > Email Notification interface. Parameter Set-up: • Sender’s Email Name: enter the name of the email sender. www.akuvox.com... - Page 74 • FTP server: enter the address (URL) of the FTP server for the FTP notification. • FTP User Name: enter the FTP server user name. • FTP Password: enter the FTP server password. • FTP Path: enter the folder name you created in the FTP server. www.akuvox.com...
-
Page 75: Sip Call Notification
You can set up the web interface automatic log-out timing, requiring re-login by entering the user name and the passwords for security purposes or for the convenience of operation. To configure the configuration on web System> Security > Session Time Out interface. www.akuvox.com... -
Page 76: Action Url
PIN code, and RF card access for security purposes. You can navigate to Setting > Actions URL Note • Action URL and format are provided by a third-party manufacturer, Akuvox door phone only sends the URL to the third-party devices. For example :... - Page 77 E16 Door Phone Administrator Guide http://192.168.16.118/help.xml? mac=$mac:ip=$ip:model=$model:firmware=$firmware:card_s n=$card_sn Akuvox supports the following parameter format for the event below. Event Parameter format Example Http://server ip/ Make Call $remote Callnumber=$remote Http://server ip/ Hang Up $remote Callnumber=$remote Http://server ip/ Relay Triggered $relay1status relaytrigger=$relay1status...
- Page 78 E16 Door Phone Administrator Guide Http://server ip/ Invalid Car Entered $card_sn invalidcard=$card_sn Tamper Alarm Http://server ip/ $alarm status Triggered tampertrigger=$alarm status www.akuvox.com...
-
Page 79: Monitor And Image
13 Monitor and Image 13.1 MJPEG Image Capturing E16 series allows you to capture the MJPEG format monitoring image if needed. You can enable the MJPEG function and set the image quality on the web interface. To configure the configuration on web Surveillance > MJPEG > MJPEG Server interface. -
Page 80: Live Stream
E16 Door Phone Administrator Guide 13.2 Live Stream If you want to check the real-time video from the E16 series access control terminal, you can go to the device web interface to obtain the real-time video or you can also enter the correct URL on the web browser to obtain it directly. -
Page 81: Rtsp Stream Monitoring
E16 Door Phone Administrator Guide 13.3 RTSP Stream Monitoring E16 series door phones support RTSP stream that allows intercom devices such as an indoor monitor or the monitoring unit from the third party to monitor or obtain the real-time audio/ video (RTSP stream) from the door phone using the correctURL. -
Page 82: Rtsp Stream Setting
VGA, 4CIF, 720P, and 1080P. The default video resolution is 720P, and the video from the door phone might not be able to be shown on the indoor monitor if the resolution is set higher than 720P. • Video Framerate: 25fps is the video frame rate by default. www.akuvox.com... -
Page 83: Onvif
13.4 ONVIF Real-time video from the E16 series access control terminal camera can be searched and obtained by the Akuvox indoor monitor or by third-party devices such as NVR (Network Video Recorder) you can configure the ONVIF function in the access control terminal so... -
Page 84: Camera Mode
You can select the camera mode for better video quality depending on where the door phone is located. You can select Indoor mode for better video image(RTSP, ONVIF, and Mjpeg) if the door phone is placed indoors. On the contrary, you can select Outdoor mode if the door phone is placed outdoors. www.akuvox.com... - Page 85 E16 Door Phone Administrator Guide www.akuvox.com...
-
Page 86: Logs
• Local Identity: displays the door phone’s SIP account or IP number that receives incoming calls. • Name/Number: select the Name and Number options to search call log by the name or by the SIP or IP number. 14.2 Door Logs www.akuvox.com... -
Page 87: Temperature Log
• Name/Code: select the Name and Code options to search door log by the name or by the PIN code. • Action: click to display the picture captured. 14.3 Temperature Log To check the temperature log, go to Access Control > Temperature Log. www.akuvox.com... - Page 88 • Export Picture Enabled: enable it if you want to export the temperature log with a snapshot picture captured. • Time: select the specific time span of the temperature log you want to search, check, or export. • Action: click to display the picture captured. www.akuvox.com...
-
Page 89: Debug
System > Maintenance > System Log interface. Parameter Set-up: • Log Level: select log levels from 1 to 7 levels. You will be instructed by Akuvox technical staff about the specific log level to be entered for debugging purposes. The default log level is 3, the higher the level is 5, the more complete the log is 7. -
Page 90: Remote Debug Server
1MB. 15.3 Remote Debug Server You can set up a remote debug server so that Akuvox technical team will be able to obtain the log remotely for debugging. To configure the server, go to System > Maintenance >... -
Page 91: Face Recognition Debug
PCAP. If a user agent is blank, by default, users can see the company name “Akuvox”, model number, and firmware version from PCAP. Path: Account > Advanced > User Agent interface. -
Page 92: Firmware Upgrade
E16 Door Phone Administrator Guide 16 Firmware Upgrade E16 series door phones can be upgraded on the device web interface. You can go to System > Upgrade. Note • Firmware files should be in .zip format for an upgrade. www.akuvox.com... -
Page 93: Backup
E16 Door Phone Administrator Guide 17 Backup If you want to import or export encrypted configuration files to your Local PC, go to System > Maintenance > Others. www.akuvox.com... -
Page 94: Auto-Provisioning Via Configuration File
E16 Door Phone Administrator Guide 18 Auto-provisioning via Configuration File Configurations and upgrading on the E16 series door phone can be done on the web interfaceviaone-timeauto-provisioningandscheduled auto-provisioningvia configuration files, thus saving you from setting up configurations needed one by one manually on the door phone. -
Page 95: Autop Schedule
MAC-based configuration files. 18.3 AutoP Schedule Akuvox provides you with different AutoP methods that enable the door phone to perform provisioning for itself at a specific time according to your schedule. You can go to System > Auto Provisioning. -
Page 96: Pnp Configuration
DHCP Custom Option on the web interface. To set up DHCP AutoP with “Custom Option” and “Power on” mode, on web System > Auto Provisioning > Automatic Autop interface. Click Export tab in Export Autop Template to export Autop template. Then set up DHCP Option on DHCP server. www.akuvox.com... - Page 97 • The custom Option type must be a The value is the URL of the TFTP server. Parameter Set-up: • Custom Option: enter the DHCP code that matched the corresponding URL so that the device will find the configuration file server for the configuration or upgrading. www.akuvox.com...
-
Page 98: Static Provisioning Configuration
TFTP, FTP, HTTP, and HTTPS are the protocols that can be used for upgrading the device firmware and configuration. To download the Autop template on System > Auto Provisioning > Automatic Autop, and setup Autop server on System > Auto Provisioning > Manual Autop interface. www.akuvox.com... - Page 99 • Password: set up a password if the server needs the password to be accessed otherwise leave it. • Common AES Key: set upAES code for the intercom to decipher the general Auto Provisioning configuration files. www.akuvox.com...
- Page 100 • HTTP: http://192.168.0.19/ (use the default port 80) • http://192.168.0.19:8080/ (use other ports, such as 8080) • HTTPS: https://192.168.0.19/ (use the default port 443) Note • Akuvox does not provide user specified server. • Please prepare TFTP/FTP/HTTP/HTTPS server by yourself. www.akuvox.com...
-
Page 101: Integration With Third Party Device
19 Integration with Third Party Device 19.1 Integration via Wiegand If you want to integrate the E16 series door phone with the third-party devices via Wiegand. To configure it, you can go to the web Device > Wiegand interface. Parameter Set-up: •... -
Page 102: Integration Via Http Api
19.2 Integration via HTTP API HTTP API is designed to achieve a network-based integration between the third-party device with the Akuvox intercom device. You can configure the HTTP API function on the web Setting > HTTP API interface for the integration. -
Page 103: Lift Control
19.3 Lift Control You can connect the E16 door phone with AKuvox EC32 lift controller and third-party lift controllers for the lift control. You can summon the lift to go down to the ground floor when you are granted through various types of access methods on the door phone. -
Page 104: Integrate With Third-Party Access Control Server
You are required to check for the device integration protocol and make sure that they use the same integration protocol. Select Akuvox EC32 if you want to connect the Akuvox EC32 device with the Akuvox EC32 lift controller. Select KEYKING if you want to integrate with the KEYKING KEYKING lift controller. - Page 105 See the example below: http://www.server.com/ <base>/hs/ACS/checking/{QRCode}/{DeviceID}/Card • Prompt On LCD: select Default, if you want to adopt the Akuvox door phone prompt for the door access. Select Return value, if you want to use the return value from the third-party server as the prompt.
-
Page 106: Password Modification
In addition, you can also select the user role when setting passwords. To set the password, go to System > Security > Web Password Modify To set up the system PIN code, you can go to the system PIN section. www.akuvox.com... -
Page 107: System Reboot&Reset
System > Upgrade interface. To set up the device reboot schedule, go to System > Auto Provisioning > Reboot Schedule. To reboot the device manually, go to System > Upgrade > Basic. To reboot the device, tap Advanced > Reboot. www.akuvox.com... -
Page 108: Reset
Configuration to Default State (Except Data) Reset, if you want to reset the device (retaining the user data). To reset the device, go to System > Upgrade. To reset the device to the factory setting on the device, go to Advanced > Reset. www.akuvox.com... - Page 109 E16 Door Phone Administrator Guide www.akuvox.com...
-
Page 110: Abbreviations
CPE: Customer Premise Equipment CWMP: CPE WAN Management Protocol DTMF: Dual Tone Multi-Frequency DHCP: Dynamic Host Configuration Protocol DNS: Domain Name System DND: Do Not Disturb DNS-SRV: Service record in the Domain Name System FTP: File Transfer Protocol GND: Ground www.akuvox.com... - Page 111 PCMA: Pulse Code Modulation A-Law PCMU: Pulse Code Modulation µ-Law PCAP: Packet Capture PNP: Plug and Play RFID: Radio Frequency Identification RTP: Real-time Transport Protocol RTSP: Real Time Streaming Protocol MPEG: Moving Picture Experts Group MWI: Message Waiting Indicator www.akuvox.com...
- Page 112 SNMP: Simple Mail Transfer Protocol SDMC: SIP Devices Management Center TR069: Technical Report069 TCP: Transmission ControlProtocol TLS: Transport Layer Security TFTP: Trivial File Transfer Protocol UDP: User Datagram Protocol URL: Uniform Resource Locator VLAN: Virtual Local Area Network WG: Wiegand www.akuvox.com...
-
Page 113: Faq
Using Akuvox IP Scanner to search Akuvox devices in the same LAN network. Q2: Do Akuvox devices support opus codec? A2: For now, only Akuvox Android video IP phone R48G can support Opus audio codec. Q3: What is the supported temperature range for the Akuvox door phone? A3: R20/E21/R26/R23/Standard R27/Standard X915 -- 14°... - Page 114 E16 Door Phone Administrator Guide Indoor Monitor -- 14° to 112°F (-10° to 45°C) IP Phone -- 32º~104ºF(0~40ºC) Q4: Do Akuvox devices support Modbus protocol? A4: No. Q5:Failure in importing the X915 face data to another X915 using the exported face data.
- Page 115 E16 Door Phone Administrator Guide A8: 1. Label • Hardware version 1 • Hardware version 2 • Firmware Version The firmware is different between hardware version1 and hardware version2. Go to Web > Status > Firmware Version www.akuvox.com...
- Page 116 220.X.X.X is hardware version2. • Hardware version The firmware is different between hardware version 1 and hardware version 2. Go to Web > Status > Firmware Version If the hardware version is 220.X, then the device is the hardware version2. www.akuvox.com...
-
Page 117: Contact Us
E16 Door Phone Administrator Guide 24 Contact Us For more information about the product, please visit us at www.akuvox.com or feel free to contact us by Sales email: sales@akuvox.com Technical support email: support@akuvox.com Telephone: +86-592-2133061 ext.7694/8162 We highly appreciate your feedback about our products.
Need help?
Do you have a question about the E16 Series and is the answer not in the manual?
Questions and answers