Advertisement
Quick Links
Operating and
assembly instructions
REQ5..Y, REQ6..Y, REQ7..A,
REQ8..A
Door station Video 2-wire
Safety instructions
Electrical equipment may only be installed and
assembled by a qualified electrician in accord-
ance with the relevant installation standards,
guidelines, regulations, directives, safety and
accident prevention regulations of the country.
When installing and laying cables, always com-
ply with the applicable regulations and stand-
ards for SELV electrical circuits.
These instructions are an integral component
of the product and must be retained by the end
user.
1
Elcom Kommunikation GmbH - Gottfried-Leibniz-Str.1 - D-74172 Neckarsulm - www.elcom.de -
Design and layout of the device
(1)
(2)
§
(3)
(4)
(5)
(6)
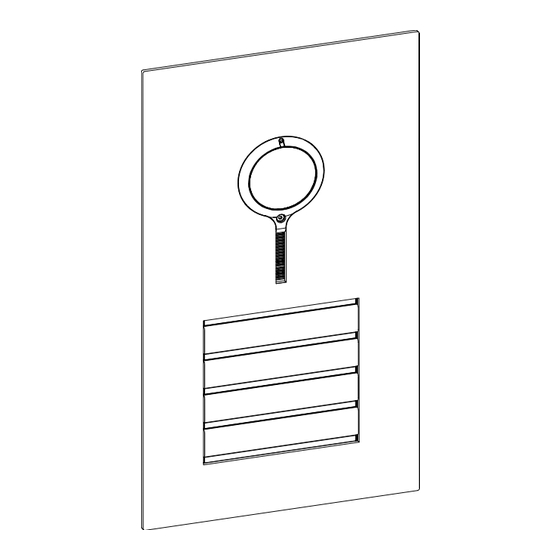
Figure 1: Front
(1) Front plate stainless steel
(2) Microphone
(3) Camera
(4) Locating screw for camera
(Allen key supplied)
(5) Twilight sensor for call button
(6) Button panel with call push-buttons
(7) Cover strip for dismantling protection
(8)
(9)
(10)
(11)
(12)
Figure 2: Back
(8) Adjustment button Upwards
(9) 7-segment display
(10) Selection button
(11) Adjustment button downwards
(12) Connecting cable module
(13) Connection terminal block
Function
The door station video works in the 2-wire bus
system and enables communication via sound and
image.
Correct use
- for surface- or flush-mounted installation in spe-
cial housings (see Accessories)
- not compatible with intercom systems of other
manufacturers
- suitable for use exterior applications
Product characteristics
- completely pre-assembled
- protected against vandalism
- with brushed 2 mm stainless steel front plate
- Name plate can be changed from the front with-
out any special tools
- One-man commissioning
- Call push-button with acknowledge tone (can
(7)
be switched off) and tactile feedback
- Call button, light release or door release can be
adjusted even without any function
- durable, homogeneous, white LED call
push-button backlighting
- Twilight controlled call push-button backlighting
with adjustable switch-on brightness level
- Opening of door station only with enclosed
opening tool
- break-proof flush-mounted call buttons
- Colour camera
- invisible, glare-free IR LED night lighting
- temperature controlled camera heating for clear
view
- scratch-proof camera cover
- Loudspeaker and microphone protected against
sabotage
- Volume and microphone sensitivity settable
- Door release contact on 1 ... 10 s adjustable
- Door release without previous call adjustable in
single door systems
- Safety rope as installation aid
Operation
Establish call (ringing)
„ Press the call push-button assigned to the
desired subscriber.
If configured, the call push-button activation is
confirmed by an acknowledge tone. Addressed
(13)
indoor stations are called.
Switch-on lights
A call push-button is configured and labelled for
lighting control (light insert supplied).
„ Press the call push-button for lighting.
If configured, the call push-button activation is
confirmed by an acknowledge tone. The light
contact of a line power supply is closed for the
set time.
Label call push-button
„ Keep call push-button pressed on one side.
On the opposite side, the lever opening (14) is
accessible for a screwdriver.
„ Position the screwdriver in the lever opening
(14) and release the interlock (Figure 3).
„ Remove cover with name plate insert.
6LE000714A - 06/2015
Advertisement

Summary of Contents for ELCOM REQ5 Y Series
- Page 1 „ Position the screwdriver in the lever opening (12) Connecting cable module (14) and release the interlock (Figure 3). (13) Connection terminal block „ Remove cover with name plate insert. Elcom Kommunikation GmbH - Gottfried-Leibniz-Str.1 - D-74172 Neckarsulm - www.elcom.de - 6LE000714A - 06/2015...
- Page 2 Do not use wire wool, wire brushes or any similar products for cleaning. This will prevent damage to the surface and accumulation of flash rust. Elcom Kommunikation GmbH - Gottfried-Leibniz-Str.1 - D-74172 Neckarsulm - www.elcom.de - 6LE000714A - 06/2015...
- Page 3 „ Confirm the selection with The 7 segments display goes dark if there is no actuation for 5 seconds. Settings are applied. The device returns to normal operation. Elcom Kommunikation GmbH - Gottfried-Leibniz-Str.1 - D-74172 Neckarsulm - www.elcom.de - 6LE000714A - 06/2015...
- Page 4 Figure 14: Vertical camera orientation horizontal ap- erture angle horizontal swivelling range Figure 15: Horizontal camera orientation Figure 12: Insert door station Elcom Kommunikation GmbH - Gottfried-Leibniz-Str.1 - D-74172 Neckarsulm - www.elcom.de - 6LE000714A - 06/2015...
- Page 5 „ Remove the module to be replaced and install the new module in reverse order. Elcom Kommunikation GmbH - Gottfried-Leibniz-Str.1 - D-74172 Neckarsulm - www.elcom.de - 6LE000714A - 06/2015...
- Page 6 2 x 2 modules 225.5 x 332 x 2 mm with 3 und 2 modules or with 2 x 3 modules 225.5 x 422 x 2 mm Elcom Kommunikation GmbH - Gottfried-Leibniz-Str.1 - D-74172 Neckarsulm - www.elcom.de - 6LE000714A - 06/2015...


Need help?
Do you have a question about the REQ5 Y Series and is the answer not in the manual?
Questions and answers