Advertisement
Quick Links
Operating and
assembly instructions
REQ0..Y, REQ1..Y, REQ2..A,
REQ3..A
Audio door station 2-wire
Safety instructions
Electrical equipment may only be installed and
assembled by a qualified electrician in accord-
ance with the relevant installation standards,
guidelines, regulations, directives, safety and
accident prevention regulations of the country.
When installing and laying cables, always com-
ply with the applicable regulations and stand-
ards for SELV electrical circuits.
These instructions are an integral component
of the product and must be retained by the end
user.
1
Elcom Kommunikation GmbH - Gottfried-Leibniz-Str.1 - D-74172 Neckarsulm - www.elcom.de -
Design and layout of the device
(1)
(2)
§
(3)
(4)
(6)
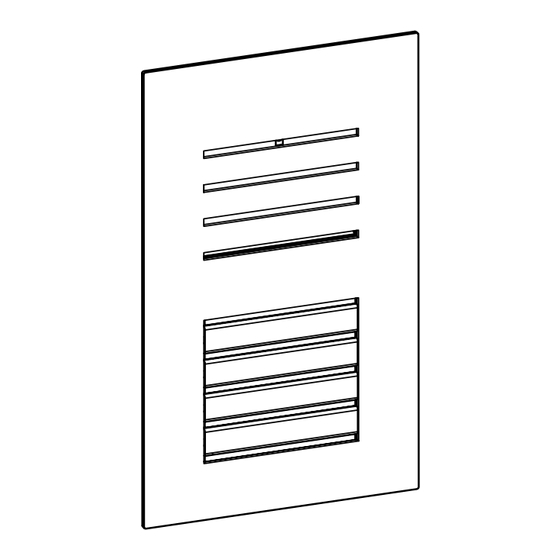
Figure 1: Design and layout of the device front
(1) Front plate stainless steel
(2) Microphone
(3) Door loudspeaker
(4) Twilight sensor for call button
(5) Button panel with call push-buttons
(6) Cover strip for dismantling protection
(7)
(8)
(9)
(10)
(11)
Figure 2: Design and layout of the device back
(7) Adjustment button Upwards
(8) 7-segment display
(9) Selection button
(10) Adjustment button downwards
(11) Module bus connector
(12) Connection terminal block
Function
The audio door station works in the 2-wire bus
system and enables communication via sound.
Correct use
- for surface- or flush-mounted installation
- not compatible with intercom systems of other
- suitable for use exterior applications
Product characteristics
- completely pre-assembled
- protected against vandalism
- with brushed 2 mm stainless steel front plate
- Name plate can be changed from the front with-
- One-man commissioning
(5)
- call button with acknowledge tone (can be
- call button, light release or door release can be
- durable, homogeneous, white LED call
- Twilight controlled call push-button backlighting
- opening of door station only with enclosed
- break-proof flush-mounted call buttons
- Loudspeaker and microphone protected against
- Volume and microphone sensitivity settable
- Door release contact on 1 ... 10 s adjustable
- Door release without previous call adjustable in
- Safety rope as installation aid
Operation
Establish call (ringing)
TOP
„ Press the call push-button assigned to the
Switch-on lights
A call push-button is configured and labelled for
lighting control (light insert supplied).
(12)
„ Press the call push-button for lighting.
Label call push-button
„ Keep call push-button pressed on one side.
„ Position the screwdriver in the lever opening
„ Remove cover with name plate insert.
manufacturers
out any special tools
switched off) and tactile feedback
adjusted even without any function
push-button backlighting
with adjustable switch-on brightness level
opening tool
sabotage
single door systems
desired subscriber.
If configured, the call push-button activation is
confirmed by an acknowledge tone. Addressed
indoor stations are called.
If configured, the call push-button activation is
confirmed by an acknowledge tone. The light
contact of a line power supply is closed for the
set time.
On the opposite side, the lever opening (14) is
accessible for a screwdriver.
(13) and release the interlock (Figure 3).
6LE000689A - 06/2015
Advertisement

Summary of Contents for ELCOM REQ0 Y Series
- Page 1 „ Remove cover with name plate insert. (7) Adjustment button Upwards (8) 7-segment display (9) Selection button (10) Adjustment button downwards (11) Module bus connector (12) Connection terminal block Elcom Kommunikation GmbH - Gottfried-Leibniz-Str.1 - D-74172 Neckarsulm - www.elcom.de - 6LE000689A - 06/2015...
-
Page 2: Cleaning And Care
(16) Fixing element Do not use wire wool, wire brushes or any similar products for cleaning. This will prevent damage to the surface and accumulation of flash rust. Elcom Kommunikation GmbH - Gottfried-Leibniz-Str.1 - D-74172 Neckarsulm - www.elcom.de - 6LE000689A - 06/2015... - Page 3 Afterwards the display returns to the previous push-button addressing menu entry „ Confirm set value with The device applies the setting and returns to the previous menu entry. Elcom Kommunikation GmbH - Gottfried-Leibniz-Str.1 - D-74172 Neckarsulm - www.elcom.de - 6LE000689A - 06/2015...
- Page 4 Figure 13: Removing the cover strips „ Press up the call push-button module upper part in the bottom lever opening with the screw- driver and guide it forwards (Figure 14). Elcom Kommunikation GmbH - Gottfried-Leibniz-Str.1 - D-74172 Neckarsulm - www.elcom.de - 6LE000689A - 06/2015...
-
Page 5: Technical Data
„ Unlatch retaining brackets (22) of each module Storage/transport temperature -30 °C … +80 °C by carefully lifting up with a screwdriver (Figure 17). Connecting terminals for conductor diameter 0.5 ... 0.8 mm Elcom Kommunikation GmbH - Gottfried-Leibniz-Str.1 - D-74172 Neckarsulm - www.elcom.de - 6LE000689A - 06/2015...


Need help?
Do you have a question about the REQ0 Y Series and is the answer not in the manual?
Questions and answers