
Related Manuals for Spokey EVA 944165


Summary of Contents for Spokey EVA 944165
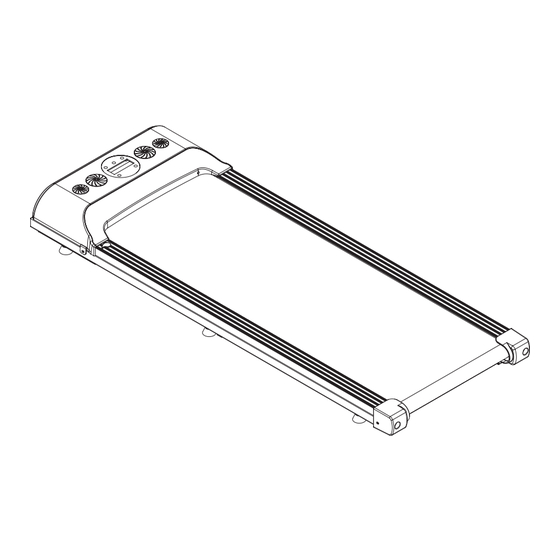
- Page 1 EVA 944165 5905339441652 Walking treadmill for home use Bieżnia do chodzenia do użytku domowego www.spokey.com...
-
Page 3: Contents Of The Package
MANUAL TRANSLATED FROM THE ORIGINAL CAUTION: Before starting any exercise program, consult with your physician or other health care professional. IMPORTANT: Read all instructions carefully before using this product. Retain this owner’s manual for the future reference. CONTENTS OF THE PACKAGE Before starting to use, check whether all the listed elements are included in the packaging. - Page 4 USER MANUAL INTRODUCTION: 9. Always unplug the power cord before removing Thank you for purchasing our product. To ensure any part of the treadmill cover. safety and proper use, read the instructions before 10. DANGER - Unplug the treadmill when cleaning using the product for the first time and keep it, as it or maintaining it.
- Page 5 These activities can be distracting, leading to loss GROUNDING OUTLET GROUNDING of balance and causing falls and injuries. 10. Do not throw any objects into any openings in the device. 11. Do not touch the moving parts of the device. 12.
-
Page 6: Technical Specifications
NOTE: If the instructions in this manual are not followed, we are not responsible for any problems or injuries. TECHNICAL SPECIFICATIONS Dimensions of the 1350 x 520 x 125 mm 1,0 - 6,0 km/h Speed range folded device Belt dimension 1120 x 400 mm Motor (power) 1,0 - 2,0 HP... -
Page 7: Moving The Treadmill
MOVING THE TREADMILL PREVENT INJURY WHEN LIFTING NOTE: OR ADJUSTING THE TREADMILL, MAKE SURE YOUR Before moving the treadmill, make sure GRIP IS FIRM AND STABLE. the power switch is in the OFF position and the power cord is unplugged from the electrical outlet. STORAGE The treadmill should be stored in a clean and dry place. -
Page 8: Exercise Instructions
REMOTE CONTROL FUNCTIONS ON/OFF BUTTON SPEED + SPEED - As shown in Figure B: First, place the 3V button bat- tery model “CR2032” into the battery box, and note that the „+” pole of the battery should face upwards; Insert the battery cover together with the battery into the remote control. - Page 9 Hamstring stretch: sitting on the floor, stra- ighten one leg. Bend your other leg and pull it towards your straight leg. Try touching your toes with your hands. Maintain the position for 10 - 15 seconds. Repeat the exercise three times on each leg (see Figure 2).
- Page 10 determine the pace of exercise and training inten- TRAINING ON THE TREADMILL sity. If you feel chest tightness or pain, irregular heartbeat, difficulty breathing, dizziness, or other WARM UP STAGE: discomfort during exercise, stop training imme- If you are over 35 years old or not in excellent health diately and consult your doctor or other health and this is your first physical activity, consult your care professional.
-
Page 11: Maintenance Instruction
MAINTENANCE INSTRUCTION • WARNING: All repairs should be carried out WARNING: by a specialist. Always unplug the treadmill before • Only use grease intended for this purpose! The set cleaning or maintenance. includes one bottle of silicone oil. • If you exercise on a treadmill for at least an hour a day, you should lubricate the treadmill once a CLEANING THE TREADMILL month, and if you use it less frequently, once every... -
Page 12: Belt Adjustment
BELT ADJUSTMENT If the belt is too loose, it will slip during use; If the belt is too tight, it will affect the engine perfor- mance and increase the abrasion of the roller and belt. The belt can be moved away from the board by approximately 5-6 mm, as long as the tension is appropriate. -
Page 13: Troubleshooting Guide
TROUBLESHOOTING GUIDE ERROR DESCRIPTION: SOLUTION METHOD: The display does not receive a signal. Lower control unit failure. The treadmill cannot be tur- ned on. E1 may appear on the display and an acoustic signal may sound. Solution: Control unit and display are disconnected. Check that all ribbon cables are connected and unda- maged. - Page 14 Protect against falling and dropping. Do not throw. Fragile - handle with care. Protect against moisture and getting wet. Do not use a crane. Home use treadmill - class HC The manual can be downloaded from www.spokey.pl EN | 14 user manual...
-
Page 15: Zawartość Opakowania
INSTRUKCJA TŁUMACZONA Z ORYGINAŁU UWAGA: Przed rozpoczęciem jakiegokolwiek programu ćwiczeń skonsultuj się ze swoim lekarzem lub innym pracownikiem służby zdrowia. WAŻNE: Przed użyciem tego produktu przeczytaj uważnie wszystkie zalecenia. Zachowaj niniejszą instrukcję obsługi do wykorzystania w przyszłości. ZAWARTOŚĆ OPAKOWANIA Przed rozpoczęciem użytkowania, sprawdź czy wszystkie wymienione elementy znajdują się w opakowaniu. Nr. -
Page 16: Instrukcja Obsługi
INSTRUKCJA OBSŁUGI WPROWADZENIE: opisane w tej instrukcji powinno być wykonywane Dziękujemy za zakup naszego produktu. W celu wyłącznie przez autoryzowany serwis. zapewnienia bezpieczeństwa i prawidłowego stoso- 9. Zawsze odłączaj przewód zasilający przed zdjęciem wania, przed pierwszym użyciem produktu zapoznaj jakiejkolwiek części osłony bieżni. 10. - Page 17 danie telewizji lub czytanie. Czynności te mogą roz- GNIAZDKO WTYCZKA praszać, prowadząc do utraty równowagi i powodu- UZIEMIAJĄCE UZIEMIAJĄCA jąc upadki i urazy. 10. Nie wrzucaj żadnych przedmiotów do otworów w urządzeniu. 11. Nie dotykaj ruchomych części urządzenia. 12. To urządzenie nie jest przeznaczone dla osób (w ...
-
Page 18: Specyfikacja Techniczna
UWAGA: Jeżeli zalecenia zawarte w niniejszej instrukcji nie będą przestrzegane, nie ponosimy odpo- wiedzialności za jakiekolwiek problemy lub obrażenia. SPECYFIKACJA TECHNICZNA Wymiary złożonego 1350 x 520 x 125 mm Zakres prędkości 1,0 - 6,0 km/h urządzenia Wymiar pasa 1120 x 400 mm Silnik (moc) 1,0 - 2,0 HP Częstotliwość... - Page 19 PRZENOSZENIE BIEŻNI ABY ZAPOBIEC JAKIMKOLWIEK OBRAŻENIOM UWAGA: W CZASIE PODNOSZENIA CZY USTAWIANIA BIEŻNI, Przed przeniesieniem bieżni, upewnij się, UPEWNIJ SIĘ ŻE TWÓJ CHWYT JEST PEWNY I STABILNY. że przełącznik zasilania znajduje się w pozycji OFF, a przewód zasilający jest odłączony od gniazda elektrycznego. PRZECHOWYWANIE Bieżnię...
-
Page 20: Wskazówki Dotyczące Ćwiczeń
wskazującym na zewnątrz. Zdejmij pokrywę baterii FUNKCJE PILOTA ZDALNEGO STEROWANIA z pilota, a następnie wyciągnij baterię. PRZYCISK WŁĄCZ/WYŁĄCZ PRĘDKOŚĆ + PRĘDKOŚĆ - Jak pokazano na rysunku B: Najpierw umieść baterię pastylkową 3V model „CR2032” w pojemniku na ba- terie i zwróć uwagę, aby biegun „+” baterii był skie- rowany do góry;... - Page 21 Rozciąganie mięśni trójgłowych łydek: siedząc na podłodze, wyprostuj jedną nogę. Drugą nogę zegnij i przyciągnij do wyprostowane nogi. Spróbuj rękami dotknąć palców u stóp. Utrzymuj pozycję przez 10 - 15 sekund. Powtórz ćwiczenie trzy razy na każdą nogę (zobacz rysunek 2). Rozciąganie ścięgna Achillesa: oprzyj się...
- Page 22 Intensywność biegu możesz kontrolować regulując TRENING NA BIEŻNI prędkość bieżni. FAZA ROZGRZEWKI: Przed rozpoczęciem treningu skonsultuj się Jeśli masz więcej niż 35 lat lub nie cieszysz się dosko- ze swoim lekarzem lub innym pracownikiem nałym zdrowiem i jest to Twoja pierwsza aktywność służby zdrowia.
-
Page 23: Wskazówki Dotyczące Konserwacji
WSKAZÓWKI DOTYCZĄCE KONSERWACJI • OSTRZEŻENIE: Każda naprawa powinna być prze- OSTRZEŻENIE: prowadzona przez specjalistę. Zawsze odłączaj bieżnię od prądu przed • Należy używać wyłącznie smaru przeznaczonego czyszczeniem lub konserwacją. do tego celu! W zestawie znajduje się jedna butelka olejku silikonowego. •... - Page 24 REGULACJA PASA Jeśli pas będzie zbyt luźny, podczas użytkowania będzie się ślizgał; jeśli pas będzie zbyt napięty, wpłynie to na wydajność silnika i zwiększy ściera- nie rolki oraz pasa. Pas można odsunąć od blatu na około 5-6 mm, o ile stopień naciągnięcia jest odpowiedni.
-
Page 25: Wykrywanie I Usuwanie Usterek
WYKRYWANIE I USUWANIE USTEREK BŁĄD: OPIS: METODA ROZWIĄZANIA: Wyświetlacz nie odbiera sygnału. Awaria dolnej jednostki sterującej. Nie można włączyć bieżni. Na wyświetlaczu może pojawić się komunikat E1 i rozlegnie sygnał dźwiękowy. Rozwiązanie: jednostka sterująca i wyświetlacz są odłą- czone. Sprawdź, czy wszystkie przewody taśmowe są... - Page 26 Nie śmieć! Wyrzuć opakowanie do kosza. Chronić przed upadkiem i upuszczeniem. Nie rzucać. Delikatne — obchodzić się ostrożnie. Chronić przed wilgocią i zamoknięciem. Nie używać dźwigu. Bieżnia do użytku domowego - klasa HC Instrukcję można pobrać ze strony www.spokey.pl PL |26 instrukcja obsługi...
- Page 28 Poland Spokey Sp. z o.o. al. Roździeńskiego 188C, 40-203 Katowice tel.: +48 32 317 20 00 www.spokey.pl / www.spokey.com biuro@spokey.pl / office@spokey.eu Distributor: Czech Republic Spokey s.r.o. Sadová 618, 738 01 Frýdek-Místek tel.: +420 731 157 912 www.spokey.cz spokey@spokey.cz...
Need help?
Do you have a question about the EVA 944165 and is the answer not in the manual?
Questions and answers