Zip HydroTap G4, HydroTap G4 Industrial IS, HydroTap G4 Industrial IT Manual
- User manual (560 pages) ,
- Installation instructions manual (40 pages) ,
- Installation and operating instructions manual (28 pages)
Advertisement
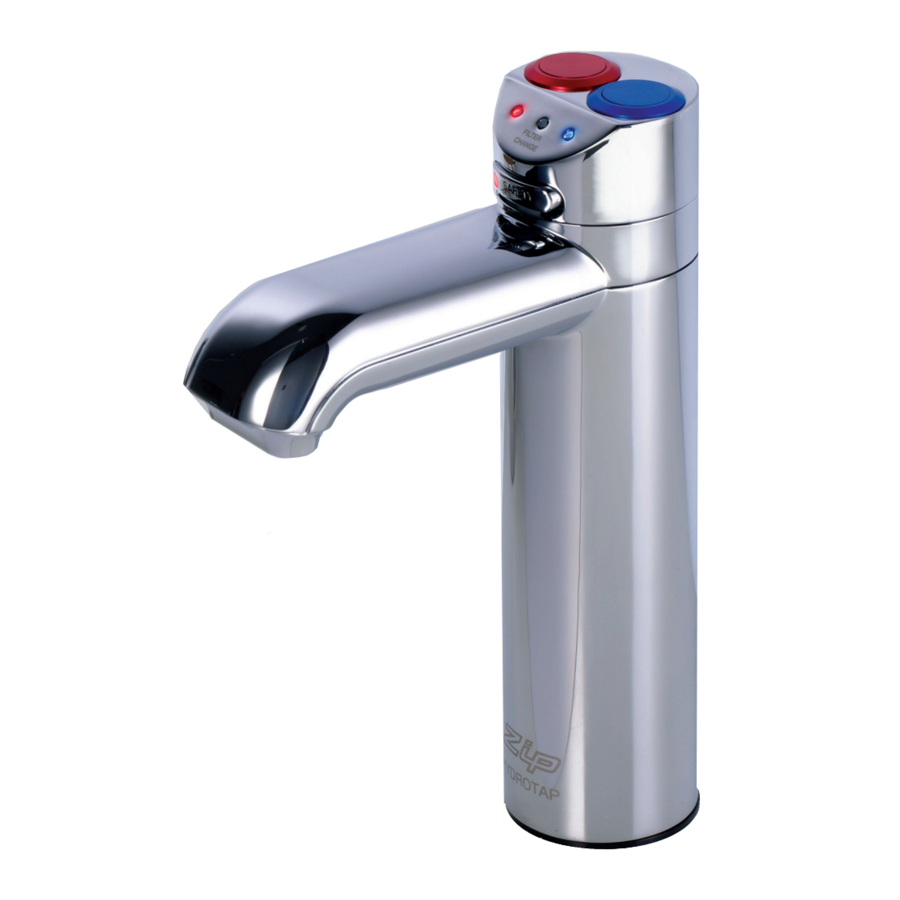
Control styles

IS 3 button
Press button controls

IT 2 button
Press button controls
Product functionality
Range of tap functions (by condition of water dispensed) Boiling and chilled (BC).
IS 3 button
Controls

Operation

Press for finger controlled dispense. (Safety lock off).
BC models, press to dispense

Safety operation

Press for finger controlled dispense. (Safety lock on).

BC models, press to dispense
Activate / deactivate the safety lock see section Safety.

Touch for 10 seconds to *activate / deactivate.
*Ensure allow safety setting change is activated on the touch screen, see section Safety
IT 2 button
Controls

Lights

 BOILING TEMP BOILING TEMP | |
| ON | Water at set temp |
| FLASHING SLOWLY | Water below set temp (wait) |
 CHILLED TEMP CHILLED TEMP | |
| ON | Water at set temp |
| FLASHING SLOWLY | Water above set temp (wait) |
 FILTER FILTER | |
| OFF | Filter within life span |
| FLASHING SLOWLY | Change filter (see sections Filter reset & Water filter change) |
 | SAFETY LOCK ON |
Operation

Press for finger controlled dispense. (Safety lock off).

BC models, press to dispense
Safety operation

Press for finger controlled dispense. (Safety lock on).

BC models, press to dispense
Activate / deactivate the safety lock see section Safety & below
Safety lock


Touch for 10 seconds to *activate / deactivate.
*Ensure allow safety setting change is activated on the touch screen, see section Safety
For hot isolation mode, see section Safety
LCD screen
Zip HydroTap G4 features a 'TOUCH' screen for easy setup and operation adjustment.

Other possible messages in status window:
| Status** | Information | Notes | |
| Safety OFF | Product is in normal operation mode | - | |
| Safety ON | Safety lock is activated | Refer to section Safety | |
| System Fault | Product has one or more system faults | Refer to section System info. | |
| Sleep Mode | System is in sleep mode. Neither boiling or chilled water are available | Refer to section Energy modes | |
| Change Filter | External/Internal filter needs to be replaced | Refer to section Installation | |
| System Off | System off in off mode. No boiling water or chilled water available | Refer to section Energy modes | |
| Hot isolation | Hot isolation has been activated. Boiling water or hot water is not available. | Refer to section Safety | |
| Main menu | Sub menu | Sub menu options | Section |
| Language | English / Deutsch | Set language | |
| Information |
|
| System information |
| Installation |
|
| Install |
| Service |
| Service | |
| Security |
|
| Security |
| Communication |
|
| Communication |
| Settings |
|
| Settings |
Set language

- Press the [MENU] button for main menu.
- Press the [Language] button.
- Select the language.
- Press [<=] button for the previous menu.
System information
In this section, you can find your product serial number, check system fault messages or view the filter logs of your product.

- Press the [MENU] button for main menu.
- Press the [Info] button to review product status information.

- Press [Product Info] to view the current product serial no.
- Press [<=] button for the previous menu or press [HOME] button to return to the home screen.

- Press [System Faults] or [Recent Fault Log] to check the fault information.
- Press [<=] button for the previous menu or press [HOME] button to return to the home screen.

- Press [Filter Log] to check the filter resets.
- Press [<=] button for the previous menu or press [HOME] button to return to the home screen.

- Press [Energy] to review the energy usage.
- Press [Reset] for a new period.
- Press [<=] button for the previous menu or press [HOME] button to return to the home screen.
Install

Once your Zip HydroTap G4 unit has been installed, Go to the install menu to configure the system settings for your product.
Sub menu
Filter flush.
Filter reset.
Boiling calibration.
Booster.
Lux sensor calibration.
Reset.
Filter flush
Have a bucket or similar container (not supplied) at the ready to hold a quantity of water that will be ejected while the filter flush mode is in operation. Open the filter access door on the front of the HydroTap G4 and the filter cartridge will be exposed. Located to the rear right hand side of the cartridge is a flush line, approx 600mm long and the flush line stop cock. Place the free end of the flush line into the bucket or container (not supplied).

- Press [MENU] button for main menu.
- Press the [Install] button. Turn the stop cock on.
- Press the [Filter Flush] button.
- Press [START] button to start filter flush. Once the filter flush is finished, turn the stop cock off first (ensure the cock is properly closed) then press [STOP] to end filter flush mode.

- Press [<=] button for the previous menu or press [HOME] button to return to the home screen.
- After initial installation, turning off the filter flush mode puts the HydroTap G4 into calibration mode. With subsequent filter changes, the system reverts to the main menu.

Note: Run at least 10 Litres of water through to flush the filter of any excess black carbon particles (this is normal). Once the filter flush has finished, press the [STOP] button to display the main menu
Filter reset
After replacing the filter, the counters should be reset.

- Press the [MENU] button for main menu.
- Press the [Install] button.
- Press the [Filter Reset] button.
- Press the [Reset Internal Filter] / [Reset External Filter] button.
- If you need to flush the filter follow the filter flush guide, see section Filter flush.
- To cancel the filter reset program press [HOME] or [<=].
- To set the filter life or edit filter usage, see section Filter.
Boiling calibration
(Boiling models only)

In general, boiling water units may vent steam from the tap spout. Take care to avoid personal injury whenever this occurs.
The Zip HydroTap G4 is equipped with a self-calibrating program. On start up, the controls take the system through a calibration process. Once this mode is completed the system reverts back to normal operation. If you would like to calibrate the system anytime after installed, please follow the steps below.

- Press the [MENU] button for main menu.
- Press the [Install] button.
- Press the [Boiling Calibration] button.
- In the next screen, press [Calibrate] if you want to start calibration.
Booster
(Boiling models only)
This function should only be used when a booster unit is installed.

- Press the [MENU] button for main menu.
- Press the [Install] button.
- Press the [Boost] button.
- In the next screen, press button
![]() to enable the booster, dispense boiling water for 30 seconds and check the (insulated) outlet hose from the booster is warm.
to enable the booster, dispense boiling water for 30 seconds and check the (insulated) outlet hose from the booster is warm.
 to enable the booster, dispense boiling water for 30 seconds and check the (insulated) outlet hose from the booster is warm.
 Refer to the Command Centre instructions if installing a Booster.
Note Failing to make the correct selection for [Boost] will affect product performance.
Lux sensor calibration
Note Lux sensor calibration is not applicable to the industrial tap range.
Reset/restart

- Press [MENU] for main menu.
- Press [Install].
- Press [Reset] to power down and restart the system. This is useful if you need to reset a password in section Security.
Service
Caution must be observed when changing any settings within the service menu as any changes may affect the normal operation of the unit. This can only be done by a Zip technician. Please contact your Zip service provider for further assistance.

- Press the [MENU] button for main menu.
- Press the [Service] button.
- A password is required to enter service menu.
Note In UK call a licensed electrician / plumber, or call Zip on 0345 6 005 005, for assistance, service, spare parts or enquiries.
Security
The Zip HydroTap G4 allows the appliance coordinator to set up a password to protect against users changing the preferred system settings.
To set a password
- Press the [MENU] button for main menu.
- Press the [Security] button.
- Press [Enable Password].

- Enter a 4 digit password.
- Press [Enter].

To change a password
- Press the [MENU] button for main menu.
- Press the [Security] button.
- Press [Change Password].
- Enter your old 4 digit password.

- Then enter your new 4 digit password & press [Enter]. (Once the password has been set you will need to enter the password to access the settings screen. If you have forgotten the password, please disconnect the power and restart your HydroTap G4).


Communication
- From the Home screen press [Menu].
- Press [Comm's]
- Enter your 4 digit password to access the WiFi set up.

- Follow the set up instructions in the ZipAssist installation manual.

To disable the WiFi setup navigate to the WiFi screen (as above).

- Press [WiFi setup].
- In the next screen Press [Disable]
- Press [<=] button for the previous menu.
Settings
- Press the [MENU] button for main menu.
- Press the [Settings] button.
- Enter your 4-digit password and press [Enter].

- Once the password has been set you will need to enter the password to access the settings screen. If you have forgotten the password see LCD screen operation - section Security.


In the settings mode you will be able to access the following:
Set Date/Time

- Press the [MENU] button.
- Press the [Setting] button.
- Enter your 4-digit password and press [Enter].
- Press the [Date/Time] button.
- Choose '12 HOUR' mode or '24 HOUR' mode by pressing the square button. The selected mode will be displayed in dark grey colour with a tick box on the right.
- Press [NEXT] button to set time.
Set temperature
Zip HydroTap G4s are designed to operate within 1ºC to 2ºC of set point for boiling water and between 3ºC to 5ºC for chilled drinking water. All boiling water units are self calibrating to 98ºC, which is the recommended setting. Hot and cold set temperature can be adjusted. Adjustments to the factory setting are not recommended, however may be made.

- Press the [MENU] button for main menu.
- Press the [Settings] button.
- Enter your 4-digit password and press [Enter].
- Press the [Temperature] button.
- To adjust the temperature, press the relevant temperature button and then use the up and down arrows.
Filter
Zip HydroTap G4 allows the user to adjust filter life and edit filter usage.
Note
The filter life may be set as a function of litres used, or in months from the filter change. When the first of these functions is reached (i.e. litres or months expired), the filter warning light will be illuminated on the tap.
Either of these functions may be disabled (see below).
To edit the filter life
Press the [MENU] button for main menu.
- Press the [Settings] button.
- Enter your 4-digit password and press [Enter].
- Press the [Filter] button.
- Press the [Int Filter Life] / [Ext Filter Life] button.

- To change filter life, first select (Litres) or (Months) then press the up or down arrows to edit filter life.


Note
Filter life increases in 500 litres increments to a maximum of 10000 litres. Factory set at 6000 litres.
To edit the filter usage
This function is to reset the filter change display after a filter has reached the end of its life (see section Filter maintenance).
- Press the [MENU] button for main menu.
- Press the [Settings] button.
- Enter your 4-digit password and press [Enter].
- Press the [Filter] button.
- Press the [Edit Int Filter] / [Edit Ext Filter] button.
- To change filter usage, first select (Litres) or (Days), then use the up and down arrows to edit the filter usage.


Energy modes
This mode allows the HydroTap G4 to go into energy saving mode. There are two options available: sleep mode and on/off mode.
In sleep mode the unit will go to "Sleep" after a 2hr period of inactivity. The boiling water will gradually drop to either 68°C or room temp, as shown in the table below and the chilled water will be ON or OFF.
To activate sleep mode
- Press the [MENU] button for main menu.
- Press the [Settings] button.
- Enter your 4-digit password and press [Enter].
- Press the [Energy Modes] button.
- Press the [Sleep Modes] button then in the next screen, use the up and down arrow to select sleep mode from the 3 options in the table below.


| Sleep Mode* | Light level | Time delay | State | Boiler | Chiller |
| 2 Hours > 68°C | N/A | 2 Hr | Sleep | 68°C | ON |
| 2 Hours > OFF | N/A | 2 Hr | OFF | OFF | OFF |
| Disable | N/A | N/A | ON | ON | ON |
Note
Lux sensor options are not applicable to the industrial tap range.
Note
Any attempt, during off mode, to dispense water, will bring the unit out of sleep mode. The unit will return to sleep mode after 2 hours of non use. Please allow sufficient time for the water to reach the set temperature after disabling the sleep mode.

On/Off mode menu
On/Off mode allows the user to turn the unit on or off at a specific time.
To activate On/Off mode
- Press the [MENU] button for main menu. Press the [Settings] button. Enter your 4-digit password and press [Enter].
- Press the [Energy Modes] button.
- Press the [On / Off Mode Menu] button.
- Select 'Individual Set' if you wish to allocate a specific time for each day.
- Select 'Group Set 1' if you wish to allocate the same time to all seven days.
- Select 'Group Set 2' if you wish to allocate the same time to the five working days (Mon-Fri) and additional times for weekends (Sat-Sun).

Individual set screen
This screen allows you to select the individual days for programming. Only one On/Off period is allowed for each day.

Group set screen
- Select 'Group Set 1' / 'Group Set 2' then press [NEXT].
- Press button
![]() to enable and set the On/Off time by scrolling with the up & down arrow keys.
to enable and set the On/Off time by scrolling with the up & down arrow keys.
 to enable and set the On/Off time by scrolling with the up & down arrow keys.
Note
Any attempt, during off mode, to dispense water, will bring the unit out of energy mode. The system will revert to the energy mode setting after 30 minutes of non use.
Safety

To allow the safety setting to be changed using the touch screen
- Press the [MENU] button for main menu.
- Press the [Settings] button.
- Enter your 4-digit password and press [Enter].
- Press the [Safety] button.
- Press button
![]() to allow the safety setting to be changed.
to allow the safety setting to be changed.
To enable or disable the safety lock on the tap
Press button B to select 'Enable' / 'Disable'.
Hot isolation (IT models only)
- To allow safety changes, select 'YES' on the safety settings screen.
- To activate, press button
![]() to disable safety lock feature. Then press button
to disable safety lock feature. Then press button ![]() to enable hot isolation. To de-activate, press button
to enable hot isolation. To de-activate, press button ![]() to disable hot isolation. Then press button
to disable hot isolation. Then press button ![]() to enable / disable the safety lock.
to enable / disable the safety lock. - To operate the tap when in hot isolation mode, touch the safety lock three times, around once per second, the LEDs will flash. This operation confirms de-activation and will remain de-activated for 30 seconds. The hot isolation can be immediately reset, by touching the safety lock three times again, or after 30 seconds of non use the unit will revert to hot isolation active mode.
 to disable safety lock feature. Then press button
  to enable hot isolation. To de-activate, press button
 Note
Upon completion all the settings can be protected by dis-allowing any setting changes by selecting 'NO' on the safety change settings screen.
Dispense times
The ability to change the maximum dispensing time for both the hot and cold water has been introduced. The default settings for the maximum dispensing times is 15 seconds. The operator may change both the hot and cold dispensing times from 5 to 15 seconds, in increments of 1 second.

- Press the [MENU] button for main menu.
- Press the [Settings] button.
- Enter your 4-digit password and press [Enter].
- Press the [Dispense Time] button.
- Select the option to change and scroll using the up and down arrow keys.
Filter maintenance
Water filter
The HydroTap G4 notifies when filter replacement is due. If you notice one of the following, you will need to change the filter.
- The white change filter light will flash and remain so until reset.
- The filter percentage will show 0% on the home screen.
Note
Depending on local water quality conditions and usage, the filter may require changing anywhere from 1,000 Ltrs to 10,000 Ltrs. You may also need to replace the filter if you notice unpleasant odours or tastes.
Some water may drip from the filter head (socket) during replacement. Keep a towel handy to dry up any drips.
Water filter change
- Open the door of the Command Centre.
- Relieve system pressure via the filter flush stop cock, a quick open and close will do. Use the bucket to catch the discharge.
- Grasp filter cartridge, rotate the cartridge a quarter turn clockwise, then gently pull down.
![]()
![]()
Water will drip as the cartridge is removed.- Do not tilt the cartridge as water may spill from it if tilted.
- Unpack replacement cartridge and remove sanitary cap, write today's date where shown on the label.
- Avoid touching the filter o-rings and filter opening as this may cause bacterial contamination of the cartridge.
- Moisten the o-rings with water, align the front cartridge label to the left (as shown in the "insert filter" diagram below), and push the new cartridge up into the filter head.
![]()
- Turn the cartridge a quarter turn anticlockwise until it comes to a complete stop and locks, with the front label facing forward.
- Initiate the filter flush programme by scrolling through the menu screen (see section Filter flush).
- When completed, clean up and dispose of old cartridge and packaging.
- Close the door to secure the appliance.
- Adjust the filter settings (see section Filter) litres and days.


If the HydroTap G4 is switched off for a long period of time (e.g. more than a weekend), run water through the chilled water outlet for at least 5 minutes before consumption.
Air inlet filter change
The HydroTap G4 air filter is conveniently located on the outside of the condenser. The filter screen is a sliding fit in the plastic housing on the left hands side of the Command Centre. The screen may be removed for cleaning by sliding it forward. This needs to be inspected at least quarterly, cleaned and replaced if damaged.

Note
For best performance the unit should only be operated with a clean air filter screen, correctly fitted in place. Maintain at least a 50mm air gap in front of the screen at all times. Take care not to allow cloths or other soft materials to accidentally block the air inlet.
Home menu icons
 | Safety switch is enabled. The HydroTap G4 will not dispense any Boiling water. See tap sections for safety lock operation. |
 | Safety switch is disabled. Boiling water may be dispensed. See tap sections for safety lock operation. |
 | Sleep mode is active. There are 3 sleep mode options which display this icon on the home screen. See section Energy modes for details. |
 | Heater is in off mode. When this icon is displayed, no power is being supplied to the heating element. See section Energy modes for Energy Mode options. |
 | Boiling temperature The temperature of the water in the boiling tank will be displayed. This is optimises at 98°C but may be adjusted between 68°C- 98°C. See section Set temperature for hot set point adjustment. |
 | Chilled temperature The temperature of the water in the chilled tank will be displayed, dependant upon model purchased. |
 | Filter use This icon displays the filter usage remaining from 100% (new filter) to 0% (end of life). When it reaches 0% the filter warning light on the tap head will flash slowly. The filter life can be adjusted by litres and by days used. |
Cleaning
Do not use strong, corrosive spray or abrasive cleaners / chemicals.
Clean the casing, tapware, external filter, piping and all other fittings with a soft cloth and mild soap and water.
Do not spray water over the tap as it may damage the low-voltage electronics.
Should any of the plastic fittings accidentally come into contact with cleaners with a PH level less than 4, hypochlorite, hydrogen peroxide or any other aggressive chemical the affected component must be replaced immediately.
Command Centre units must never be located near, or cleaned with water jets. Avoid using airborne pesticides near the Command Centre.
Zip Water UK
14 Bertie Ward Way, Dereham, Norfolk NR19 1TE
0345 6 005 005 sales@zipindustries.co.uk
www.zipwater.co.uk
Documents / Resources
References
Download manual
Here you can download full pdf version of manual, it may contain additional safety instructions, warranty information, FCC rules, etc.
Download Zip HydroTap G4, HydroTap G4 Industrial IS, HydroTap G4 Industrial IT Manual
Advertisement


Need help?
Do you have a question about the HydroTap G4 and is the answer not in the manual?
Questions and answers