OPT7 AURA UNDERGLOW - RV CLASS B/B+ FIT Manual
- Installation manual (6 pages) ,
- Installation manual (4 pages)
Advertisement

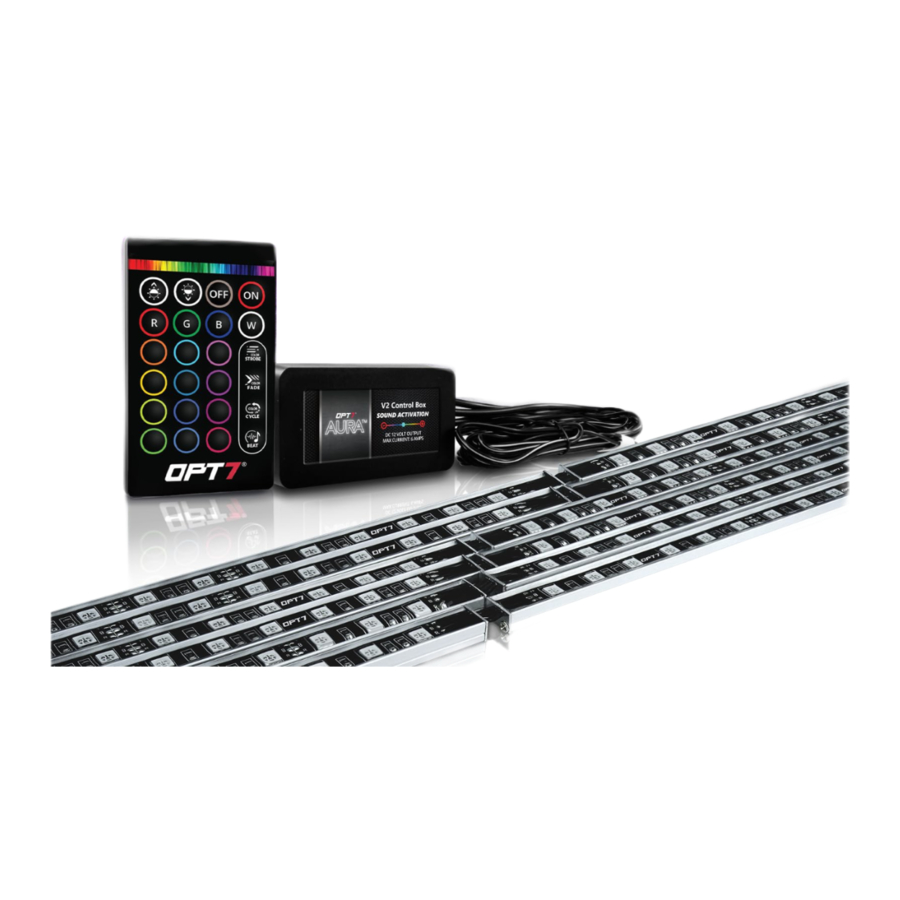
COMPONENTS

INSTALLATION
STEP 1
Inspect kit to ensure all contents was included.
STEP 2
Decide where to locate the control box and ensure wiring has enough length for light bars to be installed in desired location.

The control box must be installed inside the vehicle as it is not waterproof. Avoid installation areas of the engine bay + heated surfaces.

The spare tire is usually located at the bottom of the car. Please pay attention to the position of the spare tire of your vehicle after installing the rear light bar. Please find a suitable place to install the rear light bar to prevent the spare tire from being used normally.

EXAMPLES

HOW TO CONNECT POWER HARNESS TO YOUR VEHICLE

- Connect the Red wire (+) of power harness to the vehicle battery's positive terminal.
- Connect the Black wire (-) of power harness to the vehicle battery's negative terminal or an unpainted area on your vehicle's frame.

Please ensure the Underglow LED Bars / Control Box / Wirings are all mounted away from heated surfaces exceeding from 85°C or 185°F.
BE SURE TO CONFIRM THE CORRECT DIRECTION OF THE ARROW!! TO AVOID PRODUCT DAMAGE DUE TO INCORRECT INSTALLATION.

STEP 3
Secure Control box in desired location with Velcro or zipties.

* CONTROL BOX NOT WATERPROOF
Ensure the control box is safely and securely hidden from exposing elements of moisture.
STEP 4
Secure the light bars using the zip ties to tie all the wiring away from the moving components.

AUX WIRING FOR A DOOR/DOME LIGHT
Please scan to see a detail instruction on Door Assist Sync or go to https://wintis.ladesk.com/549690-AURA-Door-AssistAUX-Installation-Guide

Using the included E-Z Remote, select your desired color or pattern.

OPTION METHOOD
To power the kit using an switched 10 AMP fuse tap method, you may purchase the AURA Universal Replacement Fuse Tap Adapter Set & Power Wire on our website. (*Not included; sold separately.)
Feel free to contact us using the link below for product inquires or installation support.
OPT7 SUPPORT TEAM: https://www.opt-7.com/pages/customer-support

- Connecting to more than 10 AMP will override the kit and cause early failure, ensure it is 10 AMP or less!!
- Please ensure the Underglow LED Bars / Control Box / Wirings are all mounted away from heated surfaces exceeding from 85C or 185F.
 DISCLAIMER
OPT7 Lighting is not liable for damages or personal injuries while installing this product. The Installation Guide is intended as assistance to reduce setup time. OPT7 Lighting assumes no responsibility for improper installation. If you are unfamiliar with your vehicle or inexperienced with aftermarket upgrades, please seek professional assistance.
OPT7 recommends installation for safety and guidance. Modified installations or installation recommendations not specified by OPT7 Lighting will void product warranty.
Documents / Resources
References
![wintis.ladesk.com]() AURA Door Assist/AUX Installation Guide
AURA Door Assist/AUX Installation Guide![www.opt-7.com]() Contact Us | Support Request Page - OPT-7.com – OPT7 Lighting Inc
Contact Us | Support Request Page - OPT-7.com – OPT7 Lighting Inc
Download manual
Here you can download full pdf version of manual, it may contain additional safety instructions, warranty information, FCC rules, etc.
Advertisement


Need help?
Do you have a question about the AURA UNDERGLOW and is the answer not in the manual?
Questions and answers