
Subscribe to Our Youtube Channel
Related Manuals for Mount-It! MI-1246F


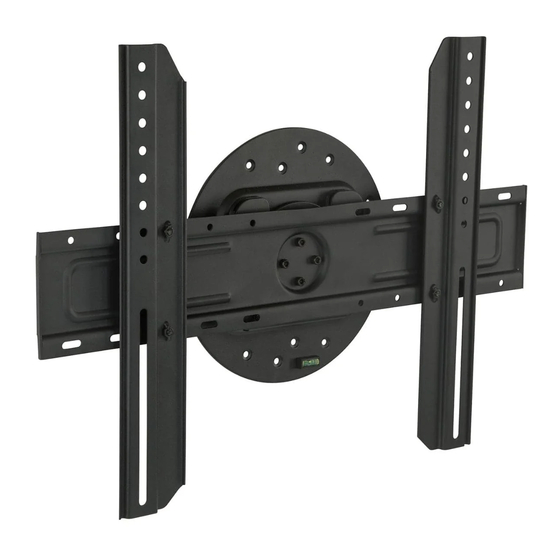
Summary of Contents for Mount-It! MI-1246F
- Page 1 MI-1246F Scan this QR code for product information, videos, and assembly assistance. ROTATING TV WALL MOUNT...
- Page 2 Mount and Accessories Thank you for choosing Mount-It Mount-It! Right VESA Arm Left VESA Arm TV Bracket Mount-It! Wall Plate VESA HARDWARE WALL MOUNTING HARDWARE Check carefully to make sure there are no missing or defective parts. Some hardware provided may not be used.
- Page 3 Step 1a Step 1b Wood Stud Mounting Option Concrete/Brick Mounting Option • With a stud finder locate the stud and center the Wall Plate (#A) on the stud at the desired height. Using • Using a bubble level to ensure straightness hold the Wall Plate (#A) to the desired location on the wall a bubble level to ensure straightness mark the center of the 4mounting holes indicated here with a pencil.
- Page 4 Step 2 Step 2b VESA Arm Placement Attaching the VESA Arms to the TV (With Spacers) • The VESA Arms (#C and D) will be oriented as shown in the diagram with Right VESA Arm (#C) on • Select the appropriate size mounting bolt (#M-C,M-D) for your display’s mounting holes and verify the the right hand side, and Left VESA Arm (#D) on the left hand side on the back of the TV.
-
Page 5: Step 5 Rotating The Screen
Step 4 Step 5 Hang the TV on the Wall Rotating the Screen • Hang the TV onto the mounted wall bracket and ensure that it is fully seated into the pocket of the wall • The screen can be rotated by pulling down or lifting one corner of the screen until the mount begins to plate by giving the TV bracket a firm downward tug. - Page 6 Step 6 Removing the Screen from the Wall • To remove the TV from the wall, rotate the screen slightly so that the latch is released between the 90° increments, then lift the screen straight up and away from the wall.
Need help?
Do you have a question about the MI-1246F and is the answer not in the manual?
Questions and answers