Advertisement
Quick Links
Advertisement

Related Manuals for Mount-It! MI-4461


Summary of Contents for Mount-It! MI-4461
- Page 1 LCD/LED/Plasma Wall Mount Manual...
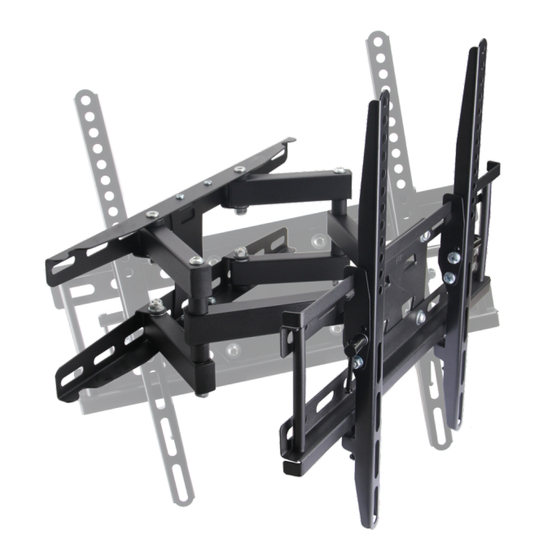
- Page 2 Product Overview: The mount ar cula ng arm mount features a flat profile of 2.75" from the wall to the back of your display and a full extension of 13.5" from the wall as well as +15 degrees of lt. The mount is constructed with 100% High Grade Steel providing a sturdy and reliable mount.
- Page 3 Description Quantity Part Removable Bubble Level 6x50mm Lag Bolts S10x50mm Concrete Anchors 8mm Washer 6x13 Plastic Spacer 8x15mm Plastic Spacer 5mm/6mm Washer M4 12mm Screw M5 12mm Screw M6 12mm Screw M8 12mm Screw M5 30mm Screw M6 30mm Screw M8 30mm Screw Mount TV Arm Brackets...
- Page 4 *Hole Pattern Coverage/Supported VESA Patterns: Up To 15.75" Horizontal by 15.75" Vertical or VESA 400x400mm Unit Weight: Net: 8.8LBS Gross: 9.5LBS Unit Materials: Arms, Wall Plate and TV Plate: 100% High Grade Steel Tilt Range: 0 - 15° 130° Total Swivel Rotation: Fully Extended: 13.5"...
- Page 5 Installa on instruc on: Note: Please read all installa on instruc ons carefully before installa on. For standard wood stud installa on please start at Sec on 1: Wood Stud Installa on. For Concrete/Mortar installa ons please refer to Sec on 2: Concrete/Masonry Installa on. Sec on 1: Wood Stud Installa on: 1.Loca ng a Stud: First you will need to locate the stud in the wall you wish to mount your TV to.
- Page 6 3. A aching The Mount to Your Wall: Once the four holes are pre-drilled, affix the wall plate to the wall with all four lag bolts and washers into the wall. The included plas c anchors DO NOT need to be used for wood stud installa on.
- Page 7 6. A aching Your Display to The Wall Plate: A er installing the wall plate and tes ng to ensure that it is a ached securely and a aching the arms to the back of the display, it is me to a ach your display to the wall. This step may require two people, a ach the hook to the top lip of the wall plate.
Need help?
Do you have a question about the MI-4461 and is the answer not in the manual?
Questions and answers