Table of Contents
Advertisement
Quick Links
Advertisement
Table of Contents

Related Manuals for Mount-It! MI-395


Summary of Contents for Mount-It! MI-395
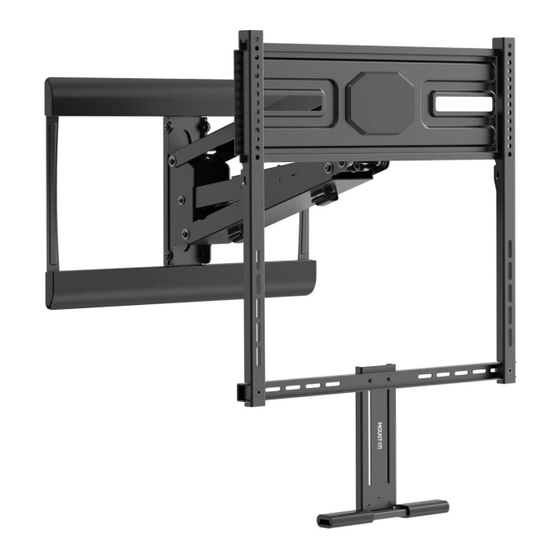
- Page 1 MI-395 FIREPLACE TV MOUNT...
- Page 2 PACKAGE CONTENTS Thank you for choosing Mount-It Mount-It! Mount-It! WALL PLATE SPRING ARM TV BRACKET VESA BRACKETS CROSS BAR PULL HANDLE DECORATIVE COVER PLASTIC PLATE RATCHET RATCHET WALL BUBBLE ALLEN WRENCH WRENCH WRENCH TEMPLATE LEVEL VESA HARDWARE WALL MOUNTING HARDWARE Check carefully to make sure there are no missing or defective parts.
- Page 3 Step 1 Step 3 Installing The Spring Arm To The Wallplate Positioning The Mount Over The Fireplace Attach the Spring Arm (B) and Wall Plate (A) with bolts (4 x I) as shown, using the Allen Wrench (Q) to The height of the mount is dependent on the depth of the mantel to ensure the spring arm clears the tighten securely.
- Page 4 Step 5 Option 2. Concrete/brick Installation Attaching The Decorative Plates Using the bubble level (V) to ensure straightness, hold the Wall Template (U) to the wall at the required mounting height determined by step 3. Identify the 4 outermost holes (located at each corner) and mark Install Decorative Cover (G) as shown over the top and bottom of the wall bracket, covering the now the center of the holes with a pencil.
- Page 5 Step 7 Step 9 Attaching the pull handle Adjusting the spring arm tension a. Attach the Cross Bar (E) to the VESA Brackets (D) using Washer (P) and Bolt (O). Tighten securely The tension of the spring arm must match the weight of the TV for easy height adjustment of the TV. using Allen Wrench (Q).
- Page 6 Step 10 Step 11 Cable Management Positioning The TV a. Remove the Allen key(previously inserted to lock the spring arm in step 8) to adjust the height of the TV to the desired position ” To prevent injury NEVER put your hands or any object into the mount's structure.
Need help?
Do you have a question about the MI-395 and is the answer not in the manual?
Questions and answers