Table of Contents
Advertisement
Quick Links
User instructions
with motorised height adjustment
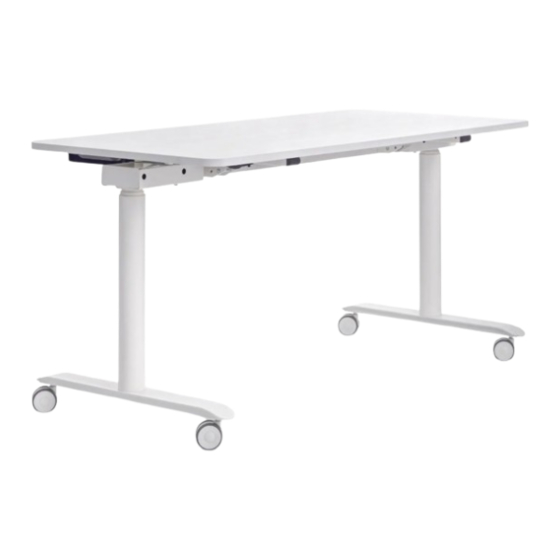
Desk
se:lab tableboard
English
Please read these instructions carefully before putting the system into operation, and keep
them in a safe place for future reference.
Do not dispose of the product with household waste.
Disposal takes place at designated collection and return points.
WEEE Reg No. DE 15163456
29
Advertisement
Table of Contents
Troubleshooting

Related Manuals for Sedus se lab tableboard


Summary of Contents for Sedus se lab tableboard
- Page 1 User instructions with motorised height adjustment Desk se:lab tableboard English Please read these instructions carefully before putting the system into operation, and keep them in a safe place for future reference. Do not dispose of the product with household waste. Disposal takes place at designated collection and return points.
-
Page 2: Table Of Contents
Table of contents Foreword ............................. 31 1.1 Intended use ............................ 32 1.2 Features and function ......................... 32 1.3 Target group and prior knowledge ......................32 1.4 Symbols used for safety notes ......................32 1.5 Safety notes ............................. 33 1.5.1 General safety notes ........................ 33 1.5.2 General safety instructions for the JCP35PA rechargeable battery .......... -
Page 3: Foreword
The desk must be assembled exactly as described in these instructions. Modifications to the desk or improper use can impair its safety, function and service life! These user instructions are provided for all desks from the se:lab tableboard range, so some figures may differ from your model due to different designs or types. Sedus Systems GmbH... -
Page 4: Intended Use
This desk may only be used as an office desk in a professional setting. The desk may not be modified. This desk must be assembled, put into operation and subjected to a function check by qualified personnel. The use of this desk for any purpose other than that mentioned above is only permitted with the approval of Sedus Systems GmbH. -
Page 5: Safety Notes
Note: This safety note indicates important information which users must observe to ensure safe use of the desk. Danger: This safety note indicates a potential crushing hazard, which can occur in exceptional circumstances. Failure to observe these notes may result in health implications, life-threatening injuries and property damage. - Page 6 Danger: This device may be used by children aged 8 or above and by persons with physical, sensory or mental impairments or a lack of experience and knowledge if they are supervised or instructed in the safe use of the device and understand the potential danger resulting from such use.
-
Page 7: General Safety Instructions For The Jcp35Pa Rechargeable Battery
Danger: If an error occurs, the desktop may start to move every time the height adjustment is triggered before the safety shutdown is engaged. Note that there is a potential crushing hazard in this situation. Danger: During all reset processes (Section 6), the integrated collision protection is not active. Note that there is a potential crushing hazard in this situation. -
Page 8: Before Putting The Desk Into Operation
1.5.4 Before putting the desk into operation • Ensure that the desk was assembled in compliance with these instructions. • Establish plug connections from the operating unit and the side elements to the motor control unit. • Check whether the desk’s operating voltage corresponds to the local power supply (see nameplate on the control unit, standard = 230 V) and plug in the control unit’s mains cable. -
Page 9: Warranty
Warranty We provide a 24-month warranty for these desks (except for the rechargeable battery). We provide a 6-month warranty for the rechargeable battery. The warranty covers all material and production defects and applies as of the production date (see the type plate). The warranty only applies under the condition that the desks were assembled and used appropriately and correctly within the scope of the described parameters, that maintenance was performed correctly, and that repairs were only carried out by authorised service personnel. -
Page 10: Rechargeable Battery
If the writing has already been there for a long time, it may be necessary to wipe over the writing several times and with slightly increased pressure! Therefore, it is recommended to wipe off the writing daily, or at least once a week! Caution: Aggressive cleaning agents, such as acetone, ethyl butyl acetate or disinfectants can damage the whiteboard surface if left on for a long time! Please avoid such cleaning agents or... -
Page 11: Charging The Battery
Charging the battery Charging a fully discharged battery with the supplied charger takes approx. 5–6 hours. Recharging the battery is only possible if the battery charge level is less than 75%. To charge the battery, it must be pulled out of its holder underneath the desktop (see Fig. 4.2 a) and charged at a socket using the charger supplied with this desk. -
Page 12: Using The Usb Power Supply
Using the USB power supply There is a type A USB charging socket at the front of the battery. which can be used to charge small devices (e.g. smartphone). Assembly Only the screws provided may be used for the assembly of your desk. Caution: The wrong screws can cause damage to your desk. -
Page 13: Assembly Instructions Desk With Power Supply
Assembly instructions desk with power supply 12 x 12–14 Nm... - Page 14 Assembly instructions desk with power supply...
- Page 15 Assembly instructions desk with power supply...
-
Page 16: Assembly Instructions Desk With Battery
Assembly instructions desk with battery 12 x KW5 5 12-14 Nm... - Page 17 Assembly instructions desk with battery...
- Page 18 Assembly instructions desk with battery...
-
Page 19: Putting The Desk Into Operation
Putting the desk into operation Putting the desk into operation comprises all actions that are necessary for an electrically height-adjustable desk to become height-adjustable by means of the motor control unit. The condition for putting the desk into operation is: •... -
Page 20: Procedure For Putting The Desk Into Operation
5.3.3 Procedure for putting the desk into operation Caution! For tables with power supply unit: Do not plug in the power supply cable / mains cable until all other electrical connections have been made! (All motors and the handset are connected to the motor control box). -
Page 21: Electrical Connections (General)
5.3.5 Electrical connections (general) Electrical wiring must be secured with brackets at least every 150 mm (see Fig. 5.3.5). Fig. 5.3.5 5.3.6 Connecting the power supply cable / mains cable Attention: Before you plug in the power supply cable, check again •... -
Page 22: Initialisation/Reset
Initialisation/reset Following assembly, or when the desk has been disconnected from the rechargeable battery for an extended period of time, or if a fault has occurred on the desk, or if the connection between the drives and the motor control unit was interrupted, the desk’s motor control unit has to be initialised. If the motor control unit expects a new initialisation, only lowering of the desk at reduced speed is possible. -
Page 23: Tilting The Desktop Up And Down
Tilting the desktop up and down Fig. 7.2 a Fig. 7.2 b Before tilting the tabletop, please make sure that no connected cable can be crushed or torn out of its connection socket! To bring the desktop into the vertical position, pull the release bar below the front edge of the desktop towards the edge of the desktop (see Fig. - Page 24 The slim handset is equipped with a capacitive sensor field. To operate the handset, it is necessary to touch the sensor surfaces in the area of the printed arrows. If the table does Table only moves when the keys are not move after touching the handset.
-
Page 25: Error Messages On The Controls' Display (Optional And Only For Service Staff)
Error messages on the controls’ display (optional and only for service staff) Display Causes Rectification motor control unit’s operating Wait for the cooling-down period to end, see temperature was exceeded Section 1.5.4 To unlock, you need a handset with a memory button: Press and hold the memory button for at least 8 seconds. -
Page 26: Technical Data
Technical Data For the dimensions and weight, see the delivery note. Supply voltage power supply unit 100-240 V / 50-60 Hz, 1,6 A Output voltage power supply unit 29 V DC, 2 A Optionaly: JCP35PA battery supply voltage 29–40 V / DC, max. 0.5 A JCP35PA battery output voltage 24 V DC, max. -
Page 27: Ec Declaration Of Compilance
EC Declaration of Compilance... -
Page 28: Adressen / Addresses
Internet: www.sedus.it Internet: www.sedus.ch Internet: www.sedus.com France Nederland España Sedus Sarl Sedus Stoll B.V. Sedus Stoll S. A. 10 rue Auber Platinastraat 33 Parque Empresarial San Fernando, F-75009 Paris NL-2718 SZ Zoetermeer Avenida Castilla, 2 Tel.: +33 1.53.77.20.50 Tel.: +31 79 363 1590 Edificio Italia, 1a planta Fax: +33 1.53.77.20.51...
Need help?
Do you have a question about the se lab tableboard and is the answer not in the manual?
Questions and answers