Table of Contents
Advertisement
Quick Links
Advertisement
Table of Contents
Troubleshooting

Related Manuals for HP FAX 1250 Series


Summary of Contents for HP FAX 1250 Series
- Page 1 HP 1250 Fax series User Guide...
- Page 2 HP Fax 1250 series User Guide...
-
Page 3: Safety Information
Read and understand all instructions in the Setup Guide. Notice Use only a grounded electrical The only warranties for HP products outlet when connecting the and services are set forth in the device to a power source. If you express warranty statements... -
Page 4: Table Of Contents
Contents HP Fax overview....................3 The HP Fax at a glance..................3 Control panel features....................4 Menu overview.......................5 Text and symbols....................6 Find more information..................9 Sources of information....................9 Finish setting up the HP Fax................11 Set your preferences....................11 Fax setup......................12 Load originals and load paper................35 Load originals.......................35... - Page 5 Copy specifications....................90 Fax specifications....................90 Physical specifications..................91 Power specifications.....................91 Environmental specifications................91 Memory specifications..................91 Environmental product stewardship program............91 Regulatory notices....................93 Declaration of conformity (European Economic Area)..........96 HP Fax 1250 series declaration of conformity............97 Index...........................99 HP Fax 1250 series...
-
Page 6: Hp Fax Overview
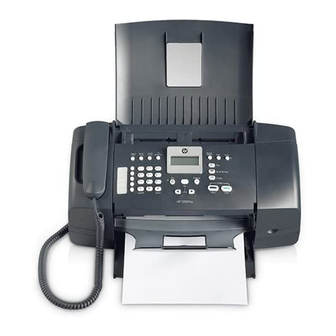
HP Fax overview You can quickly and easily accomplish tasks such as making a copy or sending a fax from the HP Fax. This section describes the HP Fax hardware features and control panel functions. ● The HP Fax at a glance ●... -
Page 7: Control Panel Features
Darker: Lightens or darkens black-and-white faxes being sent. Resolution: Adjusts the resolution for black-and-white faxes being sent. On light: Indicates, when lighted, that the HP Fax is on. The light blinks when the HP Fax is performing a task. HP Fax 1250 series... -
Page 8: Menu Overview
HP Fax is on. The light blinks while performing a job. When the HP Fax is off, a minimal amount of power is still supplied to the device. To completely disconnect the power supply to the HP Fax, turn the device off, and then unplug the power cord. -
Page 9: Text And Symbols
Speed Dial Setup Basic Fax Setup Advanced Fax Setup Tools Preferences Text and symbols You can use the control panel keypad to enter text and symbols when you set up speed dial entries and the fax header information. HP Fax 1250 series... -
Page 10: Available Symbols For Dialing Fax Numbers
When the HP Fax dials the number, it will interpret the symbol and respond accordingly. For example, if you enter a dash in the fax number, the HP Fax will pause before dialing the remainder of the number. A pause is useful if you need to access an outside line before dialing the fax number. - Page 11 When auto-dialing, W causes the Speed dial numbers and fax or HP Fax to wait for a dial tone before phone numbers continuing to dial. During auto-dialing, the R functions Speed dial numbers and fax or...
-
Page 12: Find More Information
Make sure you follow the steps in the Setup Guide in order. Note To take full advantage of the features on the HP Fax, you might need to perform additional setup or set additional preferences, described in the User Guide you are reading. For... - Page 13 Chapter 2 HP Fax 1250 series...
-
Page 14: Finish Setting Up The Hp Fax
The language and country/region setting determines which language the HP Fax uses to show messages on the display. Usually, you set the language and country/region when you first set up the HP Fax. However, you can change the setting at any time by using the following procedure. -
Page 15: Fax Setup
Chapter 3 If the HP Fax loses power for more than 72 hours, you might need to reset the date and time. To set the date and time Press Setup. Press 5, and then press 3. This selects Tools and then selects Date and Time. - Page 16 Set up the HP Fax for faxing Before you begin setting up the HP Fax for faxing, determine which kind of phone system your country/region uses. The instructions for setting up the HP Fax for faxing differ depending on whether you have a serial- or parallel-type phone system.
- Page 17 To determine the best way to set up the HP Fax in your home or office, first read through the questions in this section and record your answers. Next, refer to the table in the following section and choose the recommended setup case based on your answers.
- Page 18 Select your fax setup case Now that you have answered all the questions about the equipment and services that share the phone line with the HP Fax, you are ready to choose the best setup case for your home or office.
- Page 19 1 only.) PBX or ISDN system Case C: Set up the Case C: Set up the HP Fax with a PBX phone HP Fax with a PBX (You answered Yes to system or an ISDN line phone system or an ISDN question 2 only.)
- Page 20 Back view of the HP Fax 1 Telephone wall jack 2 Use the phone cord supplied in the box with the HP Fax to connect to the "1-LINE" port To set up the HP Fax with a separate fax line...
- Page 21 1 Telephone wall jack 2 DSL filter and cord supplied by your DSL provider 3 Use the phone cord supplied in the box with the HP Fax to connect to the "1-LINE" port To set up the HP Fax with DSL Obtain a DSL filter from your DSL provider.
- Page 22 If you are using either a PBX or an ISDN converter/terminal adaptor, connect the HP Fax to the port that is designated for fax and phone use. Also, make sure that the terminal adapter is set to the correct switch type for your country/region, if possible.
- Page 23 Back view of the HP Fax 1 Telephone wall jack 2 Use the phone cord supplied in the box with the HP Fax to connect to the "1-LINE" port To set up the HP Fax with a distinctive ring service...
- Page 24 Back view of the HP Fax 1 Telephone wall jack 2 Use the phone cord supplied in the box with the HP Fax to connect to the "1-LINE" port 3 Telephone (optional) To set up the HP Fax with a shared voice/fax line...
- Page 25 Back view of the HP Fax 1 Telephone wall jack 2 Use the phone cord supplied in the box with the HP Fax to connect to the "1-LINE" port To set up the HP Fax with voice mail Using the phone cord supplied in the box with the HP Fax, connect one end to your telephone wall jack, then connect the other end to the port labeled 1-LINE on the back of the HP Fax.
- Page 26 Back view of the HP Fax 1 Telephone wall jack 2 Use the phone cord supplied in the box with the HP Fax to connect to the "1-LINE" port 3 Computer with modem To set up the HP Fax with a computer dial-up modem Remove the white plug from the port labeled 2-EXT on the back of the HP Fax.
- Page 27 2 "IN" phone port on your computer 3 "OUT" phone port on your computer 4 Telephone 5 Computer with modem 6 Use the phone cord supplied in the box with the HP Fax to connect to the "1-LINE" port HP Fax 1250 series...
- Page 28 Tel. Run a fax test. If you pick up the phone before the HP Fax answers the call and hear fax tones from a sending fax machine, you will need to answer the fax call manually. Case I: Shared voice/fax line with answering machine...
- Page 29 4 Telephone (optional) 5 Answering machine 6 Use the phone cord supplied in the box with the HP Fax to connect to the "1-LINE" port To set up the HP Fax with a shared voice/fax line with answering machine Remove the white plug from the port labeled 2-EXT on the back of the HP Fax.
- Page 30 "listening" for fax tones. If incoming fax tones are detected, the HP Fax will emit fax reception tones and receive the fax; if there are no fax tones, the HP Fax stops monitoring the line and your answering machine can record a voice message.
- Page 31 6 Computer with modem 7 Use the phone cord supplied in the box with the HP Fax to connect to the "1-LINE" port To set up the HP Fax on the same phone line as a computer with two phone ports Remove the white plug from the port labeled 2-EXT on the back of the HP Fax.
- Page 32 "listening" for fax tones. If incoming fax tones are detected, the HP Fax will emit fax reception tones and receive the fax; if there are no fax tones, the HP Fax stops monitoring the line and your answering machine can record a voice message.
- Page 33 5 Computer with modem 6 Use the phone cord supplied in the box with the HP Fax to connect to the "1-LINE" port To set up the HP Fax on the same phone line as a computer with two phone ports Remove the white plug from the port labeled 2-EXT on the back of the HP Fax.
- Page 34 Change settings on the HP Fax to receive faxes In order to receive faxes successfully, you need to change some settings on the HP Fax. If you are unsure which setting to choose for a specific fax option, see the fax setup information in the previous sections.
- Page 35 In this setup, the answering machine will answer the call and the HP Fax will monitor the line. If the HP Fax detects fax tones, the HP Fax will receive the fax. If the call is a voice call, the answering machine will record the incoming message.
- Page 36 Test your fax setup You can test your fax setup to check the status of the HP Fax and to make sure it is set up properly for faxing. Perform this test after you have completed setting up the HP Fax for faxing. The test does the following: ●...
- Page 37 Chapter 3 HP Fax 1250 series...
-
Page 38: Load Originals And Load Paper
Load originals and load paper You can load many different types and sizes of paper in the HP Fax, including letter or A4 paper, photo paper, transparencies, and envelopes. By default, the HP Fax is set to detect the size and type of paper you load in the input tray automatically and then adjust its settings to generate the highest quality output for that paper. -
Page 39: Choose Papers For Copying
Choose papers for copying You can use different types and sizes of paper in the HP Fax. Review the following recommendations to get the best copying quality. Whenever you change paper types or sizes, remember to change those settings. -
Page 40: Load Full-Size Paper
● Greeting card paper. Load full-size paper You can load many types of letter, A4, or legal paper into the input tray of the HP Fax. To load full-size paper Slide the paper-width guide to its outermost position. Tap a stack of paper on a flat surface to align the edges, and then check the paper for the following: –... -
Page 41: Avoid Paper Jams
To load HP Premium Inkjet Transparency Film or HP Premium Plus Inkjet Transparency Film ➔ Insert the film so that the white transparency strip (with arrows and the HP logo) is on top and is going into the input tray first. Note The HP Fax cannot automatically detect the paper size or paper type. - Page 42 ● Do not force paper too far forward in the input tray. ● Use paper types that are recommended for the HP Fax. User Guide...
- Page 43 Chapter 4 HP Fax 1250 series...
-
Page 44: Use The Fax Features
Use the fax features You can use the HP Fax to send and receive faxes, including color faxes. You can set up speed dial entries to send faxes quickly and easily to frequently used numbers. From the control panel, you can also set a number of fax options, such as resolution and the contrast between lightness/darkness on the faxes you send. - Page 45 HP Fax. Note Do not use the keypad on the control panel of the HP Fax. You must use the keypad on your phone to dial the recipient's number. If the recipient answers the telephone, you can engage in a conversation before sending your fax.
-
Page 46: Send A Fax Using Monitor Dialing
Load your originals print side down and top first in the center of the document feeder tray. Pick up the handset that is attached to the HP Fax and dial the number by using the keypad on the control panel. -
Page 47: Receive A Fax
This is referred to as manual faxing. Use the instructions in this section to receive a manual fax. Note If the HP Fax has a handset, you can pick it up to talk or listen for fax tones. To receive a fax manually Make sure the HP Fax is turned on and you have paper loaded in the input tray. -
Page 48: Reprint Received Faxes From Memory
HP Fax from printing the faxes (for example, if the HP Fax runs out of paper). The HP Fax will continue to store incoming faxes as long as there is memory available. (If the memory becomes full, the HP Fax will stop answering incoming fax calls.) When the error condition is resolved, the... -
Page 49: Forward Faxes To Another Number
7. Forward faxes to another number You can set up the HP Fax to forward your faxes to another fax number. If you receive a color fax, the HP Fax forwards the fax in black and white. HP recommends that you verify the number you are forwarding to is a working fax line. -
Page 50: Block Junk Fax Numbers
HP Fax does not print faxes received from those numbers in the future. When an incoming fax call is received, the HP Fax compares the number to the list of junk fax numbers you set up to determine if the call should be blocked. - Page 51 If you want to remove another number from the list of junk fax numbers, press to select Yes, and then repeat step 4 for each number you want to block. – If you are done, press to select No. HP Fax 1250 series...
-
Page 52: Print Reports
HP Fax. By default, the HP Fax is set to print a report only if there is a problem with sending or receiving a fax. A confirmation message that indicates whether a fax was successfully sent appears briefly on the display after each transaction. -
Page 53: Stop Faxing
HP Fax does not stop faxing, press Cancel again. The HP Fax prints any pages it has already started printing and then cancels the remainder of the fax. This can take a few moments. To cancel a number you are dialing ➔... -
Page 54: Use The Copy Features
Change the copy settings You can customize the copy settings of the HP Fax to handle nearly any task. When you change copy settings, the changes are for the current copy job only. You must set the changes as defaults for the settings to apply to all future copy jobs. -
Page 55: Stop Copying
Make any needed changes to the settings in the Copy Menu. Press Copy repeatedly until Set New Defaults appears. Press until appears and then press OK. Stop copying To stop copying ➔ Press Cancel on the control panel. HP Fax 1250 series... -
Page 56: Maintain The Hp Fax
Maintain the HP Fax The HP Fax requires little maintenance. Sometimes you might want to clean the glass strip inside the automatic document feeder to ensure that your copies remain clear. You will also need to replace, align, or clean your print cartridges from time to time. -
Page 57: Clean The White Strip
The liquid might seep under the glass and damage the device. Close the automatic document feeder cover. Plug in the power cord, and then turn on the HP Fax. Caution Make sure you close the automatic document feeder cover before loading any paper or originals. -
Page 58: Clean The Exterior
Use a soft cloth or slightly moistened sponge to wipe dust, smudges, and stains off the case. The interior of the HP Fax does not require cleaning. Keep fluids away from the control panel and the interior of the HP Fax. -
Page 59: Print A Self-Test Report
Work with print cartridges To ensure the best print quality from the HP Fax, you will need to perform some simple maintenance procedures and, when prompted by a message on the display, replace the print cartridges. -
Page 60: Handle The Print Cartridges
To order print cartridges for the HP Fax, go to www.hp.com/learn/suresupply. If prompted, choose your country/region, follow the prompts to select your product, and then click one of the shopping links on the page. - Page 61 Open the print cartridge door. The print carriage should move to the far right side of the HP Fax. If the print carriage does not move to the right side, close the door. Then, turn the HP Fax off, and then on again.
- Page 62 1 Copper-colored contacts 2 Plastic tape with pink pull tab (must be removed before installing) 3 Ink nozzles under tape Caution Do not touch the copper-colored contacts or ink nozzles. Touching these parts can result in clogs, ink failure, and bad electrical connections.
-
Page 63: Align The Print Cartridges
11. Load the print cartridge alignment sheet print side down and top first in the center of the document feeder tray, and then press OK. The HP Fax aligns the print cartridges. Recycle or discard the print cartridge alignment sheet. -
Page 64: Clean The Print Cartridges
Load the print cartridge alignment sheet print side down and top first in the center of the document feeder tray, and then press OK. The HP Fax aligns the print cartridges. Recycle or discard the print cartridge alignment sheet. Clean the print cartridges... - Page 65 Chapter 7 The print carriage moves to the far right side of the HP Fax. Wait until the print carriage is idle and silent, and then unplug the power cord from the back of the HP Fax. Note Depending how long the HP Fax is unplugged, the date and time might be erased.
-
Page 66: Order Supplies
Order other supplies Order paper, or other media To order HP papers and other supplies, such as HP Premium Photo Papers or HP All- in-One Paper, go to www.hp.com/learn/suresupply. If prompted, choose your country/ region, follow the prompts to select your product, and then click one of the shopping links on the page. - Page 67 Chapter 8 HP Fax 1250 series...
-
Page 68: Troubleshooting Information
HP Fax. See Find more information. If you are unable to solve the problem using this guide or the HP website, call HP Support using the number for your country/region. For more information, see warranty and support. - Page 69 ● If you plugged the HP Fax into a switched outlet, make sure the switch is on. If it is switched to on but still does not work, then there might be a problem with the power outlet.
- Page 70 The wrong measurements are showing in menus on the display Solution You might have selected the incorrect country/region when setting up the HP Fax. The country/region you select determines the paper sizes shown on the display. To change the country/region, you must reset the language settings. You can...
- Page 71 If you are having faxing problems, you can print a fax test report to check the status of the HP Fax. The test will fail if the HP Fax is not set up properly for faxing. Perform this test after you have completed setting up the HP Fax for faxing. For more...
- Page 72 Try connecting a working phone and phone cord to the telephone wall jack that you are using for the HP Fax and check for a dial tone. If you do not hear a dial tone, contact your telephone company and have them check the line.
- Page 73 Back view of the HP Fax 1 Telephone wall jack 2 Use the phone cord supplied in the box with the HP Fax to connect to the "1- LINE" port After you have connected the phone cord to the port labeled 1-LINE, run the fax test again to make sure it passes and the HP Fax is ready for faxing.
- Page 74 1 Telephone wall jack 2 Use the phone cord supplied in the box with the HP Fax to connect to the "1- LINE" port If the supplied phone cord is not long enough, you can extend it. For...
- Page 75 ● Make sure you connect the HP Fax to an analog phone line or you will not be able to send or receive faxes. To check if your phone line is digital, connect a regular analog phone to the line and listen for a dial tone.
- Page 76 HP Fax directly to the telephone wall jack. ● Make sure you use the phone cord that came with the HP Fax. If you do not use the supplied phone cord to connect from the telephone wall jack to the HP Fax, you might not be able to send or receive faxes.
- Page 77 Check to see if another process has caused an error. Check the display or your computer for an error message providing information about the problem and how to solve it. If there is an error, the HP Fax will not send or receive a fax until the error condition is resolved.
- Page 78 HP Fax. To send a fax manually, the telephone must be connected directly to the port labeled 2-EXT on the HP Fax, as shown below. 1 Telephone wall jack 2 Use the phone cord supplied in the box with the HP Fax to connect to the "1- LINE" port 3 Telephone ●...
- Page 79 If you have a computer dial-up modem on the same phone line with the HP Fax, check to make sure that the software that came with your modem is not set to receive faxes automatically. Modems that are set up to receive faxes automatically take over the phone line to receive all incoming faxes, which prevents the HP Fax from receiving fax calls.
- Page 80 To find out if other equipment is causing a problem, disconnect everything except the HP Fax from the phone line, and then try to receive a fax. If you can receive faxes successfully without the other equipment, one or more pieces of the other equipment is causing problems;...
- Page 81 HP Fax will monitor the line. If the HP Fax detects fax tones, the HP Fax will receive the fax. If the call is a voice call, the answering machine will record the incoming message. For more information, Set the number of rings before answering.
-
Page 82: Operational Troubleshooting
1 Telephone wall jack 2 Coupler 3 Use the phone cord supplied in the box with the HP Fax to connect to the "1- LINE" port Operational troubleshooting This section contains information on paper and print cartridge troubleshooting. If you have Internet access, you can get help from the HP website at www.hp.com/... - Page 83 Chapter 9 Caution Trying to clear a paper jam from the front of the HP Fax can damage the print mechanism. Always access and clear paper jams through the rear door. Gently pull the paper out of the rollers. Caution...
- Page 84 separator pad after extensive use, or if you copy handwritten originals or originals that are heavy with ink. ● If the automatic document feeder does not pick up any pages at all, the rollers inside the automatic document feeder need to be cleaned. ●...
- Page 85 If you are still experiencing problems with printing, determine which print cartridge is experiencing the problem and replace it. For more information, see: ● Replace the print cartridges ● Print a self-test report ● Clean the print cartridges ● Clean the print cartridge contacts HP Fax 1250 series...
-
Page 86: Hp Warranty And Support
If a support service number is not listed for your country/region, contact your nearest authorized HP dealer for help. Warranty To obtain HP repair service, you must first contact an HP service office or an HP Customer Support Center for basic troubleshooting. See Before you call HP customer support for steps to take before calling Customer Support. -
Page 87: Warranty Information
3. HP's limited warranty covers only those defects that arise as a result of normal use of the product, and does not cover any other problems, including those that arise as a result of: a. -
Page 88: Get Support And Other Information From The Internet
HP Fax. Note If the HP Fax is not turning on, you can view the serial number by looking at the sticker on the rear side. The serial number is the 10-character code in the upper left corner of the sticker. -
Page 89: Call In North America During Warranty
Before you return the HP Fax, make sure you remove your print cartridges. To remove print cartridges before shipment Turn on the HP Fax and wait until the print carriage is idle and silent. If the HP Fax will not turn on, skip this step and go to step 2. -
Page 90: Pack The Hp Fax
To remove the control panel faceplate Press the button to turn off the HP Fax. Unplug the power cord, and then disconnect it from the HP Fax. Do not return the power cord with the HP Fax. Remove the control panel faceplate as follows: Place your hands on each side of the control panel faceplate. - Page 91 – A copy of the sales slip or other proof of purchase to establish the warranty coverage period. – Your name, address, and a phone number where you can be reached during the day. HP Fax 1250 series...
-
Page 92: Technical Information
Technical information The technical specifications and international regulatory information for the HP Fax are provided in this section. Paper specifications This section contains information about paper tray capacities and paper sizes. Paper tray capacities Type Paper weight Input tray Output tray Document †... -
Page 93: Copy Specifications
Automatic busy redial up to five times (varies by model). ● Automatic no-answer redial one time (varies by model). ● Confirmation and activity reports. ● CCITT/ITU Group 3 fax with Error Correction Mode. ● 33.6 Kbps transmission. ● Ring detect with automatic fax/answering machine switching. HP Fax 1250 series... -
Page 94: Physical Specifications
● Non-operating (Storage) temperature range: -40º to 60º C (-40º to 140º F) In the presence of high electromagnetic fields it is possible the output from the HP Fax might be slightly distorted. If you have Internet access, you can get acoustic information from the HP website. Go to www.hp.com/support. -
Page 95: Energy Consumption
Customers without Internet access should contact their local HP Customer Care Center. Hardware recycling program HP offers an increasing number of product return and recycling programs in many countries, as well as partnering with some of the largest electronic recycling centers throughout the world. HP also conserves resources by refurbishing and reselling some of its most popular products. -
Page 96: Regulatory Notices
For regulatory identification purposes, your product is assigned a Regulatory Model Number. The Regulatory Model Number for your product is SDGOB-0604-01. This regulatory number should not be confused with the marketing name (HP Fax 1250 series, etc.) or product number (Q8095A, etc.). -
Page 97: Fcc Statement
La terminaison d’une interface peut se composer de n’importe quelle combinaison d’appareils, à condition que le total des numéros REN ne dépasse pas 5. Basé sur les résultats de tests FCC Partie 68, le numéro REN de ce produit est 0.1B. HP Fax 1250 series... - Page 98 This equipment meets the applicable Industry Canada Terminal Equipment Technical Specifications. This is confirmed by the registration number. The abbreviation IC before the registration number signifies that registration was performed based on a Declaration of Conformity indicating that Industry Canada technical specifications were met. It does not imply that Industry Canada approved the equipment.
-
Page 99: Declaration Of Conformity (European Economic Area)
(PSTN). Please connect the TAE N telephone connector plug, provided with the HP Fax into the wall socket (TAE 6) code N. This HP fax product can be used as a single device and/or in combination (in serial connection) with other approved terminal equipment. -
Page 100: Hp Fax 1250 Series Declaration Of Conformity
HP Fax 1250 series declaration of conformity User Guide... - Page 101 Chapter 11 HP Fax 1250 series...
-
Page 102: Index
2-wire phone cord 73, 78 specifications 89 connection problems 4-wire phone cord 73, 78 environment fax 73, 75, 76, 77 Environmental product HP All-in-One does not stewardship program 91 turn on 65 environmental A4 paper, load 37 control panel specifications 91 ADSL. - Page 103 5 order lines 53 paper 63 streaks 53 labels print cartridges 63 specifications 89 Setup Guide 63 language, set 11 software 63 left arrow 5 receive fax User Guide 63 legal paper auto answer mode 31 HP Fax 1250 series...
- Page 104 85 weight 91 troubleshoot problems 73 serial phone system 13 telephone recycle service ID 85 receive fax 44 HP All-in-One 92 settings send fax 42 print cartridges 92 country/region 11 telephone line, answer ring Redial/Pause 4 date and time 11...
- Page 105 HP Fax 1250 series...
- Page 106 Print Cartridge Selection Numbers Black 27 / 21 Tri-color © 2006 Hewlett-Packard Development Company, L.P. Electronic Edition www.hp.com *Q8096-90101* *Q8096-90101* Q8096-90101...
Need help?
Do you have a question about the FAX 1250 Series and is the answer not in the manual?
Questions and answers