Grizzly G1140 Owner's Manual
6" x 80" edge sander
Hide thumbs
Also See for G1140:
- Manual insert (32 pages) ,
- Parts list (2 pages) ,
- Owner's manual (52 pages)
Table of Contents
Advertisement
Quick Links
Advertisement
Table of Contents

Subscribe to Our Youtube Channel
Related Manuals for Grizzly G1140


Summary of Contents for Grizzly G1140
- Page 1 OWNER'S MANuAL Model G1140 Model G1531 Copyright © july, 2008 By grizzly industrial, inC. WARNiNG: NO pORtiON Of thiS MANuAL MAy bE REpRODucED iN ANy ShApE OR fORM WithOut thE WRittEN AppROvAL Of GRizzLy iNDuStRiAL, iNc. #Bl10851 printed in taiWan...
-
Page 3: Table Of Contents
............30 Functional overview ........2 Cleaning ............30 identification ........... 3 unpainted Cast iron ........30 g1140 data sheet ......... 4 lubrication ........... 31 g1531 data shet ........... 6 SEctiON 7: SERvicE ........32 SEctiON 1: SAfEty ........8 troubleshooting ........... -
Page 4: Introduction
OFF. are complete. Visit our site often to check for the latest updates to this manual! the platen on the Model g1140 can be adjusted for horizontal face sanding. after the table is tilted contact info... -
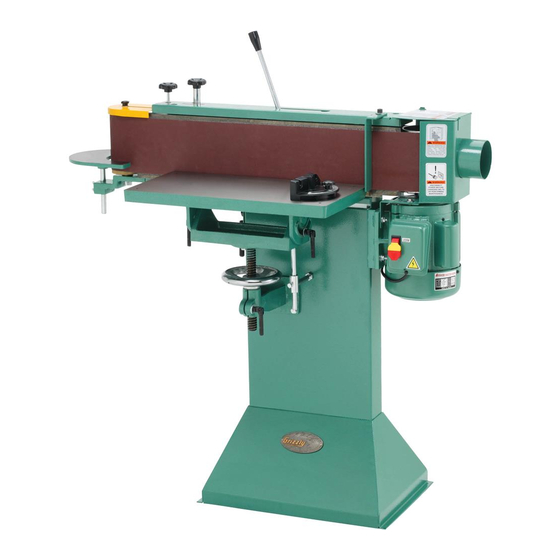
Page 5: Identification
O. leadscrew Bracket lock handle p. leadscrew Bracket Q. table height handwheel R. table Bracket S. Work table end table u. table tilt lock Bolt (Model g1140) v. table tilt lock handle (Model g1140) g1140/g1531 6" X 80" edge sander... -
Page 6: G1140 Data Sheet
MACHINE DATA SHEET Customer Service #: (570) 546-9663 · To Order Call: (800) 523-4777 · Fax #: (800) 438-5901 MODEL G1140 6" X 80" FLOOR MODEL EDGE SANDER Product Dimensions: Weight................................240 lbs. Length/Width/Height..........................47 x 20 x 49 in. - Page 7 The information contained herein is deemed accurate as of 7/14/2008 and represents our most recent product specifications. Model G1140 PAGE 2 OF 2 Due to our ongoing improvement efforts, this information may not accurately describe items previously purchased. g1140/g1531 6" X 80" edge sander...
-
Page 8: G1531 Data Shet
The information contained herein is deemed accurate as of 7/14/2008 and represents our most recent product specifications. Model G1531 PAGE 1 OF 2 Due to our ongoing improvement efforts, this information may not accurately describe items previously purchased. g1140/g1531 6" X 80" edge sander... - Page 9 The information contained herein is deemed accurate as of 7/14/2008 and represents our most recent product specifications. Model G1531 PAGE 2 OF 2 Due to our ongoing improvement efforts, this information may not accurately describe items previously purchased. g1140/g1531 6" X 80" edge sander...
-
Page 10: Section 1: Safety
Safety instructions for Machinery g1140/g1531 6" X 80" edge sander... - Page 11 6" X 80" edge sander...
-
Page 12: Additional Safety For Edge Sanders
-10- g1140/g1531 6" X 80" edge sander... -
Page 13: Section 2: Circuit Requirements
6-15 plug & outlet electrician! for 220V NOTICE the Model G1140/G1531 is prewired for figure 1. recommended plug types. 220v. if you plan to operate the machine at 110v, the motor must be rewired (see Extension cords pages 41 &... -
Page 14: Section 3: Setup
Otherwise, filing a freight claim can be difficult. When you are completely satisfied with the condi- tion of your shipment, inventory the contents. -12- g1140/g1531 6" X 80" edge sander... -
Page 15: Inventory
........... 1 idler roller guard ........1 K. Miter gauge ..........1 L. lock Knob "-18 ........1 M. Back stop (g1140 only) ......1 N. lock handles "-16 x 1" ......3 O. Feet ............4 horizontal Brace ......... 1 Q. -
Page 16: Hardware Recognition Chart
Recognition chart -14- g1140/g1531 6" X 80" edge sander... -
Page 17: Clean Up
Lock entrances to the shop or disable start switch or power connection to prevent unsupervised use. figure 2. Cleaner/degreaser available from grizzly. -15- g1140/g1531 6" X 80" edge sander... -
Page 18: Assembly
6. installing sanding belt. tension lever to line up with the thread in the yoke. -16- g1140/g1531 6" X 80" edge sander... - Page 19 1" away from the main roller and fasten to the sander using the two pre-installed "-18 hex bolts and flat washers, as shown in figure 8. figure 8. dust hood installed. -17- g1140/g1531 6" X 80" edge sander...
-
Page 20: Test Run & Tracking Belt
Connect the machine to the power source. even spaces on Both top and Bottom figure 10. example of sanding belt centered on main roller (dust hood removed for clarity). -18- g1140/g1531 6" X 80" edge sander... - Page 21 Call tech support for result in severe personal injury. help. -19- g1140/g1531 6" X 80" edge sander...
-
Page 22: Installing Work Table
(figure 13), but do not tighten the hex nut (figure 16). thread the handwheel down yet; the brace will require further adjustment until it touches the top of the leadscrew later. bracket. -20- g1140/g1531 6" X 80" edge sander... - Page 23 17. Checking table bracket for parallelism. figure 19. Work table installed. Note: You can use an " or " hex wrench as a gauge to set the distance between the table and sanding belt. -21- g1140/g1531 6" X 80" edge sander...
-
Page 24: Installing End Table
Make sure tables do not come in contact sanding the ends of workpieces at least 8'' with rotating sanding belt. long. do not use it as a back stop. figure 22. Miter gauge installed. -22- g1140/g1531 6" X 80" edge sander... -
Page 25: Back Stop (G1140)
Consult an expert or purchase a good dust collection "how-to" book. to connect a dust collection hose: DO NOt attempt to operate the Model G1140 without this back stop in place and properly Fit the 4" dust hose over the dust port, and secure adjusted as described above. -
Page 26: Section 4: Operations
Regardless of the content in this section, Grizzly industrial will not be held liable for accidents caused by lack of train- ing. figure 27. trunnion lock handles. - Page 27 30. Belt tracking and tension controls. figure 28. table height controls. platen tilt (Model G1140 Only): to tilt the End table: to adjust the end table height, loosen platen, loosen the table tilt lock handle and lock...
-
Page 28: Contour Sanding
Serious personal figure 33. typical edge sanding method. injury may result. figure 35. example of contour sanding method. figure 34. typical end grain sanding method using miter gauge. -26- g1140/g1531 6" X 80" edge sander... -
Page 29: Horizontal Sanding (G1140)
36. the Model g1140/g1531 uses a 6" x 80" sanding Note: Apply even hand pressure while mov- belt. ing the workpiece back and forth for even belt wear. -
Page 30: Replacing Belt
Model g1140/g1531 with perform the belt pre-tracking precedure (refer a 6" x 80" sanding belt. grizzly carries a wide vari- to pre-tracking belt on page 18). ety of aluminum oxide sanding belts for your edge sander (refer to Accessories on page 29). -
Page 31: Section 5: Accessories
" x 1 " x 8 ") G1512—Large: (2 " x 2" x 12") figure 42. recommended products for protect- ing unpainted cast iron/steel part on machinery. figure 40. pro-stik Belt Cleaners. ® -29- g1140/g1531 6" X 80" edge sander... -
Page 32: Section 6: Maintenance
• Clean/vacuum dust buildup off motor. cleaning Cleaning the Model g1140/g1531 is relatively easy. Vacuum excess wood chips and sawdust, and wipe off the remaining dust with a dry cloth. if any resin has built up, use a resin dissolving cleaner to remove it. -
Page 33: Lubrication
44. tension shaft lubrication locations. figure 43. locations to lubricate leadscrew. -31- g1140/g1531 6" X 80" edge sander... -
Page 34: Section 7: Service
4. Motor fan is rubbing on fan cover. 4. replace dented fan cover; replace loose/damaged fan. 5. Motor bearings are at fault. 5. test by rotating shaft; rotational grinding/loose shaft requires bearing replacement. -32- g1140/g1531 6" X 80" edge sander... - Page 35 1. shaft spring tension incorrect. 35). 2. lubricate tension shaft (see page 2. tension shaft needs lubrication. 31). 3. idler roller-to-platen relationship incor- 3. adjust idler roller-to-platen relation- ship (see page 39). rect. -33- g1140/g1531 6" X 80" edge sander...
-
Page 36: Adjusting Tensioner
Steps 3 & 4 and examine the belt tension, and remove the idler roller the effect of the tension adjustment on your guard and back stop (Model g1140). belt. repeat the adjustment procedure if nec- essary. open the dust hood, then remove the sand- ing belt from the sander. -
Page 37: Resetting Tensioner Spring Tension
Move the tension lever to the tension posi- Note: It may be necessary to slightly adjust tion. the tension nut to make the table fit. -35- g1140/g1531 6" X 80" edge sander... -
Page 38: Parallel Belt Tracking
⁄ " away from the top of the platen, then you do not need to adjust your belt for parallel tracking. -36- g1140/g1531 6" X 80" edge sander... -
Page 39: Platen-Roller Adjustments
First, check the platen-to-roller relationship to see if you need to make the adjustments. tools Needed straightedge ............1 Wrench 8mm ............. 1 Wrench 12mm ........... 1 Wrench 14mm ........... 1 -37- g1140/g1531 6" X 80" edge sander... - Page 40 52. example of checking bottom of roller at both the top and bottom are more platen-to-roller. or less than ". action: adjust the idler roller (refer to instructions on page 39). -38- g1140/g1531 6" X 80" edge sander...
- Page 41 (refer to page 28) 3-5. before resuming sanding operations. replace the sanding belt and dust port, and retrack the sanding belt (refer to page 28) before resuming sanding operations. -39- g1140/g1531 6" X 80" edge sander...
- Page 42 Step 7. replace the sanding belt and dust port, and retrack the sanding belt (refer to page 28) before resuming sanding operations. figure 55. hex bolts that secure platen for adjustments. -40- g1140/g1531 6" X 80" edge sander...
-
Page 43: G1140 Wiring Diagram
The motor wiring shown here is current at the time of printing, but it match your machine. Always use the wiring diagram inside the motor junction box. figure 56. g1140 motor wiring, prewired 220V. figure 57. g1140 capacitor. -41- g1140/g1531 6" X 80" edge sander... -
Page 44: G1531 Wiring Diagram
The motor wiring shown here is current at the time of printing, but it match your machine. Always use the wiring diagram inside the motor junction box. figure 58. g1531 motor wiring, prewired 220V. figure 59. g1531 capacitor. -42- g1140/g1531 6" X 80" edge sander... -
Page 45: Section 8: Parts
SEctiON 8: pARtS G1140 parts breakdown -43- g1140/g1531 6" X 80" edge sander... -
Page 46: G1140 Parts List
SPECIAL WASHER 5/8 X 30 X 27 P1531046A TABLE V2.07.98 P1140102 LOCK BOLT 5/8-11 PW07 FLAT WASHER 5/16 PW01 FLAT WASHER 1/2 PB03 HEX BOLT 5/16-18 X 1 PLABEL-14 ELECTRICITY LABEL P1531049 TILT SLIDES LEFT P1140105 G1140 MOTOR LABEL -44- g1140/g1531 6" X 80" edge sander... -
Page 47: G1531 Parts Breakdown
G1531 parts breakdown -45- g1140/g1531 6" X 80" edge sander... -
Page 48: G1531 Parts List
DISCONNECT 220V 2W X 3.3H P1531046A TABLE V2.07.98 P1531091 BELT TRACKING CONTROL LABEL PLW01 LOCK WASHER 5/16'' PLABEL-14 ELECTRICITY LABEL PW07 FLAT WASHER 5/16'' P1531105 G1531 MOTOR LABEL PB03 HEX BOLT 5/16-18 X 1 -46- g1140/g1531 6" X 80" edge sander... -
Page 51: Warranty And Returns
WARRANty AND REtuRNS...
Need help?
Do you have a question about the G1140 and is the answer not in the manual?
Questions and answers