Grizzly G1531 Owner's Manual
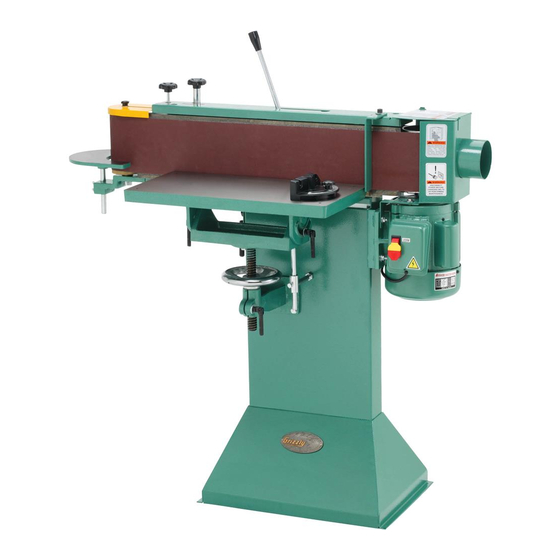
6" x 80" edge sander
Hide thumbs
Also See for G1531:
- Instruction manual (28 pages) ,
- Parts list (3 pages) ,
- Owner's manual (52 pages)
Table of Contents
Advertisement
Quick Links
Download this manual
See also:
Instruction Manual
MODEL G1140/G1531
6" X 80" EDGE SANDER
OWNER'S MANUAL
(For models manufactured since 8/14)
Model G1140
Model G1531
COPYRIGHT © JULY, 2008 BY GRIZZLY INDUSTRIAL, INC., REVISED APRIL, 2018 (MN)
WARNING: NO PORTION OF THIS MANUAL MAY BE REPRODUCED IN ANY SHAPE
OR FORM WITHOUT THE WRITTEN APPROVAL OF GRIZZLY INDUSTRIAL, INC.
#BL10851 PRINTED IN TAIWAN
V2.04.18
Advertisement
Table of Contents

Related Manuals for Grizzly G1531


Summary of Contents for Grizzly G1531
- Page 1 (For models manufactured since 8/14) Model G1140 Model G1531 COPYRIGHT © JULY, 2008 BY GRIZZLY INDUSTRIAL, INC., REVISED APRIL, 2018 (MN) WARNING: NO PORTION OF THIS MANUAL MAY BE REPRODUCED IN ANY SHAPE OR FORM WITHOUT THE WRITTEN APPROVAL OF GRIZZLY INDUSTRIAL, INC.
- Page 2 This manual provides critical safety instructions on the proper setup, operation, maintenance, and service of this machine/tool. Save this document, refer to it often, and use it to instruct other operators. Failure to read, understand and follow the instructions in this manual may result in fire or serious personal injury—including amputation, electrocution, or death.
-
Page 3: Table Of Contents
Identification ........... 3 Unpainted Cast Iron ........30 G1140 Data Sheet ......... 4 Lubrication ........... 31 G1531 Data Sheet ......... 6 SECTION 7: SERVICE ........32 SECTION 1: SAFETY ........8 Troubleshooting ........... 32 Safety Instructions for Machinery ....8 Adjusting Tensioner ........ -
Page 4: Introduction
Use this machine with respect and caution to lessen the pos- sibility of operator injury. If normal safety precautions are overlooked or ignored, seri- Manufacture Date ous personal injury may occur. Serial Number Model G1140 G1531 (Mfd. Since 08/14) -
Page 5: Identification
V. Table Tilt Lock Handle (Model G1140) Miter Gauge K. Paddle Switch W. Trunnion Lock Handle (Model G1140) Table Tilt Lock Handle To reduce your risk of serious injury, read this entire manual BEFORE using machine. Model G1140 G1531 (Mfd. Since 08/14) -
Page 6: G1140 Data Sheet
The information contained herein is deemed accurate as of 4/4/2018 and represents our most recent product specifications. Model G1140 PAGE 1 OF 2 Due to our ongoing improvement efforts, this information may not accurately describe items previously purchased. Model G1140 G1531 (Mfd. Since 08/14) - Page 7 The information contained herein is deemed accurate as of 4/4/2018 and represents our most recent product specifications. Model G1140 PAGE 2 OF 2 Due to our ongoing improvement efforts, this information may not accurately describe items previously purchased. Model G1140 G1531 (Mfd. Since 08/14)
-
Page 8: G1531 Data Sheet
MACHINE DATA SHEET Customer Service #: (570) 546-9663 · To Order Call: (800) 523-4777 · Fax #: (800) 438-5901 MODEL G1531 6" X 80" BENCHTOP EDGE SANDER Product Dimensions: Weight................................200 lbs. Width (side-to-side) x Depth (front-to-back) x Height............... 47 x 17-1/2 x 34-1/2 in. - Page 9 The information contained herein is deemed accurate as of 4/4/2018 and represents our most recent product specifications. Model G1531 PAGE 2 OF 2 Due to our ongoing improvement efforts, this information may not accurately describe items previously purchased. Model G1140 G1531 (Mfd. Since 08/14)
-
Page 10: Section 1: Safety
Everyday ery. Never operate under the influence of drugs or eyeglasses are NOT approved safety glasses. alcohol, when tired, or when distracted. Model G1140 G1531 (Mfd. Since 08/14) - Page 11 EXPERIENCING DIFFICULTIES. If at any time debris. Make sure they are properly installed, you experience difficulties performing the intend- undamaged, and working correctly BEFORE ed operation, stop using the machine! Contact our operating machine. Technical Support at (570) 546-9663. Model G1140 G1531 (Mfd. Since 08/14)
-
Page 12: Additional Safety For Edge Sanders
-10- Model G1140 G1531 (Mfd. Since 08/14) -
Page 13: Section 2: Power Supply
6-15 PLUG sure it is connected to a power supply circuit that meets the specified circuit requirements. Grounding Prong Figure 2. NEMA 6-15 plug and receptacle. -11- Model G1140 G1531 (Mfd. Since 08/14) - Page 14 Use the diagram provided on the motor. -12- Model G1140 G1531 (Mfd. Since 08/14)
-
Page 15: Section 3: Setup
IMPORTANT: Save all packaging materials until you are completely satisfied with the machine and No list of safety guidelines can be complete. have resolved any issues between Grizzly or the Every shop environment is different. Always shipping agent. You MUST have the original pack- consider safety first, as it applies to your aging to file a freight claim. -
Page 16: Inventory
"-13 (Vertical Brace) ....2 • Flat Washers "-13 (Vertical Brace) ..2 • Hex Bolts "-18 x 1" (Trunnions) ....2 • Flat Washers " (Trunnions) ....2 • Flat Washer " (Miter Gauge) ....1 -14- Model G1140 G1531 (Mfd. Since 08/14) -
Page 17: Cleanup
Children and visitors may be seriously injured if unsuper- vised around this machine. Lock entrances to the shop or disable start switch or power connection to prevent unsupervised use. Figure 6. T23692 Orange Power Degreaser. -15- Model G1140 G1531 (Mfd. Since 08/14) -
Page 18: Assembly
" Phillips head screws (Figure 8), then stand the machine Tighten the hex nut against the swivel assem- upright. bly to secure the tension lever. Figure 8. Foot installed. Loosen the belt tension lock knob. -16- Model G1140 G1531 (Mfd. Since 08/14) - Page 19 Figure 11. Belt pre- tracking and tracking are covered on Pages 18 and 19. Idler Roller Guard Lock Knob Flat Washer Figure 13. Idler roller guard installed. Figure 11. Sanding belt installed. -17- Model G1140 G1531 (Mfd. Since 08/14)
-
Page 20: Test Run & Tracking Belt
Even Spaces on Both Top and Bottom Figure 14. Example of sanding belt centered on main roller (dust hood removed for clarity). Tighten the belt tension lock knob. -18- Model G1140 G1531 (Mfd. Since 08/14) - Page 21 The switch disabling feature is not working correctly. This safety feature must work properly before proceeding with regular operations. Call Tech Support for help. -19- Model G1140 G1531 (Mfd. Since 08/14)
-
Page 22: Installing Work Table
Figure 17. Horizontal brace installed. bracket. Thread the horizontal brace into the sander (Figure 17), but do not tighten the hex nut yet; the brace will require further adjustment later. -20- Model G1140 G1531 (Mfd. Since 08/14) - Page 23 " or " hex wrench as a reinstall the vertical brace. Check the table gauge to set the distance between the table and bracket-stand distance and adjust until it is sanding belt. equal. -21- Model G1140 G1531 (Mfd. Since 08/14)
-
Page 24: Installing End Table
The miter body should only be used when with rotating sanding belt. sanding the ends of workpieces at least 8'' long. Do not use it as a back stop. Figure 26. Miter gauge installed. -22- Model G1140 G1531 (Mfd. Since 08/14) -
Page 25: Back Stop (G1140)
Figure 29. Example of dust port connected to dust collection system. -23- Model G1140 G1531 (Mfd. Since 08/14) -
Page 26: Section 4: Operations
Read books/magazines or get formal training before beginning any proj- ects. Regardless of the content in this sec- tion, Grizzly Industrial will not be held liable for accidents caused by lack of training. Figure 31. Trunnion lock handles. - Page 27 This also prevents the edge of the workpiece from becoming tapered. Thumb Knob Lock Handle Figure 35. Platen tilt lock handle. Figure 33. End table. Figure 36. Platen tilted to 90 ˚ . -25- Model G1140 G1531 (Mfd. Since 08/14)
- Page 28 Serious personal injury may result. Figure 38. Typical end grain sanding method using miter gauge. -26- Model G1140 G1531 (Mfd. Since 08/14)
-
Page 29: Horizontal Sanding (G1140)
Figure 40. The Model G1140/G1531 uses a 6" x 80" sanding Note: Apply even hand pressure while mov- belt. ing the workpiece back and forth for even belt wear. -
Page 30: Replacing Belt
G1140). Replace the belt on the Model G1140/G1531 with Perform the belt pre-tracking procedure (refer a 6" x 80" sanding belt. Grizzly carries a wide to Pre-Tracking Belt on Page 18). variety of aluminum oxide sanding belts for your edge sander (refer to Accessories on Page 29). -
Page 31: Section 5: Accessories
" x 1 " x 8 ") W1307—Large: (2 " x 2" x 12") Figure 46. Aluminum oxide sanding belts. Figure 44. Pro-Stik Belt Cleaners. ® www.grizzly.com 1-800-523-4777 order online at or call -29- Model G1140 G1531 (Mfd. Since 08/14) -
Page 32: Section 6: Maintenance
To reduce risk of shock or accidental startup, always disconnect machine from power before adjustments, Cleaning the Model G1140/G1531 is relatively maintenance, or service. easy. Vacuum excess wood chips and sawdust, and wipe off the remaining dust with a dry cloth. -
Page 33: Lubrication
(Figure 47). After lubricating, be sure to move the leadscrew through the full range of motion that it can travel, so that the grease is spread evenly. Figure 48. Tension shaft lubrication locations. Figure 47. Locations to lubricate leadscrew. -31- Model G1140 G1531 (Mfd. Since 08/14) -
Page 34: Section 7: Service
4. Motor fan is rubbing on fan cover. 4. Replace dented fan cover; replace loose/damaged fan. 5. Motor bearings are at fault. 5. Test by rotating shaft; rotational grinding/loose shaft requires bearing replacement. -32- Model G1140 G1531 (Mfd. Since 08/14) - Page 35 1. Adjust shaft spring tension (see Page 35). 2. Lubricate tension shaft (see Page 2. Tension shaft needs lubrication. 31). 3. Idler roller-to-platen relationship incor- 3. Adjust idler roller-to-platen relation- rect. ship (see Page 39). -33- Model G1140 G1531 (Mfd. Since 08/14)
-
Page 36: Adjusting Tensioner
Rotate the tension nut (Figure 49) counter- clockwise to increase the belt tension and clockwise to decrease the belt tension. Tracking Control Bolt Tension Nut Figure 49. Belt tension nut and tracking control bolt. -34- Model G1140 G1531 (Mfd. Since 08/14) -
Page 37: Resetting Tensioner Spring Tension
Note: It may be necessary to slightly adjust Move the tension lever to the tension position. the tension nut to make the table fit. -35- Model G1140 G1531 (Mfd. Since 08/14) -
Page 38: Parallel Belt Tracking
⁄ " away from the top of the same amount of turns as the top set the platen, then you do not need to adjust screws. your belt for parallel tracking. -36- Model G1140 G1531 (Mfd. Since 08/14) -
Page 39: Platen-Roller Adjustments
Instructions for all three adjustments are given below. First, check the platen-to-roller relationship to see if you need to make the adjustments. Tools Needed Straightedge ............1 Wrench 8mm ............. 1 Wrench 12mm ........... 1 Wrench 14mm ........... 1 -37- Model G1140 G1531 (Mfd. Since 08/14) - Page 40 Figure 56. Example of checking bottom of roller at both the top and bottom are more platen-to-roller. or less than ". Action: Adjust the idler roller (refer to instructions on Page 39). -38- Model G1140 G1531 (Mfd. Since 08/14)
- Page 41 (refer to Page 28) 3-5. before resuming sanding operations. Replace the sanding belt and dust port, and retrack the sanding belt (refer to Page 28) before resuming sanding operations. -39- Model G1140 G1531 (Mfd. Since 08/14)
- Page 42 Proceed to Step 7. Replace the sanding belt and dust port, and retrack the sanding belt (refer to Page 28) before resuming sanding operations. Figure 59. Hex bolts that secure platen for adjustments. -40- Model G1140 G1531 (Mfd. Since 08/14)
-
Page 43: G1140 Wiring Diagram
Always use the wiring diagram inside the motor junction box. Figure 60. G1140 motor wiring (prewired 220V). Figure 61. G1140 capacitor. -41- Model G1140 G1531 (Mfd. Since 08/14) -
Page 44: G1531 Wiring Diagram
Always use the wiring diagram inside the motor junction box. Figure 62. G1531 motor wiring (prewired 220V). Figure 63. G1531 capacitor. -42- Model G1140 G1531 (Mfd. Since 08/14) -
Page 45: Section 8: Parts
SECTION 8: PARTS We do our best to stock replacement parts when possible, but we cannot guarantee that all parts shown are available for purchase. Call (800) 523-4777 or visit www.grizzly.com/parts to check for availability. G1140 Parts Breakdown 11-3 11-2... - Page 46 HEX BOLT 5/16-18 X 1 P1140103 FLAT WASHER 1/2 P1140049 TILT SLIDES LEFT P1140104 ELECTRICITY LABEL P1140049A TILT SLIDES RIGHT P1140105 G1140 MOTOR LABEL BUY PARTS ONLINE AT GRIZZLY.COM! -44- Model G1140 G1531 (Mfd. Since 08/14) Scan QR code to visit our Parts Store.
-
Page 47: G1531 Parts Breakdown
Safety labels help reduce the risk of serious injury caused by machine hazards. If any label comes off or becomes unreadable, the owner of this machine MUST replace it in the original location before resuming operations. For replacements, contact (800) 523-4777 or www.grizzly.com. BUY PARTS ONLINE AT GRIZZLY.COM! -45- Model G1140 G1531 (Mfd. - Page 48 FLAT WASHER 5/16'' P1531104 ELECTRICITY LABEL P1531048 HEX BOLT 5/16-18 X 1/2 P1531105 G1531 MOTOR LABEL P1531049 TILT SLIDES LEFT BUY PARTS ONLINE AT GRIZZLY.COM! -46- Model G1140 G1531 (Mfd. Since 08/14) Scan QR code to visit our Parts Store.
- Page 49 Would you recommend Grizzly Industrial to a friend? _____ Yes _____No Would you allow us to use your name as a reference for Grizzly customers in your area? Note: We never use names more than 3 times. _____ Yes _____No 10.
- Page 50 FOLD ALONG DOTTED LINE Place Stamp Here GRIZZLY INDUSTRIAL, INC. P.O. BOX 2069 BELLINGHAM, WA 98227-2069 FOLD ALONG DOTTED LINE Send a Grizzly Catalog to a friend: Name_______________________________ Street_______________________________ City______________State______Zip______ TAPE ALONG EDGES--PLEASE DO NOT STAPLE...
-
Page 51: Warranty And Returns
WARRANTY & RETURNS Grizzly Industrial, Inc. warrants every product it sells for a period of 1 year to the original purchaser from the date of purchase. This warranty does not apply to defects due directly or indirectly to misuse, abuse, negligence, accidents, repairs or alterations or lack of maintenance.
Need help?
Do you have a question about the G1531 and is the answer not in the manual?
Questions and answers